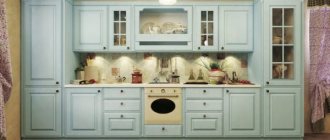
Kitchen furniture is a modular series of wall cabinets and cabinet tables. Yes, sometimes you have to use non-standard solutions. But most modules have a completely standard design. It is enough to estimate the volumes of kitchens sold in bulk, when the buyer is asked to independently select the modules of the required size and assemble them into a full-fledged set. You can make a simple kitchen cabinet with your own hands at home. And at the same time save a lot.
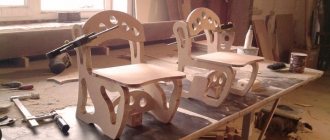
Wall cabinet with shelves
Another example of how to make a wall kitchen cabinet with your own hands.
Unlike other designs presented, this cabinet has double doors. The general rule is that the door should always be taller than it is wide. You will also need to add a center vertical strip to bridge the gap between the double doors. For work you will need boards, plywood, and two sets of doors. First, attach the side walls with pin holes on the inside for the adjustable shelves - this is much easier to do at first. Drill holes for the face frames. For taller shelves, simply cut the sides higher. For deep shelves it is necessary to adjust the width of the plywood.
Attach the rear support insert to the top of the cabinet. When you hang the cabinet, screw this board into the studs on the wall. For additional support, you can add a second support at the bottom of the cabinet.
Calculation of cabinet sizes for the kitchen
With your own hands, you can make a small compact cabinet and a whole set of kitchen furniture that will fit everything you need in the kitchen.
Making it is not as difficult as it seems at first glance.
To make a set consisting of several cabinets, you will need to draw up a detailed kitchen plan. On it it is necessary to mark the location of the sink, tiles, exhaust structure, counter, all existing pipes and sockets. Using this plan, it will be easy to determine how to more rationally arrange a future cabinet or several. The dimensions of all structures must be noted in order to understand the possible dimensions.
Once you have decided on the type of cabinet, it is important to choose the right material.
If the kitchen set has been installed for a long time and there is a need for several additional cabinets, then the measurements should be much more accurate than when making a full set. If you don’t want to draw on paper yourself, you can use any calculation and drawing program on the Internet.
Making a kitchen cabinet with your own hands is not that difficult.
When drawing up a future layout, it is important to make sure that the dimensions correspond to reality and the cabinet will fit perfectly. Calculating dimensions warns against mistakes. After all, if the cabinet fits well, this does not mean that its door will open without problems. Therefore, this point also needs to be monitored.
Main features of corner models
The list of the most important differences includes:
- doors are not required. The open top cabinet is great for storing beautiful crockery sets;
- variety of forms. The design can be triangular, L-shaped, or even trapezoidal (by the way, triangular variations have become very widespread in our time). Choosing the right varieties depends on the people who will be using the cabinets and their preferences;
- the lower part of the structure, located on the floor, is often used to create sinks. The sink placed on top will be convenient to use;
- it is possible to integrate large types of household appliances for their more efficient operation;
- Various methods are used to decorate the facade. The most common options are applying a pattern to wall cabinets or upholstering them with some material;
- the lower cabinet under the sink is often equipped with legs, which makes cleaning the room easier;
- The upper corner cabinet can be equipped with carousel shelves to store dishes and other accessories.
Main settings
Kitchen furniture is manufactured to standards that depend on the parameters that determine the height of the cabinet you are going to assemble.
We list the main indicators that will be taken into account in the process of creating a corner cabinet:
- The width of the base - this indicator ranges from 10 to 12 cm, while its value is not affected by what type of stand will be used - solid or legs.
- The height of the cabinet is usually 70cm if you are not going to equip the cabinet with a sink. In this case, you need to make it slightly lower than the level of all other cabinets. This is done for convenience when washing dishes.
- Tabletop height varies from 2 to 4 cm. Depends on the material used, primarily on its structure.
- After all measurements, the height of the corner cabinet is usually about 84-85cm.
- The most common parameters for a cabinet are 90x90cm. Of course, the dimensions primarily depend on the parameters of other parts of the headset.
It is important to know: the distance between the tiers of the set is usually 60cm, while the standard height of a wall-mounted corner cabinet, which makes it possible for people of average height to use it comfortably, is 70cm.
What affects the size of kitchen wall cabinets?
There are certain standards for kitchen furniture. This is due to:
- Practical considerations, ergonomics and functionality.
- Standards adopted for the installation of fittings and internal contents.
- Dimensions of the standard line of facades.
The facade part in budget options is also made from chipboard. In “more expensive” options, the facade material can be:
- MDF with veneer, PVC film, plastic.
- MDF with enamel painting, varnished polymer coating (acrylic, High Gloss).
- An array of different types of wood.
- Glass and acrylic in aluminum frame.
The front part is what determines the final cost of the kitchen. Therefore, before calculating and making kitchen cabinets with your own hands, check the cost of the selected facade option. As a rule, doors for cabinets of standard sizes are offered by manufacturers in stock and are much cheaper than custom-made to size.
Pricing is also influenced by internal content in the form of metal storage systems, drawers and other mechanisms. For wall cabinets, complex lifting and drying mechanisms are of decisive importance:
- Lifting mechanisms are designed for installation in cabinets of a certain depth, height and door weight. As a rule, any mechanism will “fit” to a wall cabinet depth of about 280-320mm, and a height of 250mm. The weight of the door can be calculated after the fact. An alternative is to install two lifting mechanisms on opposite sides of the box.
- Drying racks (a set of grids for mugs and plates with a tray) are offered in standard sizes in cabinets 300mm, 400mm, 500mm, 600mm, 700mm, 800mm, 900mm. But it is better to check availability in your city; the range may be limited.
Material selection
The most accessible for home “furniture creativity” are laminated chipboards (LDSP) or fine fraction boards (MDF). These materials are affordable, have a decent appearance, and come in a variety of colors and textures. Solid wood is an expensive material; it is best to work with a professional.
The same can be said about glass - although kitchens with glass surfaces are very beautiful and popular, this material is probably not suitable for self-production.
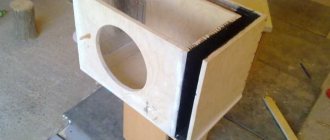
How to install modules and embed a sink
Hole cut out for sink in countertop
At this stage, the finished product is placed in a corner. If we are dealing with an attached lower module, then first we should install a cabinet with a sink with a ready-made hole for the pipes. Only then do you need to install a cabinet with a door.
You will need furniture intersection links when the time comes to connect cabinets to each other. A total of four fasteners are required.
If we are talking about a corner kitchen cabinet in which a sink will be installed, under this sink you will first need to make a hole in which the sink will be placed.
To make a cutout for the sink, attach it to the countertop and create a marking with a pencil, and then at the edge of this marking line, drill a hole of such a diameter that a jigsaw file can easily fit into it.
Once the socket is cut, the sink is inserted into it and screwed using the special fastener supplied in the kit. The cut line after this operation is treated with sealant.
Where to begin
To do this, you need to be prepared for certain difficulties that you can cope with. There are many instructions for assembling cabinets in a variety of shapes and sizes.
Regardless of the final result, if you want it to be of high quality, divide the entire process into several very important stages: preparatory, creation of parts, assembly stage, and installation of this cabinet in the right place. Next we will talk about individual stages.
How to properly hang kitchen cabinets on a backsplash
Usually, kitchen cabinets are hung after the bottom row of cabinet tables has already been installed. This is due to the presence of an apron: sometimes its role is played by decorative panels, skinals, which are placed on the tabletop. The edge of the apron (of any wall top) may or may not go behind the cabinets. It all depends on the type of material from which the kitchen apron is made:
- The laid tiles (tiles) go behind both the lower and upper cabinets. The overlap is small, about 10-20 mm.
- A wall top made of MDF or chipboard 8-10 mm thick is placed on the countertop and goes behind the upper cabinets. The places where the top is attached to the wall are hidden behind the baseboard and the edge of the upper cabinets.
- Wall decor panels thicker than 10 mm and glass skinnels are attached exclusively between the upper kitchen cabinets and the countertop. This type of apron can be installed last, after hanging the cabinets. But before cutting into the sink and household appliances! A sink with a mixer, protruding parts of the hobs can prevent you from “bringing” the decor panel onto the wall for subsequent installation.
Drawings and diagrams of kitchen cabinets (sketches)
If anyone doubts whether drawings are needed in order to correctly determine the dimensions of kitchen cabinets, the answer is clear - designing kitchen furniture is mandatory. Initially, they take measurements of the room, and then, starting from them, sketch out sketches of future furniture elements and their placement around the perimeter.
It will be difficult to make kitchen cabinets without sketches.
The size of the room, the distribution of communications, the location of windows and doors, the presence of non-standard openings - all this will affect the placement of many functional objects.
The placement of objects largely depends on the size of the room.
In addition, the diagram must clearly indicate where the main communications and household appliances will be located:
- stove or hob;
- Dishwasher;
- fridge;
- washing;
- pull out drobe;
- sockets;
- gas, water and sewerage pipes.
The drawing should indicate the location of the main elements of the kitchen. After all the necessary measurements have been made and there is a general drawing of the future headset, you can begin to design its individual parts.
Standard
To make a drawing of a standard kitchen set, you don’t need to put in a lot of effort - such sets consist of cabinets, the dimensions of which are standard for any model.
The standard set consists of standard cabinets.
They can fluctuate, but in most cases this only concerns the length, which depends on the area of the room. The remaining parameters remain practically unchanged and are maximum (height; width; depth in cm):
- for the top ones: from 70x30x30 to 90x90x30;
- for the lower ones: from 85x30x40 to 90x90x50;
- corner bottom: 80x80 or 90x90;
- corner top: 55x55 or 60x60.
It is not difficult to make a drawing of a standard headset.
Important! When adjusting the sizes, you should decrease or increase the step by 5 cm. These parameters, although they are standard, are not mandatory - everyone decides for themselves which ones are best suited.
Bottom row
In addition to standard lower cabinets with shelves, you should take into account that you will need to make calculations for the sink cabinet. Dimensions may be as follows:
- width: 800;
- side walls: 500x722;
- pallet: 500x768;
- top bar: 80x768;
- bottom bar: 100x800.
The dimensions of the sink cabinet may vary. The lower cabinet with one shelf 600 mm wide is made with the following dimensions:
- side walls: 500x722;
- pallet: 500x568;
- shelf: 500x568;
- bottom bar: 100x600.
For the lower cabinet you can make the width 600 mm.
Note! The parameters of the tabletop are adjusted according to the bottom row of cabinets, but it must be taken into account that it should overhang the front edge and rear wall, by 4 and 6 cm, respectively.
The tabletop should overhang the edges by a few centimeters.
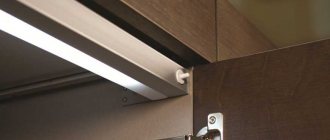
Kitchen lighting for wall cabinets
See another example of how to illuminate a kitchen cabinet with LED strip .
One of the nice things is that it is only 12V DC and you can use the backlight without any risk as long as you use it fully. Moreover, you don’t need any tools; if the tape comes off, you can fasten it back in place.
Preparatory work
Preliminary preparation plays a very important role when making furniture yourself: it is necessary to complete a drawing of future kitchen cabinets. Here again the Internet will come to the rescue: the network is replete with drawings for making kitchen cabinets.
However, it doesn’t hurt to check the drawings first to see how accurate the measurements are - “home craftsmen” may make mistakes.
Types of cabinets in the toilet
When planning bathroom storage, you have a choice between wall and built-in cabinets. Both options fit beautifully into the interior, but are manufactured and installed differently.
The wall-mounted one is made completely with all walls. The cabinet box is hung on the wall behind the toilet with loops on hooks. Metal lugs are attached to the vertical walls on the rear side of the housing. Special dowels with curved ends are installed as hooks. The best option is to secure the locker to the tire with hook brackets.
The design of a built-in wardrobe differs favorably from wall-mounted furniture in that the walls and ceiling of the toilet act as the top plate and sides. A facade frame with doors and a bottom (if necessary) are attached to them. In addition to hinged curtains, you can install roller shutters.
An example of a built-in closet behind a full-wall toilet
If you have no experience at all in this matter, and the desire to make a cabinet yourself overwhelms you, ask for help from neighbors and friends who already have practice in making and assembling furniture.
Wooden cabinet doors and hinges
The easiest option is to use door hinges. This is how they used to do it on massive wooden cabinets. Let's look at this option.
Door hinges are the easiest door opener to install.
One of the disadvantages is that there is no door adjustment, that is, you have hung them and cannot adjust them in any way.
The installation diagram is the same as for → installing interior doors. Hinges at equal distances from the bottom and top are screwed into the ends of the doors and cabinet walls. It is important to do this evenly and at the same distance. You need to read how interior doors are installed, specifically hinges, to understand.
The second option for hinges for a solid wood cabinet is furniture hinges.
They are quite easy to install; you just need to drill a round hole for one part of the hinge. They have the ability to adjust, BUT they will not be able to support the heavy weight of massive wooden doors. Therefore, if your cabinet is small and more like a bedside table, then such a mount will be suitable. If this is a massive cabinet, then you need to use stronger hinges.
Another option for fastening doors is antique hinges. Such hinges are installed on the front of the cabinet and bring their own aesthetics to the product. There are a wide variety of them on sale and such loops can be made with your own hands.
Antique wooden furniture hinges
Installation instructions
Initially, you choose what and how to fasten the kitchen set in order to buy suitable fasteners.
Then the following steps are performed:
- hooks are attached to the walls with self-tapping screws according to the markings, aligned in one line;
- canopies are fixed;
- if tires are used, then blanks are made for which holes are formed in the walls;
- The cabinet body is installed on the bus;
- the following parts of the headset are fixed in orientation to the already fixed elements;
- To avoid damage, it is recommended to use insulation;
- consistent fixation is ensured by a clamp;
- holes are made in the cases for fastenings; it is advisable to use a wood or plywood cover to protect against cracks and chips;
- The parts are connected with ties.
Once all the wall cabinets are hung, the doors are attached. Loops are attached to them.
Preparing for work
Assembling furniture with your own hands should begin with preparatory work. The master will need working tools: tape measure, level, pencil, hammer, screwdriver, drill, screwdriver, hacksaw. He also needs to make a drawing of the cabinet with his own hands. It is very important to correctly calculate the dimensions of the product and all its components. If the furniture maker does not have experience in drawing up drawings, then it is recommended to use ready-made diagrams. If necessary, they can be adapted to your own needs.
When the cabinet drawing is ready, you can begin to calculate the amount of materials needed, and then go to the store. In addition to wood or laminated chipboard, it is necessary to purchase fastening elements and fittings (hinges, handles).
If a master wants to equip a cabinet with a decorative facade, but does not have sufficient skills to make it, then it is better to entrust the decorative work to an experienced carpenter.
When the preparatory work is completed, the furniture maker can make the structure with his own hands.
Assembly steps
The work of assembling a wall cabinet consists of several stages:
- Fitting parts. You need to check whether all parts of the future product fit together in size. If not, then adjustments need to be made. A novice furniture maker may find this work difficult, but over time he will learn to do it quickly.
- Edge sticker. A decorative edge should be glued to the sides of the parts that will be visible when using the furniture.
- Installation of hangers. On the inside, in the upper rear corner of each of the sidewalls, you need to make holes for hangers. The work should be done using a drill. Then the hangers are screwed using self-tapping screws (inserted into through holes) and large bolts (screwed through adjustment holes). Holes for hangers need to be cut in the back wall of the cabinet.
- Marking and drilling. First you need to mark the side walls. The location of future shelves is indicated on them, then holes are drilled in the appropriate places. The diameter of the holes must correspond to the size of the shelf holders, most often it is 6-7 mm. If a master decides to make wall furniture from laminated chipboard, then he needs to use a high-quality tool that gives minimal error. When drilling, you need to keep the cabinet parts as straight as possible, since the slightest inaccurate movement can lead to damage to the product.
- Housing assembly. All shelves (most often there are 2-3 of them per wall in a cabinet) are screwed to one of the sidewalls, and then the second sidewall and the back wall are attached. It is recommended to connect the sidewalls with the shelves using Euroscrews. The back wall is attached using a furniture stapler or small nails.
- Preparing loops. On the facades you need to make recesses for the hinges using a 35 mm cutter. Then you should attach the hinges to the doors and check that they match the dimensions of the recesses. There is no need to secure the hinges yourself yet, because the doors will create inconvenience when hanging the cabinet on the wall. It is advisable to install the doors after placing the cabinet in the designated place.
- Placing a cabinet on the wall with your own hands. Using a level and plumb line, the wall is marked. You need to make sure that the marks are level. Then you need to drill holes and install dowels. After that, all that remains is to hang the cabinet.
- Installation of hinges. The façade is attached to the finished product and secured with hinges on the inside. Then the hinges are adjusted using a screwdriver.
DIY furniture assembly is complete! All that remains is to fill the cabinet with useful items.
First steps towards a new kitchen cabinet
What actions should you take first?
- Mark the exact location of the future cabinet.
- Calculation of the total size of the product, dimensions of some structural elements. All indicators, including the number of shelves, the distance between them are indicated on an A4 sheet, it will provide better clarity.
- First, the color of the cabinet is selected. Shades that imitate natural wood coverings such as oak, beech, alder and maple are considered traditional.
How to make a corner cabinet for the kitchen?
- Choose the right material and purchase it in the right quantity. Calculating the purchase volume is very simple if you follow the previously drawn up diagram.
- Prepare the tools necessary for the job. Their list includes: fasteners, hangers, sealing compound, furniture screed, drill, sandpaper, fittings and some other devices. It all depends on what model you plan to create.
- Prepare the basic details for the future cabinet. It is most convenient to cut them from solid slabs. Be extremely careful when performing this work and use power tools to achieve the best results. Alternatively, you can contact a specialized company that will make blanks at a professional level.
- Make through holes to insert dowels into them and fasten the individual elements that make up the furniture. Lubricate the chopsticks with adhesive to increase the reliability of the structure.
- Check the evenness of individual parts of the structure using a level.
- Screw the confirmations into the dowels using a hex wrench for this purpose.
- Install the legs and adjust the height. If the design does not require legs, this step can be skipped.
- Make holes in the side elements and place cross-shaped fastenings for the doors in them.
- On the walls located on the sides, attach elements for rails, due to which the boxes will roll out. Secure the rails.
- Attach the back wall.
- Secure the fittings.
Corner cabinet diagram
Corner cabinet drawing
Design Features
A corner kitchen cabinet is a rational solution that allows you to use unclaimed parts of the kitchen. There are many placement options for this simple system, making it easy for the planner. The positive aspects that such a cabinet will bring:
- The corner is a rarely used place in the room, therefore, in addition to useful storage compartments, the cabinet will also improve the design of the kitchen, giving it an original look:
- For owners of Khrushchev-era apartments and other apartments with a small area, thoughtful use of every square meter is important. A corner cabinet will add up to 0.5 cubic meters of useful volume, which will allow you to install additional equipment and fittings. You can read more about kitchen furniture fittings here.
- Stores offer many types of corner kitchen cabinets, and some of them transform (into a bar counter or additional seating) and have a pull-out section.
Expert opinion
Svetlana Kolesnikova
Designer
Some designers suggest placing an oven, dishwasher, etc. in corner cabinets as an “ergonomic” solution. In fact, such a design is irrational, since most household appliances have rectangular shapes, which is why a lot of useful space disappears.
This type of furniture also has disadvantages. They apply only to certain types of kitchens. Among them are:
- Pipes and other communications in the corner of the kitchen. This applies to Khrushchev houses, since it was customary for designers at that time to place heating systems, sockets and other structures that required constant access to the wall.
- Problems opening the locker. Developers already solved this issue several decades ago by inventing accordion doors. A smart solution: make the cabinet open over the entire surface. This, in addition to convenience, gives scope for design ideas.
Types of suspended structures
Mounted structures can be divided into several groups according to their purpose, design features, and operating conditions:
- Cupboards for dishes. They are used to store various items - from dishes to food, spices. There are shelves inside such structures. Doors can be made of wood, MDF, and other opaque materials.
- Drying cabinets. Such DIY structures are located above or next to the sink, with dish dryers installed inside them.
- End structures. Corner products are the best solution for small-sized kitchens, where it is necessary to rationally use every centimeter. The end structures are suspended in the corner of the room using special hangers.
- Open type products. Cabinets with open shelves are used to store various decorative elements, beautiful dishes, and jars of spices. Such furniture is equipped with hinged, sliding or tilting transparent doors, which ensure the safety of using the cabinet and do not allow objects located on the shelves to fall down.
Before you make a cabinet with your own hands, you need to decide on the type of construction; the choice depends on the dimensions of the room and the needs of the people living in the apartment.
Suspension height
The height of hanging cabinets will depend on the height of the person. Therefore, there are certain recommendations regarding these two values: height and suspension height.
- If a person’s height is 160 centimeters, then the cabinets are hung at a height of 175 centimeters.
- Height 170-175 centimeters – height 185 centimeters.
- Height 180-190 centimeters, hanging height 200 centimeters.
Consequently, taking these ratios into account, the required height is measured on the wall: the required distance is set aside from the floor, which is marked on the wall with a horizontal line. The horizon is drawn according to the building level.
How to assemble boxes
- The walls for the boxes are tightened with screws. As soon as you assemble three walls, insert pieces of fiberboard into their bottom, which were created according to the parameters of these walls.
- The fronts of the drawers must be secured using eccentric ties. In this case, the screws are screwed into the facade, then the side with the head is inserted into the bushings located on the sides of the drawers. The main thing is to make nests in them first. Once the bushings are in the holes, rotate them until they engage the screw heads.
- If we are talking about a corner cabinet, you need to screw guides for rollers onto the lower corners of the drawers.
If we are talking about assembling an oven, the last stage is excluded due to the lack of drawers in this type of cabinet.
How to make your own kitchen cabinets
Wall cabinets have approximately the same design:
- The stand-up (sidewalls) are made through, and the shelves, lid and bottom are inset.
- The depth of cabinets is taken as 300-320mm as standard. The body is assembled using four euroscrews (confirmata), the stand-up sidewalls are drilled 50 mm from the edge on all sides.
- Internal shelves are made smaller in depth. The first reason is that the back wall can be inserted into the groove. The second reason is that the front of the cabinet may have overlay glass; the thickness of the glass “shifts” the shelf inward.
- Adjustment for shelves +/- 50mm is very convenient. Already in place, the housewife can rearrange the shelf in the closet to a convenient distance.
Visually, a do-it-yourself wall kitchen cabinet can be represented in the assembly diagram and drilling drawings as follows.
Furniture terminology
Kitchen cabinets come in several types. Depending on the location, the cabinets can be floor- or wall-mounted, respectively located on the floor or hung on the wall.
Note!
- Do-it-yourself wardrobe: a review of ways and methods on how to build a stylish and original wardrobe (video and 145 photos)
Do-it-yourself furniture restoration - removing chips and scratches, restoring surfaces. Instructions with photos and video tips
DIY ottoman: how to make it at home. The best ideas, master classes. Photo + video review of beautiful ottomans
According to the cabinet configuration, kitchen cabinets can be straight or corner. Also, lockers can be either open or closed. Closed cabinets come with hinged doors or using pull-out structures.
Having carefully analyzed the available space and thought through the functionality, you can decide what types of homemade kitchen cabinets need to be made.
Making a countertop
This is the main work surface of the kitchen cabinet. If the cabinet is small, then a solid slab is not difficult to find. The ideal option is if it is marble. But it can be simpler, from those available on construction markets.
If the cabinet is small, then there will probably be a solid slab that can cover the entire corner. But if there is none, then you will have to use a prefabricated one, calculating its dimensions so that the seams diverge as far from the center as possible. Then the main central load will not provoke the formation of slopes towards the joints.
We invite you to pay attention to an interesting article on how to choose wallpaper for the kitchen. You can read an interesting article with a selection of various design ideas for decorating a kitchen studio here.
You may be interested in a detailed description of making a kitchen countertop yourself.
Treatment:
All wooden materials must be pre-treated before assembly. Their service life will depend on this. Surface treatment includes several stages:
- sanding with sandpaper or sanding machine;
- impregnation with water-repellent compounds to prevent moisture penetration;
- priming, applying astringent binders between paint and wood;
- coloring
It can be painted with varnish, alkyd, acrylic, nitro or oil enamels. The main thing is that they are compatible with the primer.