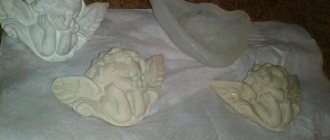
Nowadays, handicrafts do not lose their popularity, since handmade crafts cannot leave anyone indifferent. Each craft can be called a masterpiece, because it contains a piece of the author’s soul.
Nowadays, there are many ways to create various things from beads, wire, polymer clay, and so on, but gypsum is more popular for creating garden sculptures.
Later in the article we will describe in more detail the options for creating magnificent products from this material.
Preparatory work
In order to make a mushroom from plaster, you must prepare:
- PVA glue;
- acrylic paints;
- compass;
- set of cutters;
- stationery knife;
- two cups;
- waterproof glue;
- soap;
- varnish;
- brushes;
- pencil;
- cellophane film;
- empty plastic bottle;
- decorative elements;
- water.
The basis will be sculptural plaster, which will need about 500 g. You can replace it with a cement mixture, in which case the figurine will be more durable. Construction PVA is used as glue. When choosing paints, you should prefer acrylics designed for working with ceramics or glass.
For registration you will need:
- beads;
- figurines;
- flowers;
- artificial leaves;
- molds for creating figures.
To securely fix the wooden elements, waterproof glue is required.
Master Class
- Cut off the neck of the plastic bottle.
- Prepare a solution of water, grated soap and sunflower oil. Mix well and wait until all elements are completely dissolved.
- Apply the solution to the inner walls of the bottle using a silicone brush.
- Dilute the plaster in the required quantity as indicated in the instructions on the package.
- Make a fungal stem this way: pour the gypsum mixture into the neck of the bottle, wait until it hardens completely (40 minutes).
- To make the fungus stalk empty inside, insert a small plastic bottle, neck down, into the hardening plaster mixture. Then press down with a stone or heavy object so that the bottle does not rise up.
- Cut the bottle and remove the stem of the fungus.
- Cut off the protruding part of the bottle that creates a void inside the fungus.
- Form a mushroom cap in this way: take a cup or saucer and tightly cover the inside of the dish with cling film.
- Dilute the plaster in the required quantity as indicated in the instructions on the package.
- Pour the gypsum mixture into the cup, let it stand for 3 minutes and insert the fungus stem evenly.
- Leave for 40 minutes until the figure hardens completely.
- Make the base for the mushroom in this way: take a bowl or plate, cover with cling film and pour out the plaster mixture.
- Wrap the stem of the mushroom in cling film, immerse it in the base and wait 40 minutes.
- Take out the figurine and remove the film.
- Make small figures from plaster (flowers, leaves...) to further decorate the cap of the fungus or its base. Use molds and do not forget to grease them with emulsion first so that you can easily remove the figure after hardening.
- Place the fungus for two days in a warm place without drafts.
- Think over a design for the mushroom by first drawing it on a regular sheet.
- Draw a picture on the mushroom with a simple pencil.
- Trace the drawing with a needle.
- Dilute PVA glue with water, cover the mushroom with it and wait until it dries completely.
- Paint the mushroom with acrylic paints and wait until it dries completely.
- Cover the mushroom with several layers of varnish so that it becomes moisture-resistant and does not lose its brightness after bad weather.
Making the legs
If you want to decorate your garden with a gypsum mushroom, then you can make it yourself. The first step is to perform the leg. To do this, cut off the neck of the plastic bottle, which will serve as a shape for the stem. The walls can be coated with a solution of grated soap, water and vegetable oil. To do this, the soap is grated on a fine grater and poured into a jar. Water and vegetable oil are poured there. The composition is mixed well and applied to the inner walls of the bottle using a brush.
When making a mushroom from gypsum, you must adhere to technology. The next step is to dilute the plaster. You will only need that part of it that will be used to make the legs. The solution is poured into the mold and left until it hardens. To reduce material costs, gypsum can be poured into a hollow mold. To do this, select a smaller bottle and insert it into the hardening material. The diameter of its neck should be less than the diameter of the neck of the mold itself.
To prevent the bottle from floating in the plaster, it can be pressed down with a press. The material will set in just 6 minutes. After 40 minutes you can continue working with the figure.
DIY owl for the garden
To create cute and attractive garden sculptures you need to purchase materials such as:
- 6 tbsp. gypsum;
- Water;
- Wooden skewers or strong wire;
- Cellophane bag;
- Form;
- 500 grams of polymer clay;
- Paints: acrylic or gouache;
- Brushes, beads, varnishes;
- Glass for modeling.
Let's start creating charming garden figurines:
- Mix the ingredients to create a gypsum mixture. Cover the mold with polyethylene film and make sure that the bag does not form wrinkles. This is important to ensure the symmetry of the future figure.
- Place the solution into the mold until a third of the entire mold is filled. Then wrap the finished product.
- Place a wooden skewer or wire in the center on which the craft itself will be placed. Level the solution with your hands and leave it for two hours to completely harden.
- Carefully lift the pedestal out of the film and remove the cling film.
- Remake the plaster solution. Stick it on a skewer so that it resembles the outline of an owl, and smooth the mixture with your hands. Wrap the mold and leave it for 24 hours to completely harden.
- Using polymer clay, form the details of the bird: head, wings, beak and other components as desired.
- Using a pusher, draw the texture of the feathers and pupils.
- Start sculpting the bird's tail. To make it look realistic, sculpt the tail in layers.
- Add detail to the sculpture, paint the pupils with varnish, and use a pusher to create more details on the figure.
- Paint the owl with paints and then varnish it.
Making the base platform
Before you make a mushroom from gypsum, you must think about its features. Among other elements, the base should be highlighted. To do this, you need to choose a cup that is suitable in size and shape. It is also covered with cling film or lubricated with an emulsion prepared according to the recipe described above. Now you can dilute another portion of plaster and pour it into a cup.
The leg is immersed in the same place, but it is better to make it removable; it will be more convenient to work with the design of the mushroom. The leg is covered with cling film and immersed. After 40 minutes the product is removed. If desired, you can use figures, leaves or flowers for decoration. They are easily made from plaster, poured into molds and left to harden. Before you make a mushroom from gypsum with your own hands, you must think through the nuances of the technology. It involves drying the figurine before painting. It is left in a warm place for 2 days.
Mushroom decoration
The design of the figurine can be spontaneous. Ideas may arise during the process. However, it is recommended to think through the drawing in advance by drawing it on paper. When the sketch is ready, you can start drawing the pattern. Using a simple pencil, you can draw on the mushroom everything that you subsequently want to see on it.
Having looked at the photo of gypsum mushrooms, you can understand that their outer surface can be made in relief. This is usually done using a large needle or woodworking tool. To ensure that the paint adheres better and costs less, the mushroom is pre-primed. This can be done using special mixtures. An alternative solution is construction adhesive diluted with water in a ratio of 1:2.
Using a brush, the primer is applied to the surface. It is left for 2 hours until the mixture dries. Then the mushroom can be painted with paints according to the intended and cut out design. The paint is left until it dries, and then the figure can be varnished. It is applied in several layers, leaving no unpainted areas. The figurine is left for a while, and then the design details can be fixed in the right places using glue. It is necessary to use a composition that is resistant to moisture.
Preparation of gypsum solution
The paradox of Gypsum is that the solution made from it hardens very quickly, and this is its positive side, since the time for making various products from it is reduced. But this is also its negative side, since the time for its use is limited.
The positive and negative aspects of gypsum also include the fact that it, being a relatively hard material, crumbles easily, which facilitates its rapid processing, but requires careful handling of the transportation and operation of products made on its basis.
In order for products to be made and used in the future, it is necessary to know how to properly dilute plaster for making crafts. Of the many methods for diluting gypsum, the ones proposed are the most used.
First way
Gypsum solution is prepared on the basis of water, gypsum with the addition of PVA glue. Gypsum is added to the water in a ratio of 10 to 7, respectively. After thorough stirring, add a couple of tablespoons of PVA glue to the resulting solution.
Second way
This method is a little labor-intensive, but allows you to make stronger objects that can be used for a long time. These products will remain attractive for a long time.
The gypsum mixture is mixed in the following proportion: 6 parts of gypsum are added to 10 parts of water. One part of slaked lime is added to the resulting mixture, which will make the mixture more elastic during use and more durable after hardening.
Slaked lime must be used. You can purchase it at a hardware store, or extinguish it yourself, at least a day before use.
Third way
In this case, gypsum, water and gouache are used to make the mixture. The gouache is first diluted in water and mixed thoroughly so that the paint is completely dissolved.
With gentle stirring, gypsum is gradually added to the resulting solution until a homogeneous mixture is created. The proportions of gypsum and water should be no more than in the first two cases.
It is necessary to stir until a homogeneous mixture is obtained so that no air bubbles arise. The density of the resulting mass of solution should correspond to the diluted flour for making pancakes.
Recommendations for making mushroom
If you decide to make mushrooms from gypsum for the garden with your own hands, then you can purchase the material for the base at any relevant store. The figurine will be fragile, so when decorating you need to try not to damage it. You can also purchase the form in the store. However, plaster can have such a structure that it can be sculpted by hand.
You can supplement the mushroom with artificial caterpillars, which are made from flattened circles. It is better to make them of different diameters, combining the elements with each other. The head is made round. Eyes in the form of small balls are placed on top of it. If everything is done correctly, the figures will cope well with high humidity and precipitation, as well as temperature changes. However, the figurines must not be dropped.
General provisions
DIY garden crafts made from plaster allow your imagination to run wild. Thanks to the simplicity of manufacturing technology, you can give them almost any shape and color, which will allow you to populate your dacha with a variety of fairy-tale animals, castles and plants for your dacha.
Here are some examples of possible directions:
- Cute little animals. Turtles, hedgehogs, frogs, kittens and other representatives of the animal world are always held in high esteem; their habitat in the tall lawn grass at the dacha or at the edge of the path will be to the liking of both the little representatives of your family and adults.
Turtle – chocolate coquette
- Fairy-tale heroes . Recreate your favorite fairy tale in the garden, what could be better? Such DIY plaster garden crafts will not only delight children, they will also make their parents smile more than once.
Meet Shrek
- Miniature architectural structures. If there is no financial opportunity to build a life-size castle, then let you at least have a smaller plaster analogue.
Medieval towers reliably protect your favorite flowerbed
- Plants . Of this category, mushrooms are the most popular due to their naturalness and ease of production. It is with their example that we will look further at how to make plaster toys for the garden with your own hands.
Own mushroom meadow
Of course, the flight of your imagination is not limited to the proposed options, but before moving on to creating more complex figures, you should practice on simple sculptures, which is what we will do with you now.
Gypsum mushrooms
What kind of mushrooms do you like – porcini mushrooms, aspen mushrooms, honey mushrooms or champignons? I am sure that you have never seen mushrooms like those of Anastasia and Seryozha Ivanets. Mom and son prepared... mushrooms from plaster . Yes, they turned out so beautiful that now everyone in Seryozha’s kindergarten admires them.
I pass the word to the crafts masters.
Well, the school year ends and the decoration of playgrounds in kindergartens and schools begins. Last year we made an Elephant out of plastic bottles for the kindergarten playground, and this year Seryozha and I decided to make mushrooms from plaster. At first they thought of one mushroom, but during production they decided to make three)))
There was also an option to make mushrooms from polyurethane foam, but since I am more accustomed to working with alabaster (plaster), we decided to stick with it.
Gypsum mushrooms
So, we will need:
- About 3 kg of gypsum (we used about 3 kg for THREE mushrooms)
- Water (dilute plaster)
- Milk and water bottles (for legs)
- Sushi sticks or something you can use to stir the plaster
- Paints (any)
- Transparent varnish is a MUST, NO WAY WITHOUT IT.
- Jar, glass, bucket - a container for diluting a mixture of gypsum and water
- A deep plate and a bag (for hats).
ATTENTION: the plate will not be damaged. ))))
Gypsum mushrooms - work progress:
1. Take the bottle, the cap is screwed on!! cut off the bottom of the bottle.
2. Pour plaster into the jar and pour water, and stir with a sushi stick, the consistency is approximately 15% sour cream - not thick and not liquid. This will be the stem for the plaster mushroom.
Stir thoroughly so that there are no lumps and pour into our bottle without a bottom.
I diluted the plaster several times, poured it out, then diluted it again, poured it out, diluted it again and poured it out. Then I left it for half an hour for the plaster to harden.
3. After half an hour, when the plaster has hardened, we take a cut into the bottle and, as it were, tear it.
If you can’t tear off the neck where the lid is, it’s okay - just remove the lid.
4. Then take a bag and a deep plate. We put a bag in it, this is so that the plaster sticks to the plate)))
We spread the plaster, this time a little thicker than for the leg.
And we put a small amount of this gypsum in the middle of our plate. While the plaster has not hardened, place the leg, neck down, in this cake)))
We hold the leg a little, the thick plaster hardens very quickly.
5. Then we add more plaster and pour plaster to the desired height of the cap (plate). Leave for half an hour.
6. When the plaster has hardened, remove it from the plate and remove the bag.
Here is a mushroom made from plaster.
Because of the package, folds were created, so when the mushroom is finished, painted and patched, the folds will give it more naturalness.
7. LEAVE THE MUSHROOM WITHOUT COLORING IN A DRY PLACE TO DRY. IT MUST DRY FROM THE INSIDE. WE STANDED IT FOR THREE OR FOUR DAYS!
8. When the mushrooms have dried, we begin painting.
It's up to you to decide what kind of mushroom you want.
We have two white ones and one fly agaric. Seryozha and I first painted the hats, the bottom of the hat and half the legs. Two or three layers. Both acrylic and gouache.
9. After a day or two, when the gouache had dried, the remaining parts of the leg were painted.
BY THE WAY, DRYING CAN GO FASTER IF YOU LEAVE THE MUSHROOMS FOR A SOME TIME ON THE BALCONY, AND NOT IN THE APARTMENT.
10. The next day after work and kindergarten, they began to varnish it. This is also best done on the balcony. The varnish dries quickly, so I varnished the caps and half-legs with the first layer and then the second.
11. I left it on the balcony overnight to dry and air out! The next evening, we finished off the remains of the leg in two layers)) and again on the balcony at night.
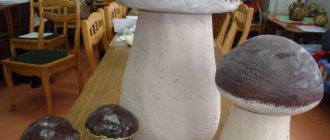
Here are our gypsum mushrooms:
Porcini mushrooms made of gypsum
In your hands, plaster mushrooms still look like crafts. But when they were dug into the garden, they actually looked like real ones:
Our mushrooms on the playground:
And a close-up of porcini mushrooms:
And, of course, the fly agaric:
And here it is morning)) the varnish is all dry and there is no smell!! HOORAY! Mom (I) quickly took pictures, and dad and Seryozha took them to kindergarten!)) The teachers and children liked our plaster mushrooms ! I’ll be sure to attach a photo once they’re dug in on site—I’ve already shown it above!)) Have a great summer everyone!!
