It allows you to efficiently clean the roof, prevent sudden melting of snow layers, injury and damage to the coating.
Read the article about what a scraper for removing snow from a roof is, how to choose it, how to use it and more.
Purpose
A snow scraper is used to remove snow from the roofs of low-rise buildings. In this case, the worker himself is on the ground .
If you do not take any action and leave snow on the roof, it can sag and even collapse.
Another danger lies in roof damage. Due to temperature changes, the snow melts, water seeps into the lower layers of the coating and freezes again, leading to its destruction.
No one knows exactly when the layers of snow will come off the roof . If there is a person below at this moment, he could be seriously injured.
An avalanche can damage equipment standing below, destroy a fence, barn and other buildings. Using a scraper avoids these problems.
Sometimes the tool is used to clear snow from the roofs of multi-story buildings. In this case, the worker, being at the top, pushes the layers down . He himself does not come to the edge.
However, this use of the product is an initiative of public utilities, since it was developed for removing sloping roofs from the ground. To dump snow masses, another tool is used, called an engine.
conclusions
After reading this article, you learned:
- how to clear roofs of snow and ice with your own hands or with the help of climbers in various ways;
- how to remove ice from the roof of a private house or high-rise building;
- how to knock down icicles in various conditions.
All the methods for clearing snow from roofs described in the article have one thing in common - they allow you to remove snow and ice without damaging :
- rafter system;
- roof covering.
The choice of method for clearing snow from the roof depends on:
- availability of this or that equipment;
- your physical data;
- technical savvy;
- condition ;
- thickness of the snow and ice layer.
Device
The scraper has a simple device. It is represented by the following elements:
- Pen . Most often, it is retractable (telescopic) and consists of several elements that are inserted from each other. This allows you to adjust the length of the product at your discretion.
- Handle . It provides a comfortable grip on the device.
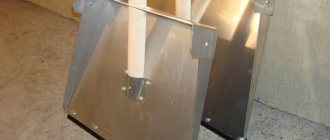
- Scraper . It is this that acts as the working surface. Most often it is made of aluminum or plastic. Wooden models are less common.
Requirements
Requirements for scrapers:
there should be no sharp areas or chips on the working surface that could damage the roof;- the telescopic handle should move apart smoothly and smoothly;
- all parts must be securely fastened, not wobble or dangle;
- the length of the telescopic handle can reach 6.5 m;
- the optimal length of the scraper is 65 cm, and the length of the engine is 50 cm; the height can vary within 160 mm for the scraper and 600 mm for the engine.
How to choose equipment for cleaning snow masses?
When choosing a scraper you need to pay attention to the following points :
- Product weight. Since the instrument has to be held for a long time on outstretched arms, it must be light. Therefore, it is made mainly of plastic and aluminum.
- The presence of a handle on the telescopic handle. It not only allows you to hold the scraper securely, but also prevents frostbite on your hands. The rubberized coating prevents the tool from slipping.
- The length to which the handle extends. It is directly related to the height of the building whose roof is to be cleaned.
- The presence of a rubber pad on the working surface. It allows you to carefully clean the roof without damaging the delicate coating. Most often, engines have such overlays.
How to do it yourself?
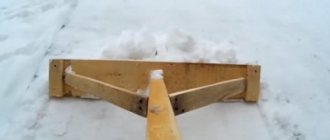
A factory-made scraper is always superior to its homemade counterparts in all respects. If you decide to make it yourself, then use a sheet of plywood or tin as a working surface. It is fixed on a handle made of metal or wood.
Making a telescopic handle on your own is problematic . The only option is to use a handle from an old scraper, mop or window cleaning brush. However, the length may not be enough to clean the roof.
This video will show you how to make a scraper for removing snow from a roof:
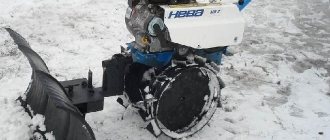
Wheelbarrow snow blower: main components
A snow blower must cope equally well with snow on smooth and difficult terrain. A good snow blower can clear walkways and prepare a path for your car to exit the garage. Let's see how to make a simple unit without special technical knowledge and skills.
You will need:
- Wheelbarrow;
- Mounted snow shovel;
- Fastenings (M8 bolts are suitable).
The design is simple: a mounted snow shovel is attached to the wheelbarrow using two harness joints. The weight of the shovel falls on the wheels, you will only spend energy on moving the wheelbarrow.
The shovel is attached to the front of the wheelbarrow at an angle of about 45°.
We measure the wheelbarrow and make pusher arms. A metal profile will do. Make blanks from the profile and insert the timber. Attach the profile to the wheel axle, move the beam until it touches the axle and secure with screws.
Thin steel 1-3 mm is suitable for harness clamps. Cut 2 strips of the same size, make a bend in the center and fold. The clamp is installed on the wheel axle. The finished profile is inserted into the clamp.
The beam and blade mounts are secured with screws. We begin to assemble the structure. Turn the wheelbarrow over and install the harness clamps on the wheel axle. Insert the push bar and bolt it together. We turn the wheelbarrow back onto its wheels and fasten the mounted snow shovel using screws. The length of the shovel handle depends on your height, choose the most convenient option.
The last thing to do is to make and install a mount that holds the shovel in the up position. Make a blank of steel, drill holes and attach the resulting bracket with screws.
A simple snow blower does not require electricity or fuel. Using the unit is simple. When clearing snow, you can adjust the position of the shovel depending on the thickness of the snow cover.
Rules of use and care
Recommendations for using and storing the roof scraper:
- Cleaning begins with icicles, which are carefully knocked down using a tool. You need to stand at a distance to avoid injury.
- To knock down the icicle and not damage the roof, swing the scraper and hit the ice at a distance of 10 cm from the edge of the roof.
- The scraper is placed on the roof at a distance of about 50 cm and smoothly pulled towards you. If the snow has already compacted, you need to start from a distance of 20 cm.
- Do not pull the tool too hard. If an obstacle is encountered, it is bypassed; perhaps there are roofing elements or a build-up of ice under the layer of snow.
- When the roof has been cleaned around the perimeter, begin processing the areas located above.
- There is no need to press the tool tightly against the roofing.
- After completing the work, the scraper is cleaned of any remaining snow and dirt, wiped with a dry cloth and stored.
You can protect the metal surface from corrosion using grease. It is applied before long-term storage of the product.
Making your own shovel
The design of a snow shovel is very simple. Such a tool can be assembled in a couple of hours from materials available at home.
The most common is plywood tools. Making a scoop occurs in the following order:
- Take a piece of plywood sheet. A square measuring 40x40 or 45x45 cm is cut out of it with a jigsaw.
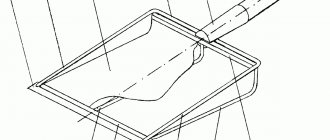
- A board 10 cm wide and 2 cm thick is nailed to one side of the plywood sideways. This will be the back side of the scoop. The bottom of the board can be rounded with a plane. Then the scoop will be curved, as shown in the diagram. A small recess is cut out in the center of the side, which forms a seat for the cutting.
- The plywood end of the front part of the scoop is sheathed with a bent galvanized strip. Similar strips can be used to strengthen the rear side.
A metal scoop is made according to a different principle. Typically aluminum sheet or galvanized steel is used for manufacturing:
- A square is similarly cut from the selected metal sheet. Here you need to take into account the dimensions of the working canvas itself, plus the bends for the sides.
- The back element of the scoop can be cut from a board, as was done for the plywood counterpart. It’s easier to just bend all the sides out of metal. Then a hole for the handle is cut in the center of the rear element.
After any scoop design is ready, proceed to attaching the handle. The cutting can be bought new or removed from another shovel. One end of it is cut at an angle so that its end fits tightly to the plane of the scoop, strictly in the center. In this case, the handle itself should touch the seat on the rear side. The end of the handle is secured to the working plane of the scoop with a self-tapping screw, plus it is reinforced with a tin plate. If the back side was bent out of metal, then the handle is simply inserted through the drilled hole. The handle is fixed to the wooden board with a steel strip plate.
Read also: Snow blower Huter sgc 6000, 1000e
Homemade snow removal devices are exclusive. They can have the most unusual design. The main thing is that the tool does not pose a danger to the working person and the roofing itself.
Advantages and disadvantages
Using a scraper to remove snow from the roof has a number of advantages:
Snow does not stick to the working surface, so you do not have to waste time cleaning it;- there is no need to climb to a height or approach the edge of the roof, it is safe to work with the scraper;
- the tool is designed specifically for removing snow on the roof;
- no significant physical force is required during operation;
- When stored assembled, the scraper does not take up much space.
The disadvantages of the tool include:
- narrow scope of application, the tool can only be used to remove snow from the roof;
- a shovel is required to remove the thrown snow;
- if the number of floors of the building is high, then it will not be possible to do without climbing to the roof;
- If handled incorrectly, there is a risk of damaging the coating.
Countermeasures: how NOT to clear snow from the roof of a private house
If you are unwilling – or impossible – to regularly remove snowdrifts from the roof, you can arrange heating of the roof covering. Such measures are not cheap, but they reduce the risk of damage to rafter structures during heavy snowfalls and frequent weather changes - from frost to thaw.
The heating cable is laid in a strip along the lower edge of the roof, as well as in gutters and gutters. The latter measure is necessary, since otherwise the water flowing from the roof will freeze in the drainage system, increasing the risk of its breakdown.
For roofs with roof windows, projections and recesses of various kinds, the heating cable is laid along the contour of all protruding or recessed structural elements.
In houses with a living (working) attic, this method of dealing with snow and ice is most useful, since it allows you to avoid leaks on the roof heated from below.
The best option is considered to be a combination of electric heating systems in the house, on its surface structures, as well as on the site.
This not only eliminates problems with “avalanches” coming from the roof, but also reduces the risk of disruption of water supply, sewerage and other utilities.
Top 3 best models
The most popular models of roof scrapers.
Berchhouse №18
Telescopic scraper for removing snow from roofs, 6.5 m. Tool with telescopic handle . It is produced in Russia and adapted for use in the country. Aluminum handle, plastic bucket. Product weight – 1.5 kg. Price – 4550 rubles.
Truper ROOF-RK
The bucket and handle of the tool are made of lightweight aluminum. The handle is retractable, which allows you to work the product at a remote distance from the edge of the roof. The width of the bucket is 45 cm, the weight of the scraper is 2.2 kg. Price – 3,800 rubles. Read reviews here.
SKRAB 28095
Bucket size: 16x63 cm. The bucket is flat, made of aluminum. It is possible to change its location. The handle is metal and has a comfortable grip at the end . The length is adjustable, its maximum value is 640 cm. If necessary, the working surface can be removed. Price – 3,700 rubles.
