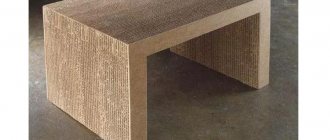
Today the idea of competent organization of space is very popular. On the Internet we read a lot of useful tips for those who want to find a place to store small items. And when you look at how many different boxes you need to buy, you realize that your budget won’t support it.
But you don’t have to leave huge sums of money in stores - you can make an organizer for accessories and important things yourself. It won't take much time and won't require any special skills. Shall we check?
For the office
If, in search of a pen, you turn the whole house upside down, then a master class in making organizers with your own hands is your option. Let's try to make a convenient device for storing pens, pencils and other small things that may suddenly be needed.
To do this you need to take:
- cardboard;
- pencil;
- ruler;
- tourniquet;
- paint (in a can);
- scissors and glue;
- paper;
- tin cans (at least 2)
Lubricate the jar with glue and cover it with paper. We wrap the jars with a tourniquet, then paint and leave to dry. It is better to take an even number of cans to create convenient organizers. We place them in pairs and insert a handle in the middle.
Wrap it with a tourniquet. Ready! Now in organizers you can separately store accessories according to the types and purposes of work.
Dimensions and types of construction
There are a huge number of storage systems. Their choice depends only on your preferences and finances.
- Pull-out storage systems. In kitchen sets there are often special metal pull-out systems, as well as wicker or plastic baskets that pull out. If your set does not have such systems, then you can store vegetables and fruits in plastic, metal, wooden, wicker containers installed in kitchen drawers.
- Rack or bookcase. Stationary or wheeled storage systems consisting of 6 compartments in which you can store both fruits and vegetables. The mobile option is ideal for a small kitchen. In a large kitchen you can install a mobile or stationary wooden shelf.
- Hanging shelves, containers, baskets located next to or above the countertop. They give the interior the coziness of a country house and take up little space.
- Wire or wicker storage baskets. The ideal option is baskets made from natural materials, such as vines. The advantage of such containers is breathability and the absence of large holes, which helps keep the kitchen clean.
- Special cabinet. You can make it yourself by making special wire windows in an old cabinet, or purchase it in a store. Such wooden storage is designed in the form of a bench or stool with a folding seat. The product will take its rightful place in the kitchen, in the hallway or on the balcony.
Convenient solutions for the kitchen
There are always a lot of things in the kitchen. To simplify access to them and at the same time avoid clutter, you can see how to make an organizer with your own hands.
For this you will need:
- thread and needle;
- cutting boards;
- stapler;
- braid and fabric.
You need to make patterns for a rectangular organizer, equal to the boards. We trim them with ribbon. We attach it to the boards using a stapler. Convenient storage containers are ready! You can now store appliances or other small items in them.
Which tablets can be split?
Tablets can be divided if they have a clearly marked line on the surface designed to facilitate division. In addition, such a drug must have a recommendation for the possibility of division in the instructions.
In this case, you cannot use scissors and other devices; there are special guillotine separators for these purposes. They are sometimes equipped with an additional compartment that is used to store cut tablets. It should be remembered that if one cutter is used to separate many drugs, it should be thoroughly cleaned before each use to avoid mixing drugs.
Bags for storing packages
Bags or napkins are often needed around the house. If you keep them in sight, it looks sloppy. You can see how to sew an organizer for them and not worry that such little things will ruin the aesthetics.
The organizer requires the following things:
- needle and thread;
- scraps of any fabric;
- a sleeve from a former item (or you can sew a new one);
- elastic or braid;
- scissors.
We make 2 round patterns from fabric and cut holes in them. We wrap the edges and sew them together. Insert an elastic band or braid into the opening that appears.
We sew the patterns to the sleeve on both sides and make a loop on the right side at the top. The result is a bag that can be filled with small items and hung on a hook. It definitely won't be conspicuous.
How to choose?
You can buy a pill box at any pharmacy, but the range of products here is usually limited. If you need more functional storage, you can order it in the online store:
- Wideberries,
- Ozone,
- Sima Land,
- Aliexpress s, etc.
Prices vary from 100 to 1000 rubles.
TOP 3
Below are popular options for containers for storing medicines:
Electronic pill
The most easy-to-use tablet holder, equipped with a timer . Suitable for taking tablets 3 times a day.
The user can set the exact time for taking medications, and at the appointed time the organizer will notify about the need to take medications with a loud signal.
The latches on the lid are fixed easily and firmly, which prevents the contents from spilling out. Average price: 450 rubles. Read reviews here.
Pros:
- ease of operation;
- material strength;
- secure locks;
- compactness;
- reasonable cost;
- loud reminder sound.
Cons : none.
Azovmed
The tablet holder is from a Russian manufacturer, made of durable material. The organizer is divided into 14 compact cells . It is convenient to store tablets for taking during the week, in the evening and in the morning. For the convenience of visually impaired people, the cells are marked with letters that are convex to the touch and painted in different colors.
Not the best option for travel - the latches may open spontaneously during transport.
Pros:
- compactness;
- ease;
- acceptable price.
Cons : unreliable fasteners.
Average price: 270 rubles. Read reviews here.
Be First TS 1265
Capacious tablet holder with 7 cells. Made of durable plastic, equipped with reliable latches. Quite deep and capacious cells allow you to place a large number of tablets or vitamins in them, which is especially convenient for those who take dietary supplements daily.
Pros:
- compactness;
- ease;
- acceptable price;
- capacity.
Cons : none.
Average price: 150 rubles. Read reviews here.
What to consider when choosing?
When purchasing a pill box, it is useful to consider several factors:
- Strength of the material . It is better to choose boxes and containers for tablets made of polymers or plastic. Such products have a durable body and a reliable clasp.
- Compactness . Regardless of how the container is used - for home use or for travel - it is better to choose a model with small sizes. This product will not take up very much space.
- Purpose . Conventionally, containers for medicines can be divided into travel and stationary. Their main difference is parameters and functionality. The road version is more compact, the home version is more voluminous.
- Convenience of design . Tablet holders can have different shapes: square, rectangular, oval, round. The buyer chooses the most convenient option for himself.
- Additional functions . You can find a wide variety of tablet holders on sale: from the simplest to the most advanced, with a timer with a reminder to take medications and grind them into powder, the presence of a glass for water, etc.
- Price . A container for medicines can be budget or expensive; the price tag depends on the functionality of a particular model. Modern high-quality tablet makers have an optimal ratio of characteristics and cost.
Folding organizer for household items
There are things in every home that are a pity to throw away, but there is no way to store them separately. A special organizer is perfect for this.
- DIY polymer clay jewelry: master classes with photos
- DIY decorative candles: master classes with photos
Decorating a vase: ideas and master classes on how to make a vase with your own hands (80+ photos)
To work you need the following things:
- thread and needle;
- a piece of any dense fabric and several scraps;
- pins;
- buttons.
Lay the fabric horizontally and fold over about 1/3 of its length. Use pins to mark where the pockets will be. We sew the workpiece according to the markings and attach 2 buttons to each side of the pocket. From the flaps we make valves that will close the pockets. We cut holes. We attach the valves to the pockets.
It turned out to be a great thing for storing small items. It can be folded into several parts and placed in a table or closet. You can get what you need at any time.
You can even use a terry towel as a basis for the organizer. Then you can fold the item and even take it with you on a trip - everything will be preserved perfectly!
A little imagination and free time is all you need to properly organize the space in your home. Organizers will definitely help with this!
Useful tips
Several useful recommendations will help you choose the optimal tablet holder for the needs of a particular buyer:
- It is better to choose products with markings that are clear to the buyer.
There may be indications of times of day or days of the week, written in Russian or English. Also, this data can be indicated in different colors or in the form of pictures or symbols. - A large accessory during travel can fall apart inside the bag into its component parts. Therefore, on the road it is better to take a small pill bottle with a transparent lid and a tight latch.
- If the buyer understands that he cannot rely on his memory, it is better to purchase a model that will give a reminder signal to take pills.
- A pill box with compartments marked in Braille is suitable for a visually impaired person. This will eliminate confusion while taking the medication.
- Pay attention to the reliability of the fastener. It should remain effortless, but should not dangle either. The fastener can be any type: magnetic, screw or snap.
Plasticine tank
The best tank for children that they can make with their own hands is a plasticine combat vehicle. At the same time, there is a choice in what style to make such a creation.
It can be molded into a three-dimensional model, made into an appliqué on paper, or pasted over a picture drawn on glass.
If you need to make a T-34 tank in the form of a three-dimensional model, then everything is very simple.
- Take green plasticine, preferably a dark shade. The base, tower and barrel are made from it. And dark plasticine is used as wheels: brown or black.
- The base is molded in a rectangular or trapezoidal shape. A round flattened tower is completed and attached on top, to which a long rounded cannon barrel is completed.
- The wheels are made like for a car, but there are 4 on each side, and they are connected to each other with a thin ribbon of dark plasticine. Stars are added from red plasticine.
- For a painting on glass, you need to prepare a drawing from which the image will be transferred. A black quick-drying marker or paint will also come in handy. The glass is placed on top of the image of the tank, and the outline of the design on the glass is traced with a marker.
- The next step is to glue small balls of plasticine onto the drawing and flatten it on the glass. On the back side the image will turn out uneven and a little unattractive, but on the back side the picture will turn out smooth and beautiful.
- The back side of the picture is covered with cardboard; it will stick well to the plasticine.
Craft box decor
A box is a unique item for storing various things at home. Such as shoes, stationery. Someone keeps letters, postcards, you never know.
As a rule, the box is made of cardboard and is easily decorated. The main thing is an idea and a little imagination. So, let's make a box for needlework, or rather for ribbons, lace, threads and other cute women's things.
Materials and tools for decorating the box:
- Cardboard box for tiles
- Scissors
- Ruler and pencil
- Flat brushes
- PVA construction adhesive universal and PVA for carpentry
- Acrylic paints
- Three-layer paper napkin, background
- Single-layer textile napkins, 41*41 – 3 pieces
- Acrylic varnish
- Braid
- Button
- Glue gun
The tile box consists of a main part and a removable lid (Photo 1), and I have an idea to make a box for needlework. Then the box should close like a suitcase.
To do this, I drew a line around the perimeter of the box on three sides (Photo 2), noting the depth of the lid and cut it off (Photo 3).
I left one side and glued it to the base (Photo 4).
I coated the entire surface of the box with glue so that the paint would adhere better and reduce its consumption (Photo 5) and dried well.
I covered the entire box with white paint (Photo 6,7).
For decoration, I took single-layer large napkins, very reminiscent of fabric ones. They behave well when glued (Photo 8).
I glued the first napkin: first I determined the location of the napkin (Photo 9), so that it completely covered the box lid from the front, and so that the edge of the napkin went under the lid, coated the surface of the box, laid the napkin and glued it, smearing it on top of the napkin as well (Photo 10). Dried it out.
I glued it to the side of the lid in the same way, as much as the size of the napkin allowed (Photo 11).
The rest of the part was glued to the back wall of the box (Photo 12). Dried it out. This type of napkin takes longer to dry than a paper one.
I glued the second napkin to the bottom of the box, and first coated the surface of the bottom of the box with glue (Photo 13, 14).
Dried it out. I folded the rest of the napkin inward (Photo 15).
The procedure takes a long time, since each plane was thoroughly dried and only then moved on to the next side.
I divided the next napkin into sides and glued it with the fold inward, helping with clamps (Photo 16). I left part of the napkin for the inside of the lid.
I covered the bottom of the box with a paper napkin to match the leaves, covering it with glue from the center to the edges (Photo 17).
And I glued the last fragment onto the inside of the lid (Photo 18).
Once the entire box was dry, I varnished the entire box (Photo 19).
I glued the tape along the edge of the box lid using wood glue (Photo 20).
Inside the box, at the junction of different napkins, I closed the seam by gluing tape (Photo 21).
I painted the button to match the colors (Photo 22) and left it to dry. While the button was drying, I made a loop from the braid, twisting the edges into a snail shape (Photo 23).
I glued the loop to the lid of the box with a glue gun (Photo 24, 25).
I glued a button in the same way, and threaded a thin cord through the holes (Photo 26).
The craft box is ready (Photo 27).
You can put any little things for your hobby in this box.
In order not to forget the page address and share with friends, add to your social networks:
When is heating needed?
When storing potatoes on an uninsulated loggia, they need to be heated. To do this, use cold-resistant boxes that are powered from the mains. They consume electricity in amounts comparable to an incandescent lamp.
A good option is the so-called balcony cellar. It is represented by a backpack made of thick fabric, which is additionally insulated with padding polyester. In terms of strength, it is not inferior to ordinary boxes. Container capacity varies between 100-300 liters.
Heating is carried out by a carbon filament. To determine the temperature, a sensor is built into the “cellar”. After the end of the cold season, it is cleaned and folded. In this form it does not take up much space.
Set for the game “Doctor”
The other day I noticed that our girls began to treat dolls, hares and bears. They come to eat with their “patients” and sit them next to each other on a chair to observe how they feel at this time. They feed sick dolls with a spoon and carefully wrap them in toy blankets. Then they go to the room and carefully look after the sick. After watching these games, I decided that the little ones clearly lack doctor’s tools and other medical “bells and whistles.” To begin with, we purchased the “Doctor” toy set, and then... my mother’s imagination ran wild!
For three days my daughters watched my serious preparations, asked questions and clapped their hands. And finally, they were given a big doctor's box. It contains medical instruments, boxes with medicines, forms for writing down prescriptions, badges with their names and all sorts of interesting and useful things. In addition, the surrounding play space turned into a doctor's office for them.
When I conceived the “Doctor” playset, I really wanted it to come out:
And now the kit is ready and it seems to me that it fully meets all the listed points.
A set of blanks for the game “Doctor” (19 sheets) | pdf
Now I’ll tell you in order what’s in the doctor’s box:
Medicines
Blisters, a regular medical syringe, an antipyretic syringe, a pipette (it was not included in the shot), a measuring spoon.
Paper boxes with medicines (ours are empty inside and taped on all sides for durability): vitamins, herbal tea, cold medicine, headache medicine, eye drops, heart medicine, ointment for feet.
Medicine bottles and jars (some empty, some containing buttons, glass beads and hama beads).
Materials for treating wounds and injuries
Plaster in skeins, plaster (printout), bandage, elastic bandage, dry wipes, wet wipes, a jar of cotton swabs, rubber gloves, protective masks, scissors.
Tools
A phonendoscope (an instrument for listening to the heart and lungs), 2 digital thermometers (plastic and printed), a hammer for a neurological examination, an otoscope (for examining the auricle), a bottle and a syringe (these are not instruments, of course, they just happened to fit into the frame