Waste collection and disposal is the problem that I first encountered when I bought a summer cottage. If you leave garbage in bags, animals will take it around the area. Even utility services don't always pick up packages. I decided to buy a trash container. After studying the assortment of several stores, I realized that it was too expensive. Then the idea came to my mind - to make a garbage container with my own hands.
Source nadoremont.com
Types of waste bins
Based on the material of manufacture, there are metal, wooden, plastic and concrete containers for collecting solid waste.
What you can use to make your own trash can:
- wooden boards;
- cement mortar;
- plastic bottles;
- old water barrel;
- metal sheets.
For waste of natural origin - cleaning, food scraps, paper, weeds, plastic cannot be used, since during the decomposition of organic residues such waste becomes very hot. Bins made of any material are suitable for packaging, bottles and other garbage.
Box for solid waste made of wood
Wooden containers are suitable for collecting waste in the country and making compost from waste. For production you will need:
- Softwood boards.
- Nails with a hammer or screws with a screwdriver.
- Metal corners.
- Polyethylene film or covering material.
- Impregnation against rot.
The waste box at the dacha should have a collapsible front wall for access to the lower layers of compost and the ability to turn over the waste. Therefore, first, four sides of the box are assembled using corners with nails or screws - the bottom, back and side walls. The lid and front wall are assembled separately to make the trash box dismountable. To secure the top and outer parts, you can use hooks or drive a long nail on each side that can be bent.
Since compost requires an influx of oxygen, the boards in the walls should not fit tightly together. The lid for the trash container is complemented by a handle made of a wooden block and hinged hinges if desired. When the parts are assembled, the wood is treated with stain or anti-rot impregnation. Without treatment, the box will decay and become unusable.
Before loading organic waste, you need to lay a film or garden covering material on the bottom of the container. From above, under the lid, the pile can be additionally covered with polyethylene to accelerate the greenhouse effect.
As it rots, you need to take the compost from below and mix the pile. Only organic matter can be thrown into such a box: scraps, weeds, roots, peelings, paper, straw. For the rest of the garbage you need to arrange another trash can.
Classification of waste containers by purpose
Depending on the conditions and for what types of waste the garbage disposal will be used, a specific model is selected.
For collection and storage of municipal solid waste (MSW)
Plastic and metal containers are suitable for collecting municipal waste. They are installed on special sites and in garbage chambers. The standard volume for an apartment building (MCD) is up to 0.75 cubic meters. Available with or without lids, on wheels, with locks and a self-opening flap.
Bunker for transportation of bulky waste (KGM)
For large-sized waste, reinforced bins with a volume of 8 m³ or more are used. Such containers are installed in specially designated places. When carrying out repair work with a large volume of construction waste, it is possible to order a bunker on an individual basis. Such containers are placed next to garden societies and at production sites of enterprises.
Press container
A device consisting of a hopper in which a press is built. The unit reduces the initial volume of waste several times. Various modifications make it possible to use the device at large enterprises involved in recycling waste and in private homes.
The following types of presses are distinguished:
- Container (another name for press compactors). The machine consists of a hopper into which waste is collected, as well as a hydraulic press that compresses each portion of scrap. They produce mobile and stationary versions of the unit.
- Briquetting. Allows you to compress loaded waste by three quarters of its original volume. At the end of pressing, compact briquettes emerge, ready for further processing.
- Baling. Used for compressing plastic bottles, aluminum cans, waste paper and other materials. Used in recycling collection points, shops, hotels. At the exit from the press, a compact briquette is obtained, ready for further transportation of waste to the disposal site.
Some models have a crushing device that allows for greater compaction of debris.
Containers for waste transportation
Transportation of production waste, industrial waste equivalent to MSW and construction waste is carried out in special containers with a cable or hook grip. There are containers with side and rear loading of waste. The volume of such bunkers is from 15 to 32 m³; they are transported using KAMAZ or MAZ-based equipment.
Garbage removal rules
In order to protect residents from noise, it is allowed to remove solid waste from 7 a.m. to 11 p.m.
SanPiN 42-128-4690-88 strictly regulates the frequency of garbage removal in order to prevent it from rotting and decomposing. At air temperatures from +5 °C and below, the frequency of removal is 1 time every 3 days. During the warm season, when the average daily temperature is above +5 °C, garbage cans must be removed daily.
In case of violation of waste removal standards, you should file a complaint with the Rospotrebnadzor department, since supervision over the implementation of sanitary and epidemiological legislation is within its competence.
Maintenance of container sites and responsibility
According to government decree No. 290 of 04/03/2013, the responsibility for maintaining the sites lies with the owner of the land on whose territory it is located. Or at local government bodies: UO, housing cooperatives, residential complexes. Landscaping of waste sites consists of:
- maintenance – painting, repairs, etc.;
- cleaning, including the selection and storage of garbage located next to the tank;
- labeling containers by type of waste;
- cleaning and disinfection of waste bins;
- maintaining the coating in the required condition, etc.
Incorrect calculation of the size of the site and the number of tanks required
For violation of the procedure for maintaining these places, the administrative and technical inspection applies a sanction in accordance with Art. 6.4 Code of Administrative Offenses of the Russian Federation Art. A fine of up to 2 thousand rubles is imposed on officials, and up to 20 thousand rubles for enterprises. The organization may face suspension of activities for up to 3 months.
How to make an ashtray for a summer house with your own hands (video)
As you can see, there is nothing supernatural in the manufacture of such accessories, and therefore, as soon as you have a free minute or an urgent need for a trash can, trash can or ashtray in the country, you can immediately begin production and complete the project within an hour or two.
At a dacha, personal plot or private house, waste collection and storage is the responsibility of the owner. Random burning or dumping of waste is prohibited by law and is harmful to the environment. Therefore, in order to sort, collect and store garbage before disposal, you need to install solid waste bins. From scrap materials, you can make your own garbage collectors and compost pits.
Slate box
The most inexpensive and reliable box can be made from slate, because it does not rot. It can be used to make back and side walls, as well as partitions. It is recommended to reinforce the slate with boards so that it does not crack due to overcrowding.
It is best to build the front of the box entirely from boards (the front wall is constructed based on the fact that the finished fertilizer could be conveniently removed from the box). At half height, the front part can be made standard, and then assembled from boards that lie exactly horizontally. The boards are fastened in such a way that they can be removed to the required level. You will understand how convenient this is when you take out the finished fertilizer.
Shiver option
Correct sorting
Look with a skeptical eye at everything that is left after cleaning. What you use every day can be left on the table top or in a nearby drawer. What you take out once a week or less often, put it in a closet or on shelves for storage. This will make it easier for you to keep the space organized and clean, and occasionally getting up from the computer to go get something is just a useful workout.
Wooden trash bin
From the boards remaining after the repair, it is quite possible to make a trash box. To make the product durable, the wood is treated with a protective compound. A varnish coating will help improve the appearance of the trash can. The boards must first be sanded. If desired, the box can be equipped with a homemade tin lid. The bottom is installed on the basis of a smaller diameter, this is necessary so that during rains the urn does not sink in water.
DIY metal trash can
To make an iron garbage bin you will need the following materials and tools:
- Sheet steel 1-2 mm thick.
- Rectangular profile or pipe.
- Bolts, washers, nuts.
- Hacksaw for metal.
- Scissors, circular saw or guillotine for cutting metal.
- Electric welding machine with 2 mm electrodes.
The urn will last longer if you choose stainless steel as the material. Regular iron will rust and thin metal will become brittle.
First you need to cut the blank from the sheet according to the development. To transfer the dimensions, you can print out the drawing of the urn in parts and align them using tape. The diagram shows approximate dimensions that can be increased by observing the proportions.
A small urn made from an old bucket or barrel
Used tanks for liquid and bulk products should not be immediately disposed of in a landfill, because they can also serve well within the perimeter of a summer cottage. As an example, we would like to give old buckets and barrels, which can be easily converted into trash cans and small trash cans.
Any old bucket that is not too dilapidated, or a barrel that is not rotten, can become a garbage container in a gazebo, near a summer kitchen, and so on. To do this, we won’t have to upgrade much, but just adjust the tank to size, perhaps patch up the old holes a little, repaint it in a cheerful color and install it where necessary.
Buckets can be used almost immediately, but barrels often have to be trimmed a little because they are too large. After carrying out the simplest reconstruction work, you can upholster the tank with building materials - plastic, wood, thick cardboard, after applying patches of tin or aluminum sheet. That’s it, now it’s just painting in the desired color or a bright pattern to match the design style of the location.
Classification
As mentioned earlier, there are a large number of specialized furnaces that are created to operate and burn a specific type of waste. They use some engineering features and technological solutions that not only simplify the process of burning materials, but also significantly reduce the cost of maintenance!
- Recycling and burning of hazardous waste. A medical waste incinerator is a fairly clear example of the type of device that handles hazardous materials. Medical waste poses biological and chemical hazards, so all items must be disposed of properly. In the working chamber, the temperature reaches 1200 degrees Celsius, which is quite enough to reduce the mass and volume of waste, destroy microbiological residues, as well as residues of pharmacological agents.
- Disposal and incineration of mixed waste and garbage. This type of device works with a wide range of materials, which explains its popularity. The average temperature in the chamber is about 1000 degrees. Thanks to the availability of modern engineering solutions, it is possible to achieve high energy efficiency.
- Disposal and burning of animal carcasses. The system is actively used on farms and other livestock farms. Average efficiency is about two tons of waste per hour. The stove has a rotating mechanism that ensures uniform combustion of objects, as well as a large number of air filters that allow you to clean the exhaust air from any impurities and sediments.
- Recycling and combustion of mixed waste (and garbage) with increased productivity. This type of model has the following technical characteristics: Volume of waste burned: about 350 kg per hour; The amount of energy released from combustion: not less than 6250 kcal/kg; Ash content indicators: 9.5%; Humidity: no more than 50%.
- Furnaces for burning phenol and formaldehyde generated during the production of plywood and chipboard. A fairly simple device that maintains elevated temperatures to eliminate phenol and formaldehyde compounds from materials. The furnace is a dual-circuit device, and elevated temperatures are achieved through active combustion of diesel fuel and natural gas.
- Furnace for thermal neutralization of liquid waste from the production of polypropylene (mineral oil containing TEAL and ATMER). Devices of this type are installed at oil refineries to neutralize oils and other substances that contain polypropylene. Despite the modern structure, the installation must be installed outside the work premises where the company personnel are located.
Do-it-yourself garbage cans, trash cans and ashtrays for your dacha
Buying a lot of country accessories involves serious waste, but today we are learning to save and making some of them with our own hands. Garbage cans, trash cans and ashtrays for the dacha using improvised materials - it’s not as difficult as it might seem!
Of course, many are already accustomed to using an old bucket instead of a trash can, and a small glass jar instead of an ashtray.
It is quite possible that it is convenient and inexpensive, but such devices do not have any appearance, or rather, they spoil many of our achievements in design and decoration with their too simple appearance.
That is why we decided to find a way to correct the situation and tried some hand-made work on ourselves, thereby learning how to make trash cans and ashtrays for the dacha with our own hands. Everything is very simple, and now we will tell you how to do such interesting things yourself without a lot of money and time.
Tags
with your own hands with your own hands with your own hands with your own hands Do it yourself How to make an unusual one How to make an unusual one
paperbackdiyleafstoryrigamiarticlecommentsmasterphotoconstructionhomemadedetailedcardboardsiterulesconstructionheredecorcraftideastepgomintoolsuslongersizereadbetteraddallminicanedgebucketbottlesalreadyschoolorganizationhole
Suitable material for manufacturing
You can make your own trash container. At the initial stage of creation, it is necessary to select the appropriate material.
| Material for production | Description, features |
| Metal sheets | Containers made from sheet metal are distinguished by durability, strength, immunity to temperature changes, and the ability to dispose of any type of waste. |
| Plastic | The advantages of plastic are the lightness of the containers, the ability to quickly change the placement location, as well as antibacterial qualities that appear after additional coating of the walls of the tanks with special compounds. |
| Concrete | Increased strength, durability, ability to withstand any load. |
For self-production, they also use available materials that are resistant to deformation and can withstand temperature changes. Plastic containers are limited by capacity. The largest containers can hold up to 300 kilograms, but no more.
DIY ashtray
One type of urn is an ashtray. Ashtrays, both tabletop and floor-mounted, are an indispensable attribute of any private home. Even if the owner does not smoke, an ashtray will not hurt. It successfully performs the functions of a miniature urn. In addition, not all guests lead a healthy lifestyle. Install floor ashtrays near the barbecue, at the entrance to the gazebo.
What are tabletop ashtrays made from? Wood and plastic, gypsum, clay, metal. The fastest and easiest way to make an ashtray is to use a regular beer can:
- Take an empty soda or beer can.
- Wash it thoroughly.
- Using a sharp knife, cut off the top of the can. Trim the edges.
- Using scissors, make vertical cuts towards the bottom of the jar. The cut should not reach the bottom by 2-3 cm. The width of each strip is about 1-1.5 cm.
- Roll each strip down into a roll or bend them, intertwining them together.
- The simplest desktop ashtray is ready.
DIY floor ashtray:
- An old milk can or a piece of ventilation pipe is perfect for making a floor ashtray.
- Cover the can with a fine mesh and decorate. Install in the desired location and start using.
- You will have to tinker a little longer with cutting the pipe. Place an old bucket inside the pipe or use the bottom of it. Cover the pipe with a fine removable mesh and decorate. The ashtray is ready for use.
Tip: When working with metals that need to be cut, be very careful. There is a very high risk of injury.
Buying a lot of country accessories involves serious waste, but today we are learning to save and making some of them with our own hands. Garbage cans, trash cans and ashtrays for the dacha using improvised materials - it’s not as difficult as it might seem! Of course, many are already accustomed to using an old bucket instead of a trash can, and a small glass jar instead of an ashtray. It is quite possible that it is convenient and inexpensive, but such devices do not have any appearance, or rather, they spoil many of our achievements in design and decoration with their too simple appearance. That is why we decided to find a way to correct the situation and tried some hand-made work on ourselves, thereby learning how to make trash cans and ashtrays for the dacha with our own hands. Everything is very simple, and now we will tell you how to do such interesting things yourself without a lot of money and time.
Requirements for MSW and MSW sites
First, let's understand the concepts of MSW and MSW. After the adopted amendments to the law “On Production and Consumption Waste”, the concept of MSW – municipal solid waste – appeared for the first time. The responsibility for storing and removing these raw materials was assigned to public utilities.
The bulk of the garbage in modern cities is ordinary household solid waste (MSW), which is generated daily: food debris, glass, plastic, cellulose, etc. Municipal waste (MSW) includes waste that accumulates in residential or non-residential premises during activities person or organization, for example, consumer goods that have lost their original purpose.
In the above-mentioned law, the terminology of MSW serves primarily to distinguish between types of waste and, accordingly, standards and tariffs for ordinary people and enterprises. It is obvious that entrepreneurs and organizations with large staff throw away much more garbage in the course of their activities than the average resident.
The organization of the container site is carried out by local utilities. When installing and maintaining these territories, they must be guided by the requirements enshrined in the instructions “Sanitary rules for maintaining the territory of populated areas SanPin 42-128-4690-88. These include:
- It is mandatory that in the area of residential buildings there must be special areas fenced on at least three sides. The height of the fence should be at least 1–1.5 m to prevent the wind from blowing debris into the nearby area. The location must be such that there is clear passage for the garbage truck. There should be no vegetation within a radius of 10 meters.
- Garbage containers must be located at a distance of at least 20 meters from residential buildings, children's and sports grounds, but no more than 100 meters.
- Garbage containers should be installed on a concrete or asphalt base at a height of 10–20 cm from the ground level so that rain streams do not fall under them. Sealable tanks are required.
- The number of storage bins depends on the number of houses located nearby. On average, the site size should accommodate from 3 to 5 waste containers.
- Garbage must be removed daily, and containers must be cleaned and treated with disinfectants at least once every 10 days, with the exception of winter.
- Possibility of installing covered fences for private sector owners.
Bin made from old car tires
An excellent urn is made from old car tires. Even if you don’t have your own car, any service station will be happy to provide them to everyone, and completely free of charge. Making a tire bin is very easy. It won't take much time:
- Take 2-3 old car tires.
- Clean them thoroughly to remove dirt and grime.
- Rinse the tires with water and dry.
- Fasten the tires together from the inside using metal staples.
- Mask the joints on the outside. A piece of a car camera would work well.
- Paint the urn with any bright colors.
- Since this type of trash can has no bottom, use garbage bags.
Tip: It is advisable to use garbage bags for any trash can design. This will make cleaning easier and eliminate the need to wash the bin.
Original urn from an old bucket
If a plastic bucket becomes dilapidated or begins to leak, it can be used as a trash can. Such a garbage can can be placed in the summer kitchen, near the gazebo, at the entrance to the house. It's easy to put a patch on the hole. Then the do-it-yourselfer’s own imagination comes into play. For example, you can put a pattern on the walls in the form of an ornament, paint a bucket like a fairy-tale character, or cover it with stickers and posters.
DIY trash can
4 pieces of lining were prepared the size of the height of the box, 20 pieces of lining the length of the depth of the box, 18 pieces of lining the size of the width of the box and 5 each for the bottom and lid, and then Evgeniy thought and thought and cut 2 more pieces of lining the size. like the height of the box - I’ll attach it to the sides of the front of the container, Lefty decided.
First, 2 pieces of lining were fastened together with self-tapping screws, fragments of lining, those that were the depth of the container, and then 2 more bars, in the same way. We ended up with 2 identical shields, which in the future will serve as the side walls of the container. From the short edge I connected the boards with clapboard intended for the floor and then screwed on the back and. front part of the container. The result was an open box, the front wall of which was 2 linings lower than the back wall. From the remaining 5 pieces of clapboard, a lid for the container was knocked together. Oh, somehow I suspect that there were more bars! Somewhere it was necessary to screw the clapboard for the lid! A! You can see it in one photo! That the lining, which represents the lid, is stuffed onto 2 transverse strips:
And right there, by the way, you can see that the lid is attached to the container using a piano hinge. Piano hinges (also called card hinges) are a single-hinged multi-tubular mechanism consisting of two plates, one of which is attached to the inside of the back wall, and the second to the top of the lid:
This is what it looks like, like a very long door hinge. Piano hinges are good because they add additional rigidity to the structure. There were 2 wheels screwed to the bottom of the box (along the back wall of the container), and 2 metal legs in front. Since if you make 4 wheels, then in case of strong wind or violent play, the container can roll right onto the marigolds! And if you make 4 legs, it will be difficult to move the container! And Evgeniy counted on the fact that each time he would roll it over in accordance with what part of the garden he would be working in. Because this will allow him to have a view of beauty every minute. “This is not a see-view of the sea, when in order to see the surface of the sea you have to lean out from the balcony and look diagonally across the parking lot, slightly bending at the waist,” Evgeniy thought as he screwed on the wheels.
So! Consider the container built. It's time to put your design talents and skills to use! What is not less important! Now we’ll find out how to decorate our trash can even more:
Drawing of a trash can with dimensions
Drawing of a simple conical sheet metal trash can with layout and dimensions
When the workpiece is cut, the reamer is bent along the lines in three places, and the joint is connected by welding. Without experience in such work, thin metal can be damaged, burned, not welded, or deformed by sagging on the reverse side. Therefore, it is better to practice on scraps of steel. To get a thin seam, you need to use electrodes no thicker than 2mm.
Next, the triangular ends are folded towards the center to obtain an even cone and the resulting joints are welded together. For ease of emptying, a U-shaped piece of metal sheet is welded at the bottom, which will serve as a handle.
To make the structure stable, a stand is assembled. Two T-shaped parts are welded from a square section profile, which can be fastened together with a horizontal section for rigidity.
Holes are drilled in the upper part of the finished tank and stand, and the parts are connected with bolts and nuts. The finished assembly is cleaned with sandpaper and painted with powder paint. The joints with the legs must be protected with a coating of copper, graphite or lithol grease.
In a similar way, you can make a large bin for collecting waste according to the following scheme:
Drawing of a truncated metal trash can with dimensions
Instead of a profile for stands, you can use iron pipes or corners. When you need to cut large workpieces, it is better to use electric sheet metal shears.
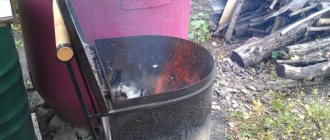
If you don't have a welding machine, you can make a trash can from a water barrel. First, remove rust from the surface, dry it, apply primer and paint. You can put a garbage bag inside to make emptying the container more convenient. If the barrel is too high, you can reduce the length using a circular saw.
An old barrel can be converted into a waste incinerator. To do this, you need to punch 5-6 holes in the body. This will create strong draft when burning waste, which will reduce emissions of harmful substances into the air. Burning garbage in this way is allowed on personal plots if the territory is not adjacent to agricultural land.
Design options for homemade urns
Outdoor trash cans designed for the disposal of household waste from residents of a country house come in a variety of shapes, models and designs. The first step in making your own trash can is choosing a suitable design.
Common container models depending on the purpose of use:
- open (installed under canopies);
- closed (used to avoid unpleasant odors);
- with ashtray (for smokers);
- with a canopy (to protect garbage from rotting garbage);
- with several containers (for separate waste collection).
Based on their design features, the following types of containers are distinguished:
- stationary - the container is stationary, fixed on the surface;
- mobile - the bowl is dynamic and can be emptied by turning over; the model can be equipped with wheels and be light in weight.
How to build a garbage can for a summer house
Before we find out how you can make a garbage container with your own hands, let's see what kind of containers there are. And they can be very different, they can be like this:
There may be these for separating garbage, like a “bell”:
Or they could be:
This is what Evgeniy was thinking about. Eugene was at that moment in Greece on the island of the Peloponnese, but it was not vacation, beaches and hotels that occupied his mind, and not even the fact that the climate in the Peloponnese is much milder than in other resorts in Greece. The picturesque bay did not excite his heart:
and what excited his mind, excited his thoughts, awakened his fantasies was the garbage can that stood near the cottage in which Eugene and his better half settled down to rest. This tank was made in the form of a wooden box, lovingly painted, decorated with intricate handles and wheels for ease of movement. This box amazed Evgeniy so much that for the rest of the vacation he sang to himself: “...And only you!” My dream box...
“and from now on he always had something to talk about with his wife in the evening over a glass of wine. I don’t know how Evgeniy endured until the end of his vacation, but he was able to do it. And upon arriving home, I immediately rushed to the dacha, where among the marigolds lovingly planted by my mother lay the remains of building materials. Evgeny chose 4 bars and a lot of lining.
Having determined the desired size of the box and holding nails in his teeth (Evgeniy read somewhere that this is a trick of cool carpenters), and a jigsaw in his hands, the master began to work.
DIY trash can
4 pieces of lining were prepared the size of the height of the box, 20 pieces of lining the length of the depth of the box, 18 pieces of lining the size of the width of the box and 5 each for the bottom and lid, and then Evgeniy thought and thought and cut 2 more pieces of lining the size. like the height of the box - I’ll attach it to the sides of the front of the container, Lefty decided.
First, 2 pieces of lining were fastened together with self-tapping screws, fragments of lining, those that were the depth of the container, and then 2 more bars, in the same way. It turned out 2 identical shields, which in the future will serve as the side walls of the container. From the short edge I connected the boards with clapboard intended for the floor and then screwed on the back and...
front part of the container. The result was an open box, the front wall of which was 2 linings lower than the back wall. From the remaining 5 pieces of clapboard, a lid for the container was knocked together.
Oh, somehow I suspect that there were more bars! Somewhere it was necessary to screw the clapboard for the lid! A! You can see it in one photo! That the lining, which represents the lid, is stuffed onto 2 transverse strips:
This is what it looks like, like a very long door hinge. Piano hinges are good because they add additional rigidity to the structure. There were 2 wheels screwed to the bottom of the box (along the back wall of the container), and 2 metal legs in front.
Since if you make 4 wheels, then in case of strong wind or violent play, the container can roll right onto the marigolds! And if you make 4 legs, it will be difficult to move the container! And Evgeniy counted on the fact that each time he would roll it over in accordance with what part of the garden he would be working in. Because this will allow him to have a view of beauty every minute.
“This is not a see-view of the sea, when in order to see the surface of the sea you have to lean out from the balcony and look diagonally across the parking lot, slightly bending at the waist,” Evgeniy thought as he screwed on the wheels.
So! Consider the container built
It's time to put your design talents and skills to use! What is not less important! Now we’ll find out how to decorate our trash can even more:
Beautiful trash can
To get not just a faceless container, but a real beautiful trash can, Evgeniy habitually armed himself with an angle grinder. After tapping the trash container on all sides with a dangerous tool, I started painting. As usual, we used leftover varnishes of different colors; we already talked about this on the forum. And when will these leftovers run out? and where did he get them?
The front panel was decorated with a designer handle, painted with the same “remnants”:
I screwed clamps around the inner perimeter of the box. For those who are not in the know, a clamp is one of the types of auxiliary tools used to fix any parts during processing, or to press them tightly together. In this case, a clamp like this was used:
On Aliexpress they sell for 356 rubles for 6 pieces.
“Oh, what a great idea I came up with with the clamps...” Evgeniy said, fastening a large garbage bag to the container. But it was a really cool idea! The bag is fastened without effort, and can also be unfastened, everything is neat, clean, convenient and inexpensive!
Well... Tadam!
The efforts were not in vain! We wish inspiration to Evgeniy! And everyone!
Equipment for container sites
There are several features to consider when constructing a waste disposal area:
- type of site - open or closed;
- size, if there is a need to install more than two tanks;
- take into account the need for the likely use of an additional bunker or roll-out container;
- types of garbage bin designs;
- manufacturing materials;
- external design of the site.
Recently, the prevailing trend is the arrangement of covered and completely enclosed container sites. They are considered more practical in providing protection from precipitation and wind. As a result, there is no need to purchase tanks with lids, because they are less durable during operation. In closed areas, regular waste bins can be used.
Containers can be made of various materials. But, it is better to choose plastic ones, as they are not afraid of dampness and their service life is much longer. Depending on the type of equipment for solid waste removal, you can purchase roll-out (on rollers) tanks.
If necessary, places with bunkers for collecting bulky waste can be arranged. Most often they are found in places where construction work is underway.
We provide for rent a container with a volume of 1.1 m³. It is used for collecting and storing solid household waste. A container with a volume of 1 cubic meter is provided for rent only with subsequent removal by our company’s garbage trucks to a landfill.
Dimensions :
We provide for rent a container with a volume of 1.1m³. Used for collecting and storing solid household waste. At the moment, this type of garbage can is the most common for placement at city public garbage sites. The tank is equipped with a lid that protects against the penetration of odors and the entry of rodents and insects. This container is made of cold-rolled sheets of steel grade ST3, with a thickness of 1.5 mm.
up to 2 mm, depending on customer needs. The sides of the container are solid, made by bending along the entire length, using a professional sheet bending machine - this provides additional rigidity to the entire structure of the garbage can. Painted with a special primer - enamel. Provides garbage and solid waste collection. Load capacity up to 400 kg.
A container with a volume of 1 cubic meter is provided for rent only with subsequent removal by our company’s garbage trucks to a landfill. These waste bins are produced in-house. The garbage can is welded with a continuous seam and has a one-piece rigid structure. We carefully monitor the quality of the containers we produce and take care of their durability.
Here's what one of our regular customers says about these containers: “Before this, we rented cube containers from another company, and the janitors constantly complained about wheels falling off and lids breaking. Now we understand what a real high-quality waste container is. During the entire period of operation, which is almost a year, not a single tank broke. The janitors and residents of the houses are happy, and we, as a service organization, are doubly happy.
The most interesting thing is that the cost of renting these containers is even lower than in the previous place.”You have the opportunity to rent comfortable and high-quality 1.1m³ containers for MSW with a lid and on wheels for easy movement around the waste site. All containers of this type have a Euro grip and are served by a side and rear loading garbage truck
Container K-14 with a volume of 14 cubic meters is equipped with swing gates and folding sides for collecting bulky waste. It has grippers for cable and hook installation for special machines with a multi-lift installation.
Sheet iron container
If you have a welding machine, it is better to weld the container from steel. When painted, it will not rust; you can put heavy garbage in it without fear of damage. For manufacturing, 1.2-1.5 mm steel is suitable; you will need a grinder, cutting and flap wheels, a welding machine and electrodes.
The work algorithm is simple:
- mark and cut out patterns, adjust them to each other;
- we process the edges;
- We place all the elements end-to-end, first we grab and evaluate the general appearance;
- We weld the joints with a dotted line; with a continuous seam, the material may lead;
- drill drain holes at the bottom;
- We complete the work by painting the container.
A container made of steel is more reliable; it will last 2-3 times longer than one made of plywood. You just need to keep an eye on the metal and tint it in time.
Reference documents nearby
If you have documents in your work that you constantly consult (instructions, tables, whatever), it is important that they are easily accessible and not lost in other papers. Organize a place for these “reference books” on the wall near your desk or in a desk organizer. For greater effect, you can mark this document with a bright sticker, put it in a unique folder, or frame it.