Badges are one of the most popular youth accessories. Each such product contains some information about its owner. An icon can tell about personal hobbies, values, musical preferences, affiliation with an organization, or attitude towards life.
There is no doubt that a fancy badge can be bought in a store. But a thing made in a single copy is always a priority. Its value lies in the fact that it is unique. No one else will have one like this! Are you ready to express yourself out loud and show your friends what you are capable of? Then quickly see how to make badges at home . Some ways will really surprise you!
Making a paper badge
The easiest way to make a badge is to make it out of paper. Paper badges, medals and badges are often used during school Olympiads, sports competitions and children's parties. Young fashionistas also love to create them. And all because making badges from cardboard does not require special materials or special skills. Just paper, a hairpin and a rich imagination!
Cut out from a magazine, print or draw a picture of the desired size. Glue it onto a piece of cardboard. A sticker would also work well as a picture.
To make the badge last longer, cover it with tape on both sides or laminate it at any office supply store. You can also add a glossy shine to your badge using notebook wrapper Place the picture between two pieces of wrapper, sealing the edges using an iron and parchment.
That's all! The paper badge for your clothes or favorite bag is ready. A hole punch and a thin rope can easily turn it into a stylish keychain.
Still have questions? The video will show you how to properly make a paper badge and attach a safety pin:
Ice cream and hamburger made. What about cat or cloud keychains? Let's see!
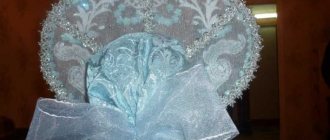
If a special event is approaching - a name day, a family holiday or a children's party, cardboard badges can be easily decorated with lace, sparkles, rhinestones, beads, and satin ribbons.
A paper badge can be coated with epoxy glue . Glue the picture printed on thick paper onto a cardboard base and let it dry. Attach the badge to a plasticine stand and apply glue in two stages: first, a thin layer, distributing the glue over the entire area of the picture, then add a few drops of glue - they will spread on their own and make the badge convex.
IconsFlow
IconsFlow.com - vector icons + editor that allows you to create personalized sets and export them in good quality (SVG, ICO & PNG). The main advantage of the service is the presence of two editors:
- the main one, in which the palette, style, effects are selected;
- form editor, where you can change the current shape or draw a new one.
If you've already created icons in Illustrator, simply download the SVG files and experiment with different backgrounds. IconsFlow has certain restrictions when using it for free, so make sure you read them before you start. There are lessons and a help section for novice users, and it is also possible to work in the icon editor in Russian.
View of the IconsFlow vector editor:
Work examples:
How to make plastic badges in the oven?
Oven icons - unexpected, right? But how beautiful! Tell me, where do you put disposable plastic containers for cakes, salads or cookies? Don’t rush to throw them in the trash, it’s better to put them in the oven. Two minutes - and a small miracle will manifest itself.
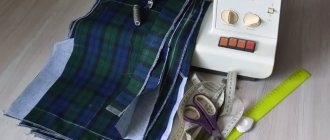
To make plastic badges in the oven you will need:
- Plastic container,
- scissors,
- hole puncher,
- colored permanent markers.
Using scissors, cut out a smooth and even part of the plastic packaging.
Place the selected design underneath and use a marker to transfer it to the plastic. Paint it over. Make a hole on top with a hole punch and cut out the picture along with the loop, retreating a few millimeters from the edge.
Attention! The pattern should be large enough, because during baking it will shrink several times.
Preheat oven to 160°C. Place the dough on parchment paper and keep in the oven for 2-3 minutes. As it heats up, the picture will begin to shrink and bend, so you can slightly flatten it with a fork.
Carefully! If you suddenly forget the safety rules while working with a hot oven, you can get seriously burned. Ask adults for help.
After baking, your badge will become strong and smooth. Make several similar badges and put them on a thin metal chain. You will make a wonderful bracelet or a cool keychain for your briefcase.
Badges can also be easily made from plastic buttons . Apply an image or design with acrylic paints and cover with nail polish. Ready!
Masters in making badges manage to cover the plastic base with embroidered designs, tying them at the back with thread. The work is painstaking and requires the use of special tools and the ability to embroider with satin stitch.
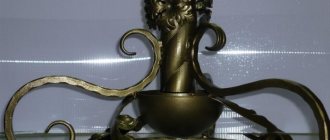
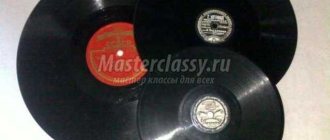
Aluminum and lead - the basis for work
In Soviet times, metal badges were popular. Now you can make them yourself, but this will require some tools and skills to work with them. Aluminum plates 2 mm thick are suitable for production. An image is applied to them, and then the shape is cut out and turned out. The finished badge is coated with paint. This is painstaking work.
But you can cast a lead badge even at home. Lead is a fusible metal. You need to put small pieces of metal into a special container; solder used for soldering radio components is also suitable. Melt the metal over a fire and pour it into the mold. It must be heat resistant. There are ready-made options for sale; they can be found in specialized stores. Simple shapes can be made in regular sand. Sift the sand, compact it well and make a depression of the desired size and shape. Molten lead should be poured into it. When the metal has cooled, you need to sand the product and attach a pin to it. Further decoration is at the taste and discretion of the master.
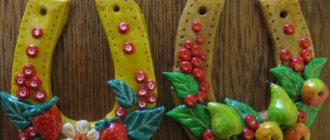
Wooden badges are the hit of the season!
Stylish, elegant, and most importantly - environmentally friendly! This is why wooden badges are popular among young people. Do you also want an exclusive mini-brooch? We'll have to work!
To make a wooden badge for clothes, prepare:
- round flat wooden blanks,
- acrylic paints,
- safety pin,
- glue gun,
- simple pencil,
- water and a brush.
Making wooden badges should start with a sketch on paper. You can draw whatever your imagination whispers - ice cream, elephants, bunnies, and so on.
Now, using a simple pencil, transfer the image onto a piece of wood about 5–8 mm thick. They are sold in craft stores.
It's cool if you know how to work with a chisel, or burn patterns on wood (this is often taught in labor training classes). Then the surface of the icon will become textured, and the contours of the image will be clearer.
Draw your intended image with acrylic paints. Once the paint is completely dry, use a glue gun to attach a safety pin. Cover the badge with wood varnish.
The stylish decoration is ready.
When making wooden badges, additional materials are often used - threads, beads, pieces of fabric.
DIY metal badges
Creative do-it-yourself metal badges are made on the basis of old ones that have already lost their relevance and are not popular with their owner.
To decorate your clothes with a metal badge, prepare:
- old metal badge,
- stationery knife,
- acrylic paints,
- pieces of cloth or napkin.
Take an old iron badge and take it apart using a utility knife.
This is what the workpiece will look like.
Paint the badge with light acrylic paint in two layers. When the paint dries and becomes tacky, cover the badge with a small piece of tissue paper.
Pay attention! If there is too much paint, it will ooze through the napkin and ruin the badge.
Fold the edges of the napkin inward and cover the badge.
The final result depends on the image on the napkin. These could be pirates, heroes of your favorite cartoons or fairy tales...
DIY acrylic badges
These original pins will look like they came straight from a store shelf. To make an acrylic badge with your own hands, you need to purchase a special blank. It can be found in any office supply store.
The workpiece consists of a body and fastening. All you need to do is cut out the image and place it between the base of the badge and the transparent cap. To prevent the image from scrolling, apply a drop of glue to the back side. Everything about everything - one minute!
Congratulations! Now you know not only the technique of making badges, but also how to make a keychain with your own hands. After all, with the help of a hole punch, a wood burning device or a regular soldering iron, the icon can easily turn into a pendant. However, do not forget about the help of adults. Only under their supervision can you work with electrical appliances.
Create, stand out, express yourself!
Read also:
- We weave bright bracelets-baubles,
- Weaving from rubber bands. An amazing success story.
Launcher Icon Generator
The Launcher Icon Generator project is free and we think it is more suitable for advanced users. This online icon editor allows you to upload images/cliparts and add text. You can download one icon at a time in 5 sizes (48 x 48; 72 x 72; 96 x 96; 144 x 144; 192 x 192).
The base clipart is a set of Material Design style graphics from GitHub. The service contains settings such as: indents, shape, background color or transparency, scaling + additional effects. Result:
Android Material Icon Generator is another tool for creating flat icons. The highlight of the service is definitely the effect in the form of a long shadow. If you need similar solutions, this icon editor will be an ideal option.
Start by selecting an image from the gallery, then determine the color, background shape (circle or square), shadow length, saturation, attenuation - and your icon is ready. Everything is extremely simple. The site is completely free for personal use.
After downloading, in the archive file you will find 6 PNGs of different sizes and an SVG vector file. The SVG icon will be blurry in Illustrator, but luckily it looks good in the browser. The end result is something like:
The Simunity site is an HTML5 generator where you can create an icon and then copy the code to display it in your web projects. Icons from Font Awesome are used as source materials, for which different parameters are selected: color, frame, size and style of shadows.
This service is useful if you need to quickly create simple, original icons for your website. Result of using Simunity:
Total. The online icon editors discussed above are excellent tools for optimizing the work of designers. There is no point in downloading any programs when everything can be done easily and quickly online. From this selection, perhaps, IconsFlow can be distinguished. It contains the largest possible number of functions: icon gallery, SVG download, embed code, preview, create your own templates, export PNG, ICO and SVG, adapt size, fashion styles and built-in vector editor. In addition, this is the only free icon editor in Russian, if this is important to you.
If you know any other similar services, send options in the comments.
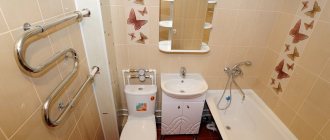
If you want to give the folder an original look, then change the folder icon. I'm not talking about those that are already in the system, but specifically your icon from your photos or from any images.
You can make a folder icon from your photo in the standard program - Paint
, which everyone should have in the Windows 7 operating system
Believe me, with your icons it will be much easier and faster for you to find the folder you need without reading the text (folder name)
Here's a small example. This type of folder speeds up searching among a large number of similar folders.
Find the program "Paint" «
You can go through “Start” and “All programs” Launch it and drag the picture into the program window. And it’s even easier to call up the context menu by right-clicking on the image you want to use as an icon. Select the item “Change” The program “Paint” will open