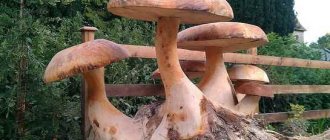
The beautiful mushroom made from salt dough, presented in this master class, looks like a small house from a fairy tale.
A good gift for yourself or friends. To make such a craft, you do not need to be a talented sculptor or gifted artist. A plastic mass of flour, salt and water is ideal for those who are just starting to sculpt. After drying and decorating, the products become strong and durable, but they are afraid of moisture and do not like direct exposure to sunlight.
- Creative materials
- Technique for sculpting and decorating a mushroom
Plasticine: a combination of simplicity and originality
This mushroom is easy to make. It is enough to roll out a cylinder-sausage for the leg from light plasticine and roll a ball from brown or red plasticine for the future hat.
The leg should not be too long - thickening is necessary at the bottom for a more durable attachment. You can make grass at the bottom. To do this, take the green mass, roll it into a sausage, and then flatten it. Using a knife, a fringe is cut out, which is then wrapped around the leg at its base.
Closer to the hat you can make a skirt. To do this, wrap a white plasticine sausage around the leg, secure it and slightly flatten it, as can be seen in the photo of the mushroom.
A hat with grooves will look original. The rolled out pancake for the hat is turned over. On the inside, grooves are made using a toothpick, running from the center.
To make a double hat, just roll two balls from white plasticine. One of them is flattened into a cake, which is fixed on the leg. A white ball is placed on top of the pancake. A pancake made of red plasticine is placed on top of the ball and smoothly flows around it, connecting with the white lining.
Plasticine can also be used as a connecting element - a ball of plasticine is placed on a vertically fixed acorn, and a chestnut cap is attached on top.
Handle weaving
To do this, you will need a thick willow shoot, which is cut to size.
- The ends are sharpened and stuck into opposite sides of the product.
- Next, take 4-5 rods and stick them into the weaving at the end of the handle.
- They are braided several times and threaded into the weave from the other end.
- Then they take a few more shoots and do the same.
- They stick another rod nearby and braid the handle at the base, tightening it with a knot.
- The end is cut with a knife.
Penoplex product
With the participation of parents, you can make an original composition from the material used for wall insulation. A simple instruction on how to make a mushroom will help you. A leg and a cap are cut out of two pieces of penoplex using a stationery knife. The surface is carefully leveled.
On the inside of the cap, a recess is made in the center for joining. A little glue is poured into this hole to attach the ceiling tiles. A leg is placed inside.
You can color the craft using gouache. For better adhesion, PVA is added to it. The leg is painted a light color, and the cap is painted a darker color, such as red or brown.
After the paint has completely dried, the surface can be coated with ghost nail polish. It is important that you do not make any mistakes in applying the paint.
Several mushrooms can be installed in a shoe lid. The material used to wrap flowers as a substrate is preliminarily placed in it. The composition can be diversified with natural samples - dry twigs, leaves, cones.
Mushrooms from dough
To work, you need to prepare the dough. You will need half a glass of finely ground salt. Hot water is added to the glass with salt and the whole mass is kept in this form for an hour. After this, the solution should be poured into a bowl and add 2 tbsp. PVA glue for fastening strength, as well as flour. A novice master will be required to knead a thick dough.
The stem of the mushroom needs to be formed around the base in the form of a foil rod. The hat can also be wrapped around foil, or you can sculpt it without it. To secure it to the leg, treat the attachment points with water. The molded mushroom craft from salt dough is sent to the oven and dried over low heat for 10-13 hours.
If the composition is very large, then first the stem is dried for an hour and the cap separately, which must then be fixed hot on a support. After fastening, the entire structure goes into the oven. It is recommended to dry the extracted mushroom naturally, for example on the balcony.
- What does a sword mean to a man?
A variety of engraver attachments for every taste and color
- A still life with roses will delight you longer than fresh flowers
The final stage is coloring. In addition to the mushroom, you can mold other shapes or decorate the composition with natural materials.
How to dry salt dough?
There are two most common ways to dry salt dough. The first method: the finished craft will dry on its own. The main thing is that it should not be exposed to direct sunlight, otherwise it will crack. The craft can be placed on a flat surface and wait a few days. Second method: dry the finished craft in the oven for 3 to 6 hours (depending on the size of the craft). Drying occurs in batches with breaks. One approach is 1-2 hours. For quick drying in one go, set the oven to 75-100 degrees, and then the craft will dry in an hour. At a temperature of 120 degrees, the craft will dry in 30 minutes, but it is better to dry it naturally.
We use vegetables and fruits
As a basis for the composition, you can use a regular box, board or sheet of cardboard. Leaves or greens are placed on it. To make a mushroom-shaped vegetable craft, take several carrots that will act as legs.
Hats can be made from potato or apple halves. It is advisable to fasten the workpieces together using matches or toothpicks.
How to color salt dough?
There are two most common ways to color salt dough. The first method: after drying, paint the finished craft with acrylic paints or gouache using a brush. Second method: food coloring is diluted in water, then added while preparing the dough. When the craft is completely painted and dried, it must be coated with transparent varnish for crafts in 2-3 layers. If you don't have one, use clear manicure polish. Each layer must dry before applying the next. This way the craft will last for a long time.
Paper mushrooms
Paper mushroom crafts at home can be made using different technologies. For example, the following sequence of actions is popular:
- take a sheet of colored paper and assemble it with an accordion in increments of 5-7 mm;
- then the structure is straightened and the top is cut off to form a dome of the cap;
- the reverse side of the cap is glued to an ice cream stick;
- You can attach white circles to the hat, and decorate the wand with a perky face.
An interesting model can be made from a disposable paper plate. Our master class on how to make a mushroom craft yourself will help you. A fold is made on the plate and a slightly convex shape is formed.
- Dopp kit. Leather work of art.
- Choosing a brick of your life
- DIY shoes for life
The fold must be treated with glue and clamped with a clothespin. To make a leg, roll a sheet of cardboard into a cylinder and glue its edges. An alternative could be a toilet paper cylinder.
The hat is painted red, and white paper circles or cotton wool flakes are attached to the top. The cylinder leg can be wrapped in colored paper or painted in the chosen color. The hat and knife are glued together using glue and then left to dry.
Mushroom compositions made using the quilling technique look original. The components are made in the form of tight twists of thin strips of colored paper. But if the hat is round, then the support should be given an oval appearance.
Sometimes the twist is pulled into a cylinder or dome. The result is interesting 3D compositions. Original ideas for DIY crafts can be offered to children who know the origami technique. Of course, it will take a little longer, but the result will justify the effort.
Mushroom crafts can be made from a variety of materials. Along with the options discussed above, more complex models are created from papier-mâché, felt and felt, etc. Your work together with your child will be exciting and interesting for all participants in the process.
How to make salt dough?
You will need: a glass of wheat flour, a glass of extra salt, half a glass of cold water, a bowl.
Recipe
- Take a bowl.
- Pour in a glass of flour.
- Add a glass of extra salt.
- Fill with cold water.
- Knead the dough.
The finished salted dough should not stick to your hands or crumble. It should be cool and easy to sculpt. I recommend watching the video master class!
SALT DOUGH | How to make your own salted play dough | A simple salt dough recipe.
Photo crafts mushroom
- DIY is a place for DIYers.
- For unique snags and pebbles on a bicycle.
- Coins in Brawl Stars

