You can also make a craft for kids from a bottle and gouache, just stuff the bottle with cotton wool, make eyes, a nose and add a scarf. It will turn out beautiful and irresistible, the kids will definitely like it.
Older children can make a snowman out of cotton swabs by gluing the sticks clockwise onto regular cardboard.
Or from decorative ribbons, like this toy for the Christmas tree.
If you are a stick lover, then you can make such interesting New Year's toys for the Christmas tree:
Or like this:
You can use your imagination and ingenuity and simply use one stick to make any cartoon character, even Santa Claus.
You can also easily build a Christmas tree from paper or satin ribbons. Make a cone and glue the needles.
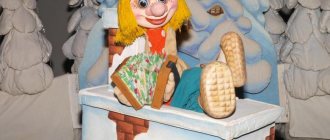
Cheerful snowman made of cotton wool
In further subheadings there will also be a master class on crafts for the New Year. You will be able to clearly master the technique of performing them and present the necessary materials.
You will need the following materials:
- strong Whatman paper;
- cotton wool;
- glue gun;
- buttons, 3 of which are orange;
- double-sided blue paper;
- scissors;
- black gouache.
Tips from needlewomen
To make your own Christmas tree decorations from ribbons the first time, you need to follow some useful tips:
1. Before work, sharpen the scissors, since the tape needs to be cut in one motion.
2. Do not forget to handle the ends of the material with a lighter so that the threads do not spill out.
3. To cut small parts, you need to make a template and fix it on the fabric with a paper clip.
4. You can use a sticky roller to collect small debris at the end.
5. You need to start with easy jewelry options, and having already gained some experience, take on complex ones.
6. When buying tape, you need to take it with a reserve. This is especially true for newcomers to this business.
7. Do not squeeze the material too much when working, this will lead to unwanted dents on the finished product.
8. When working with a glue gun, you must be careful, as glue may drip onto an almost finished decoration, and it will not be possible to remove it.
9. The needle must be sharp to avoid tearing the material.
10. When processing the edge of the material with a candle or lighter, you must bring the edge quickly and evenly to avoid unevenness and blackness.
We recommend watching the video:
Execution technique
To make a funny snowman, you need to do the following:
- cut out 3 circles of different diameters from white paper - large, medium, small;
- Using small bases, attach the circles in ascending order to each other;
- then apply glue to the circles one by one, except for the smallest circle;
- Glue pieces of cotton wool in small pieces to two circles;
- use glue to attach the number of buttons you need to the belly of the snowman;
- make a nose from orange buttons in the same way;
- draw the snowman’s eyes and nose with black gouache;
- cut out a thin rectangular leaf from blue paper;
- wrap it around the snowman's neck, securing it with glue.
Photo examples
Sources
- https://vdome.club/materialy/svoimi-rukami/kak-sdelat-banty-iz-atlasnyh-lent-na-elku-svoimi-rukami.html
- https://svoimirukami.guru/bantiki-na-elku/
- https://svoimirukamy.com/banty-na-yolku-iz-lent.html
- https://setafi.com/yolka/bantiki-na-elku-svoimi-rukami/
- https://nyaskory.ru/podarki-svoimi-rukami/banty-iz-lent.html
- https://mimiledi.ru/rukodelie/podelki/banty-na-elku-iz-lent-svoimi-rukami-kak-sdelat-i-zavyazat.html
- https://portniha.com/dlya-detej/kak-sdelat-bantiki-iz-atlasnoj-lenty-svoimi-rukami-poshagovaya-instrukciya.html
- https://heaclub.ru/kak-sdelat-bolshoj-pyshnyj-krasivyj-bant-iz-lenty-kak-pravilno-sdelat-bant-iz-shirokoj-uzkoj-i-tonkoj-lenty-svoimi-rukami
- https://joy-pup.com/creative/kak-krasivo-zavyazat-rozhdestvenskij-bant/
Lush spruce made of paper ribbons
If little readers have difficulty handling scissors. Adults can help you by cutting paper strips. The main method is the usual fastening (gluing) of these parts.
Necessary materials:
- stripes;
- glue; cardboard sheet;
- multi-colored;
- scissors.
Snowflakes made from cotton swabs
And here is another option for crafts for creative needlewomen - snowflakes made from cotton swabs. When your baby needs to be occupied and there is nothing left for creative materials, it’s time to look for an alternative.
Need more cotton pad crafts? We have plenty!
How to do the craft
Making a paper tree includes the following steps:
- roll the cardboard sheet into a cone, cutting off excess parts;
- prepare colored strips, starting from the shortest and ending with the longest ribbons. They can even be with sparkles;
- fasten the two bases of the strips to each other, forming a semi-oval;
- In ascending order, start gluing the strips to the cone, from top to bottom;
- The fasteners should be placed close to neighboring ones so that there are no gaps;
- At the end, cut out a small star-garland from a shiny yellow ribbon and glue it to the top of the resulting Christmas tree.
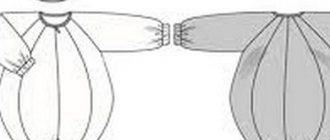
Typical forms of bows
There are not so few of them:
- four-pointed
- pentagonal and hexagonal
- eight
- dahlia
- socket
- triangles
- tie
In addition, they can be simple and composite, multi-layered and of different textures. Fastening - on a knot, clip or elastic band. Choose what you like, combine and share ideas.
Magic garland of stripes
This garland in the shape of hearts will envelop your Christmas tree like a charm, creating a unique image for it.
Material used to make the craft:
- multi-colored graceful ribbons;
- glue, preferably a stapler.
Mice and rats
Of course, most of us will make a cheerful and amusing mouse this year, because it is she who will patronize the coming year.
The most accessible and easy to make toy is, of course, sculpted from plasticine.
Next, you can make it from an ordinary unnecessary music disc.
Or sew it from felt, this pattern will help you.
The kids also love to create things out of yarn, in the form of donuts:
New Year's souvenirs from pine cones
You will need:
- a few cones;
- small, flat plate;
- glue moment;
- green gouache paint;
- various examples of decor for decoration;
- thin white tinsel or cotton wool.
Method of implementation:
- color the cones green;
- after the paint has dried, glue the cones to the bottom of the plate;
- attach white tinsel or cotton wool with glue, thereby creating snowdrifts and grass strewn with snow;
- decorate the cones with various small garlands, rhinestones, you can sprinkle them with finely chopped paper, creating an imitation of snow;
- the craft is ready!
Fragrant Christmas tree made from coffee beans
You can make such an original Christmas tree very quickly. To work you will need:
- scissors;
- a sheet of thin cardboard;
- “Moment” glue with a gel consistency;
- beads;
- small decor.
A wide triangle is cut out of cardboard and glued together in the shape of a cone. Coffee beans are glued to its surface along with small beads that will represent New Year's balls. The entire surface of the cone is covered with coffee and small decorations, which are glued into the spaces between the grains.
This fragrant Christmas tree will decorate your kitchen or bedroom. It will also serve as an air freshener in the house.
Wonderful lantern made of natural material
You will need:
- any size jar;
- a candle, sized so that it can fit in a jar;
- sprigs of pine needles;
- decorative items;
- glue moment;
- cones;
- matte wool threads;
- paints;
- wire;
- tinsel.
Manufacturing process:
- place some pine branches on the bottom of the jar, so that some branches touch the sides;
- place a candle in a jar, preferably with a large diameter;
- decorate the cones, for example, in the color of Christmas trees or any garlands;
- wrap wool threads around the neck;
- tie the dried cones to the neck of the jar;
- pass the wire under the threads and secure;
- wrap the wire with tinsel, securing it with glue if necessary;
- Finally, decorate the lantern with various decorative items.
Unusual Christmas toys
You can use the most unexpected items to create an exclusive decoration for your Christmas tree. Creative imagination will allow you to transform them into original Christmas tree decorations.
- Painted spoons . It is more convenient to use aluminum spoons. They are painted with white acrylic paint. After drying, a New Year's drawing is applied. If you don't have drawing skills, you can use stickers. The handle of the spoon is bent and the decoration is hung on a tree branch.
Luxurious painted spoons for Christmas tree decoration
New Year's motifs on an old spoon
- Original cutlery . Disposable cutlery, complemented with braid with New Year's paraphernalia, looks great against the backdrop of snow-covered greenery.
New Year's beauty
- Updated balls . You should not throw away Christmas balls that have lost their splendor over the years. They can be updated with lace details, which can be easily crocheted if desired. The use of beads and decorative braid in the design gives an interesting sound.
You can use absolutely any decoration to decorate New Year's balls.
Festive balls can be used to decorate not only the Christmas tree, but also decorate the interior of the room with them.
Use special needles to secure the glitter to the foam piece.
Step-by-step master class on making a New Year's ball using felt pom-poms
- Light bulb toys . Old light bulbs can serve as the basis for original Christmas tree decorations. They are painted, creating a variety of bright images. After drying, it is recommended to coat the surface with varnish to stabilize the tone. Beads, tinsel, braid, beads, etc. act as additional decor.
Interesting idea for using a regular light bulb
Handmade New Year's toys will add a special atmosphere to the holiday.
Beautiful and original decoration for the Christmas tree
- Memorial balls . The Christmas tree balls, inside of which there is a photograph of your favorite pet, will not leave you indifferent. If you wish, you can place images of household members, memorable trips, and interesting landscapes there.
Manufacturing algorithm:
- From the assortment of Christmas tree decorations available at home, choose transparent, fairly voluminous balls, houses, and pine cones. Carefully remove the fasteners.
- Coarse salt and beads are poured inside the ball. Using tweezers, carefully place miniature spruce legs, pieces of tinsel, snow-white cotton wool and other suitable decor.
- Cut out a fragment from the photograph, making it smaller than the diameter of the ball. Roll it into a tube and place it inside.
- Then you need to straighten the photo using tweezers. All that remains is to return the fasteners to their place and hang the updated Christmas tree decoration in the designated place.
Family archive on the New Year tree
Royal snowball
Snowballs will gracefully enhance the design of any room with their splendor. They will create winter coolness, the threshold of a miracle in the New Year.
To make this craft you will need a foam ball, beads, beads, and a glue gun. Glue the beads to the circumference of the ball, then attach a hanging string. Our New Year's mesmerizing souvenir is ready.
Wall decorations
- Plywood Christmas tree . Mark the outline of the Christmas tree on a sheet of plywood. They are cut out, painted in the desired tone and decorated with sparkling garlands.
- Outline Christmas tree . If desired, the silhouette of the Christmas tree is laid out directly on the wall using an LED garland.
- Coniferous pendant . It is not always possible to install a Christmas tree at home. In such a situation, a fluffy fir or spruce branch will help create a New Year's entourage. It needs to be fixed on the wall and decorated with toys hanging on decorative cords of different lengths. If desired, you can add a garland or artificial snow.
The brighter and more creative the decorations, the more memorable the holiday will be.
To create the atmosphere of the New Year's holiday, it is not at all necessary to buy a live Christmas tree.
Spectacular Christmas trees made from branches
The relevance of New Year's crafts made by children
DIY children's crafts for the New Year play a very important role in the development of a child. In order to become creative people with a rich inner world and to study well, various making of beautiful crafts will help you.
The most important thing is the fact that when using hands, fine motor skills are developed, which contribute to the development of the brain. You will also be able to enrich your attention when you imagine images of the future task or its specific details.
Beautiful crafts for the New Year with your own hands will delight your parents, grandparents, and so on, because you put your soul into them, hidden for your loved ones.
What material can be used to make Christmas tree bows?
New Year's tree decorations can be made not only from satin ribbons. For creativity you can use the following materials:
1. Colored paper - the choice of shade depends on the style in which the composition is conceived. Finished products can be decorated with finely chopped tinsel.
2. Crepe paper is a material with which you can experiment endlessly. The products are elegant, strong, and durable.
3. Organza – DIY Christmas tree bows from it help to create a delicate, unusual decor. Designers advise choosing a shade of fabric that will make crafts from a distance look like snow flakes.
4. Foil – you can use foil wrappers from chocolates collected throughout the year. The material wrinkles and folds well.
5. Colored wire - you can use it to assemble a decorative structure in the form of a bow.
6. Tulle - the fabric makes delicate, airy decorations for the Christmas tree. The elastic material holds its shape perfectly, does not get dirty, and does not wrinkle.
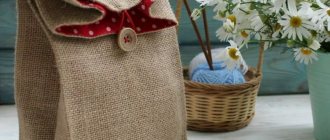
7. Burlap - combining this cut with satin, lace and velvet allows you to make exquisite bows to decorate the New Year's tree and room.
8. Foamiran - Christmas tree bows made of non-toxic material can easily be confused with store-bought ones. From pliable plastic suede, you can make multi-colored, multi-layered pieces.
9. Felt and velvet - do not require additional processing, ideal for New Year's decor.
10. Tinsel - it is not recommended to decorate the Christmas tree with a large number of such bows. The decor looks hard.
11. Using braid and decorative cord using the macrame technique you will get special, beautiful products.
You can sew bows on a fabric Christmas tree either by machine or by hand. They are decorated with beads, applique and embroidery. A variety of raw materials and a large number of ideas inspire you to open a creative workshop at home
Attention! To make exclusive jewelry, it is permissible to combine various materials, combining them with each other.
Wonderful New Year's paper crafts
Working with paper involves easy DIY crafts for the New Year.
Each time the days become shorter, and the snow-white starry nights become deeper. There is very little time left to make gifts. A great idea would be a simple “Chain” garland consisting of ribbons. It has been known to everyone since childhood for its simplicity and elegance.
You will need: glue or tape, ribbons of various colors and decor. Glue the two edges of the ribbon together to form a ring. Then thread the next ribbon through the finished ring and seal the edges with tape or glue. This way, all the rest of the work on the garland is done.
New Year cards
Anyone can make a handmade New Year's card with their own hands.
You just need to show a little imagination when creating an original New Year's composition. To work you will need:
- colored cardboard;
- glue;
- scissors;
- beads, buttons, various types of decor;
- lace;
- glitter;
- corrugated cardboard;
- decorative clothespins;
- scrapbooking paper;
- thin paper of different colors.
Making a card should always begin with developing the design of the New Year's composition. It can be created from what you have at hand. This could be a New Year tree, a snowman, a reindeer sleigh, Santa Claus or any symbol of winter and the New Year holidays.
The base of a postcard measuring 13x20 cm is cut out of cardboard. You can make a beautiful and simple composition with mittens or felt boots.
On a cardboard base, you should cut out a background from scrub paper, which should be 2-3 cm smaller than it. Draw stencils of mittens, hats or felt boots, cut them out of corrugated cardboard. Make two knots along the edges of the decorative cord. Glue the scrub paper to the cardboard. Glue the lace in the places of the knots in the middle of the card. Using decorative clothespins, attach mittens or felt boots cut out of cardboard to it. Sprinkle the card with glitter to imitate snow.
Next, we will make a wreath
For this you will need: double-sided light and dark green and other colors of paper, glue, a plastic plate, items for decoration.
How to do it:
- cut out the bottom of the plate, leaving only the ring;
- cut ribbons of colored paper of any thickness;
- thread the strip into the ring of the plastic plate;
- seal the edges of the tape with glue;
- After a wreath of green and other ribbons has been formed, decorate it with various beautiful decorations, for example, a bow, rhinestones, tinsel.
Making Christmas trees
Small Christmas trees can be made from different materials. They can be used to decorate a large Christmas tree, you can make a garland from them, create a New Year's installation, or decorate a windowsill with them.
To make the main symbol of the winter holiday, any material can be used:
- felt;
- candies;
- plastic bottles;
- colored paper;
- threads;
- plywood;
- feathers.
The Christmas tree can be glued, sewn, sawed or knitted. Everyone can choose the manufacturing technique that is most suitable for them.
Cotton pads in products
Cotton pads will help you make a real sketch of winter landscapes. They will serve as an excellent element of snow-white airy snowdrifts, snowy decoration of trees and roofs of houses. They also make great cute snowmen.
Just give freedom to your imagination and then you will get wonderful crafts that seem to reflect the entire winter fairy tale. Photos of DIY New Year's crafts will help you feel the boundlessness of ideas and creative ideas.
Required tools and materials
Making Christmas tree decorations with your own hands lifts your spirits and fills you with a festive mood.
To work you will need:
- multi-colored satin ribbons (of different widths);
- needle;
- matching threads;
- heat gun;
- scissors;
- lighter, candle.
Christmas tree bows can be made not only from satin ribbons. Suitable:
- guipure - openwork fabric with an airy lace pattern;
- lace – has an ornamental design, it is better to choose one with a New Year’s pattern;
- fabric with a pattern - a canvas on which a thematic image is applied.
Photos of DIY New Year crafts
Craft “Winter's Tale” with New Year's houses on the window
Well, now let’s see how you can combine different single volumetric and flat houses, add New Year’s pictures to them and create a truly magical winter fairy tale.
I saw such a master class at the Masters Fair.
In addition to paper or cardboard (in this case, whatman paper is used), you will also need artificial snow, an electric garland and cutting tools.
The first step is to prepare the templates; they can be made the same sizes as indicated on the patterns or larger/smaller.
We transfer the drawings onto paper and cut out the houses using a stationery knife.
At the bend points, immediately make cuts in the form of dotted lines with a knife, this will make further work easier.
We bend all parts of the houses. To do this, we place one ruler under the paper, and place the second on top along the intended line, press it tightly and wrap the part up.
Cut out the roof blank.
Now we glue the walls of the houses (take Moment glue or a hot gun), and put the roof on the glue.
We are preparing several structures this way.
Then let's get down to the silhouettes. They just need to be cut out of paper.
For our entire structure we will need a stand. For it we will prepare a strip of paper, say 90 cm long and 12 cm wide than the width of the window sill.
We mark squares (6x6 cm) at the corners, leave an allowance for gluing and cut out.
Glue the pallet together. We cut the front wall along the edges and wrap it inward, so it will become thicker and stronger.
Glue a paper silhouette onto this wall from the inside.
On the back wall you need to make slits for the garland bulbs.
Next, let's start decorating the window.
Let's cut out a stencil of the second silhouette for it; you can use numerous templates for cutting out of paper, which are posted in a separate publication.
We attach double-sided tape to the reverse side and glue it to the window.
We apply snow from a spray can.
We install houses in the stand and turn on the garland. Well, isn't it a fairy tale?
House made of toothpicks, wooden skewers or matches
If you couldn’t find branches to create a house, you can use wooden skewers, toothpicks or matches.
Two-story tower made of wooden skewers step by step
Let's make a house model from wooden skewers. Place the skewers on top of each other. Leave holes for windows. When the first floor is ready, lay out long skewers. The hanging part will serve as the base of the balcony. We are building a second floor with a door and windows. Making a roof out of matches. Add sides and a chimney.
Miniature matchstick house - step-by-step master class
You can build a small house from ordinary matches. We lay out two matches. Glue a row of eight matches across. Repeat this action across the first layer. Next, place two matches on each layer. We make the roof using this diagram. Add a small chimney.
Chocolate House
A cardboard house can be covered with anything, even chocolates and sweets! Look how interesting it will look. To do this, sometimes it is not even necessary to specifically cut out a house out of cardboard; it is enough to use a candy box.
Let's watch a detailed video together on how to make such an amazing house with your own golden hands. Are we watching?
Stages of creating a figurine
- Choose a sample from which the Bull will be molded (drawings can be found on the Internet or in children's books).
- Use the dough to sculpt the body, head, and legs of the animal. Connect all parts firmly using toothpicks. You can make several copies at once.
- Dry the products. This can be done in several ways:
- leave the figures for several days until they harden well (in this case, you need to start making them now);
- bake in the oven (place the crafts on a baking sheet in a preheated oven, immediately turn off the oven and do not open it until it has completely cooled down);
- Bake over low heat, and you must constantly monitor the products so that they do not burn.
- Cover the finished crafts with white paint (gouache, watercolor, acrylic).
- Let the figures dry and paint.
- To complete the work, coat the Bychkov with colorless varnish and gold or silver glitter.
These amazing DIY New Year's crafts can be wonderful gifts for invited friends. A larger figurine in the center of the table will become its decoration.
Note!
- DIY snowman costume step by step: TOP-100 photos of beautiful options for the New Year holidays
- DIY New Year's card: ideas for creating beautiful options (135 photos)
- DIY New Year decorations: learning how to make beautiful crafts. Master class with photos and descriptions for beginners!
It's easy to make Christmas tree decorations from salt dough. This will require your child’s extraordinary imagination. The only caveat: you need to make a hole on the sculpted toy to make a loop.
Felt boots and mittens
It’s easy to make a pattern for these crafts—even a small child can draw a felt boot and a mitten. For both felt boots and mittens, cut out two parts; you can take two different colors. The entrance to the felt boot and mitten is left open so that you can put a small toy in them or insert a spruce branch.
To connect parts, you can use a loop stitch with contrasting threads. The child will especially like it if the mitten is made to the size of the baby’s hand.
Paper and cardboard
The easiest way to make a house with your own hands is to use cardboard or thick paper. You need to draw a layout of the house on a piece of paper, cut it out and glue it together!
Winter city made of paper + template
The simplest paper craft in the form of a winter city. Print the template, cut and glue! The city is ready! And in the evening, you can put electric candles in the back and the whole structure will sparkle with new colors!
New Year's house cut and glue
For the first option, you need to print the scan on thick paper. Color it with colored pencils and cut it out. We bend all the lines and glue the house together. We glue the roof separately. A simple New Year's house made of paper is ready.
Christmas Toy Shop + Cutting Template
The next house will consist of separate modules. We print all the parts and cut them out. We cover the windows with lilac paper. Adding brown elements. Glue all the walls together and attach the top part. We complement the house with signs and a canopy. Glue the bottom and place the house on a cardboard stand. We decorate the New Year's craft with wreaths and a horse with gifts.
Note! The house template consists of 11 sheets! They all need to be printed and cut out.
Paper house templates
Using the templates below, you can glue together interesting houses. You can color and decorate them to your taste.
Note! Templates for complex houses are placed on several sheets! In our gallery they are arranged sequentially. Be careful!
Postcard with an openwork snowman
On cardboard cut in the shape of a postcard, you can stick a paper snowflake cut in the shape of a circle, square, rectangle or triangle - this will be the body of a snowman. On top you need to glue a smaller circle - the head. You can simply draw the eyes and nose. Here is such a simple snowman without unnecessary details.
Note!
Winter applique: TOP-180 photos and simple DIY patterns for children's crafts. Options for unusual winter applications + step-by-step master class
- How to make a snowman with your own hands: reviews of the best ways to create a snowman. Simple work schemes and step-by-step master class for children (130 photos)
- Snowman made of cotton wool - TOP-170 photos of original ideas. Simple schemes for creating a snowman with your own hands + step-by-step instructions for children
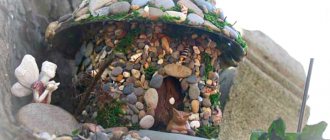
Cones and their preparation
Characteristics and their compatibility with other materials
Any cones that are collected in the forest on the ground are suitable for crafts. Suitable times of year for collection are spring and autumn. It is impossible to pick cones from a tree especially for crafts, since they contain a lot of moisture, and the product from such cones will not work, and in the end result it may even become moldy.
“How to process correctly?”
You won’t be able to put freshly collected pine cones to work. They must undergo special processing.
Using a cotton swab and alcohol, we remove the resin, and insects that live inside the cones - using a vinegar solution (1:1 ratio of water and vinegar), into which the entire harvest is placed for 20 minutes.
“How to dry it properly?”
There are several simple drying methods:
- The first is drying in the microwave at the highest power; place the raw cones on a dry towel and dry for 1 minute. We definitely control the entire process.
- The second is drying in the open air: in a dry and ventilated room, spread our natural material on newspaper in one layer and leave for two to three weeks. It all depends on the humidity of the ventilated room.
Our buds are ready to use. And so we begin our New Year's masterpieces.
How to make a house from foamiran
Let's make a three-dimensional house from foamiran. We cut out all the parts according to the pattern in the gallery, glue them together, paint them and add decorative elements. All is ready!
You can also make a flashlight like this. Please note that the third sheet of the pattern must be lowered down under the first sheet.
Pasta balls
Another option for decorating crafts. Using a variety of pasta, the most exclusive balls will hang on your Christmas tree. After gluing, it is better to paint the ball using spray paint or cover it with PVA glue and sprinkle it with glitter.
Beautiful works for the New Year's competition for school
Well, get ready to be surprised. Take these ideas and go ahead to take prizes. Look at the first masterpiece, it’s a jar, and from it the author created an amazing snowman. There is a battery-powered candle inside.
You can also build a winter composition, take an ordinary glass jar and decorate it, for example, put a car in it, and an artificial small Christmas tree on top of the car.
Tie the container with a ribbon or other decorative thread and hang the beads.
Let's look further, you can make an imitation of snow on a can. To do this, apply glue and glue regular salt.
And then add any decor so that it is immediately clear that this is a New Year’s style vase. Now place the spruce branches and enjoy.
Quite an interesting idea to make a Christmas tree from coffee beans. They are glued to a paper cone rewound with dark threads. And then add decorations.
You can also create a miracle out of candy. Take note for yourself too.
Here’s another button beauty, how do you like this masterpiece?
If you are an avid needlewoman, then you can also embroider a picture with your grandfather.
In addition, a masterpiece made of beads also looks great.
I have one more composition in my collection, but I will write a separate note about it and show you a master class. So don't miss it. A real masterpiece will come out in the form of a lamp, and you can imagine how cool it will look on New Year’s Eve.
Or make a Christmas tree like this, disguise a plastic bottle, pour plaster into the pot to secure the stick stem.
And if you want to charm the teacher, then present him with the following directly on the blackboard.
And now I propose to build a sweet ball, only it will not be edible. Glue the round-shaped jelly beans onto the foam plastic blank with a glue gun.
Also don't forget to add a rope or ribbon in the form of a loop.
Similarly, decorate the same blank with beads. Or put the beads on a safety needle and stick them into the workpiece.
And here the author invites us to make a cupcake from a foam plastic ball.
I think I’ll show you a couple more ideas, this will be a tangerine topiary.