A wonderful craft for the New Year - a DIY snowman! Firstly, it is an invariable symbol of the New Year holidays and, more broadly, everything related to winter, and therefore not a single winter holiday can be imagined without a snowman. Likewise, how unthinkable it is to imagine winter-themed fairy tales without this character. Secondly, such a craft is very easy to make - even kindergarten kids can handle this task. And thirdly, a snowman can be made from almost anything you can get your hands on.
So, let's learn how to make a wonderful fairy-tale winter craft - a snowman.
Fluffy cotton wool snowmen
Snowmen made of cotton wool look the most festive and realistic. After all, it is traditionally associated with snow. For this craft you will need PVA glue, paper, cardboard, paints and pieces of fabric.
Cotton wool soaked in glue is placed on a base cut out of paper. The method is ideal for recreating the structure of a snow globe. A carrot is formed from small lumps, also doused with PVA. The body is ready, all that remains is the decor. The face is drawn with acrylic paints or gouache, pieces of fabric are turned into a scarf and hat.
Branch arms can be made from either cardboard or wire. Wire with mittens on looks more realistic, but everything is done at the request of the master. The final touch will be buttons or beads glued to the body.
Several cardboard rectangles, folded in a certain way, will become a stand. Place the finished snowman in a box accompanied by a Christmas tree and small decorations.
Features of handmade
Since then, New Year's “fashion” has undergone many changes. The stores offer a huge selection of garlands, Christmas tree decorations and outdoor lighting figures, among others. You can buy a variety of decorations for the holiday. However, along with the variety of products, the need for making New Year's decor with your own hands is growing. There are several reasons for this, but the main ones include:
- high cost of finished products;
- their lack of individuality.
The price of luminous figures for the street can reach ten and even one hundred thousand rubles. Although, if you have the time and desire, you can make a Christmas attribute yourself, spending from 500 to 1000 rubles.
The necessary materials are available in supermarkets, craft stores and construction outlets. Here you can buy everything for a three-dimensional base - wire, nails, tape and plastic fasteners. The rest of the equipment, in addition to the LED strip, depends on the characteristics of the decoration and the imagination of the creator.
Box decor
The inside surface of the box should be painted in a winter style. Using a scouring sponge or piece of foam, create a gradient of blue and white. Thin snowflakes or ordinary splashes are applied on top with gouache. Christmas trees and clouds can be added if desired. The fairytale landscape is ready.
If the work still lacks accents, the craftsman should think about making snowflakes from foil. The work is quite painstaking, but the result is beautiful. You can cut out silhouettes from foil or make neat tubes, which will later be combined into a shimmering snowflake.
Tags
with your own hands with your own hands with your own hands blue beaded mittens with your own hands. We cut out the mittens with our own hands. We sew pink mittens into sleeves. The hem of the sleeve should be a New Year's snowman a participant in the New Year's holidays. with your favorite New Year's toy and patterns according to patterns. cut out the pattern of the handles. ready-made patterns for making patterns. Patterns are used by the creativity of the master Fair of Masters Country of Masters Country of Masters to masters and
New Year's decoranswerpatternsewembroideryvideodollsthank yougiftsjustjustkitchens
Paper snowmen
On New Year's Eve, even the little ones think about how to make a snowman craft. Most often they have stacks of paper and cardboard at their disposal. The set is meager, but suitable for making a holiday card. It is enough to take blue cardboard and glue the missing elements in the form of a snowman, snowdrifts and snowflakes.
A more intricate option: cut out three circles, design each one separately (draw a muzzle on the head, glue arms to the body), and then sew them together with white thread. A small garland of such snowmen will be an interesting addition to the New Year's interior.
Fans of complex techniques can make origami or a geometric snowman. Print out the instructions and diagram, spend a couple of evenings on assembly, and lo and behold, a creative toy flaunts on the table. Perfect for children's competitions.
Funny company
If you use your imagination when making such a simple toy as a snowman, it turns out that there are a lot of design options. For example, clothes for a snowman boy and a girl should be different. Even the design of the face can be done in different ways. The hat can be in the shape of a bucket, or it can be very glamorous with a brooch. Let's try to sew soft toys in different versions.
To make a large company of snowmen you need:
- fleece in different colors;
- thick dark-colored felt for the feet of boots;
- thin black felt for a hat;
- green felt for the Christmas tree;
- light wool yarn for hair;
- filler;
- threads matching the color;
- beads and buttons.
Description
Let's start with two-color white and yellow toys.
The patterns used are very simple - two circles for the head and body, one rectangle for the hat.
For the head we use white fleece, the remaining parts are sewn from yellow material.
We sew the parts of the body and head with small stitches along the contour and gather them together.
Fill tightly with filler and tighten the thread. Fasten the thread and cut it off.
The result was funny balls.
For the scarf, cut out a narrow strip and cut narrow kititsa at its ends.
Fold the hat blank in half with the right side inward and stitch the edge with a blanket stitch. We assemble part of the hat by tying it with a strong thread or a narrow cord.
We sew together the parts of the head and body, joining them with open parts.
We dress up the snowman in a hat. To decorate the face, we sew on black beads for the eyes and a red bead for the nose. The body can be decorated with buttons.
We perform the second snowman in the same way.
Now let's start making a snowman - a girl. We will have her in a pink hat and brown boots.
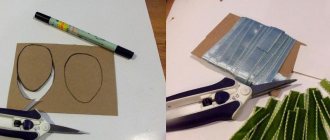
Cut out the snowman stencil.
We cut out the details of the head, body, and arms from white material.
We cut out a hat, a tassel for it, a scarf and mittens from pink material.
Stylized boots - we cut out the stand from felt.
We fold the parts of the body with the front side inward and grind them down, leaving the upper section free. Through it we turn the part inside out and fill it with padding polyester or other filler. We make the round head in the same way as described above for the previous toys.
We sew the pink mittens from two parts using an overlock stitch and fill them with filler. We insert the parts into the sleeves and stitch them. In this case, the edge of the sleeve should be sewn with a slight overlap, which is gathered into the frill.
We fill the handles with padding polyester and sew them to the body.
We make a blank for a brush from a narrow strip.
Sew it to the hat.
Attach the snowman with glue to a stylized shoe stand. We put on a hat and sew on small beads for the eyes. We will make the nose from a pink bead.
We tie a scarf.
The next toy will be a snowman - a boy in a fashionable hat.
The snowman pattern is presented below.
We cut out all the elements according to the patterns for the boy from white material, except for the boots. Let's make them red.
We sew the parts of the handles in pairs, making the seam on the wrong side. Turn it inside out and stuff it with padding polyester.
We sew the legs from two parts - red boots and a white top.
To sew the body and head we use the previous patterns. We collect all the details.
Then we sew the toy.
Let's start making a hat for a boy. It is sewn from three parts - crown, bottom and brim.
We sew a hat. Cut out a bright scarf from red fleece.
We make bangs from light wool yarn. After wrapping a suitable template several times, we tie it in the center. We cut the resulting loops.
We sew on the bangs, put on and fix the hat. Sew on the nose and eyes using beads.
We tie a scarf.
To complete the composition, cut out a blank for the Christmas tree from green felt.
We roll and sew the cone of the Christmas tree, fill it with padding polyester.
Sew on the bottom.
Attach decorations.
The company of snowmen is ready for the holiday!
Going to scale
A paper snowman craft looks cozy in an apartment, next to the Christmas tree. But decorations are also needed for the street. A figure made from plastic cups will fit well next to the front door. And if you secure the base well, you don’t have to worry about the safety of the snowman. A gust of wind will definitely not blow it away.
You will need an impressive supply of cups - more than 200 pieces. It doesn't hurt to pay attention to the rim. If it is thin, it will be easier to connect the blanks, and the snowman will come out more solid.
Large containers will be used for the body, small containers will be needed for the head. Technically fasten the glasses together using a stapler until you get a circle. The bottoms should be directed to the center. Add similar rows and thus make a ball. Leave a hole at the bottom to connect the head to the body.
Use the same method to make a second ball. All that remains is to fasten them together and decorate them. Add a thin garland with many small lights to the scarf and hat. She will revive her figure and give her New Year's charm.
Family Bunch
Good afternoon everyone, today we will make snowmen from different materials. I will show you how to make a beautiful snowman out of paper, how to make a snowman from scrap materials that are in every home. You will find on this page several master classes that will show you interesting ways to make a snowman with your own hands. Many of the ideas can be done together with children - for the next exhibition at school on a winter theme, or for a children's New Year's crafts competition at your work.
We’ll start our series of crafts with large-sized snowmen. I offer you three master classes, during which you will make BIG SNOWMAN.
Master class No. 1
SNOWMAN from garbage bags.
In the photo below we see a beautiful craft - a large snowman in a smart hat. This is a fairly simple job that you can easily do yourself. For this craft white garbage bags or regular bags from the store around the corner are suitable (then we use those parts of the bag where there is no color pattern).
The basis of the snowman is a cardboard cone . We roll a sheet of cardboard into a bag (as for seeds) and fix the edge with tape or a stapler). We trim the uneven edges of the bag with scissors so that it can stand evenly and straight on the table. We cut white garbage bags into squares of arbitrary size. The larger the squares, the deeper the fluffiness the snowman will have, and the more material will be needed. You can cut squares (3 x 3, or 4 x 4, or 5 x 5, or 6 x 6).
Prepare the glue by heating a hot-melt gun with a glue stick. We wrap a square of film around the tip of a pencil - this is how we get a bunch with a sharp center, it is convenient to apply a drop of glue on it and glue it to the base of the cone.
And we need to cover the entire cone with such bunches - the pasting comes from the lower circular rows and so, tier by tier, we move upward in a circle
Now we make a hat for the snowman. You can make a pattern for the bottom, sides and brim of a hat from cardboard and assemble all these parts. Or you can do it simpler - cover a jar of olives with pieces of cardboard.
You can do it even simpler : take a jar of yogurt, glue wide hat brims made of cardboard to its edges and paint everything with black gouache (mix it with liquid soap so that it applies well to the plastic, and then spray it several times with hairspray to fix the color).
We cut out the eyes and buttons from black cardboard and attach them to the snowman - it is best to glue the buttons not to the fluffy covering, but to the very base - to the cone . To do this, we attach a toothpick to each element with hot glue (as in the photo above) and glue such a button on a long stem to the cone, breaking through the fluffiness to the cardboard.
Master class No. 2
HOW TO MAKE A SNOWMAN
from modular origami.
At school we are all taught to fold paper modules and then assemble them into pot-bellied vases. And since we already know how to do this, then it is entirely within our power to collect BELLY SNOWmen. Everything is very simple here, the children will help you fold the modules - you sat down at the table in front of the TV in the evening and cut several sheets of office paper into rectangles and layered them into modules. And then the next evening, a snowman was assembled from these paper parts - like from a Lego set. A large voluminous craft is obtained.
If you are a beginner master of modular origami, then first make a small snowman, as in the photo above.
And if you have free time and long-term inspiration, then take on a larger project.
Even the cheerful snowman Olaf from the cartoon can be made using the modular origami technique. How to work with modular origami ( how to fold the module itself, and how to connect them to each other, I described in the article Modular origami (top 55 crafts for beginners)
Master class No. 3
How to make a snowman
PAPIER MACHE
on the air balloon.
Below we see a beautiful large snowman. It is made from two balloons.
Above in the photo is a link to a video master class where you can see the whole process in motion. But for those who are in a hurry, I have posted here the main points of this craft.
The idea is simple and clear - coat pieces of newspaper with glue. From my own experience, I’ll tell you that you can’t do this quickly with a brush (throw away the brush) - just pour glue into a saucer, scoop glue from the saucer with your fingers into your palm with the same hand, take a piece of paper and directly with your palm, in a split second, cover a piece of newspaper with glue and immediately onto the ball... grab it We place a new piece with a glue hand and onto the ball, and so on...
When the entire ball is covered with 3-4 layers of newspaper, leave it to dry for a day or overnight.
Using a knife, we cut off the sharp part of the ball, where the tail is - take out the rubber ball, it will not be needed. And cover the hole with masking tape or other tape.
This cut will be the BOTTOM of the snowman. And on top of the large ball we attach a smaller ball - also previously covered with newspaper. secure with tape or masking tape.
We cover the adhesive areas with patches from the same newspaper. And immediately from this newspaper we roll up a tight ball of the nose, and also wrap it with newspaper wet in glue - so that it becomes denser. And with several layers of newspaper patches we attach the nose to the front of the snowman.
Next, cover the entire surface of the snowman with white paint. We dry it and decorate it with buttons, a scarf, a hat and other items that match the image of the snowman you have in mind.
the snowman’s hands from newspaper strips or wire. We make hands in the shape of twigs.
In my opinion, it is better to take the wire as a basis and secure it thoroughly. Punch a hole through the left and right sides of the snowman so that the end of the wire comes out from the left side and from the right side. Wrap newspaper patches around the wire and form twig fingers. Dry, cover with brown gouache, sprinkle with hairspray.
IF YOU DON ' T HAVE WHITE PAINT . You can cover the snowman with a layer of white paper napkins (or white toilet paper) - 2-3 layers will hide the newspaper font and the snowman will turn white. also make the finishing layer of toilet paper in the form of strips with fringe. You will get the effect as in the photo below.
How to make a snowman
FROM NEWSPAPER LUMPS.
You can do without balloons in our craft. We just roll sheets of newspaper into comas. And then we glue these lumps with white sheets of office paper using PVA glue. For such work, you can buy glue not in tubes, but in a bucket, universal or construction PVA (this will be cheaper in terms of money).
And before wrapping them in white paper, it is better to fix the lumps of newspaper so that they do not unfold. The cling film used to wrap suitcases at airports helps with this.
Master class No. 4
How to make a snowman
FROM BOTTLES OF YOGURT.
Yogurt bottles often have convex, thick shapes and smooth curves - this is a suitable shape for a snowman. And milk bottles are made of white plastic - this is a suitable color for a snowman.
In the photo below we see a snowman made from a milk bottle. The cap is made from a BALLOON, the edge of the balloon is cut off and placed on the neck of the bottle.
But below, a round head made of a foam ball is attached to a white bottle. The snowman's cheeks and smile are drawn on the ball, and the nose and eyes are glued on. The hat and scarf are made from a sock or a piece of woolen fabric.
But even IF YOU DO NOT HAVE a foam ball, you can construct a snowman's head FROM a wad of newspaper, wrap it in cling film so that the newspaper holds the shape of the lump. Then secure the round lump on the top of the bottle with tape. And then THIS TEMPLATE for the future snowman should be covered with pieces of newspaper smeared in PVA glue (as we did in the second master class) and allowed to dry.
After this, paint the dry silhouette of the snowman white (gouache or spray paint) and decorate it with clothes.
Also, two short glasses of your yogurt or soft cheese can turn into a funny snowman. And as we see in the master class below, it’s easy and quick to do it yourself at home, together with your children.
Master class No. 5
SNOWMAN FROM THREAD
with your own hands.
In the photo below we see a cute snowman made of yarn balls. Perhaps you have already seen such crafts before at children's exhibitions, as the work of other parents. And they admired the openwork beauty of such transparent, delicate snowmen.
On our website I have already made a separate article with detailed master classes BALLS from THREAD (master class + photo of interior ideas). There you will find all the nuances and tips. And here I will just give an infographic with step-by-step photos showing the whole process.
How to make a snowman
from FOAM BALLS.
And now one of the fastest ways to make a snowman with your own hands. We come to the “Everything for Creativity” store and buy foam balls there (preferably two sizes - one larger, the other smaller in diameter). You can buy 2 balls, or three... or more. Look at the money - they are not expensive, the price does not bite.
Next, your task is simple - we cut the balls (cut off the tops) and collect them together with these flat cuts. It is better to attach it not only with glue, but also to make a FASTENING ROD inside from an ordinary toothpick. After fastening the parts, it is better to tint the balls with paint. gypsum putty or varnish or paper napkins and PVA glue. Choose a blue coating for your craft - in any case it will turn out beautiful and gentle.
Some people coat the snowman with glue and sprinkle it with salt - grains of salt imitate snow (as in the photo below). Someone coats it with glue and covers it with thin pieces of cotton wool - the snowman turns out to be felt, like a felt boot.
You can do it very beautifully - pick out scales from a pine cone and paste them over the lower part of the snowman - dress him in a pine cone caftan. And make a hat from birch bark from a birch tree - you will get a snowman with your own hands, as in the photo below.
You can assemble the snowman parts NOT VERTICALLY, but at different angles. We cut off the tops of the balls at an angle towards each other and stick the toothpicks in at an angle too - and this makes the figures curved. Like the snowmen bent over and bent - like in the photo with the craft below, DANCING SNOWMANS.
The snowman can be placed ON A PEDESTAL - on a skewer, or on two long legs (as in the photo below). To thicken the legs, you can cover them with a napkin using PVA glue, achieving the desired thickness and proportions.
Master class BELLY SNOWMAN made from halves of balls.
To make such a snowman with our own hands, we will need two balls, whose diameter differs slightly from each other. One is slightly smaller than the other. From each ball we cut off A LITTLE LESS THAN HALF. And we put these trimmed balls next to each other at the cut points.
We cut out the details of the snowman's uniform from mold or felt. And we attach these parts to the body of the snowman using glue from a hot gun.
We paint the snowman's scarf and hat with patterns (with a felt-tip pen or paints).
You can make many New Year's crafts from foam balls. A whole composition on a snowy landscape with a Christmas tree made of balls and a team of snowmen. Everything is done according to the same principle - we cut off the tops of the balls and connect them at the place of the cut.
How to build a snowman
from CUPS.
If you spare no glue and buy 2-3 pipes with cups of 100 pieces each, you can make a beautiful snowman. You can, of course, save these cups by taking them out of the trash can next to the office cooler (if the supplies order white cups, then they will be suitable for a snowman).
This snowman craft is very simple. All you do is place the cups in a circle - like in a round dance, with the bottoms towards the center. We fix everything with a drop of hot-melt glue (you can use squares of double-sided tape, it also holds well). And then we place more cups on top of this round dance... and again - until the dome grows (this will be half a sphere). Next, we turn the sphere upside down with the first round dance and continue to build up the second half of this sphere on it.
Next, you can figure out how to decorate your snowman. You can make him a hat out of cardboard, you can sew a hat out of fabric, or roll it out of crepe paper into a ball.
Using the same principle, snowmen are made from drink bottles. The cut quarters of the bottom of the bottle are placed in a circle in the same way - with the cut towards the center and the bottoms out.
Snowman woven from newspaper.
How to make a newspaper bundle.
If you unfold a large sheet of newspaper and begin to twist it diagonally into a tube, you will get a strong and flexible bundle of newspaper. From such thin newspaper tubes you can weave a snowman, just like people weave baskets.
Let's see how easy and simple it really is to do. Here is a newspaper, here we roll it up into a PENCIL to make it convenient, into a narrow tube.
To prevent the tubes from unfolding, you can secure them with a drop of glue. And make a lot of threaded tubes in advance, put them in bundles, tying them with an elastic band or string.
The beginning of weaving is 8 tubes. We put them CROSS ON CROSS, four at a time. And we intertwine these four by four tubes in pairs - we slide them under each other, as can be clearly seen in the photo below.
Next, take ONE tube, fold it in half - and throw both halves over one of the sides of the cross of base bundles - that is, through a row of four tubes (this is shown in the first photo below).
Immediately after these four tubes, we Twist the ends of this bent tube ONCE WITH EACH OTHER (we just swapped them) and threw them through the next portion of four tubes. This can be seen in the second photo below.
We repeat this WITH ALL the four pipes of our cross.
And we notice that the ends of our first tube have become SHORT. This means it’s time to lengthen them - to do this, we take out TWO more tubes from our supplies and coat their ends with a little glue and insert them inside the short tails of our weaving. This is shown in the photo below.
After this lengthening, we move our cross beams apart in different directions. So that the tubes in the crossspread out like rays of the sun.
And now our two elongated ends will go along all the rays, each time intertwining around each of them. That is, the ends of the tube bend around the ray, crossing each other, changing places.
So that our weaving is round and uniform, and does not tighten somewhere stronger, somewhere weaker, it is better to place a jar or vase in the center of the weaving and tighten our weaving around this shape. This way we will repeat the uniform roundness of the can, and we will get an even braid.
You can weave two halves of a SPHERE, then gather them together into a ball (as in the photo below), or continue weaving upward, narrowing the sphere to the top of the ball.
After the newspaper snowman is ready, it is painted with spray paint from a can. And they decorate with eyes, nose, buttons, a hat and a scarf.
Using the same principle, you can weave snowmen from willow twigs. These snowmen can decorate your summer cottage with your own hands; they will not be afraid of rain, like a newspaper, and will last for many years.
How to make a snowman
FROM WHAT'S AT HAND.
the fastest ways.
You can simply buy a package of white toilet paper. Place the rolls on top of each other. Cut out eyes, nose, mouth, twig hands from cardboard. Use an old woolen sock to make a hat. And here he is your snowman - standing there smiling. Cute, cute and big. It's nice to look at and not ashamed to show.
Here's another great way. Pour white coarse salt into a white sock. We tie the sock with twine at the top and also make bandages twice in the middle of the sock. We get a beautiful snowman. We give him a figure and face like the cartoon snowman Olaf.
Or let's do something even more interesting. Knead a cool, tight salty dough. Three glasses of fine salt, three glasses of flour, a couple of tablespoons of vegetable oil so that it doesn’t stick to your hands - and knead the dough with water. Pour water over the eye until the dough becomes like plasticine. And then add more flour so that it is definitely tight and firm. With tight dough, the snowman holds its shape better.
And if you take not wheat, but RYE FLOUR, then the snowman will definitely not settle, it will keep its shape firmly. Rye flour will give the craft a brown color. But this is not a problem - when the craft dries to a solid state, it will be easy to paint it with gouache or any facade paint.
Also, lumps of dough can be fixed on a pedestal made from an inverted flower pot. You will get a new craft. You can make a whole happy family of snowmen using dough and pots.
You can make a very bright colorful craft in the form of a snowman FROM BALLOONS. Just buy regular round white balls and multi-colored sausage balls for twisted crafts.
In order for the snowman to melt firmly on the floor, you need to add water to the lower balls - they will be the center of gravity for the snowman.
You can also very quickly make a snowman out of a pillow. The easiest and fastest way is to just sew on buttons and roll up the nose from a piece of a bright orange washcloth. Tie the neck of the pillow with any homemade scarf, put on a hat (even a simple hat, not necessarily a New Year's cap).
Snowmen from FELT,
How to make a snowman out of wool.
Nowadays many people are interested in felting wool. Here in the photo below we see what a beautiful snowman can be made from a piece of ordinary wool for felting.
The fastest felting method is the wet method. In a bowl of warm, soapy water, the hairball molds like a lump of plasticine. We simply roll the wet wool in our hands and roll it into a tight ball. Three of these balls give us body parts for the snowman.
You can felt not necessarily spherical shapes. And not necessarily in a wet way. You can simply dry twist a piece of wool to the desired shape and comb it with a felting needle. It’s very simple: you poke a needle into this woolen bundle, and from this it compacts itself and knits into the dense shape that you gave it when you folded it.
You can separately felt the legs and arms of the snowman and attach them to the body by needle combing.
Twig handles are made using the wet method, when the wire is wrapped in a tuft of wool and rolled on the table with wet, soapy hands.
Additional clothing items for a snowman can be made from felt or fleece.
You can make a real broom for a felt snowman from the fibers of a homemade broom.
You can make a whole dried composition from wool with snowmen, Christmas trees, gifts, penguins and other characters that fit the New Year's theme.
Here are some simple ideas on how to make a snowman from a variety of materials. But we haven’t said everything yet... This article will have a continuation... because while I was writing all these letters, my hands were making and photographing more new crafts with snowmen. Very soon there will be a link to an article with new works - we will make snowmen out of paper. In the meantime, catch existing links to articles about snowmen.
Olga Klishevskaya, especially for the site “Family Kuchka” If you like our site, you can support the enthusiasm of those who work for you. Happy New Year to the author of this article, Olga Klishevskaya.
From the world by thread
Thanks to threads, PVA furniture glue and balloons, a delicate, openwork snowman will be born. The ball must be inflated, wrapped in cling film and lightly greased with vegetable oil. This will make it easier to remove it from the craft.
Pierce the bottle of glue with a needle and thread so that the threads are saturated with PVA. By the way, office glue will not work because it doesn’t hold its shape well. Wrap the balloon with the same threads. Not tightly until you get something like a mesh.
Leave the structure for at least 5 hours until completely dry. A neat sprinkle of glitter or finely ground pigments will give it a more festive look. Just right for lovers of creativity.
After a while, burst the balls so that the frame remains. The decor will be toy eyes and knitted accessories. The lace snowman looks unique.
Volumetric applications
We must never forget about a healthy dose of abstractionism. Cut out a lot of small hands and then make a snowman out of them? Easily. Or come up with a conceptual figure from whatever comes to hand. Draw and cut out New Year's symbols (socks, watches, balls, lollipops, etc.), and then arrange them into a harmonious silhouette. There is no need to make a muzzle - it will simply get lost. The result will be a laconic composition.
You can also embroider a snowman using floss or knit it. The work is painstaking and long, but the result is worth it. A great gift made with love and warmth. Friends and relatives will definitely appreciate it.
Uses for ancient CDs
The era of disks has passed, but the media themselves remain. The deposits are worth realizing with dignity. The principle is the same as for a paper garland: take several disks and connect them together with thread or fishing line.
Glue on a scarf or ribbon, toy eyes and carrots. Cover the voids with paper and paint them to make the craft look beautiful. In the rays of the winter sun, the disks sparkle and shimmer fabulously. A fascinating sight.
You can use the discs as card backings and glue paper snowmen onto them. Several of these crafts will nicely diversify the decor of your apartment.
Glowing deer on the window, step-by-step guide with photos
- Take the deer template, cut it out and place it on the window to trace. You will have a circuit to which you will attach the LED strip:
- Carefully attach one edge of the garland to the selected area of the deer's outline, and then circle it around the entire deer, gradually securing the garland with tape.
Snowmen made from natural materials
Snowman craft made from cotton pads, paper, ordinary cotton wool, fabric. Much has been considered, but this is not the end. At school, almost everyone made compositions from autumn leaves. About the same thing can be done for the New Year. You just need to think about this in advance before you run out of material.
One of the most common options is a snowman made from acorns. The fruits need to be glued and painted. Standard decor will complement the craft.
If you stick maple leaves and paint them in the fall, an original postcard will be ready for the New Year.
Back to Threads
Not only openwork snowmen are made from threads. Instead of a balloon, use cardboard as a base and cut out the silhouette of a snowman. Wrap the workpiece tightly with dry threads; for a more stylish look, you can use twine.
Carefully coat the craft with glue, without leaving any yellow streaks, and let it dry. The hard adhesive crust will not allow you to sew buttons or beads to the workpiece; it is better to simply draw the face and other elements.
A nice souvenir that turns into a Christmas tree toy. It is enough to glue the loop, and the snowman will take its rightful place.
Crocheted snowman (amigurumi) with pattern
The amigurimi technique is very popular among needlewomen. The simplest elements of crochet are taken there: double crochet and single crochet. This is done to create integrity.
Do you like this toy? Below is a knitting pattern!
For those who do cross stitch, you can use this pattern as a basis.
These snowmen are also made using a simple knitting technique.
Let's give one more detailed diagram for these snowmen.
Flat crafts are made using single crochets. Each row increased by 1-2-3 loops from the center.
Knit with pleasure!
A small piece of decor
It is not necessary to make a full-fledged toy. The image of the snowman can be seen even in the three buttons glued to the card. A simple decoration, complemented by a bow, will add charm to the gift. Fluffy Christmas trees or snowflakes are not always appropriate; not everyone will appreciate this festive splendor. Then pleasant minimalism will come to the rescue.
You can use foil instead of buttons. Cut out the silhouette of a snowman and his hat and glue it all onto the base. Write a sincere wish next to it, add a couple of color accents so that the card does not look faceless. Discreet and beautiful.
Wooden crafts
Experienced craftsmen can create wooden snowmen. Get unnecessary processed boards, cut out the corresponding figure, carrot and hat, connect everything with glue and paint.
If you need a movable figure, thicker material will be useful. Then the master will secure the elements with screws. The result is a cute and original craft.
On the other hand, there is something like wooden postcards. Take an unnecessary kitchen board and use a burner to draw a snowman with snowflakes, or even Santa Claus. Paint everything with paints and varnish.
This is not a complete list of DIY crafts, but there is plenty to choose from. For decoration or an unusual gift - it doesn’t matter. The main thing is that the craft is made with soul and warmth. Then it will bring pleasure, first of all, to the master.
Felt snowman (templates and patterns)
Well, we’ve come to probably the most favorite material, which many beginning craftswomen love, this is felt, since it is practical and easy to use. The thing is that it does not crumble and is easy to work with.
In general, watch and repeat all the actions after the author. First cut out the pieces.
Then apply it to the fabric and cut it out.
Or take ready-made templates from the pattern and create using them, friends. After all, you can sew not only voluminous toys, but also flat ones, in the form of keychains or crafts for the Christmas tree.
Now I’m sharing the patterns that caught my eye.