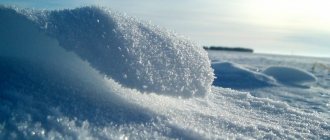
In the Far North with harsh weather, building a reliable shelter becomes the key to survival. Various huts and dugouts that save people under normal conditions turn out to be incapacitated. In severe frost and snowstorms, a lost hunter can take refuge in a snow house, which is often used by Eskimos if they are caught in a snowstorm on the way.
General information
The harsh climate of the Far North forced the Eskimos to build shelters for themselves and their families. That snow was chosen as the material. Such dwellings have amazing properties - they protect residents from strong winds and low temperatures. If you light a candle inside, you can easily warm yourself up. Surprisingly, such a snow hut does not melt, but only melts slightly, and besides, it transmits light perfectly. This type of house is called an igloo.
The ice dwelling of the Eskimos can have several rooms at once, which are connected by a long passage. When building such housing, you must adhere to the basic rules:
- You can dig snow with any available tool: a knife, saw, shovel and even a food bowl;
- It is not recommended to build a large building - the smaller it is, the warmer it will be;
- cracks that form during construction are covered with wet snow;
- during construction, it is better to take off your outer clothing so as not to sweat and subsequently get sick;
- The inside of the dwelling must be covered with waterproof bedding so that the skins on which the Eskimos sleep do not get wet.
You can look for a large snowdrift in the area and dig an ice shelter in it. You can make the entrance a little lower, and then dig a small corridor - this will strengthen the structure. The diameter of such a structure should vary from 3 to 5 meters. The low entrance to the hut is made so that the warm air that rises upward does not evaporate, but remains in the room, and heavy carbon dioxide, on the contrary, sinks and goes outside.
As for lighting, it is, in principle, not needed - the light penetrates through the wall of the house. Although, if desired, you can build a window and install ice as glass. The floor and walls must be covered with animal skins - this will additionally insulate the structure. At the end of construction, you can light a candle or fat lamp. The house is ready.
Preparing the quarry
Before starting to manufacture wall material, the working quarry must first be prepared. For this:
We dig a trench at least 70 cm wide and 60 cm deep. If the thickness of the snow layer does not allow this, then simply to hard ground.
Important! The front wall of our trench must be perfectly flat - these are the edges of our future “bricks”.
We remove all crumbly snow at the excavation site and level the working area.
Useful tips
An Eskimo can make an igloo out of snow in one hour - build a reliable and strong dome-shaped structure that even a bear cannot destroy. It will be quite difficult for an inexperienced traveler to build such a dwelling. There are several tips to help you cope with this task:
- it is necessary to start construction during the day, when it is light; doing this at night is strictly prohibited, as destruction may occur;
- the entrance to the building should not be located in the direction where the wind blows;
- When spending the night, you should definitely take a shovel or other tool so that in the morning you can dig out the entrance from the snow;
- do not build a house whose diameter is more than 5 m, otherwise the stability of the structure will decrease;
- during construction work, you need to carefully outline the circle;
- It is necessary to observe safety when lighting an open fire inside the needle, as you can be poisoned by carbon monoxide;
- It is forbidden to sleep if there is a threat of freezing.
If someone from the group feels unwell in the ice hut, for example, vomiting, dizziness or watery eyes, it is necessary to immediately leave the building , extinguish all heat-producing devices in it and ventilate the house. There have been cases of carbon monoxide poisoning. This happens especially often in a dream.
Further masonry. Keystone
Important! Since the mason is inside a closed loop, a helper is needed for further work. It is he who must supply the snow blocks.
There is nothing complicated about the spiral masonry itself; you just need to follow a few basic points.
Tilt angle
We control the angle of inclination as before using a piece of rope tied to the king pin. Only such a measure will allow us to build the right dome.
End trimming
For denser masonry, we cut the ends of the snow bricks at one angle.
The direction of the cut of the right edge of the block is set by the already familiar lacing.
We file down the left end, focusing on the already finished cut of the previous element. Sawing is done with an ordinary saw.
Keystone
The keystone is more difficult to trim. You need to work from the inside, focusing only on the finished working planes of already laid blocks.
Step by step construction
A more reliable structure is obtained from dense snow. Whole blocks are cut out of it using a hacksaw, which outwardly resemble foam. These elements are used to build a snow yurt. They need to be cut only from the side of the snowdrift from which the wind blows. Such products are much stronger, their weight is approximately 10 kg.
Next, you should choose a place for the house, draw a circle with a diameter of 3 m on the surface, mark the entrance hole and begin construction. The process looks like this:
- An igloo hut is built from snow or ice blocks, which must be laid in a spiral, moving exclusively from right to left. To do this, you need to cut two blocks diagonally in the first row, and then start laying the second row.
- Next, you should tilt the blocks in each row so that a spherical shape of the building is formed. As a result, there should be a small hole left in the upper part that needs to be sealed from the inside. To do this, you need to insert a wedge-shaped piece of ice into it. The height of the building should be approximately 2 m so that you can stand up to your full height.
- After this, all cracks should be sealed with wet snow. This must also be done from inside the building.
- The entrance tunnel needs to be dug from the outside. You can also make a hatch in the wall, but then it is imperative to lay out a corridor of snow blocks. The external entrance to the tunnel should have a height of 1.5 m.
- To strengthen the structure, you should light a candle or lamp, wait until the house melts, and then put it out. It will undergo icing and become much stronger. Now you can move in.
In winter, a snow hut can last up to 5 months if the temperature outside is sub-zero. Inside the yurt, the temperature with a burning candle can be up to +16 degrees, and with the lamp on up to +20.
If the ceiling begins to thaw, it is necessary to scrape off a 15-centimeter layer of snow from the outside so that the hut cools down a little and the ceiling stops dripping. If, on the contrary, the house does not retain heat, and frost forms on the dome, then you should throw a little snow on the dome.
Looking for snow
Work on an igloo begins with the preparation of wall material, and this requires a fairly thick layer of snow. Since the optimal dimensions for a block are considered to be 600 × 450 × 200 mm, the thickness of the snow at the excavation site theoretically cannot be less than 20 cm, but in practice one should look for a “quarry” of snow pie at least half a meter deep.
We make all the necessary measurements using a special probe, which can be purchased in a store or from a pre-marked metal rod.
Digging the exit
After finishing the masonry work, you can think about the door. This is the tunnel under the wall of our snowy hut (that’s why we needed deep snow on the construction site); it is this design of the entrance that ensures the free flow of oxygen into the room, but prevents warm air from escaping from the hut.
From the street, the “undermining” is decorated with snow blocks, making from the latter a kind of short snow pipe.
Video: how to build an igloo with your own hands
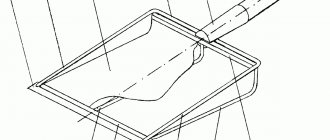
Materials and tools Carpet embroidery How to make a carpet needle
Next, a handle for the future needle is made from wood: length 2.5-3 cm, thickness 0.7-0.9 cm in diameter (also made with an ordinary knife).
Next to the needle you see 2 drills for making an eye in the needle. So, a through hole is drilled in the handle for the future needle. but most importantly, according to the diameter of the needle, and at the end a little wider for the plastic tip of the needle
Schematically it looks like this. The bed for the plastic tip can be lubricated with glue for greater secure fastening.
Then the handle is sanded with sandpaper. You can make a needle threader like this from thin wire, and the handle from a television cable.
The needle can be purchased at the store. It is quite suitable for getting acquainted with the technique of non-woven tapestry. But in the store the needle quickly breaks, because... attached to a plastic handle. If you decide to seriously engage in this type of decorative and applied art, then it is better to order several needles of different lengths and thicknesses with a wooden handle from the workshop. Most often, 4 types of needles are used to work on tapestry:
A) The main working needle is 3-5 cm long, with an internal diameter of 1.6-1.8 mm. This needle is used for cotton threads, such as “Iris”, “Tulip”, “Astra”, No. 10, in three folds.
B) The main working needle is 3-5 cm long, with an internal diameter of 2-2.5 mm. This needle is used for embroidery with synthetics and wool.
D) Auxiliary needle – length 6-7 cm, with an internal diameter of 2-2.5 mm. Suitable for embroidery with synthetics and wool
NOTE: Sometimes you have to work with very thick needles, but these are used as an exception. In order to change the length of the loop, needle attachments are used. They can be made from pieces of a ballpoint pen or the insulating sheath of a wire (cambric).
Further masonry. Keystone
Important! Since the mason is inside a closed loop, a helper is needed for further work. It is he who must supply the snow blocks.
There is nothing complicated about the spiral masonry itself; you just need to follow a few basic points.
Tilt angle
We control the angle of inclination as before using a piece of rope tied to the king pin. Only such a measure will allow us to build the right dome.
End trimming
For denser masonry, we cut the ends of the snow bricks at one angle.
The direction of the cut of the right edge of the block is set by the already familiar lacing.
We file down the left end, focusing on the already finished cut of the previous element. Sawing is done with an ordinary saw.
Keystone
The keystone is more difficult to trim. You need to work from the inside, focusing only on the finished working planes of already laid blocks.
Master class on making three-dimensional figures from foam plastic “Flamingo”
It's time to decorate the area or room. Special effects and decorations are an integral part of modern life. Decorating building facades, room interiors, movie sets, etc. - all this requires the attention of specialists in creating three-dimensional figures. Three-dimensional foam figures can be used as an economical but effective solution. These are different types of 2D and 3D products that are used for a variety of functions.
The figures turn out to be quite light and durable.
In my master class I will teach you how to make figures from foam plastic that can become the highlight of any area or group.
To make a figure we will need:
- a sheet of polystyrene foam or polystyrene foam (I tried both, each with its own advantages and disadvantages)
- glue for foam plastic (master-transparent)
- glue for foam plastic (any for ceiling tiles)
I always use 2 types of glue, just in case, as a rule, one of them sets faster, but the other holds stronger.
- stationery knife with changing knives 3 times
- grout, or finishing putty, I use a polymer base
- enamel for painting
I first mark the piece on a piece of foam board, then cut it out using a craft knife and glue the pieces together.
After gluing, I give it the desired shape again with a knife.
Then we will plaster the entire product well and give it the desired relief. Without plaster, our product cannot be painted; foam and polystyrene melt and dissolve from the enamel.
then we paint with ordinary enamel. Preferably 2 times, if our “Beauty” should stand in the yard, this will protect it from the rain.
Happy creations.
Publications on the topic:
Master class for Mother's Day on making three-dimensional flowers from porous rubber “Flower for Mommy!” for children of the middle group Master class for children of the middle group “Flower for Mommy!” Author: Erofeeva Ekaterina Vitalievna MBOU “Novotalitskaya” Secondary School “Malysh” V.
Master class for teachers “And we have flowers of unprecedented beauty! Making three-dimensional flowers from paper using different techniques” Goal: transferring the experience of making flowers using non-traditional techniques for working with paper to your colleagues. Objectives: 1. Introduce the participants of the master class.
Master class on “Pink Flamingo” postcards using the palm painting technique Often, the guys in my group come to me asking me to help them make a gift for the birthday of their loved one. Of course I always do.
Master class on making flannelgraph Flannelgraph is a visual educational aid for children from birth to; a board covered with flannel on which carved figures are attached..
Master class on making flickers What are flickers? A flicker is a reflector that can save a pedestrian or child on the road. Providing visibility in conditions.
Master class on making games with a flashlight GAME is a free activity, which is a form of self-expression of the subject and aimed at satisfying the needs for entertainment, pleasure.
Master class on making a Kokoshnik Master class on making a KOKOSHNIK The problem of instilling love for the Motherland in children has always been relevant, and it has acquired particular significance.
Master class on making a “Meadow” model Good afternoon! Today I would like to present to your attention a master class on making a “Meadow” model. We all, of course, know that the corners.
Master class on making three-dimensional flowers using the “paper-plastic” technique for decorating corners of preschool educational institutions, gifts and costumes. The “paper-plastic” technique is the same applique, only in volume. Using this technique you can make figurines of characters, houses, pieces of furniture, etc.
Master class on making herbal tea Today I would like to talk about the master class on making herbal tea, which took place in our group in the spring. The grasshoppers are small.
A language where you are not the center of the universe
Research has shown that in the languages of the world there are different types of orientation in space: egocentric, landscape and geographical. Our orientation, of course, is egocentric: here all objects exist and move relative to the speaker. This is evidenced by characteristic coordinates: “to my right”, “to my left”, “behind”, “in front” - the whole world revolves around us.
However, the aborigines of the Australian tribe Guugu Yimithirr
the “me-me-me” approach is unlikely to be useful: representatives of this tribe are oriented by the cardinal points, and not relative to themselves. To ask you to move to the right, a person from that tribe will say something like, “Could you move a little to the west?”
Linguist Guy Deustcher explains this by saying that Guugu Yimithirr speakers have an “internal compass” that they develop from infancy: from the very beginning, the tribe’s brain learns to notice natural factors that indicate positions in space, and carefully remember movements and turns, which subsequently helps the natives effortlessly determine the right direction. Just as Russians, English or French learn to use tenses correctly in speech at an early age, children of the Guugu Yimithirr tribe learn to navigate the cardinal directions. According to Deutscher, if a speaker of Guugu Yimithirr needs to draw your attention to something behind him, "he will show through himself as if he were just air and his existence meant nothing."
It's unclear whether this linguistic feature produces a less egocentric worldview, but other studies have shown that speakers of languages that use cardinal directions to indicate location have incredible spatial memory and fantastic navigation skills that we, representatives of the egocentric model, never dreamed of.
Winter fun with a child: building an igloo with your own hands
Don't know how to entertain yourself and your child during the New Year holidays? Build a fairy tale with your own hands. Building a mysterious Eskimo igloo is not an easy task, and the more valuable the result will be. Follow our instructions carefully, and the snow hut will definitely decorate the winter yard of your dacha.
The construction of an Eskimo snow igloo house is a rather interesting idea that not only you, but also your children will like.
Tools you will need for work:
- Probe for measuring snow.
- Kingpin.
- Roulette.
- Rope.
- Shovel
- Small bayonet blade.
Saw.
Preparing the quarry
Before starting to manufacture wall material, the working quarry must first be prepared. For this:
- We dig a trench at least 70 cm wide and 60 cm deep. If the thickness of the snow layer does not allow this, then simply to hard ground.
Important! The front wall of our trench must be perfectly flat - these are the edges of our future “bricks”.
- We remove all crumbly snow at the excavation site and level the working area.