A simple cardboard box is an excellent craft material. It’s worth taking a few tips from experienced decorators and designers – and you’ll end up with several useful and functional things in your home.
As soon as a good, but unnecessary box appears, immediately put it into use. For example, packaging from household appliances, parcels or gadgets. This is both reuse and cost savings!
We will tell you about different ideas from boxes that can be useful in your creativity.
Creation of a puppet theater
Necessary materials:
- Box with lid.
- A3 cardboard.
- Colored paper.
- White paper.
- Scotch.
- Glue.
- Colored pencils, markers, felt-tip pens.
- Wooden skewers.
- LEDs.
Progress
This cardboard box craft requires a little more effort than the previous product. You need to cut out a “window” and cut four holes at the top. The width of the holes should be equal to the diameter of the wooden skewers.
You need to cut out a platform from A3 cardboard and glue it closer to the bottom. Slots are made on it, just like on top. To keep it in place, you need to glue small pieces of cardboard underneath, and then glue the pad itself onto it.
Beads need to be glued onto wooden skewers. They need to be glued on the bottom. You can use a box lid as a background.
Note!
- DIY paper crafts: TOP-200 photos of exclusive ideas and craft options
- DIY paper origami craft step by step: ready-made diagrams for creating beautiful origami at home (90 photo ideas)
Crafts from paper and glue for children: step-by-step instructions for creating interesting crafts with your own hands (90 photo ideas)
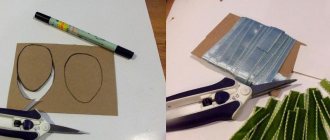
To create a relief landscape, you need to cut out the necessary components from colored paper and glue them to the inside of the lid. If you create an arctic background, you will need to create white paper glaciers and an ocean.
At the next stage, you need to cut out the heroes of the fairy tale. You can look for them in old picture books.
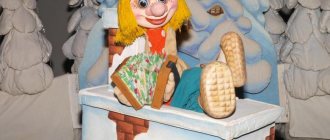
Each fairy tale hero needs to be glued onto a wooden skewer. Then you need to place a garland through the holes in the box. This craft from a box is suitable for kindergarten or primary school students.
Finger puppets
Cardboard is easily combined with other materials, serving as the basis for crafts. Finger puppets are made from fabric or crocheted. With the help of figures it is easy to set up a miniature theater, performing interesting performances based on children's fairy tales.
Master Class:
- Prepare several cardboard rectangles 3 cm long, 5 cm wide;
- Twist into a tube with one turn and glue at the joint;
- Make the heads of puppet characters in advance (cat, dog, bun, grandmother, grandfather);
- Attach the heads to the cardboard cylinders.
A simple puppet theater is ready. Fairy tale characters can be sewn from felt or crocheted from yarn. Even if you cut them out of magazines and make them flat, they will also look believable.
Mini football
There are many ideas on the Internet on how to make crafts from boxes and photos of crafts from boxes. Another good idea is to create mini-football.
To create this craft you need:
- Any shoe box.
- Glue gun.
- Skewers.
- Paints.
- Clothespins.
Progress
You need to make eight holes in the box: four on one side and four on the other. You need to attach clothespins to the skewers. After this, the skewers need to be painted. After this, you need to cut slots on both sides for the ball. The final step is to insert the skewers into the holes and the job is complete!
Christmas wreath
This decoration is becoming increasingly popular among a variety of peoples. To make it, you only need thick cardboard, fluffy tinsel, New Year's balls or pine cones.
A template for a cardboard craft can be found on the World Wide Web or you can make it yourself using a compass or plates of different diameters to create a cardboard rim. All that remains is to wrap the craft with tinsel and glue the decorative elements.
An Easter wreath is made in the same way, only thick threads are used instead of tinsel, leaving small indentations for the eggs. Chickens made from wool pompoms will help decorate the craft.
Casket made from waste material
You will need four identical boxes without lids. One of them needs to remove the side part, the other one needs to remove all the sides. The lids of these boxes need to be glued together - this will be the base for the future box. It should consist of three sides and a bottom. You need to glue the inverted lid on top. The base is ready.
All three boxes need to be placed in the base. After this, the box can be decorated with additional elements that can be used to open the drawers.
Compact storage
The change of seasons always requires a lot of extra space, especially on spring days, when you have to put away warm hats, mittens, gloves, and scarves.
To prevent all this variety of wardrobe items from lying around and getting lost until the fall, you can create a miniature wardrobe inside your usual clothes closet.
To do this, simply label the boxes according to its future residents or glue the corresponding pictures. And put everything in a neat pile.
Toys made from waste materials
You can make a toy sewing machine for your daughter. This thing will please the child, despite the fact that it is made from unnecessary materials. It requires:
- Shoe box.
- Knife.
- Dowels.
- Glue gun.
- Markers.
- Decorative elements.
Progress
The drawing diagram can be easily found on the Internet. The box must be cut according to the drawing.
After this, the wooden dowel must be attached to the rectangle. This will be a replacement sewing needle. The triangle is glued to the desired location on the sewing machine.
You need to make a flywheel from thick cardboard. It must be attached to the desired part of the machine using a plastic pin.
A wooden dowel needs to be attached to the top so that the reel can subsequently be placed on it.
On the front side of the machine, you can make buttons from small pieces of cardboard, as well as slits into which you can later insert switches from dowels with beads at the ends.
You can use a pen to fill in missing elements, such as divisions.
New Year cards
In anticipation of the New Year holidays, I want to make small cards with interesting decor, sign them with kind words and send them to loved ones. Using colored cardboard, it’s easy to make amazing postcards, providing them with the most unexpected decorations:
- buttons;
- payteks;
- beads;
- faux fur;
- foil;
- knitted snowflakes and flowers;
- make several holes and decorate with lacing;
- sew with a real stitch on a sewing machine.
Cardboard is so durable that it can take on the embodiment of any fantasy. At the same time as this property, it can be easily cut with scissors, holes made with an awl, glued together with PVA glue in a matter of minutes, and absorbs any paint well.
Car made from a cardboard box
You need to cut off three sides of the box, and bend the last side inward at an angle. This will be a makeshift dashboard.
Beads and rotating elements need to be glued to the dashboard.
For the steering wheel you will need a toilet paper roll and a disposable plate. The grommet is placed on the dashboard and the plate is glued to it.
You also need to glue the same plates on both sides of the machine. These will be the wheels.
You can stick a radiator grille on the front using colored tape. The craft is ready!
Feeder
Such a craft will not last long in outdoor conditions, so it is better to install it in a place protected from water, for example, in a gazebo.
The simplest feeder is just a box with cut-out entrances. There can be two or four, depending on the wishes of the master. More complex feeders are made from entire cardboard castles.
Houses for the little ones
These houses can be made from milk cartons. For this you will need:
- The packages themselves.
- Wire.
- Feathers.
- Kinder surprise containers.
- Scissors.
- Glue.
- Clothespins.
The bags must be painted in the required colors. Using scissors or a utility knife, you need to make windows for the birds. You need to glue a skewer or wooden dowel to the front part. This will be a perch for birds.
You can make birds out of kindersurprises. You need to draw eyes on the container, and use feathers to make wings and tails. Wire is suitable as paws. The birds are attached to the perches with glue.
Gift wrap
You can make a cute gift bag from thin cardboard. Both thin and thick cardboard will be used to make a gift box. They can also be decorated depending on the holiday with snowflakes, flowers, beads, and lace.
Note!
- Paper shuriken: TOP-140 photos of the best DIY origami ideas. Instructions for children step by step with simple diagrams
- How to make paper claws - detailed instructions with simple origami diagrams. Creative creation ideas + photo and video reviews for children
- Paper applique: TOP 100 photos and detailed diagrams of simple crafts for children. Options for unusual DIY paper applications
And a large box can be decorated with decorative paper, wrapped in bows and placed under the New Year tree to get gifts from there at midnight.
Decorating your home with boxes
The boxes need to be painted in any color using a can of spray paint.
If you don’t have paint, you can simply cover them with colored paper. The resulting shelves can be attached anywhere with double-sided tape.
Finish and extra protection
The finished house is hung on a tree with a rope threaded through specially cut holes.
To make the suspension more stable, it is recommended to make holes on opposite sides, thread a rope through them, and tie a knot over the birdhouse.
You can protect the product from rain using tape or moisture-resistant paint.
Interior decoration should be done with water-based paint and glue, since solvent-based compositions are detrimental to the health of birds.
Variety of things from cardboard boxes
Cardboard boxes are an excellent waste material for creating all kinds of crafts for children and more. You can use boxes to make a toy kitchen set, and you can use a TV box to make a toy TV.
You can make a camera out of an old box: a small round candle is attached to the front side.
You can make a computer from a cardboard box and foil, and a traffic light from a milk carton.
Assembly and design of the organizer
After the material is selected and prepared, the boxes are placed in the shape of the future product. You can decorate the craft with colored or decorative paper; self-adhesive film is also perfect for decoration.
This method allows you to extend the life of the finished organizer. Since the film is moisture-resistant, you can safely wipe it with a damp cloth and not be afraid that the product will deteriorate.
All levels should be glued together, and around the perimeter, if desired, covered with an additional layer of cardboard.
Photos of crafts from boxes
Calendar
A calendar can also be a useful craft. To create it you will need a sheet of thick cardboard and several sheets of softer material.
On a large sheet of paper you need to stick pockets for the date, month, year, day of the week. The craft can be supplemented with a weather calendar and insert images of the sun, rain, and clouds.
The calendar will help your child become familiar with numbers, letters, days of the week, and natural phenomena.
Colored cardboard
Colored cardboard is sold in stores in two types: single-sided and double-sided. Single-sided cardboard is used to create appliqués, bases for paintings, and small decorative details that will be visible only on one side.
Double-sided cardboard is used to make three-dimensional figures and crafts, the appearance of which is important on both sides.