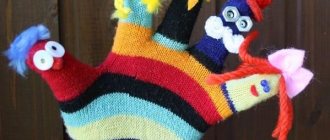
Modern gloves come in many different types. They say a lot about a person - his lifestyle, financial situation, personal preferences, etc. It is believed that the pattern of fingers and hands is even transferred to the gloves, and that it can be seen under a microscope. This accessory has always attracted attention, and therefore needs to be given special attention. Today we will tell you how to sew gloves with your own hands and look at the process of creating a pattern. Well, let's sew gloves!
How to sew gloves with your own hands
LiveInternetLiveInternet
—Categories
- remove evil eye damage at home (0)
- how to spoil a person (0)
- how to find out who caused damage (0)
- damaged a person (0)
- how to damage (0)
- damaging (0)
- listen to prayer against corruption (0)
- prayer to Cyprian from damage and witchcraft (0)
- Cyprian's prayer against damage and the evil eye (0)
- strong prayer against the evil eye and damage (0)
- prayer against the evil eye of witchcraft (0)
- Orthodox prayer against corruption (0)
- strong prayer against damage (0)
- prayer against damage and witchcraft (0)
- prayer to Cyprian from corruption (0)
- prayer for damage (0)
- after removing the damage a person (0)
- removing damage with eggs overnight (0)
- spell to remove damage (0)
- removal of grandmother's damage (0)
- removing damage in households (0)
- rite of removal of damage (0)
- removal of damage reviews (0)
- removing spoilage with salt (0)
- help removing damage (0)
- days of removal of damage (0)
- help removing damage (0)
- removing damage yourself (0)
- removing damage with water (0)
- removing damage yourself (0)
- removing damage and the evil eye (0)
- removing damage with prayers (0)
- removing damage from eggs (0)
- after removing damage (0)
- removal of damage (0)
- how to jinx it (0)
- how to spoil things at home (0)
- how to damage someone who offended (0)
- how to cause severe damage (0)
- how to get rid of the evil eye (0)
- from the evil eye buy (0)
- evil eye curse (0)
- evil eye thread (0)
- how to remove the evil eye yourself (0)
- Orthodox prayer against the evil eye and damage (0)
- protection from the evil eye and damage (0)
- Koran from the evil eye and damage (0)
- strong evil eye damage (0)
- sura from the evil eye (0)
- dua for evil eye (0)
- signs of the evil eye (0)
- evil eye help (0)
- how to find out if there is damage or the evil eye (0)
- Orthodox prayer against the evil eye (0)
- how to find out if there is damage or the evil eye (0)
- red thread against the evil eye (0)
- how to find out if there is an evil eye (0)
- damage evil eye witchcraft (0)
- amulet against the evil eye and damage (0)
- strong evil eye (0)
- evil eye at home (0)
- evil eye thread (0)
- Koran from the evil eye (0)
- from the evil eye and envy (0)
- evil eye how to determine (0)
- evil eye hand (0)
- human evil eye (0)
- is there any damage or evil eye (0)
- removing the evil eye (0)
- protection from the evil eye (0)
- protected from the evil eye (0)
- remove evil eye damage at home (0)
- evil eye spell (0)
- how to remove the evil eye at home (0)
- from the evil eye to a child (0)
- removed the evil eye home condition (0)
- how to recognize the evil eye (0)
- evil eye pin (0)
- red from the evil eye (0)
- is there an evil eye (0)
- how to remove the evil eye and damage (0)
- amulet against the evil eye (0)
- prayer against the evil eye and damage (0)
- how to remove the evil eye (0)
- how to remove the evil eye (0)
- prayer against the evil eye (0)
- evil eye damage (0)
—Search by diary
—Subscription by e-mail
-Statistics
DIY gloves with claws for the garden.
If you love comfort and quality in everything, then Garden Genie Gloves are exactly what you need.
Exclusive gloves will help you when removing weeds, as well as simply putting things in order in flower beds and beds. Gloves reliably protect your hands. Photo using Genie Gloves. Autumn pruning of gooseberry bushes Equipment for work in the countryside Miracle shovel for digging up soil When to plant vegetables in a year? Tips for gardeners Miracle hose for watering Xhose What's better: Add a comment Cancel reply You must be logged in to post a comment. Headings Architecture Pest control in the countryside Furniture Countryside water supply Countryside heating Countryside ponds Countryside reviews DIY countryside crafts Countryside buildings DIY decor Fences for the cottage Sewage for a country house Indoor plants and flowers Do-it-yourself smokehouses in the countryside Landscape design Garden and vegetable garden Garden paths Greenhouse farming at the dacha Equipment, tools for the dacha Fertilizers for plants Storing vegetables and fruits Flowers and flower beds. Dacha photos, descriptions, reviews On our website “Do-It-Yourself Dacha” we collect useful tips, master classes and interesting ideas that anyone can do for their own dacha plot. For questions of cooperation, as well as copyright holders, please contact the following contacts: When using site materials, a back link to www. The accessory will keep your hands clean and protect them from damage during work.
The most important thing is that there is one size that will suit every person. Analyzing reviews on gardening and dacha forums, we can highlight several disadvantages of these gloves: The cost of gloves is about rubles in Russia and UAH. Online stores also deliver goods to Belarus, Kazakhstan, and Moldova. Prices may be lower if you buy in bulk; check with the manufacturer on the website.
Read more detailed reviews about gloves, cost and where to buy on the official website:. Garden Genie Gloves with claws. Of course, it is impossible to dig up an entire field or garden to plant potatoes with gloves alone. But they can handle all the work in the garden beds without any problems. You can buy Garden Genie at any time in the online store at an affordable price. You must be logged in to post a comment.
And doing this is not difficult. It is enough to simply wash and dry the gloves after work. If the material suddenly becomes damaged, it is better to buy a new pair of gloves.
If you like to care for your garden beds while being careful with your hands, then Garden Genie Gloves are just the thing that will be useful to you. Durable, comfortable, high-quality gloves are ideal for working not only in the garden, but also in the vegetable garden. It is noteworthy that the new product can be ordered on the company’s official website. Many people who have already used the new product leave positive reviews on thematic forums. So, the most important thing is that the gloves weigh no more than one hundred grams.
Chainmail gloves in Sevastopol
“One-click ordering” is available on the seller’s website. To go to the site, click “Go to store”
“One-click ordering” is available on the seller’s website. To go to the site, click “Go to store”
“One-click ordering” is available on the seller’s website. To go to the site, click “Go to store”
A toll-free number 8-800 is available on the seller's website. To go to the site, click “Go to store”
“One-click ordering” is available on the seller’s website. To go to the site, click “Go to store”
Garden claw gloves Garden Genie Gloves: features of protective gloves, price, reviews
Share on social media networks:
With the onset of cold weather, gloves become simply indispensable “clothing” for our hands. In addition, they are also a fashion accessory, thanks to which the image becomes completely complete. Gloves can be made of either knitwear or suede, knitted from wool or lace. Unfortunately, not everyone can afford such an ordinary accessory, and most often a woman has no more than 1 or 2 pairs in her wardrobe. But if you wish, you can make them yourself. The most important thing is to understand the technique of cutting fabric. We will tell you in detail how to sew gloves with your own hands, so that you can easily acquire such a fashionable accessory.
Spectacular decor
Large knitting in itself is decorative, bright patterns too, but smooth gloves can decorate:
- Decorative stitches made on a sewing machine or by hand. You can also add a stitch here.
- Embroidery with colored threads.
- Crocheted lace will decorate strict plain gloves in one evening.
- Thread strands , including silk, forming complex patterns will add decorativeness.
- Appliques , including those made of fur or felted wool.
- Leather or quilted medallions . Goes well with embroidery with beads, beads, and bugles.
- Bows - ties . The best options are silk, satin, suede.
- On sports models - rivets, perforations, chevrons.
Even without special sewing skills, even a novice seamstress can sew the simplest models of gloves without a pattern. This is an exciting activity, so believe me, these will definitely not be your last gloves that you sew yourself.
We sew gloves ourselves
The glove manufacturing option we offer you is very simple, and the model is quite universal. Therefore, you can use knitted fabrics, suede or leather for sewing, and, if desired, decorate with beads, embroidery, zippers or buttons.
- Soft leather or other material;
Important! In order to make gloves, you do not have to purchase a separate piece of fabric. You can use an old jacket or trousers for this purpose.
- Paper for making a pattern;
- Scissors;
- Threads to match;
- Sewing machine;
- Tailor's Marker;
- Tailor's pins;
- Pencil.
As soon as everything is prepared, you can safely get to work and make gloves with your own hands by creating a pattern. The sequence of actions is as follows:
- Take the paper and fold it in half.
- Place your palm on the paper so that your thumb is outside it.
Important! Pay attention to the fact that there should be a space of a few millimeters between the index finger and the edge of the paper.
- Outline your hand with a pencil, leaving 3 millimeters above your fingers. Try to move them apart only in order to place the points necessary for further work.
Important! After you have traced your palm, make sure that the lines between your fingers are parallel.
- Mark the place where the thumb goes with points B and C.
- Mark the space between your index and middle fingers with point A.
- From point A, draw a vertical line.
- From points B and C, draw horizontal lines along the palm.
- Draw an oval at the junction of the straight lines. This will be the thumb hole.
- The pattern is ready. Cut it out.
- To make a gusset, trace each finger (except the thumb) and cut out.
- Match the pattern on the pattern with the gussets. Circle them directly on the diagram and label them.
- Draw a curved line at the bottom of each insert. Cut out the patterns along this line.
Important! To transfer the pattern onto the fabric, you can use a special disappearing felt-tip pen. Its advantage is that it can be used to mark all the points on the fabric while working, and afterward it can be washed off without any problems, leaving no traces behind.
- Next you should make a pattern for the thumb. Trace it on paper with a pencil. Find the middle upper point, draw a wavy line from it to the right. Repeat the same action on the left side.
Important! If you are not confident in your abilities, you can check the finished pattern. To do this, you need to sew a test pair of gloves from inexpensive or knitted fabric. And using contrasting threads, you can make all the notes on what needs to be corrected.
- Transfer the pattern to the leather from the wrong side.
- Cut out the finished piece and baste it with a stitch.
- Turn it right side out and do a test fitting.
- Bend each element of the thumb in half lengthwise and sew.
- Cut the corner so that the right side is turned outward. Turn the finished element right side out.
- Pin the thumb blank to the glove with pins. Try on the gloves again. If all goes well, you can stitch the pieces together with confidence.
- Sew along the sides and finish the bottom of the finished product.
Important! You can experiment with this pattern and sew both short and long models of gloves reaching to the elbow. And to make such accessories easier to put on and fit beautifully on your hand, a number of small buttons should be sewn on the inside. In addition, the buttons will also serve as original decor.
Option #5. Winter children's gloves
To make them you will need very thick knitwear. If you need warmer gloves, you will also need fleece. In our example, gloves are made for not very cold winters and off-seasons.
Children's glove made of thick knitwear
First of all, prepare a pattern according to the size of the child’s hand. Mark where your thumb will be located and measure its length. Mark the depth of each finger in turn, connecting the upper and lower marks. Here is an example of the finished pattern.
Pattern of children's winter gloves
Place the fabric on the edge of the little finger (fold), trace the pattern. In the example, the bend location is marked with a dotted line. Cut an oval hole and sew a pre-prepared thumb element to it. When sewing in a finger, start with the mark in the middle, aligning the mark with the seam of the thumb.
Sewn-in thumb
How to sew a thumb
If you are planning any applique, sew it on now. Next, sew a lace (a strip of fleece is a good option) around the perimeter of all the fingers. The example uses a flat shoelace. Sew with a thick thread - first on one side, then on the other.
The photo shows the front and back of the glove.
Front side of the glove
Wrong side of the glove
After this, turn the glove inside out. If the child's fingers are small, it will be quite difficult to twist them - in this case, use the blunt side of a pencil or something similar.
You can make cuffs like on a jacket - this way the gloves will hold on better. To make a cuff, cut a narrow strip of fabric, sew it into rings, fold it in half and sew it to the product.
The finished gloves turned out warm
Important point! The end of the lace needs to go somewhere. If it is not fixed and processed, then, of course, it will fall apart. On the other hand, the treated tip will be prickly, so you should not leave it. You can, as in our example, sew on a small applique.
How to hide the tip of a red lace
Another photo of the inside of the glove
Actually, the children's gloves are ready. It's even easier to sew winter mittens - here's a good free pattern.
Pattern and stages of sewing children's mittens.pdf
Paper dragon claws
There is no better way to appreciate mystical creatures than to become like them! Make these paper dragon claws for a game or a house party and let your guests tremble in fear. For this craft, you need to prepare one sheet of paper for each finger. Keep in mind that the thinner the paper, the easier it will be to fold! Take the top right corner and fold it so that the top edge lines up with the left side of your piece of paper. The sequence of how to make a paper claw is shown in the photo below.
Claws using papier-mâché technique
You can make claws out of paper in several ways, but they are most realistic if they are made using the papier-mâché technique.
At the same time, a monster costume will cause much more delight than a ninja outfit, even if the hero is armed with bladed weapons and all the necessary accessories. And all because he has ordinary nails, and the monster has real, terrifying claws.
In order to make such an unusual craft you will need:
- toilet paper;
- putty for drywall;
- PVA glue;
- flour;
- wire or plastic rings;
- sandpaper;
- paints;
- varnish
You can make the main weapon of a monster as follows:
- Plastic rings are selected precisely according to the size of each finger, or their likeness is made from the most ordinary wire.
- Toilet paper is torn into very small pieces and filled with fairly warm water.
- Squeeze the paper pulp out of the water and measure out the required amount.
- Putty, flour are added to the paper pulp and glue is poured.
- Mix all the newly added ingredients together. If necessary, add a small amount of water.
- Each claw is modeled from the resulting paper pulp, sticking paper onto rings and creating the required shape. At the same time, they try to make the size a little larger, since the paper will shrink noticeably when drying.
- The material is given time to dry. This requires at least 36 hours.
- Only after the products have dried are they carefully sanded with sandpaper, thereby adding even more realism.
- The sanded products are covered with glue and left to dry for four hours.
- After this, the claws are covered with white paint and given time to dry.
- Next, bronze paint is applied, and time is also allowed for it to dry.
- Finally, the products are coated with varnish.
The process of making claws in this way is very painstaking, but it is in this case that the desired result can be achieved. Real monster claws are made from ordinary paper.
To make your own claws, you can use not only paper, but also cardboard, plasticine, metal or wood. It all depends on who this carnival accessory is intended for and what effect should be obtained. If a costume is being prepared for a children's party, then paper will be the ideal material; products made from it are the safest and simply cannot injure anyone. Teenagers can make such an unusual costume detail from cardboard. It is more durable and can remain intact until the very end of the party. Only adults can use metal or wooden claws in addition to the suit, but even they need to be as careful as possible so as not to injure themselves and others.
How to make fingerless gloves with your own hands?
Fingerless gloves, or mitts, are a great option for keeping your hands warm without causing problems when working with various gadgets. Mittens can be the same as regular gloves, made of leather, suede, lace or knitwear.
To make such a fashionable accessory yourself, you can use two methods:
- Sew mitts from a piece of fabric, using the above method for sewing full gloves as a basis. The most important thing is not to forget to “cut off your fingers” when creating a pattern.
- Use a ready-made old pair of gloves. Next, we will consider this option in more detail.
Giving new life to old gloves
To make mitts you will need:
- Old leather gloves (can be made from another material);
- Threads in color;
- Needles;
- Pencil;
- Scissors;
- Blade.
When everything is prepared, let's start making mitts:
- First, you need to turn your old gloves inside out.
- Measure the length that needs to be removed. Cut off the “fingers”.
- We make a small fold (about 1 millimeter) on each “finger” and stitch it.
The base of the mitts is ready. You can already wear them like this or decorate them, for example, sew on a zipper or bows. We suggest you give them a more stylish and original design. For this:
- On the wrong side of the upper surface of the mitt, draw rectangles of different sizes in a chaotic manner.
- Using scissors or a razor blade, cut them out.
Important! To avoid damaging the other side during cutting, place a piece of thick cardboard inside the product.
That's all, you have become the owner of ultra-fashionable mittens, which today can be purchased exclusively in expensive boutiques.
How to calculate the dimensions of a pattern?
Before you start sewing gloves, you must make their patterns. And for this, in turn, it is necessary to correctly calculate the dimensions of the gloves and the drawing. How the calculation is performed:
- the pads of the gloves should be 3 cm wider than the hand;
- The width of the thumb section should be 2.5 times larger than the thumb itself. There will be difficulties with removing gloves if the department is narrower;
- As for the width of all fingers, it should be increased by 2 times for each of them.
Calculation of glove pattern sizes
On a note! All types of gloves have their own characteristics, not only for wearing, but also for sewing. The difference lies both in the pattern construction technology and in the choice of materials. Below we will look at how to sew different types of gloves, analyze patterns and provide step-by-step instructions with photos.
Test drive in real conditions of a dacha near Moscow
For the test, gardening gloves with claws were purchased without a box. Unfortunately, there are no photos of the store appearance, here is a screenshot from the website of the store where they were purchased:
A few pictures after two days of active use:
Right, with claws
What work was carried out:
- weeding thickets of sap, where it was possible to tear everything;
- weeding lilies of the valley from dandelions and sedum;
- extermination of nettles in raspberries;
- removing weeds from the strawberry bed by loosening the soil;
- trimming strawberry mustaches with a knife;
- chopping dry rose branches with pruning shears.
All this happened from early morning until about two in the afternoon. In the morning, hands wearing gloves are quite comfortable, but when the sun starts to warm up, you want to quickly take off the rubber. My hands sweat a lot. Anyone who went into a deciduous forest during the day wearing a raincoat to pick mushrooms had about the same effect.
Weeding is good when you don’t have to choose where the weed is and where the right thing is. Otherwise, the process is greatly delayed due to the low sensitivity of the fingers - through gloves it is difficult to understand what you are squeezing: a strawberry stem or a pine tree. In dense thickets this is critical. For example, if you take off your gloves, you can feel edges on the stems of the tree that other plants do not have.
A few notes:
- Leather tends to stretch, so even if you made a slight mistake with the size initially, everything may not be so critical.
- It is advisable not to wet the gloves. Water can stain their hands. And if you get caught in the rain on a bicycle and ride for some time, the gloves will then take the shape of your hands on the handlebars.
- If you ride a lot and under the sun, a “bicycle” tan appears on the back of your hand, which will only go away in winter.
Why does a warrior need to protect his hands?
In medieval battle, when everything was decided by the ability to wield sharp edged weapons, it was equally important to protect vital organs and be calm about the condition of the hands holding the sword. After all, if you inflict even a slight, by no means fatal wound on unprotected hands, the battle can be considered over. The guards of swords and sabers, no matter how wide they are, will not completely remove the hands from possible blows.
In addition, massive handles when holding weapons for a long time will almost certainly injure the skin on your hands. Care should be taken to preserve it - for this purpose, it is worth making a soft lining in metal protective mittens and gloves.
These moments are relevant not only for real combat, but also for tournament battles and costume parades. Finally, metal “clothes” for the hands will complete the image of an armored knight - without this it would not be complete.
Construction of a drawing of gloves
The value of the dimensional attribute Palm circumference divided by 8.
Draw five vertical lines about 20 cm long with an interval of 2.4 cm. Draw a horizontal line approximately in the middle (to mark the finger lengths).
On the little finger area, move 1 cm down from the horizontal and draw another horizontal line here (the base of the little finger on the hand is lower than the other fingers).
From the horizontal lines, plot the resulting finger length values upward. Draw horizontal lines through the resulting points and divide them in half.
Create rounded lines for your fingertips.
Draw a hole for the thumb; to do this, along the 0/1 line, move 5 cm down from the horizontal (Аmpon). From the resulting point, set aside another 5 cm (the length of the muscle tubercle at the base of the thumb).
Set aside 0.5 cm inward from the right outer line and line 2/3.
From a point on the 0/1 line, 5 cm away from the horizontal, set aside 2 cm upward. From the resulting point, set aside 1.1 cm horizontally to the left and right (if your palm is wide, you can set aside a larger value). Make the top section of the hole for the thumb.
From the resulting horizontal line, move 1 cm upward along the 0/1 line. Through this point (on the 0/1 line) draw a line 2.1 cm long from the upper left point - a slot for the thumb (if you have a large hand, the line may be longer). Draw line segments c and d.
From the mark corresponding to the lower point of the hole for the thumb (from the lower point of the muscle tuberosity), place the Rebras (corresponding to the length of the glove). Connect the bottom point of the thumb hole with points 0.5 cm away from the vertical lines.
The following materials are cut out (for one glove):
- 1 piece with thumb hole;
- 1 piece without thumb hole - for the upper part of the glove.
Drawing a thumb drawing
Draw mutually perpendicular vertical and horizontal lines. Vertically from the intersection point, put the length of the thumb up, down - the length of the muscle tubercle at the base of the thumb.
Horizontally set aside from the vertical line to the left and right the value of the circumference of the thumb plus 1 cm.
From the top point of the vertical line, set aside 1 cm to the left and right and draw rounded lines for the fingertip. Draw a smooth line (see drawing) on the lower section of the part for the thumb through the bottom point of the drawing.
The length of the line should be the circumference of the thumb hole plus 2.1 cm.
Option No. 8. Waterproof gloves from a bag
These gloves will come in handy for doing some dirty work. They can be made from any package.
Step 1 . Prepare everything you need - thick film (for example, a garbage bag), a stationery knife, an electric soldering iron and a marker.
Step 2 . In our example, we use a regular garbage bag.
Using a trash bag
Step 3 . This bag is already two-layer, so there is no need to fold it in half.
The package is placed on a flat surface
Step 4 . Place the bag on a flat surface, place your palm on it, fingers spread. Trace your hand with a marker, retreating about 5-7 mm from it.
The hand is outlined with a marker
Step 5 . Trace the outline with the tip of a heated soldering iron. This way you will burn through the film and connect both layers in parallel. Don't forget to place cardboard under the film first.
The circuit is traced with a hot soldering iron
Step 6 . Circle everything except the bottom - cut a line there with a stationery knife. The finished glove can be easily removed from the film.
The line is cut from below with a knife
On a note! Instead of a soldering iron, you can use an old knife, heating its tip over the fire. You can make as many of these gloves as you like at one time.
Trying on a finished glove
Make the cuffs long enough to protect the sleeves from splashes.
What is plate hand protection?
At the dawn of wars with edged weapons, fingers were covered first with leather, then with chain mail mittens and gloves. To protect hands in armor, starting from the 14th century, the following armor parts were used:
- plate gloves of various styles;
- plate gauntlets and half-mittens.;
- “fists” are metal and leather.
In order to put a hard metal part on the fingers, it was necessary, in addition to protection from blows and cuts from the enemy’s weapon, to ensure a soft touch and the impossibility of knocking out one’s sword. Therefore, in addition to gauntlets, you can purchase a soft mitten made of linen or other fabric and thick batting. These inner mittens can also be purchased separately - on this page you will find several convenient options.