Have you never made a leather wallet with your own hands, and do you think it is difficult and impossible? Nothing like this! Even if you don’t have special equipment for sewing leather, you probably have scissors, a knife, a scalpel, an awl in every home. And an old leather bag, or a leatherette jacket that has gone out of fashion, can be used for sewing wallets.
How to prepare your skin for work - there are many ways to cleanse. For example, if there is dirt or stains on the skin, you can clean the surface with a sponge with the addition of baby soap foam, warm milk, or coffee grounds. Just do not forget that the leather cannot be washed - it becomes brittle and warps. Handmade, custom-made wallets are expensive, so give your gift with confidence - just put any coin inside.
Main characteristics
It doesn’t matter at all whether your wallet is classic or designer and unusual, it must meet a number of requirements to make it convenient to carry with you and constantly use:
- The size of the wallet should be such that it can accommodate banknotes of any denomination. Money should be removed from the wallet freely, without getting stuck or crumpled;
- The wallet must be securely closed so that nothing falls out of it. Zippers, buttons and Velcro are used as fasteners;
- The finished wallet must be decorated. It is better to decorate even the most laconic men's wallet with decorative stitching or embossing.
A high-quality handmade wallet can easily replace a store-bought version, and as a gift it will show your love and respect for the birthday person.
Crocheted wallet: pattern
A cute wallet for storing paper money and coins can be knitted or crocheted. several useful diagrams for this
Option No. 1 with knitting needles Option No. 2 with knitting needles, openwork wallet
Option No. 3, knitting needles
Option number 4, crochet
Option number 5, crochet
Material selection
You should choose the material for your future wallet based on its wear resistance. Since a wallet is constantly being taken out of a bag or pocket and rubbed against surfaces, the material must be smooth and resistant to wear.
On the Internet you can find many photos of handmade wallets made of genuine leather, but this is not the only material from which you can make a wallet with your own hands. Suitable for sewing:
- High quality synthetic leather;
- Soft PVC;
- Thick denim;
- Natural or artificial suede;
- Felt;
- Jacquard;
- Thick raincoat fabric.
DIY sewing
You should wear a thimble while sewing to protect your fingers from needle pricks. Leather is a very thick and dense material and requires strong pressure when sewing.
Pattern for a wallet
Before you start sewing a wallet, you need to prepare pieces of leather or leatherette, as well as the tools that will be needed to complete the work. First you need to choose a product model, you should start with a simple wallet shape, so the chances of a beautiful final result will double. Use old paper or unnecessary document to create a pattern.
Pieces of leather
They begin work by creating a pattern from leather goods and cutting out parts. For beautiful cutting you need a sharp knife. It is recommended to use a utility knife, but you can also cut the material using a scalpel. You will need scissors, you can use special ones for leather, but if you don’t have them, use ordinary ones, the main thing is that they are sharp. Prepare wallet patterns from leather so that the glue adheres better; the leather is degreased using nail polish remover or alcohol.
Transfer the wallet pattern to the skin using a ruler and pen, cut out all the details with scissors or a knife.
What does a DIY leather wallet pattern look like?
The next step after cutting out the pieces is to polish the edges. The master does this using special tools; at home, the edges can be polished with wax; all you need is an ordinary candle.
You might be interested in Interesting patterns for children's T-shirts for boys and girls
When all the details of the leather wallet pattern are ready, create the outer layer. For it you need to sew all the parts so that a large rectangle is formed, which, when folded in half, will give an even fold. Bend the edges and make a middle fold line.
Attention! To create a neat middle fold, each piece of material is sewn tightly together. They use what they have, a sewing machine or just a needle.
Folding the edges
Using a compass, an awl or a non-writing pen, draw a recess at the stitching site. You should get a rectangle that needs to be folded along the middle fold line, but you should not immediately attach the outer edges of the product; the next step is to glue the pockets.
To create the inner part of the product, a fabric or thin material is taken, to which a zipper is sewn; the size does not matter. Then the resulting pocket must be glued to the outer shell. Before gluing it is necessary to degrease the surface.
Gluing the pocket
Next, holes are made in the inner pockets. To do this, take an awl; if you can’t pierce the skin with a needle, use a hammer. Craftsmen use a special tool to pierce the skin - a punch, which is equipped with small teeth. The cloves are arranged in a row and somewhat resemble a wide fork. When the instrument is struck, holes are formed in the skin.
Also, using an awl, holes are made on the outer shell of the product, this is necessary in order to make a fastener. You can sew a button or make a hook. A DIY leather wallet based on the pattern is almost ready.
Next, a groove is made on the outside of the wallet. This is done using a hammer. You need to find a suitable surface so that it is flat and preferably made of granite or marble, since these minerals prevent loud sound from spreading throughout the apartment.
Oil lubrication
Then the wallet is lubricated with oil. The oil gives the skin elasticity and does not allow it to quickly deteriorate, which ensures long-term use. It is better to use natural animal oils, since vegetable oils lead to rotting of the threads. Old masters use cow, pork and sheep fat. After sewing on the zipper or inserting magnetic clasps, the wallet pockets are sewn together.
You might be interested in How to make a cat yourself from fabrics: patterns
Next, you need to sand the edges of the product so that everything looks neat. Trim irregularities with scissors or a knife, if necessary. Polish the long edges of the wallet with wax to prevent them from bristling. Polishing begins with processing the edges, it is necessary to cut off all irregularities and wipe with sandpaper, then round the edges with scissors. Next they make a mixture to smooth the ends. Mix soap and water and rub into the edges.
For final polishing of the surface, the product is again lubricated with oil. At this stage, you can apply paint or decorative elements.
Type of leather pattern
Preparing for work
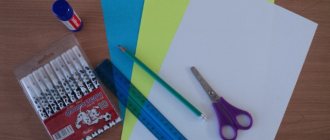
Before you start creating a wallet, you need to prepare a sketch and all the necessary tools. You should have on your table:
- Sketch and paper pattern;
- Thick threads and scissors;
- Zippers;
- Main material and lining material;
- Dublerin if you are using soft fabric;
- Cardboard. It is needed to give shape to compartments for storing plastic cards;
- Thimble;
- Decorative elements, if they are intended for decoration.
Wallet accessories can be purchased at leather goods stores or craft stores.
Before starting work, it is necessary to think through in detail all the stages of work and their sequence, and perhaps write a plan. If you have any difficulties with the sewing technology, carefully watch a master class on how to make a wallet on the Internet, preferably in video format.
How to clean a leather wallet?
A leather wallet is an item of daily use. That is why it often gets dirty and because of this it loses its appearance. To avoid unpleasant situations with showing off a dirty wallet and help your accessory keep a “worthy appearance,” you should use the following recommendations for cleaning it:
- The inside of the wallet must be wiped with a dry cloth.
- You can also wash your wallet with a weak soap solution, previously whipped into foam.
- If you wash your wallet with a sponge or cloth, carefully wring it out to remove excess moisture.
- After you have wiped your wallet with a damp cloth, dry it with a dry towel.
- Wait for it to dry and lubricate the wallet (only those made of genuine leather) with a minimal amount of topical lotion or hand cream.
Women's fabric wallet
Before sewing a simple women's wallet with your own hands, prepare the main and lining fabric, double fabric, scissors, threads to match the fabric, a needle, a clasp and a small zipper.
Cut out a template for the future product from paper or cardboard. Duplicate the fabric. To do this, apply the adhesive fabric from the back to the main one, place a piece of cotton on top, iron it with a hot iron.
Cut out the fabric, be sure to leave 1 cm on each side for seams. Sew in the zippers. Pockets without a zipper can be folded and ironed or trimmed with bias tape.
Note!
- Macrame: diagrams, interesting projects and detailed descriptions of making crafts
- Crochet amigurumi - examples of how to make a beautiful toy with your own hands (75 photos)
- Coffee topiary: step-by-step master class on how to make a small decorative tree from coffee beans
Make a photo window out of a plastic bottle. Connect the pockets together;
Sew the pockets to the main piece. Sew a strap fastener with a button. Sew decorative trim along the edges of the wallet.
Required Tools
You may need:
- leatherette or genuine leather;
- scissors (large and small);
- degreaser (alcohol or nail polish remover);
- rubber hammer;
- line punch;
- compass;
Leather wallet
- lightning;
- leather cutter;
- stationery knife;
- wooden board;
- a handle with a roller for painting the edges of the leather;
- pattern for leather;
- special threads and needles for piercing the skin.
Tools for DIY sewing
Children's wallet made of felt
Since the children's wallet is not used for its intended purpose, it can be made from soft multi-colored felt. This fabric does not require edge finishing and can be easily hand-stitched.
Children love wallets in the shape of funny animals. To sew a felt owl wallet you will need multi-colored pieces of felt, thick embroidery thread, scissors, adhesive doll eyes and a zipper.
The front side of the product is created according to the principle of appliqué. The parts are sewn with an over-the-edge seam or a classic stitch. You can also glue the parts using a glue gun. The reverse side will be plain.
You need to insert flap strips between the front and back parts to make the wallet easier to open.
A zipper is sewn into the upper part of the wallet. A small carabiner with a cord can be attached to the owl's ear so that the owl wallet can be attached to a child's belt or backpack.
The finished product can be decorated with beads or buttons.
Wallet made of transparent polypropylene
Recently, transparent products have come into fashion: backpacks, bags and boots... They look very unusual and attract attention. Why not make a wallet of this format? Yes, the contents of the wallet can be seen by other people, but this option is for those who like something unusual. In addition, the wallet can be made only partially transparent by painting with acrylic paints.
To create such a wallet, you can use:
- Thick covers for books and notebooks (found in the stationery department);
- Transparent folder corners;
- Folders with a plastic zipper.
The finished wallet will look like a cosmetic bag if you combine several small (A6 format) folders with a plastic lock.
You can connect the parts using an iron (Under parchment paper on both sides. This will allow the plastic to melt and stick together) or sew with regular threads by hand, on a machine. Alternatively, to make it more unusual, you can use bright colored threads.
Coin box made from old jeans
An original small coin purse can be made from unwanted jeans. In addition to old trousers, you will need:
- Lining fabric;
- Press for accessories;
- Thick cotton threads;
- Lightning;
- Magnetic snap closure.
To sew a coin holder, it is better to take the lower part of the jeans legs, where the fabric wears out less:
- Cut out the details of the wallet from jeans;
- Cut out pockets from the lining fabric; the edges can be stitched or finished with bias tape;
- Sew in a zipper;
- Sew two small denim flaps and sew a magnetic fastener on them;
- Sew side seams and pockets;
- Sew bias tape around the edge of the wallet;
- Decorate the product.
You can also sew a wallet from an old leather bag. If you combine pieces of the same material of different colors in one product (for example, from several old belts), you will get a patchwork style wallet.
To sew an original wallet for yourself or as a gift to a friend, you don’t have to spend a lot of money. To do this, you just need to be inspired by an interesting idea and set aside a few hours to create a masterpiece.
Fabric wallet
A more affordable material for making a wallet is fabric. Its selection is huge in special stores, which can help make any idea come true.
Just like with leather, you must first create patterns and then transfer them to fabric. Sew and process the blanks using a sewing machine or by hand. And to compact the fabric, you can use non-woven fabric.
To fasten a fabric wallet, it is better to use a lock rather than buttons.
Photos of DIY wallets
Leather wallet patterns
- We gut any thin box or use cardboard, or, as a last resort, an ordinary sheet. The base for the future front side will be 17X11 centimeters.
- Under two pockets for 7.6X11 bills. Under two slanting pockets 7.6X9X7 (one is possible). There will be three templates drawn with a pen and cut out with scissors.
- We trace the templates on the back side of the workpiece with a pen. You should get four or five stencils in total.
- We take a thin ruler as a cutting guide; you can replace it with any metal product with a straight side. Using a roller knife, cut out template pieces using stencils.
- Next, a coin of 10 kopecks or a ruble and on the largest piece with a pen we apply the rounding of the ends. On money pockets there will be two such curves - where they overlap the main part along the outer edge. There is one on the business card pockets.
Important! Take your time with small workpieces; you will always have time to cut off the rounded edge. Only when you are sure in a place that you definitely need to cut here, then do it. At the same time, do not confuse the external and internal sides, this happens often.
Preparing to Staple
It won’t take much time, but you need to pay attention:
- It is advisable to chamfer the beveled edge of small pockets. This is done with a hammer, if you don’t have one, you can try with a small needle file. You shouldn’t even try it with a blade, it’ll ruin it. You can leave it as is.
- We mark future holes with an indentation of 5 millimeters. As a starting point, you can determine one of the angles - along the bisector. The distance from the edge is at the discretion of the master, conditionally - also 5 mm.
- We punch the marked holes with an awl or a line punch. We put any board underneath.
- If you have any decorative metal thing at home (badge, military symbol, emblem), then it’s time to think about aesthetic decoration. Just think about how you will attach it. The easiest way to use military symbols is they have special antennae. Such things can be found in the nearest hotel with sewing accessories. It costs a penny, but it will look like a million!
Attention! No holes are needed where the wallet is folded.
We have all the details ready for the next stage.
Stitching
In order to do this conveniently, the product must be fixed. Rubber or wooden pieces can be glued onto the jaws of a metal vice; they can then be easily removed. If there is no vice, then take two planks or bars 30-35 centimeters long. Secure one end with twine, trimming the edges of the wood. Insert a suitable eye screw or bolt with washer into the drilled hole in the middle. The mount is ready!
First we fold the two inner pieces (when you turn them over, then the remaining ones) and secure them. We sew with a saddle stitch using two needles and threads, working in a mirror manner. More information about this method can be found online. This type of seam is the strongest, but if you don’t want to find out the details, then use one needle. Only then will you have to go through it again, in a checkerboard pattern - closing the open gaps without thread. We hide the ends of the thread and knots inside.
We sew the resulting couplings according to the pattern already completed to the cover.
That's not all, the product still needs to be finalized. This is done by trimming the edges using a special technique.
How to work with leather?
Making wallets has its own tricks. This material is different from fabric and requires a completely different approach. The most important thing in the work is the precise pattern, which is made from thick cardboard or wood.
Important! Thin paper patterns will wrinkle and it will be impossible to cut out an even piece.
- We lay out a piece of leather on a hard and flat surface - linoleum, a special mat.
- We transfer the template to the front side of the material.
- Mark the places for the seams.
- We make holes for the stitching.
- Then the product is assembled and the edges are tinted.
This is the basic procedure for working with a wallet pattern. If you sew the pieces together right away, without pre-made holes, the product will come out crooked.
Important! The parts are also sewn together using a sewing machine. But an even stitch is easy to do by hand. To do this, they use a special method - working with two needles. The first goes from below, the second from above. The threads are threaded through the same hole.
Selection of sizes and drawings of wallet patterns
First of all, it was necessary to decide on the size of the wallet based on the size of the largest bill, and make patterns from paper. Banknotes of 1000 and 5000 rubles have the same dimensions 69x157 mm. The rest of the dignity is smaller.
Thus, the width of the compartment for paper bills, taking into account their possible number and a seam allowance of 6 mm, should be at least 172 mm. As a result, the size of the wallet was 80x172 mm. Based on these data, patterns were made from thick paper.
After unraveling the seam and removing the inner fur lining, a flat sheet of genuine leather was obtained. To determine if the size of the leather plate was sufficient for making a wallet, the patterns were laid out on it. I was lucky that the sheet of leather from the boot was large enough to not require additional sewing.
How to smooth natural leather
The leather sheet from the boot had folds and uneven surfaces, which was unacceptable for making a purse.
Therefore, before cutting, it is necessary to align all the folds. The easiest way to do this is to use an iron for ironing clothes.
The skin plate was placed, flesh side up, on a sheet of plywood and covered with cotton cloth. Using a spray bottle, the fabric was slightly moistened with water. If you don’t have a spray bottle, you can simply soak the cloth in water and wring it out.
The temperature control knob was turned all the way clockwise (maximum heating). With a heated iron, you need to iron the entire skin by applying it with simultaneous pressure, and when the steam stops, lifting the iron. The essence of smoothing is to heat the skin with steam, as a result of which it softens and, due to pressing, is well leveled.
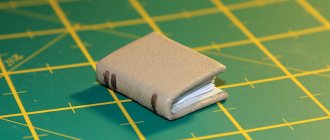
After smoothing the leather with an iron, you need to press it on top with something flat, for example, a sheet of plywood, and leave it there for several hours so that the leather dries. As you can see in the photo, there are some small uneven spots left on the leather, but they won’t interfere with cutting and sewing the wallet.