The Snow Maiden is the faithful companion of Father Frost. If you don’t have it, don’t run to the store. It’s better to make this winter beauty yourself. A handmade toy will always be preferable to a factory-made product.
In addition, it can become an exclusive gift for a loved one or colleague.
How to make a beautiful Snow Maiden with your own hands? About this and more in this article.
Volumetric Snow Maiden made of paper
To make the Snow Maiden from paper you will need the following materials: glue, scissors, ruler, felt-tip pens, a simple pencil and yellow, white and blue paper.
First you need to cut out the blanks (you can use a template): from blue paper - a semicircle with a radius of 10 centimeters, two hands in mittens, and a kokoshnik 5 centimeters high and 8 centimeters wide. From yellow paper: strands of hair - two strips measuring 6x2 centimeters, bangs - a semicircle with a radius of 3 centimeters. From white paper: the face - a circle with a radius of 3 centimeters (then draw the eyes, nose, mouth), the edge for the dress - a strip of 10 × 2 centimeters and the edge for the mittens - two strips of 1.5 × 1 centimeters.
After this, you need to roll it into a cone and glue the largest blue semicircle. Glue a strip of fringe in the center, having previously cut it. Next, glue the same fringe onto the mittens and attach them on both sides of the cone. Then cut a yellow semicircle along the edge (bangs), and glue the yellow stripes (hair) onto the white circle. Attach the kokoshnik to the head, and then you can glue the head to the finished, beautiful dress. If you wish, you can decorate the hem with pre-cut snowflakes. The paper Snow Maiden is ready.
Creating an Environment
One figure of the Snow Maiden does not look as beautiful and impressive as in the corresponding environment. Initially, you need to decide where exactly it will be: in the forest, at home near the Christmas tree, next to Santa Claus, etc.
A full composition will look much better than a single figure. However, it will not be possible to use it as a small decorative element.
The easiest way is to make a forest or a small Christmas tree, near which the Snow Maiden will stand. If the decision is made to make a Christmas tree, then the cone is again used as the base.
To imitate branches and emphasize the features of the Christmas tree, you need to wrap thin tinsel around the cone (if you have it and the size of the figurine allows it). A more affordable option would be to make the decoration for the Christmas tree yourself, but this is a painstaking and time-consuming process.
There should be a star at the top of the tree; in the classic version it is red, but white or blue can also be used.
Forest
If you plan to create a completely coniferous forest, using cones as bases for the figure will not work. This is due to the fact that the composition will be too oversaturated with identical elements, which will make it uninteresting.
For these elements it is better to use real twigs, which can be found in any forest.
This approach will create a more realistic forest with the unique shape of each individual tree. Coniferous trees must have needles; to make them, you can use the same approach that was used to create the edging of the Snow Maiden's fur coat.
Such a craft will definitely attract attention, delight the eye and decorate the room.
As a children's craft, this is the best option for the winter season; it reflects the main holiday of winter, as well as the main attributes: Christmas trees and snow.
Moreover, creating such a composition together with a child significantly brings the family closer together, develops a level of trust, and is also a great way to while away a winter evening.
Origami Snow Maiden - paper diagram step by step
You can make the Snow Maiden using the origami technique. For this you will need: blue or dark blue paper 20*10 centimeters, a pre-printed or drawn face, a white oval with a diameter of 5*1 centimeters, glue, scissors, decorations (with adhesive base). Next you need to follow the following steps exactly:
- Place the blue rectangle on the table, with the short side facing you and the white side down.
- Fold it exactly in half.
- Expand.
- Fold the bottom edge 1 centimeter.
- Turn the workpiece over with the blue side down.
- Fold the paper exactly in half (top edge over bottom edge).
- Turn the workpiece over. Fold the left and right edges towards the center.
- Turn over.
- Fold the vertical edges towards the center.
- Bend the right side towards the center, extending the corner of the part. Perform exactly the same operation on the left side.
- Turn the workpiece over.
- Glue the head to the top of the Snow Maiden's fur coat.
- Fold the white oval in half and cut along the fold line. We got mittens, glue them into the sleeves of the fur coat.
- Use adhesive-based decorations to decorate the hem, sleeves, fur coat clasp and kokoshnik.
The Snow Maiden using the origami technique is ready.
Snow Maiden stencils for cutting out on the window
Decorating the windows of your apartment, house or cottage is a great idea for the New Year holidays. The image of the Snow Maiden is loved by people of all genders and ages. Therefore, such jewelry will always be fashionable and relevant. The designs of the stencils themselves today can be found in a wide variety of designs: from a chubby girl to a Barbie-style lady. Another advantage of this decoration is its ease of manufacture.
Felt Snow Maiden - step-by-step master class and patterns
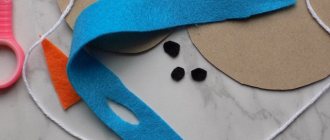
The Snow Maiden made from felt turns out to be very beautiful. To make it, the following materials are needed: blue (blue), white, yellow and gray felt. It is also good to prepare threads in the color of felt, filler, sequins and beads (for decoration), scissors, paper, glue.
First you need to prepare a pattern. Next, transfer the pattern to felt, cut out all the details (fur coat, kokoshnik, mittens - from blue, face, edge - from white, braid, bangs - from yellow, felt boots - from gray). It would be wonderful to embroider the braid with golden threads. After this, you need to design the Snow Maiden’s face (draw or glue on eyes, mouth, nose, cheeks). Decorate the edge of the fur coat and mittens with beads and sequins. Next, you should put the filler into the body and head and sew it up. At the end, you need to attach a kokoshnik, mittens and felt boots to the figure.
Tights
Pattern of tights and layout of the pattern on a mesh folded in half:
We fold the cut parts, aligning 1, pin and stitch, placing a sheet of paper under the stitching seam (the mesh does not stretch and the stitching is smooth)
We release the seam from the paper and turn the parts of the tights inside out
We fold the parts of the tights with the right sides inward, combining 2 and 3, pin them together, and then stitch them together, placing a sheet of paper under the stitching seam. Then. Release the seam from the paper.
We sew a figured rubber band along the upper edge of the tights.
Tights with a back seam are ready.
Snow Maiden made from salt dough - how to make it yourself
Snow Maidens made from salt dough are very popular. To prepare it, you need the following materials: water, flour, salt, knives and spoons that are used in working with plasticine, star-shaped pasta and paint.
First you need to knead the dough, preferably like dumplings (it should not be very liquid or hard, it is best to be plastic). Then you need to roll out one part of the dough and shape it into the Snow Maiden’s body, then make arms, legs and a head. Then, using special knives, cut out the kokoshnik and fur coat collar. Attach all this to the body. Then you can decorate the kokoshnik and the hem of the fur coat with star-shaped pasta. And at the very end, all that remains is to decorate the Snow Maiden using paints to your own taste. You can also add a paper frame.
Fantasy - to help
Don't say that you don't know how to draw, sew or sculpt. To be creative, it is not at all necessary to have special skills, abilities and talents. The main thing is desire and inspiration!
Use the most unusual materials in your crafts and be sure to come up with your own decor and design. Your sense of taste and imagination will help you create not just a children's craft, but a real masterpiece!
Do-it-yourself Snow Maiden doll made of fabric - step-by-step master class with patterns
Another option for making the Snow Maiden is from fabric. For this you need the following materials: paper, pencil, scissors, cotton fabric, satin ribbons, padding polyester, threads, beads, pompom, pins. Next you need to follow the instructions:
- On paper, draw all the parts of the future Snow Maiden and her clothes. Cut it all out
- Prepare a beige fabric for the body and fold it in two layers.
- Lay out the paper parts of the Snow Maiden on the fabric and attach them with pins.
- Trace the body parts on the fabric with a pencil and machine stitch them.
- Cut out all the parts with a slight overlap, make small notches in the corners of the parts and on the rounded places.
- Place all the details of the Snow Maiden with the right side inward, pin it together with pins, baste it first with hand stitches, and then go over it with a machine stitch.
- Turn all the parts right side out, using a special stick to do this, so as not to damage the fabric in any way.
- Fill all parts with padding polyester.
- Insert the arms and legs of the Snow Maiden into the body and sew with neat stitches.
- Using the same principle, you need to prepare a dress (fur coat): first make a pattern on paper, transfer it to fabric, cut it, baste it, sew it. At the end, sew on the details: lace or trim.
- Put the dress on the body, carefully tuck the bottom with a stick so that the threads do not stick out.
- After this, you can begin to style the Snow Maiden’s hair: it is important to sew each curl individually to the head.
- Next is the face: with a simple pencil, outline the contours of the eyes, mouth, cheeks, lips, and then draw everything well with paints.
- You can make Snow Maiden boots from white fleece and decorate them with blue ribbons.
- From knitted fabric you will get a hat with a pompom, which needs to be sewn well to the head.
- You can make a scarf from yarn, decorate it with ribbons, beads and tie it around the Snow Maiden’s neck with a few stitches.
Eyelashes
And now the eyelashes! To glue eyelashes I use clear nail polish and a needle. It is necessary to cut the eyelash tape along the length of the upper eyelid and trim part of the eyelashes at an angle for a more natural look.
First I coat the outer part of the eyelids and glue the eyelashes very carefully using a needle. Then I glue the inside. When the varnish dries a little, you need to use a needle to tilt the ribbon with eyelashes perpendicular to the eye. Clap clap! Eyelashes are ready!
Author Doll parts
Snow Maiden under the Christmas tree made of cotton wool
The classic version of the Snow Maiden is the one that can be made from cotton wool. To do this, you will need the following materials: cotton wool, hard and soft wire, threads, corrugated cardboard, paints, brushes, scissors, water, starch, glue, beads, beads, ribbons and rhinestones.
The manufacturing technology is as follows. First, you need to draw a sketch of the Snow Maiden on paper. Then, using hard and soft wire, make a silhouette frame. Make a paste from water and starch (1.5 cups of water and 3 tablespoons of starch). Dip cotton wool into it and cover the corrugated cardboard (future stand), then fill the frame with cotton pads soaked in this paste, giving the desired shape. Place it on the radiator to dry overnight. On the second day, using cotton wool soaked in paste, you need to make the Snow Maiden a fur coat and mittens. Then you can fix it on the stand, having previously made two holes there for the legs. After drying, the figurine must be decorated with paints, a face drawn, hair glued, a fur coat and mittens decorated with rhinestones, beads and beads. At the very end, apply a thin layer of paste and dry thoroughly again.
Plasticine girl
Plasticine is an excellent option for creative activities with children, even the youngest. Kids enjoy imagining, creating interesting and funny figures of their favorite fairy-tale characters. For children in the nursery group, soft plasticine is best suited, for preschoolers - harder. The figurines can be decorated the way you like - the main thing is that our Snow Maiden turns out to be cheerful and bright.
Snow Maiden made of plasticine
Making the Snow Maiden from plasticine is a fun activity for both children and adults. To do this, you only need blue, white, light blue and pink plasticine and two toothpicks.
First you need to prepare three balls: a large blue one and two small white ones. Make a cone out of a blue ball, this will be the Snow Maiden’s fur coat, and narrow rollers out of white ones for finishing. For the hands you need to prepare six balls: two blue, two light blue and two white. The blue ones will make hands, the white ones will make trim for a fur coat, and the blue ones will make mittens. It is important to connect your arms well with your body. After this, you need to insert two toothpicks into the body, on which to put the Snow Maiden’s head, made of pink plasticine. The hat will be made of blue plasticine with white trim.
Popular ideas
After watching a video on how to make a Snow Maiden with your own hands, located on the Internet, we can conclude that three methods of making such a toy are most in demand: from paper, from a bottle and from cotton wool. Let's look at each in more detail.
Snow Maiden from a plastic bottle
Another version of the Snow Maiden is made from a plastic bottle. To do this you will need a plastic bottle, glue, multi-colored felt and paper napkins, and a round cardboard stand.
First, you need to make a head for a figurine from paper napkins and glue it to the neck of the bottle. Wrap the stand in a blue or blue napkin and glue it to the bottom. Next, you need to attach a sundress, hands in mittens and a hat to the bottle with glue. All this is made from blue, pink and white napkins. If you wish, you can draw the Snow Maiden’s face.
Snow Maiden from toilet paper rolls - making a craft from scrap materials
Children love making the Snow Maiden from toilet paper rolls. It's simple, fast, and at the same time interesting. For this figure you need: a roll (sleeve), colored paper, glue, scissors and pencils.
First, you should measure the radius of the sleeve, then completely cover it with blue paper; if there is excess left, it doesn’t matter, you can always cut it off. Then trace the templates on colored paper, having previously downloaded them from the Internet, cut them out and paste them. You need to pay attention, if there is no ready-made face, it is better to draw it before attaching it to the sleeve.
Snow Maiden made from old light bulbs
The Snow Maiden made from an old light bulb looks very interesting. The technology of this process is as follows.
It is necessary to prepare a light bulb with a “skirt” (aka pear-shaped), first paint it white. Next, you should place cotton pads soaked in PVA glue on the base and form the head of the future figurine. From the same cotton pads you need to make hands, mittens, trim for a fur coat and hat and glue them to the selected light bulb. Then it is important to dry it well. After this, you can begin to carefully paint the Snow Maiden. Next, you need to make a braid from the threads, under which you need to attach a loop for hanging the figurine on the Christmas tree. At the very end, you can decorate the Snow Maiden with rhinestones, beads or beads.
Snow Maiden made of pine cones
The process of making the Snow Maiden from a fir cone is interesting. For the craft you need: fir cones, chenille wire, plastic spoons, ready-made eyes, hologram tape, plasticine, plastic caps.
First, it is important to choose a good bud; it should be strong and not very small. On its base, using PVA glue, you need to glue a wide cap from a water bottle. This will be the base of the figure. A plastic spoon should be glued to the top of the head, which will become the Snow Maiden’s head, and cotton swabs on the sides, they will be hands. Allow the glue to harden and dry thoroughly. After this, you can begin the painting process. The cone itself and the sticks must be painted blue or dark blue, and the Snow Maiden’s face must be drawn on the spoon. At the end, you can decorate the figurine with rain, beads and rhinestones.
Curls
I make curls with a soldering iron with a copper florist attachment. They come in a variety of textures, mine is the most suitable for curls 
Strand by strand I twist the entire mass of hair, depending on the nature of the curl (in this case, I twist from the roots of the hair). The hairstyle is ready!