One of the best options for spending time with your child is to make some crafts and trinkets with him. After all, this is how his parents instill in him a love of work from a very early age. Making all sorts of gizmos also has a positive effect on children’s artistic abilities and creativity, which is recommended to be developed from a very early age. In addition, as many people know, the development of fine motor skills of the hands and fingers has a positive effect on brain activity. Based on all this, we can say with confidence that making crafts from something is a pleasant and very useful activity for both children and parents.
It often happens that our home stores a huge variety of materials with which you can easily show your design and creative abilities. Ordinary household items can be used in making crafts, thereby giving it a second life and giving yourself and your child a positive mood. In addition, such an activity can easily be called participation in waste recycling, but concern for cleaning the environment should be a priority for absolutely every person.
For example, do not rush to get rid of such a seemingly extraordinary thing as used toilet paper rolls. With the help of these tubes, having accumulated a sufficient number of them, you can make many different interesting crafts, which will subsequently delight the eye.
Little Mermaids
You will need: 2 toilet rolls, colored paper, scissors, paints, glue, markers and glitter.
Master Class
- Paint the bushings a tan beige color.
- Draw a face for the little mermaids.
- Cut out of colored paper: strips for hair, blanks for a bra, a skirt, a starfish to decorate the head and a mermaid tail, as shown in the image.
- Curl the hair strips using a felt-tip pen.
- Glue the cut pieces to the bushings.
- Decorate the mermaid's tail with glitter.
Mermaids made from bushings are ready!
Advantages of material selection
The advantages of working with toilet bushings include the following criteria:
- Availability of consumables.
- Ease of working on creating crafts.
- Large selection of various crafts and useful little things.
- No financial costs.
- Working on crafts is a fun activity for children and their parents, which allows them to develop memory, thinking and plot perception.
Cardboard and paper from which the sleeves are made are an excellent basis for subsequent decoration and decoration.
Organizer for rubber bands
You will need: a sleeve, fabric, a glue gun, a plastic cap with the diameter of the sleeve, 4 push pins.
Master Class
- Cover the sleeve with fabric, leaving one circle open.
- Cut out a circle of fabric and glue it onto the plastic lid.
- Insert 4 push pins as legs to make the organizer stable.
The organizer for rubber bands from the sleeve is ready!
DIY.ORGANIZER with UNICORN.Do-it-yourself ideas from sleeves/How to make organizer.Hand made.
Heroes of fairy tales made from cardboard tubes
Take out the toilet paper roll, because this is the basis of one of the crafts. Everything that needs to be completed: arms, legs, ears, eyes - this can be easily done with multi-colored paper, fabric or even felt-tip pens.
Hare binoculars
You will need: 2 bushings, cotton wool, glue, thick mega-fluffy chenille wire, pink pompom.
Master Class
- Glue the 2 bushings together.
- Roll out many cotton balls of approximately the same size.
- Glue cotton balls onto the sleeves.
- Form the bunny's ears out of fluffy wire, then glue them on.
- Glue a pink pom pom between the sleeves as a spout.
The hare binoculars made from bushings are ready! I recommend watching this video!
DIY crafts: PHONE HOLDER from toilet paper rolls – Innova Crafts
Angels
This symbol is often used when celebrating Christmas. Catholics celebrate this holiday earlier than the New Year, and Orthodox Christians celebrate it later.
Religion does not depend on whether angels are needed or not, they will be a wonderful addition to the holiday. Angels will look very cute and there are several ways to create them.
Teenage Mutant Ninja Turtles
You will need: 2 bushings (for one turtle), scissors, glue, clothespins, black marker, green and yellow paints, painting sponge, colored paper, decorative eyes.
Master Class
- Cut strips of colored paper and make a belt as shown in the image.
- Cut out a strip of colored paper that will later become a blindfold.
- Cut off part of the sleeve, shortening it slightly, then cut off the corners and shape it into a shell.
- Paint the front side of the shell yellow and the back side green.
- Draw abs cubes with a black marker on the yellow side and diamond shapes on the green side.
- Vertically cut off part of the sleeve, glue the edges to make the sleeve narrower, then secure with clothespins until completely dry.
- Remove the clothespins and paint them green.
- Apply glue to the inside of the shell and glue the narrow sleeve.
- Cut out a blindfold from colored paper and glue it on, securing it with a clothespin.
- Glue the belt.
- Make and attach the head as shown in the image.
- Glue on the turtle's eyes.
- Make a whole team of Ninja Turtles the same way.
Ninja Turtles made from bushings are ready!
Apple shaped pencil
You will need: an oval-shaped plastic bottle, red liquid acrylic paint, golden cord, artificial leaf, glue gun, plate, nail file.
Master Class
- Pour paint into the bottle and shake well so that the entire inner surface of the bottle is painted.
- Drain off any remaining paint.
- Place the bottle on a plate and wait until it dries completely.
- File the edges of the neck if necessary, removing excess paint.
- Wrap the neck with golden lace and glue the leaf.
The apple-shaped pencil is ready!
Llamas
You will need: bushings, colored cardboard, scissors, glue, paints, brush, black marker or felt-tip pen.
Master Class
- Paint the bushing with red paint and wait until it dries.
- Paint the rug with white paint and leave to dry.
- Draw the body and legs of the llama on red cardstock, then cut them out. For the toy to be stable, the legs must be in a U shape.
- Draw eyes and other small details with a black marker as shown in the image.
- Make a cut on the body of the llama and glue it to the sleeve.
- Glue the tabs to the bottom of the sleeve.
- Make llamas of different colors in the same way.
The bushing llamas are ready!
From pencils
If you have a box of old but intact pencils lying around in the drawers, you can use them to make a bright stand for the same pencils used in your work, as well as pens and felt-tip pens.
The product is created using the technique of gluing elements in several places. The stand will not be made of a single fabric: its walls will have open elements.
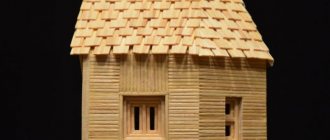
The organizer is assembled according to the principle of laying pencils in a house (like a house made of matches) and fixing them with glue. For the base, cut out thick cardboard is used, on which the first two elements of the “log house” are placed. Then the pencils are laid perpendicular to each other, forming the walls of the house.
A bright thing is placed on the drawing table in the children's room. It won't break if dropped. The pencil stand does not contain small parts. This is one of the safest organizers for younger children.
If you have nowhere to put your “army” of colored pencils or markers, make an original home storage organizer for it. A beautiful stand will decorate a desk and become a bright and useful decor for a child's room.
Unicorn
You will need: a sleeve, colored paper, scissors, glue, glitter and colored cardboard, rainbow colored yarn, black marker, pink lipstick or pink pencil.
Master Class
- Cover the sleeve with colored paper.
- Wrap different colors of yarn around 3-4 fingers, then cut and shape into a mane and tail.
- Glue the mane and tail to the sleeve.
- Cut a triangle out of glitter cardstock and glue it on as a horn.
- Make ears from triangles of different colors and sizes, as shown in the photo.
- Glue the ears next to the horn.
- Draw eyes and eyelashes with a black marker.
- Draw on the cheeks with pink fondant.
The unicorn from the sleeve is ready!
How to make a unicorn organizer | DIY Organizer from a Sleeve
Master classes on work for the master
Toilet sleeves are an excellent material from which you can make a wide variety of accessories and products. These can be both crafts for kindergarten and convenient devices for home. What crafts can be made from a toilet roll:
- Figures of animals, birds, cartoon characters.
- A practical pencil case for a schoolchild.
- Convenient hooks for chains.
- Packaging for USB cables and charging.
- Gift bag.
Each of the presented craft options has detailed instructions describing all stages.
Dog puppet
You will need: 3 bushings, a simple pencil, scissors, soft wire, rope, decorative eyes, colored paper, glue gun, wine cork, 2 wooden sticks, paints, a brush, a piece of foam.
Master Class
- Paint the 3 bushings brown and leave to dry.
- Draw 10 small circles and 2 larger circles on construction paper, then cut them out.
- Take the bushing and make 4 holes for the paws.
- Glue 10 circles onto the sleeve.
- Prepare 2 pieces of rope and thread them through the paw holes as shown in the image.
- Make 2 more holes opposite the paws and thread the rope.
- Take the second sleeve, cut off the third piece and set it aside.
- Make the dog's head: Take a large piece of the cut sleeve and make 2 holes in the top opposite each other.
- Measure the distance where the head will be, tie a knot and attach the head by threading a rope.
- Wrap 2 wooden sticks with soft wire and connect them together to form a cross.
- Glue the cross to the ropes.
- Glue 2 blue circles and decorative eyes on top of them.
- Cut ears from the third sleeve and glue them on.
- Glue on a small piece of foam for the nose.
- Screw in the small piece of sleeve that you cut off earlier and glue it in as a tongue.
- Cut the wine cork into 4 parts, make a hole in the center, paint it black and wait for it to dry.
- Attach cork blanks as paws by threading ropes through the holes and securing with knots.
The puppet made from bushings is ready!
AN EASY WAY TO MAKE AN ORGANIZER FOR JOURNALS AND NOTEBOOKS
To get a voluminous organizer that can accommodate magazines or notepads, you need to use a cardboard box as a basis.
Materials:
- cardboard shoe box;
- paper reels;
- colored paper;
- stationery.
We do the work:
- Cut off the lid from the box if it is non-removable.
- Draw a line in the middle of the box to the base and cut out a triangle.
- We bend the box along the drawn line and glue the two parts together.
- We deliver the missing parts on the sides from cardboard and secure them with tape.
- Line the bottom of the pencil holder with paper or white cardboard.
- We cover all the blanks with colored paper, install the bushings, and glue the tape. The organizer is ready. The organizer is ready.
You can give a second life not only to food boxes, but also to used tin cans. As a result, you will get a durable and very stylish organizer.
Materials:
- cans of different heights and diameters;
- board or plastic for the base;
- fabric of different colors;
- fleece, ribbons, ribbon;
- screws, screwdriver, glue;
- sewing supplies.
Making an organizer:
- Trim any irregularities around the rim and wrap the jar in fleece. Make a neat joint.
- Line the bottom with thick cardboard. This will make it easier to screw the workpiece to the base.
- Cut out strips of fabric with allowances. Glue the remaining material on the top and bottom of the can inside.
- Place a piece of white cardboard inside the jar. There should be a small gap between its edges
- Give the cardboard a bend by stretching it along the edge of the table. Glue a piece of fabric onto it, making allowances along the edges. It is necessary to stretch the material to avoid wrinkles.
- Attach the cans to the base using self-tapping screws; they are more reliable than glue. Cover the bottom with fabric.
Rainbow
You will need: a sleeve, white paper, corrugated paper in rainbow colors, scissors, glue, hole punch, rope, blue paint, brush, black marker, pink pencil.
Master Class
- Paint the bushing blue and leave to dry.
- Punch 2 holes opposite each other with a hole punch.
- Thread the string through the hole and tie a knot.
- Cut out a cloud from white paper.
- Draw eyes, eyelashes and a mouth on the cloud with a black marker.
- Highlight the cheeks of the cloud with a pink pencil.
- Glue the cloud to the sleeve.
- Cut the corrugated paper into strips.
- Glue rainbow stripes to the inside of the sleeve.
The rainbow from the sleeve is ready!
From plastic bottles
Plastic containers have firmly entered our everyday life. The planet generates countless amounts of waste from old bottles and bags. If you give bottles a second life, you can at least slightly reduce the amount of waste.
Bunny
To make a pencil holder in the shape of a hare, you need to take:
- 1.5 liter plastic bottle;
- acrylic blue, white and black paint;
- sharp scissors or a craft knife.
Way to do:
- First, you need to rinse the container and wipe it dry.
- Using a marker on the bottle, draw the ears of a hare and the outline of the edge of the future organizer.
- Cut along the contour with scissors or a knife.
- Using a brush or sponge, apply blue paint to the surface of the plastic. Let dry.
- Detail the image of the bunny: draw a face, eyes, and a white chest.
- The inside of the long ears can also be made white.
- Leave to dry for a while, varnish and let the product dry thoroughly.
The organizer is ready! Pens, markers and pencils are placed in it.
Decor made from newspaper tubes
If you cut off the top part of a plastic bottle and cover the resulting container with rolled up tubes from newspapers or magazines, you will get a creative stand that will look original on any table.
The tubes are twisted using a skewer or a thick knitting needle, fixing the edges with glue. And when gluing the surface, reduce the twist to the required length. Decorate at your discretion.
Sweet monsters
You will need: bushings, paints, sponges or brushes, regular and curly scissors, glue gun, black marker, decorative eyes, multi-colored tape, soft wire, bags of candy, ribbons.
Master Class
- Use your imagination and decide on the type of monsters.
- Take the bushings and cut out the mouth holes and the shaped edge of the head.
- Paint the bushings bright colors and leave to dry.
- Glue soft wire and decorative eyes.
- Decorate the monsters with strips of tape.
- Place a bag of candy inside each sleeve and tie with a ribbon.
Candy monsters made from bushings are ready! I recommend watching the video: how to make a miniature watermelon box)
DIY Miniature Water Melon Gift Box | Toilet Paper Roll Craft Ideas for Kids on Box Yourself
DIY crafts for children using bushings
Toilet paper rolls are a very good material for creativity with children. By themselves, they are already the body of an animal or a person, the main part of a transport or structure.
Working with bushings is easy and you can make the following crafts:
- Cartoon characters.
- Animals.
- Transport.
- Houses and castles.
Children literally from the age of three are able to cope with making toys with the help of their parents. This is a great option for leisure or educational activities.
We make animals. DIY zoo made from bushings
The simplest and most exciting process is to create your own zoo from bushings.
The easiest and fastest way to make these animals is:
- Giraffe - the bushing fights as the body. The head with neck, paws (2 V-shaped parts) are cut out of thick paper and attached in two ways: using glue or inserted into cuts in the sleeve cardboard. Then the animal is painted as desired.
- Monkey - the sleeve is painted brown or covered with appropriate colored paper. Using appliqué or paints, a muzzle is created, paws, ears and a tail are cut out of cardboard and inserted into the cuts in the sleeves - it looks neater this way.
- A family of lions . 3 bushings are made of different heights to make a lion, a lioness and a lion cub. A part of the sleeve is cut out in the shape of an arc along the book edge to make paws. Next, using paints and parts from colored paper, muzzles and tails are made.
- Elephant - the sleeve is painted in a suitable color, the trunk and ears are cut out of thick paper, glued or inserted into the cuts of the “body”, eyes are drawn. Using a felt-tip pen you can also draw the paws of an elephant.
- Crocodile - a mouth is created at one end of the sleeve using V-shaped cutouts on each side. Small white teeth are glued to them on top and bottom. A triangle from one of the cutouts is used as a tail and glued to the upper part of the body, paper paws are attached to the sides. It is most convenient to paint the crocodile green rather than paste it over with paper. When the paint dries, draw eyes and patterns on the back.
- Chanterelles . The upper edges of the sleeve are bent towards the center to form an arc connecting the 2 edges - they will be the ears. The cardboard needs to be glued along the fold line. Next, the craft is painted orange, drawn or made using an applique of a muzzle in the middle. A tail is cut out of paper and glued or inserted into the hole.
- Seals - they are made according to the same principle as chanterelles.
- Shark - the mouth is made in the same way as that of a crocodile, the fins and tail are attached with glue.
Owl. Master class on creating an owl from a bushing
DIY crafts made from toilet paper rolls in the shape of owls are easy to make. They are good as a souvenir, toy or interior decor element.
To make it you will need:
- One sleeve per owl.
- Colored paper.
- Pencil.
- Scissors.
- Glue.
- Paints.
Step-by-step instruction:
- Paint the bushings and let dry.
- Cut out wings, eyes (from 2 circles of different colors), paws, and tummy from paper.
- Glue all the parts in the right places. The wings can be glued along the body, creating an imitation of folded ones, or only on one edge so that they rise up and down.
- Use felt-tip pens to draw on the owls: feathers, eyelashes, pupils.
Various men made from toilet rolls
Toilet paper rolls can be turned into little people - cartoon characters or mythical creatures.
The easiest thing to do is:
- Little mermaids or dolls - a face, dress or scales for a tail are drawn on the base of a sleeve. Then they cut out strips of colored paper and curl them using the blade of scissors - this will be hair that needs to be glued only at one end of the “head” so that it develops. Decoration is inserted into the hair - beads, paper flowers.
- Ninja - the sleeve is covered with black or red paper, leaving a small rectangle for the eyes. They are drawn with a felt-tip pen. A ninja belt and sword can be made from plastic drinking straws.
- Pirate - a face is drawn on a sleeve, a blue and white vest, a hat and a leash are cut out of colored paper. A skull is painted on the hat with paint.
- Santa Claus - the base is painted in a color scheme that matches his costume, a beard, a hat and a bag for gifts are cut out of paper or felt, and glued to the body. You can use a disposable cup as a hat. Additionally, cut out the hands in the mittens and insert them into the holes in the sleeve on the sides. You can make DIY crafts from toilet paper rolls together with your children, which further promotes their development.
- A snowman can be made from 1 or 3 bushings. In the first case, it is enough to cut out the hat or use a plastic cup instead, and paint the body. In the second, one bushing remains unchanged, and the other 2 are cut, imitating snow globes from which a snowman is made. You should end up with three parts that form a pyramid. The top one should be the shortest - this is the head, it is painted with felt-tip pens and dressed in a cap made of colored paper. Next, a second layer is glued to the bottom wall of the head, a third layer is glued to the second, and the body is painted with buttons and a scarf. You can stretch any stick through the middle layer - the hands of a snowman. Tie a thread from different sides, by which the craft can be hung on the Christmas tree.
Racing cars and planes
To keep a boy busy, you can make the following crafts from bushings:
- Cars - to do this, paint the bushing in the desired color, cut a rectangular hole in the middle of one of the walls - this will be the cabin. Wheels made of colored paper are glued to the sides. You can complicate the task and make small cuts in the “cabin” on both sides to lift this part like a windshield. Paint on the outside and glue the steering wheel on the inside.
- Airplanes - cut off one side of the bushing to create an arc. Wings are attached to the sides on top, and wheels are attached to the bottom. A square is cut out in the middle - the cockpit.
- Rockets - the sleeve is painted, a triangle is glued at the top, “legs” and papers are glued at the bottom. Circles-windows are drawn on the base.
Houses and castle
For the house, the sleeve is decorated with felt-tip pens, drawing bricks and windows. You can also draw doors, or you can cut them out on three sides so that they open. The roof is made from a paper cone into which you can insert a chimney or glue “snow” made of cotton wool on top.
A multi-story building can easily become just a sleeve painted with many windows.
To create a castle, just make several houses of different heights and glue them together. For a fortress, instead of a cone, a roof cut into teeth is suitable.
Panels for the development of small children from bushings
One of the multifunctional DIY crafts made from toilet paper rolls is a panel for the development of young children.
To make it you need:
- The base is made of rough cardboard or plywood with dimensions starting from 1 sq.m. And more.
- As many toilet paper or paper towel rolls as possible.
- Markers or paints.
- Cardboard or plastic box for chicken eggs.
Step-by-step instruction:
- Paint the base one color or different colors. It is advisable to paint geometric shapes and household objects on it in different colors - this way the panel will have more functions.
- Prepare the bushings - make them of different lengths; you can cut them evenly, diagonally and in half lengthwise. Paint it in bright colors.
- Attach the bushings to the base in any order so that you can throw different objects at them: either into a ring or going down the bushing, or down a slide. To develop a child’s logical thinking, it is advisable to place them in the form of a labyrinth so that they converge at the bottom with several vertically placed bushings. Place an egg carton under them - toys and balls will fall there, passing along all the paths of the panel.
Bee
You will need: sleeve, colored paper, scissors, glue, black marker, self-adhesive eyes.
Master Class
- Cover the sleeve with yellow paper.
- Cut strips of black paper, then glue them on.
- Cut out the wings from blue paper, then glue them on.
- Attach self-adhesive eyes and draw a mouth with a marker.
- Glue 2 black stripes to the top of the sleeve.
The bee from the sleeve is ready!
Where to get ideas
Toilet paper roll is a versatile material. It is easy to work with, convenient, and most importantly simple. Ideal for children aged 1 year and older. The versatility of the sleeve allows you to make animals, flowers, organizers, cars and even various buildings out of them. The possibilities are limited only by the author's imagination.
Octopus
You will need: sleeve, orange paper, felt-tip pen, glue, scissors, self-adhesive eyes.
Master Class
- Cut 8 strips of the same size from orange paper.
- Twist them using a felt-tip pen.
- Cover the sleeve with orange paper.
- Glue the twisted strips inside the sleeve around the circumference.
- Glue the eyes and draw a smile on the octopus.
The octopus from the sleeve is ready!
Packaging for USB cables and charging
You can also use paper sleeves to conveniently store phone chargers and cords. Using additional fittings (Velcro for fastening), you can make a closing ring with volume regulation.
Note!
- How to make a rose from paper - the best ideas for DIY crafts + master classes on creating a rose from paper (160 photos)
- Craft letter - TOP 120 photo reviews of craft letter. Simple diagrams + step-by-step DIY instructions
- Crafts made from nut shells: the best step-by-step master classes on creating DIY crafts with photo examples of finished works
Organizer for office supplies
You will need: bushings, plastic board, colored paper, scissors, glue, rhinestones.
Master Class
- Place the sleeves on the plastic board the way you want the organizer to look.
- Cut the length of some bushings.
- Cover the bushings with colored paper.
- Decorate each sleeve to your taste by gluing rhinestones.
- Glue the sleeves to a plastic board to form an organizer.
- Fill your organizer with office supplies.
The stationery organizer made from a sleeve is ready! I recommend watching this video!
DIY. Budget DIY office stationery organizer. Desktop organization.
WE MAKE A MULTI-LEVEL PENCIL ORGANIZER FROM THICK CARDBOARD
You can make a unique pencil holder from simple thick cardboard. It will allow you to sort your pens and pencils the way you want.
We will need:
- base of the product: plastic, glass or board of the desired shape;
- cardboard boxes for cereals or baby food;
- paper towel and toilet paper reels;
- craft paper;
- stationery: scissors, glue, ruler, pencil, acrylic paints;
- braid and various decorations.
Work order:
- Take the base and paint it with acrylic paint of your choice.
- Cut all the cardboard blanks so that you get stands on several levels at once.
- Paint the inside of the boxes and sleeves white, and also apply paint to the edges and cuts of the blanks.
- Decorate the blanks with colored paper.
- Try on how the blanks will look on the base: mark their location with a pencil on the board.
- Spread the bottom of the drawers with glue and fix them one by one to the base.
- After drying, mask the joints of the cardboard boxes with tape and cover the product with decorations.
Christmas tree
You will need: toilet paper or paper towel rolls, scissors, glue gun, paint, sponge, decorative elements - shiny ribbon, rhinestones, sequins...
Master Class
- Cut the bushings as shown in Image 1.
- Paint 4 blanks with green paint and the bottom part with brown. Then leave to dry.
- Glue the blanks together to form a Christmas tree.
- Cut the ribbon into pieces and glue them in a zigzag pattern to the tree.
- Glue sequins and rhinestones.
The Christmas tree made from bushings is ready!
What you need for work
- Glue or glue gun (adults only).
- Scissors, stationery knife, awl.
- Paints (watercolor, gouache), felt-tip pens, markers.
- Colored paper or cardboard.
- Scotch tape, wire.
If all the necessary tools are available, let's get started.
Snowmen
You will need: bushings, felt, glue gun, paints, sponge, decorative eyes, soft wire, buttons, glitter, orange tic-tac, glitter balls.
Master Class
- Paint the bushings with white paint and leave to dry.
- Glue on 3 buttons, eyes and an orange tic-tac for the nose.
- Cut a strip of felt and glue it as a scarf.
- Form a U from soft wire and glue glitter balls as headphones.
- Apply glitter precisely to create a smile.
- Make each snowman unique.
Snowmen made from bushings are ready!
5 DIY IDEAS FROM A SLEEVE. BEST DIY New Year's crafts. What to give for the New Year 2022.
Elements for table setting
You've probably noticed that in expensive restaurants they use not just napkins for table setting, but place them in a special ring-holder for each guest separately. You can make such a beautiful element with your own hands. To do this, cut the roller in half and decorate it with burlap, lace, and decorative flowers.
Firecracker
You will need: bushes, balloons, Christmas tree rain, scissors, wrapping paper, glue, glitter, stickers.
Master Class
- Tie a knot in the ball and cut off the tip.
- Pull the cut portion of the ball tightly onto the sleeve.
- Cover the sleeve with packing paper.
- Decorate the cracker with stickers.
- Cut the Christmas tree rain into confetti and pour 3 tablespoons into the cracker.
- To activate the firecracker: point the empty muzzle upward and pull back the tail of the ball.
The New Year's cracker is ready!
Binoculars
You will need: yellow cellophane, scissors, tape, black paint, brush, green and black paper, glue, rubber band, wine cork, string or elastic band.
Master Class
- Cut out 2 circles of yellow cellophane and tape them to the circumference of the sleeves as binocular lenses.
- Paint the circumference of the wine cork with black paint and cover it with green paper.
- Cover the bushings with green paper and glue the black stripes as shown in the image.
- Glue the bushings together and secure with a rubber band. After a while, remove the rubber band.
- Glue the taped cork between the bushings.
- Prepare an elastic band or rope of the required length, make a hole in the side of the bushings and secure the elastic band.
The binoculars are ready! I recommend watching the first 4 minutes of the video, in it you will see great life hacks with bushings!
40 SIMPLE AND GENIUS RECYCLING IDEAS
Musical instruments
You can build your own musical instruments, or, more precisely, musical equipment: a microphone or create “the sound of rain.”
It’s easy to make a microphone, first – take and pull out an egg, dry it and cover it with dark varnish and, thanks to glue, attach it to the sleeve.
To create noise (which will resemble rain), you need to close the passage in the sleeve and pour in any cereal - rice, buckwheat, small pasta and close the other hole. Now everything is ready.
