Snowman made of threads and PVA glue - three-dimensional snowman made of thread balls
This type of snowman has recently become especially popular, since the product is at the same time openwork, creative and airy. There are no complicated steps in its manufacture if you do everything carefully.
Initially, you need to inflate three balloons of different sizes. Unwind the white yarn and place it in PVA glue. You need to wrap the balls with yarn well soaked in glue until a thick mesh is formed. This is how you need to wrap all the balls. In addition, using the same technology, make two additional small balls that will serve as hands.
As soon as the thread on the balls dries well, the balls burst, and their remains need to be pulled out of the resulting thread figures. Make indentations on two larger balls to make it easier to fix them on each other.
To make a nose blank, make a small cone out of cardboard and wrap it with film. After this, wrap it with orange yarn soaked in PVA glue. As in the case of circles, the glue on the thread should dry well and only then can you remove the cardboard cone and film.
Connect the nose and circles and fix them into one shape. A scarf and hat for a snowman can be made from crepe paper or knitted from yarn. You can decorate them with decorative snowflakes. The mouth can be cut out of red cardboard or felt, all that remains is to attach artificial eyes.
Additionally, you can make a few more white or blue balls and place them near the snowman as snowdrifts.
Stand
If you will use the snowman as a sculpture under the Christmas tree or for installation on any horizontal surface, you need to think about a stand. Alternatively, you can cut a rectangle from cardboard that is proportional to the bottom ball of the sculpture. Glue a piece of light fur or fluffy fabric of the same size on top. If you don’t have one, you can make an imitation of snow from cotton wool. Using a heat gun, the snowman needs to be secured to a stand.
Snowman on a fur stand.
There is another way to give the figure stability. To do this, using the technology described above, you need to make two small balls from balls and threads - they will serve as legs. They need to be fixed with glue. The “hands” of a snowman will also look great. With this mount you can make a figurine in a sitting position, for example, like this:
Sedentary snowmen.
Snowman made from knitting threads - a simple New Year's craft for kids
This snowman turns out to be cheerful and funny. To make it, two circles of different diameters, white and brown yarn, and black and orange felt are used.
Wrap two circles with white yarn until gaps in the cardboard are visible. Connect them together so that there is a smaller circle at the top and a larger one at the bottom. Cut out black circles from black felt and use them to place buttons on the bottom circle, eyes and mouth on the “face”. Make the nose out of orange cardboard. Cut a scarf from blue felt and secure it between the circles.
Cut out the snowman's arms from cardboard and wrap them tightly with brown yarn. Attach elements.
Can't see from the ground
Cute, mini snowmen come out in the style of Japanese amigurumi art. They can be hung for beauty on a Christmas tree, on a bag, backpack, kick, keys, mobile phone, or just to play with. The standard height does not exceed the palm of your hand. Thanks to funny faces, they become animated.
The head is usually proportionately larger than the entire torso. The basic technique is the same. Due to this, the structure is dense and holds its shape remarkably well. To help create such a miracle, a video lesson may be useful - “Snowman amigurumi crocheted or knitted for beginners.”
It's not easy and time-consuming. This chic neck ornament is knitted comfortably and easily with knitting needles.
Cast on five stitches and knit with pearl elastic about 34 centimeters.
The original snowman was designed by the Italian sculptor and architect Michelangelo Buonarroti in 1493. But whether there were pioneers even earlier is not conclusive. A written mention appears in an eighteenth-century book. The word “schneeman” itself and the illustrations originated in Germany in a children's book with songs, published by a publishing house in the city of Leipzig.
Note!
- How to crochet a beautiful scarf: video master class on creating unusual, beautiful, simple scarves for boys, girls, men and women
- How to knit a hat with a lapel using knitting needles or an elastic band: step-by-step instructions for beginners
- How to crochet a winter hat: 95 photos of new models of warm, fashionable, original knitted hats with a lapel and a beautiful pattern
Nowadays it’s difficult to find a child who hasn’t watched or at least heard about the popular Disney cartoon “Frozen.” The obvious favorite is the kind, enchanting Olaf, enlivened by Elsa’s magic. He has an impeccable sense of humor. Crochet Olaf is a brilliant souvenir for princess girls and naughty boys.
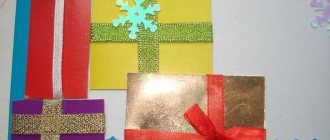
Snowman made of thread and glue in the form of an applique - New Year's craft for kindergarten
This craft will become very popular among schoolchildren. Making it is not a complicated process, but it is important to do everything carefully and not rush. The materials you can use are white yarn, pink, black and orange cardboard, black and multi-colored buttons, and other decorative elements.
Draw the outlines of a snowman on a sheet of blue cardboard. Coat the contours and middle of the circle with PVA glue. Starting from the middle, you need to carefully lay the white yarn in a circle, tightly fixing it to the base paper and the previous layer of thread. Make both circles like this. The correct shape of the snowman depends on the accuracy of your actions. After the thread has been laid and the glue has dried, you can begin decorating. Cut out a hat from black cardboard, decorate it with a pink stripe and other elements. Attach the snowman to the top ball. Cut a scarf from pink paper. Fix it between the circles. Lay out and secure multi-colored buttons in a vertical row on the second circle. Use black buttons or beads to make eyes and a mouth. Use orange cardboard or felt to make a nose for a snowman.
You can also make an applique from threads in this way: cut the yarn and glue it onto paper or cardboard.
See more ideas for snowman appliqués made from threads in our gallery.
Useful tips
During work, you should follow the advice to avoid unpleasant situations.
Adviсe:
- For crafts, you should take cotton threads, as they can absorb glue well. Synthetic threads are poorly saturated and the product will not take the required shape.
- Before winding the thread, the surface of the ball is lubricated with cream or Vaseline. You can wrap it with cling film. Such actions are necessary to prevent the yarn from sticking to the rubber.
- When winding, do not pull the thread too tightly. This will lead to incorrect formation of the figure, as well as premature deflation of the ball.
- If the thread comes out of the jar with difficulty, then the hole should be enlarged. A tight release removes glue from the yarn, which is bad for the future product, it will not be strong.
- When connecting parts of a product, do not press the parts too hard. This will lead to a change in shape and loss of integrity.
- To make the snowman stand out more, you can sprinkle the surface of the body with sparkles. This should be done while the thread is still wet for better fixation of the glitter.
- If painting the surface of the snowman is required, it must be done when the thread material has dried, but the ball has not been removed. After painting, careful drying is also required.
- If the craft is made in a small size, then you can attach a ribbon and hang the toy on the Christmas tree.
- When performing work, you must strictly adhere to the step-by-step instructions. Confirm the correctness of execution by comparing your work with the photo in the instructions.
We recommend watching the video:
Volumetric snowman made of threads without knitting - an original craft for school or kindergarten
A very cool craft can be made from an old sock, beans and knitting thread. How? Look in the gallery.
Pour dry beans into an old sock (only without holes) (by the way, you can replace it with rice, buckwheat, peas or whatever you have). Next, wrap the sock with yarn in such a way as to form the silhouette of a snowman. Now all that remains is to make eyes and us from felt, a hat and scarf from the remains of a sock, insert twigs into the arms and we can take them to the competition!
Alternatively, instead of a sock, you can use plastic bags formed into balls of different sizes. Next, we wrap them with yarn, and you can connect them together with an ice cream stick, sew them, or simply put them on glue.
eccentricity
You can make lovely decorations for the toy. For example, rainbow lights and lanterns, a warm hat with a branded inscription and a pom-pom or a summer cap with a visor, a spacious backpack or string bag, a suit consisting of pants and a shirt with a jacket, and maybe shoes.
A snowman on skates, skis or a snowboard will captivate spectators and cause delight at the winter exhibition. To avoid feeling lonely and sad, you can place next to him the companions of the great and well-known holiday - Father Frost and his granddaughter Snow Maiden. And also other fairy-tale characters: a bunny, a penguin, a moose, a Christmas tree, Santa Claus with a carriage and deer, elves and other wizards.
DIY snowman made from plush yarn
Snowmen made from white bulky yarn turn out cute and “alive”. To make the base of one snowman you will need white yarn and a foam ball. You need to wrap the thread tightly around the ball, securing it with thin small pins.
Use white and orange yarn to make a nose for a snowman. Fix black beads as eyes. Use smaller beads to line the snowman's mouth. Place a decorated hat on the top of your head. All that remains is to tie a beautiful scarf. A pair of these snowmen looks very nice as decoration.
Snowman made of pompoms - how to make it yourself
A snowman made from pompoms turns out soft and fluffy. To make the base for this craft, you will need to make two pompoms of different sizes.
There are several ways to make pompoms. The easiest way is to wrap the yarn around your fingers or a piece of cardboard of a suitable size. Tie the wound yarn with a thread in the middle and cut the edges. Fluff the resulting pompom, trim if necessary to give it the correct ball shape. Two pompom balls need to be tied together to form the base of the snowman. Make a scarf from felt. Make eyes from beads or seed beads. The nose and mittens can be cut out of felt or foamiran.
Big Snowman made from knitting threads and cotton balls - step-by-step master class
The snowman from this master class turns out to be spectacular and original. To make it, the craftsman must have white yarn, a strip of burlap, wire, foam circles, small black buttons or buttons, batting, a stationery knife, a glue gun and cotton balls.
You need to cut three circles of different diameters from a foam sheet. Use a sharp knife to cut. Secure cotton balls onto the resulting foam circles using silicone glue. This layer is necessary to make the snowman more voluminous. After this, wrap the foam circles securely with white cotton yarn, and the thread must be firmly fixed on the back of the circle. It is better to wrap the foam circles with cotton yarn in 2-3 layers. It is worth making sure that the yarn is well fixed.
Make hands and a hat from wire. All that remains is to connect the circles, attach an artificial carrot as a nose, and attach a scarf made from a strip of burlap to the snowman. Fix the black circles as buttons.
Snowman made of threads and nails - New Year's craft using the String Art technique
This is an unusual process for creating a snowman, but the result is quite original. To make the base you will need not only yarn, but also small nails and a board (it can be varnished in advance).
Choose a suitable snowman picture and print it. Attach the sheet to the board and secure it. Drive nails along the outline of the design, and remove the template when finished. Now all that's left to do is just a little bit (just kidding, the hard part is just beginning)! You can only draw an outline with threads, but a fully filled craft looks more beautiful!
Help us improve: if you notice an error, select a fragment and press Ctrl+Enter.