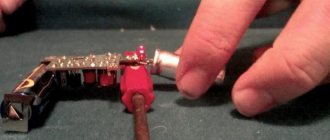
In this article we will look at creating a simple lie detector based on the Arduino Nano board, which will allow you to determine when the person being tested (for example, your friend or relative) is telling a lie. The principle of operation of a lie detector is based on changes in the condition of a person’s skin under the influence of his emotional state. All these processes will be clearly shown on the corresponding graph.
General principles of the project
Our skin is amazing - it gives us the ability to feel things when we touch them, protects us from infections and supports our internal organs. But in our project, a significant factor will be the fact that our skin can change its conductivity depending on many conditions, including our mood. This phenomenon is called electrical activity of the skin (Electrodermal activity, EDA), you can read more about this phenomenon on Wikipedia. But the main thing for us in this situation is that the conductivity of the skin changes depending on our sensations.
In our project, we will connect the Arduino board to the object under test and to a computer on which the graphing program is installed.
We begin interviewing the subject with simple questions to which we know the answers exactly, for example, “what is your name” or “where do you live.” Using these questions we will form the initial state (baseline) of our lie detector. After this, we will ask questions that the subject could potentially lie about. With false answers, the subject will most likely become nervous (and this is typical for most people), and the resistance of his skin will change, which will be reflected in the graph that we build on the computer screen. As a result, we can easily understand that the subject is telling a lie.
To construct a homemade lie detector, we will need an Aruino Nano board, several LEDs, a 2 kOhm resistor, a Velcro fastener and several basic tools (materials), such as cardboard, foil, glue, a soldering iron, and a knife.
Is it possible to fool a polygraph?
Is it possible to fool a polygraph? Yes, it's possible. When figuring out how to pass a polygraph without problems, this can be done, for example, by simply biting the tongue and causing tension in the legs, mentally counting sheep. Each of these actions will cause physiological reactions that will be immediately recorded by the device. Mental arithmetic will prevent the subject from fully comprehending the question asked, which will lead to an uncertain result.
History remembers the case of the unjustly convicted Fey Floyd. After failing a polygraph test, he was convicted of a murder he did not commit, and it was only several years later that the truth came out. Floyd decided to take revenge on his offenders and became a real expert in the field of polygraph testing. He taught prisoners who confessed to him that they had committed a crime how to deceive a polygraph, as a result of which most of the criminals were able to pass the lie detector and were found innocent.
Project diagram
The circuit of a lie detector based on the Arduino Nano board is shown in the following figure.
The connections in the diagram are quite simple:
- connect a long piece of wire to analog pin A0 of the Arduino board;
- connect the 2 kOhm resistor to ground and to the analog pin A0 of the Arduino board;
- connect a long piece of wire to the 5V pin of the Arduino board;
- connect the anode (long leg) of the green LED to pin 2 of the Arduino board, and its cathode (short leg) to ground;
- connect the anode of the orange LED to pin 3 of the Arduino board, and its cathode to ground;
- Connect the anode of the red LED to pin 4 of the Arduino board and its cathode to ground.
After this, we will just need to connect the sensor wires to the fingers, but more on that later.
Why do you need it?
Before you decide to fool the polygraph, think about it - do you need it? A deliberate mindset to deceive, especially if you are poorly prepared, can ruin everything. You will behave unnaturally, this will arouse suspicion and will be interpreted not in your favor. If you are too nervous, it will not be interpreted in your favor. If you are too dispassionate, this will also incriminate you. Therefore, if you are still serious about fooling the polygraph, prepare in advance. Forget about buttons in shoes and other “tricks”. There are more effective methods. They are not designed to hide evidence, but to protect the natural human right to privacy. There is even a social movement “anti-polygraph”. His motto: “Their right is to try to find out all the ins and outs about us, our right is to send them all to hell... This is democracy.”
Arduino Program Explanation
To work with this project, you will need the latest version of the Arduino IDE. Unlike older versions of the Arduino IDE, in which only text data could be transferred to the computer in the serial communication monitor window, in the latest version of the Arduino IDE this data can be displayed in the form of a graph, which will allow us to identify places where the pattern (pattern) changes. graphics and thereby determine that the subject is telling a lie.
To open the graph plotter window in the Arduino IDE, go to the tools menu and you will see this item under the serial monitor item.
The full code for the project is at the end of the article - you can copy it and download it to your Arduino board.
Cosmetic preparations
There are ways to reduce the level of reaction. For example, you can use cosmetics - they are applied to the fingertips - this could be talc or deodorant for sweaty feet.
You can first steam your hands and rub salicylic-zinc ointment into your fingertips. This method is not suitable if the crime was serious, in which case urine or blood are tested for the presence of psychotropic substances.
Making a finger clasp
For stable operation of our lie detector, it is advisable to make a fastener (clip) for the fingers - it will ensure stable contact between the fingers and the wires. To do this, you need to glue a strip of tin foil to the bottom edge of the Velcro (to both ends). Then you need to wrap it around your finger to ensure it fits snugly on your finger, then attach the wire to the foil and to the analog pin A0 of the Arduino board, repeat the same for the 5V pin of the Arduino board. Check that electrical connections are secure before applying power to the device.
The following three pictures show the process of making finger clasps.
Ways to fool the polygraph
There are several ways to fool a lie detector:
- Reduced sensitivity of sensory analyzers. To do this, drink some alcohol the day before the test. On the day of the test, your reactions will be somewhat slowed down, and the polygraph will not be able to give an accurate result.
- Medications. Before using them, it is important to know and understand your body’s reaction to “chemistry”. So, if a subject has taken psychotropic substances for the first time, he may, out of habit, begin to behave inappropriately, which a polygraph examiner will immediately notice.
- Non-chemical method
. To do this, you need to not sleep for several days. But it is worth remembering that an experienced polygraph examiner will always notice such a condition. - Control of emotions
. It is important not only to be able to give the desired reaction to a question, but also to control facial expressions. - Physiological reactions
. For example, some, in an attempt to counteract the polygraph, came up with the idea of putting a button in the shoe under the big toe. When pressed, the pain causes a false reaction.
Making a housing for a lie detector
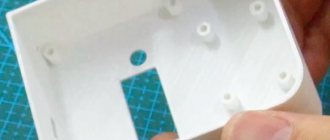
In the body for the lie detector, we need to provide 3 holes for mounting LEDs. The author of the project made the body from cardboard, for this he performed the following sequence of actions:
- cut out two rectangles measuring 15x3 cm;
- cut out one rectangle measuring 15x5 cm;
- cut out three rectangles measuring 5x3 cm (in the center of one of them you need to cut a small hole for the USB connector of the Arduino Nano board);
- cut out one rectangle measuring 9x5 cm;
- cut out one rectangle measuring 6x5 cm.
A 15x5 rectangle is the base of the case, two 15x3 rectangles and two 5x3 rectangles are the sides of the case. The third 5x3 rectangle must be glued at a distance of 6 cm from the side, closer to the center (see photo). That is, now you have a rectangle that is divided into 2 parts - one part is 6 cm long and the other part is 9 cm long. In the 6 cm long part we will place the electronic components of our project, and the other part will be a compartment for the fingers. You also need to cut 3 holes for mounting the LEDs in a 6x5 rectangle and glue it to the part that is 6 cm (that is, it will act as a cover). And finally, we need to attach the lid for the compartment, which is 9x5 cm.
Visually, the process of assembling a body for a lie detector is presented in the following pictures (pictures are clickable).
Polygraph. Where and when
The polygraph is an old invention. The ancient Hindus asked the subject neutral and leading questions, and he beat a gong for each answer. It was believed that during a false answer he would hit the gong harder than usual.
In ancient China, the suspect would put a handful of rice into his mouth. If he remained dry, then the criminal was found guilty - salivation decreases due to stress.
The polygraph that is used today is the same gong and the same rice. Only with wiring. It was brought to fruition and patented by a man with the poetic surname Keeler. However, there were detectors before him. And the “credit” for their popularization belongs to Cesaro Lombroso.
Final assembly of the project
In the final stage of working on the project, we must place the Arduino Nano board in a part 6 cm long and lead the wires from this part (connected to pins A0 and 5 V) to another part of the case, which is 9 cm long. Then we need to glue the LEDs to the cut out ones. holes in a 6x5 cm rectangle and you can start testing the project.
But the author of the project asks to warn all readers that the lie detector discussed in this article is not an absolutely accurate device, since real lie detectors, in addition to measuring skin conductivity, also contain many other sensors, for example, a sensor for measuring pulse.
Afterword
In addition to this home lie detector, which reveals deception due to a change in skin resistance during a survey by 3-5%, there are a huge number of other variations of the same device. They all use different principles:
- some monitor the subject’s blood pressure,
- others are triggered by changes in palm moisture during interrogation.
But they all have one task - testing a person for truthfulness and identifying lies. The veracity of the information provided by the subject can be verified in many ways (analysis of collected facts, psychological testing). There is also a special device called a polygraph or lie detector. It’s difficult to assemble this kind of device at home, but making a cool toy to prank friends in a fun company is quite possible.
Types of modern search devices and their characteristics
Today there are a large number of detectors of various types. Some devices help to find not only wires in the wall, but also accidental breaks.
According to the principle of their action, the following types of seekers are distinguished:
- Electrostatic.
- Electromagnetic.
- Combined.
Electrostatic testers
Electrostatic detectors help detect electromagnetic fields that come from live wires. These are simple finders that you can make yourself according to a certain pattern.
Features and characteristics of detectors:
- Since the finder responds to certain electromagnetic fields, the wires in the wall must be at high voltage to be detected.
- When working with the device, it is necessary to select a certain sensitivity level, since if it is too low, problems may arise with detecting wires that are too deep in the wall under the plaster. If the level is too high, the device may trigger erroneously.
- If the walls in the room are damp or there are many different metal structures in them, then searching for wiring will be almost impossible.
But given the low cost, ease of use and efficiency, such devices are used even by specialist electricians.
Electrostatic device for finding hidden electrical wiring
Electromagnetic devices
Such devices help to find electromagnetic excitation that comes from wiring connected to a specific load. The quality of work and accuracy of such finders is much higher than previous ones.
Also, these devices have one operating feature. In order to determine where a certain wiring is laid in the wall and how deep, it must have a load of at least 1 kW. For example, you can simply connect an electric kettle or iron to the mains.
Electromagnetic device for finding hidden wiring
Metal detectors (finders)
There are situations when it is impossible to connect voltage to the wires or load, then in this case metal detectors or finders are used. The devices work in this way: various metal elements enter the electromagnetic field of the finder, which cause certain vibrations that are captured by the detector.
Such devices clearly respond to any metal objects located in the walls, so in addition to wires, they will also find them.
Metal detector for finding wires in walls
Combination devices
Detectors of this type are multifunctional, as they are able to combine several types of devices that detect wiring in walls. Such functions significantly expand the range of use of detectors and increase their efficiency.
The TS-75 model, which contains a metal detector and an electrostatic finder, is in great demand.
Combined multifunctional device for finding hidden wiring
Homemade detectors can be:
- With sound indication. During operation of such a device, when it finds hidden wires, a characteristic sound is emitted.
- With sound and light warning system (indication). When the device finds wiring, it not only emits a sound alert, but also the light begins to blink.
- On a field effect transistor. This device is easy to make according to a certain scheme. There are several different options for assembling a device with a warning light.
- Search alarm without batteries. The device operates from the mains, which also signals detection with a bright light located on the finder body.
- Detector on a microcontroller. Such a detector works on the responsiveness of the finder to the electromagnetic field, which is formed by the current flowing through the wires. During assembly, you can use an LED or a piezo sound emitter as a siren.
- Two-element device. The detector has an LED lamp as an indicator, which begins to glow when wiring is detected.
Emotions - into a fist
Let's consider another approach. How to fool a lie detector without changing your usual lifestyle? For these purposes, you should learn to suppress your own emotions. In this case, no stimulus will cause a reaction. The main recommendation is to answer the questions asked automatically, without giving them serious importance. To do this, you should concentrate, for example, on a picture of a wall in front of your eyes, or on any other object. The main thing is that it is neutral. An alternative is to immerse yourself in an event that happened in the past and live it again. To achieve positive results, it is important to develop the ability to concentrate through constant long-term training.
How to prepare for testing
If the person has nothing to hide, then significant preparation will not be required, although the person's simple nervousness may skew the indicators. A number of rules apply to quality preparation:
- Before the test, good sleep and rest are recommended.
- You should not take medications that can make your emotional background unstable.
- It takes concentration and composure.
- You should not reason during testing.
- Before testing, you should not drink a lot of liquid, eat a lot of food, or, conversely, torture yourself with hunger.
If a person feels unwell, then they should inform the polygraph examiner and ask to reschedule the study.


