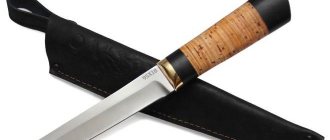
A dart is a throwing weapon. Acts as a smaller and lighter spear, compared to spears for hand-to-hand and mounted combat. The length of the dart is 120-150 cm. In addition, the spear is balanced for ease of throwing. Also called dart arrows. What does a dart represent? This is a small throwing spear with a short shaft, three or four-sided. It was used in the Middle Ages.
photo. Dart with triangular tip
Undeniable protection or how to set up a target
At the dawn of his darts, even before his first target made of Chinese pressed cardboard, the author of the text already understood that just a target on the wall was categorically wrong. The wall must be somehow protected from local snipers.
Just going to the store and buying it is not an option at all; we don’t live in England. It became clear that we had to somehow paint our own protection on the wall.
And the author of the text was already beginning to think about the size of the protection that would fulfill its task, but a collapse occurred in the form of the purchase of the first target made of Chinese pressed cardboard.
It was not possible to struggle with common sense for more than 7 minutes, and the target was hung on a bare wall. Well, just take a quick look with the whole family: what kind of thing is this - some kind of darts there.
After another 15 minutes, it became clear that the decision to “see what kind of darts this is” was just common sense, because
no matter what size protection was planned for the wall, it still would not cope with its task.
It is completely unclear to the author of the text for what reasons standard protection on a target is made with a diameter of something in the region of 70 cm (with a target diameter of 45 cm). The size of 70 cm is completely illogical in any way. Those who have been throwing for a year already do not need protection on the target in principle.
For those who have just bought a target, the protection meter per meter will be too small, however. And who the standard ~70 cm are aimed at is a mystery shrouded in darkness.
A protection of 70 cm is a completely useless and extremely incomprehensible size of the principle of “average temperature in the hospital” - for some it is absurdly large, for others it is categorically insufficient.
So what is the correct amount of protection, the attentive reader will ask. In our family, we received the answer experimentally after the first 2-3 months of mockery of the wall where the target hung.
The area of irreparable damage caused was measured and at the same time the size of the correct protection for the target was found - it turned out to be 100 by 105 cm. 100 in width and 105 in height. It was decided to make a protective shield of this size.
Moreover, make it beautiful and indestructible, and cover all this terrible destruction with it.
The first shield was a trial and error option
. It was decided that the main area would be made of hardboard (fibreboard) 5 mm thick. Hardboard 5 mm thick is stitched with a dart one at a time. Therefore, the hardboard was screwed onto a frame made of wooden blocks so that there was a gap between the wall and the hardboard.
It all turned out to be long and tedious, because... It was still unclear what method of attaching the target to the shield would be used - accordingly, it was not clear in which places on the hardboard on the back side the bars should be located so that the target fastener would be attached to them, and not to the air behind the hardboard.
Ultimately, the frame made of bars was built so that it was suitable for two different types of steep and expensive overseas fasteners, and the target was eventually hung on the shield using the simplest standard fasteners that come with every normal target.
Hardboard on wooden blocks was wrapped in carpet. The carpet is screwed to the bars. The result is a beautiful, powerful stationary protection. I hung it on the wall and forgot about the nerves from missing the target, and the eye is happy. It cost about a grand for consumables, more than half of which was carpet.
It turned out beautiful, but loud
. There is air between the hardboard and the wall. A sheet of hardboard measuring one meter by one meter with air between itself and the wall, and after a good hit with a dart it makes a good and booming sound. Even a good hardboard carpet can’t save you. They did not redo anything. That's how we live.
About a year later I had to make another shield. His task is different. This is not a stationary shield on the wall, but a mobile shield on a portable stand to provide a warm-up game line at our tournaments. The second shield was made taking into account the mistakes of the first shield and it cost not one piece, but one and a half. And all because of the same carpet - the most expensive component.
It was necessary to put twice as much carpet on this shield for one simple reason. I hung a stationary shield on the wall and nothing is visible from behind it - which means there is no need for a carpet there at the back. But a mobile shield is a completely different shield - they can also look at it from behind. Moreover, a lot of people can do this.
Therefore, it must be completely wrapped in carpet, and have a presentation everywhere, and therefore it is no longer a piece, but one and a half for consumables.
Sleeping pneumatics
Let's start with the most primitive, but very popular and quite effective device.
This “wind-throwing device” complete with “UVYSH-1m” syringes is nothing more than an enlarged modification of school tubes for spitting balls of chewed paper and homemade darts with needles. Well, or a plastic analogue of exotic sarbakans.
The “actual fire” distance is up to 15 meters.
We should immediately briefly talk about flying injection syringes that self-cock when moving along the barrel. They differ mainly in the amount of drug (from rabbit to bear or moose), ballistic characteristics and pusher drive - spring or compressed gas.
You can shoot them not only from a blowpipe. Taking a look at the photographs below, many air rifle owners will begin to look at their “toy” rifles differently.
This is a “UVYSH-651m” kit, consisting of a “Veterinarian-651KS” thrower and a set of syringes. The recommended range of use is up to 10 m, the number of shots on one can is up to 50.
It is not difficult to guess that, in fact, we are dealing with the good old Izhevsk gas-cylinder (CO2) MP-651K, only single-shot and 12 mm caliber. Compare with the prototype:
And this is a pneumatic gun with a larger canister—the “Sanitar” throwing device. It has a range of up to 30 m, and the number of shots has increased to hundreds.
There are also imported analogues. For example, Dan-Inject Model JM Special.
Since neither I nor you, dear readers, are professionals in this field and are not going to make money from this, I don’t see much point in stopping at rifles that cost tens of thousands of rubles.
And finally, even paintball markers are successfully used for remote immobilization purposes.
Most of the devices described above are highly specialized, with calibers ranging from 6.35 mm (.25) to 13 and even 21 mm. And therefore it goes beyond the interests of ordinary amateurs and owners of unlicensed pneumatics of 4.5 mm caliber (.177). But not everything is so bad - rejoice, owners of budget Izhevsk “Murkas”!
Yes, in the photo is MP-512, in this version proudly called “Lider-3pd Veterinary Gun Set”. Damage range up to 30 meters.
The photo below shows us another old friend - MP-53M, again under the sonorous name “Veterinary device LEAder-1pm”. The firing distance, as expected, is shorter.
These are standard products with declared projectile speeds of 170 and 110 m/s. With no less success, their place could be “Hatsan”, “Gamo”, “Diana” - any spring-piston air rifle or pistol with a broken barrel. Weapons with underbarrel/side cocking or PCP, due to the presence of “clips”, drums and other design features, are mostly not suitable, since the dimensions of bullets and throwing darts are very different.
And here are the darts themselves. On average the price is about 40 rubles per piece. All are branded “Leader”, all are 4.5 mm caliber, differ in ballistic characteristics and properties of the active composition.
For example, “Leader-d” (below) has half the time before the immobilizing suspension begins to work than those that use a hardening paste. And the accuracy, by the way, is higher due to the modified design.
Literally until recently, in addition to owners of PCP and rifles with a fixed barrel, owners of short-barreled gas-cylinder weapons, the drums and magazines of which simply did not fit the dimensions of the darts, were also subject to a kind of “discrimination.” Everything changed with the advent of revolvers with so-called false cartridges (see article “Short barrel”).
The photo shows the LEADER-4pgl kit. This “...hl” in its name seems to come from the company -, but any analogue will do, be it “Cybergan”, “Dan Wesson” or “Smersh”. The undoubted advantage of such a weapon immediately catches your eye - multi-charge capability. As well as a minus - a tiny dart, which means a small amount of active ingredient. Taking into account the known characteristics of such revolvers, we can say that they are designed for short shooting distances and for stray cats and small dogs. However, these animals, no less than wild ones, need treatment and evacuation to holding centers and shelters. And the device itself, if you have shooting skills, will allow you to work in a flock.
How to make a dart dart with your own hands at home | Do it yourself!
There are games that both children and adults would like to play. One of them is darts - a relaxing activity at home and at work, in the apartment and in the yard.
Over time, a previously purchased set becomes defective, and lost elements are sometimes impossible to find.
In such a situation, the question arises, how to make a dart with your own hands , saving money and the time needed to go to the store.
In fact, the procedure for making this homemade product is quite simple. Everyone can find the necessary materials and tools within a few minutes. The creative process will not take more than half an hour.
Necessary materials
The first step is preparing materials. These include:
- Dry branch of any tree species;
- Plastic bottle or cardboard;
- A 30-gauge nail, a gypsy needle or 3-4 cm of steel wire with a diameter of 1.5-2.5 mm;
- Plaster, tape or insulating tape;
- Ballpoint pen tip or needle for inflating balls.
Tool
A simple tool with which even a child can darts with his own hands
- Wire cutters;
- Scissors;
- Sandpaper, file or other abrasive material or tool.
Stages of making a dart
Having prepared everything you need, you can get down to business. In the first step, cut a piece 8-10 centimeters long from the branch. We break the gypsy needle into 2 parts or bite off 3-4 cm of steel wire. This element will serve as the front sharp part of the dart. As an option, you can use a small nail (30 or 40 mm), after first biting off the head with wire cutters.
From the needle for inflating the balls, you need to break off the tip through which air is pumped. This item is not useful. You need the part that screws into the pump when inflating.
Before making a complete dart dart , you can sharpen the wire or nail. If using a sewing needle (gypsy), this is not necessary. However, it is advisable to carry out this procedure at the final stage. The reason is that there is less chance of finger piercing.
The next step is screwing the iron into the wooden base. The nail, needle or wire must be inserted exactly into the middle of the end part of the branch. The core of the tree in this case is softer, which makes this stage quite simple.
The inner diameter of the ball needle is smaller than the diameter of the branch. You need to remove the layer of wood in the part of the dart where the tip is already inserted. Having adjusted the size to the required size, we put on the iron tip.
I saved some money and decided to become a businessman
My name is Alexander Poberezhsky, I saved up a small amount of money, and I wanted to invest it in business. I was just studying at a business incubator and met Radik. He proposed opening a transforming pneumatic shooting gallery in the Gazelle car and the Pop the Ball prize attractions for the summer in the small northern town of Nizhnevartovsk. The idea seemed interesting to me, since I collected air pistols and rifles.
I was completely new to entrepreneurship, and so we decided that I would invest money and my free time into this business, and my partner would supervise and guide me on the right path.
In general, I’ll tell you where you can invest 100,000 rubles and make good money over the summer on a transforming pneumatic shooting gallery in the Gazelle car and the Burst the Ball prize attractions.
There is very little entertainment in my small town.
Probably, in any small city there is not much entertainment for young people in the summer. In our northern Nizhnevartovsk, with a population of 250,000 people, there is also nowhere for teenagers to have fun. Perhaps any self-respecting person is ready to part with his money for the sake of positive emotions and pleasure.
Nizhnevartovsk is a fairly small city located in the Khanty-Mansiysk Autonomous Okrug.
At seaside resorts, we are used to seeing queues of people who are ready to play the attraction and do not spare their money. That’s why we decided to organize such a business in our small town, and, by the way, it turned out to be quite successful.
I was supervised by an experienced entrepreneur, who in the past had owned a shooting range, including a crossbow one, so we corrected the mistakes immediately, and I didn’t even pay attention to them.
DIY darts
My daughter wanted darts, and I, remembering the years of my former youth, suggested that she make it with her own hands in half an hour. She happily agreed, even on the condition of providing all possible assistance. And we started...
Initial materials for making darts (what any Soviet citizen had in his bins when I was still a boy):
Needles, threads, matches and paper.
We lightly wind 4 matches with threads, insert a regular needle for hand sewing into the end in the center (from a sewing machine, or even small shoe nails will do) and tightly tighten the edge with the needle with threads.
On the reverse side, a small paper square is bent for the fletching of the dart (the edges may or may not be cut off). We also insert it between four matches and tighten the matches with a thread. We have this result:
We secure the edge of the thread by tucking it between the matches. We repeat the process again until we get the required number of darts for the darts.
Be careful with darts!!! The sharpness of sewing needles allows them to pierce any surface, including arms, legs and eyes. The only exceptions, perhaps, are stones, ceramics and metal products.
Test of homemade darts:
All that remains is to make a target, and this is a matter of taste and creative imagination. I didn’t invent anything, I just took ready-made targets from the old Maxim magazine:
All that remains is to place the targets on the wooden garage doors. And the darts are ready! Now every time I need to stay in the garage, my daughter has something to entertain herself with. The photos were taken from a mobile phone, so don’t judge strictly, everything you need is visible. ————— PS
The easiest option, so as not to bother, is to simply choose a thicker tree as a target and train your dart throwing skills, gradually moving on to thinner trees. For those who do not want to cause destructive harm to natural life, you can simply draw a target on the fence.
In my Soviet childhood, I made at least a hundred similar darts, so my hand is still accurate and hits the target from a considerable distance