Knives are hand tools that vary in purpose. Products that can be bought in stores are not always good in quality. Therefore, people who know how to work with tools are often interested in how to make a knife with their own hands. By carefully studying the information on this topic, you can create a blade that has all the properties a master needs.
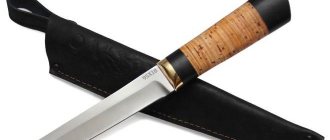
DIY knife.
History of development from stone to modern
Man first began to use a knife immediately after he stopped walking on all fours and began to get food with improvised means.
The tools that people began to use for hunting and farming were fragments of bones or stones. The first ones were much easier to make, due to the fragility of the animal’s bones, but such products dulled unusually quickly, and not all components of the skeleton were suitable for the role of a sharp instrument. To make a knife from stone, primitive man had to put in a lot of effort. However, the laboriousness of the process was compensated by its relative strength and the ability to sharpen the edge of a stone blade. Another advantage of a stone knife over a bone one was the durability of the tool. Bone weapons were fragile and often broke during hunting, so this type gradually passed into economic use and construction.
At the time of human mastery of metalworking, edged weapons began to be made from bronze and copper. They were significantly superior to stone samples in terms of durability. The blades were made from a single piece of metal. Swords, daggers, and knives of those times became indispensable weapons for the soldiers of the Roman Empire, with the help of which troops conquered new territories.
The Iron Age is the age of experimentation and new technologies. Knives acquired different shapes and lengths; at this time, sickle-shaped and wave-shaped blades were invented. In Rus' at that time, edged weapons were included in the attributes of the nobility and merchants. The Vikings used wood to make sword hilts so that the steel, frozen in the cold, would not burn the hand.
In the Middle Ages, people began to use steel - an alloy of iron and carbon - in the production of swords. These times were considered bloody; history knows many large-scale wars and battles. As a result, the emphasis in forges was not on quality, but on quantity. And in comparison with ancient times, the characteristics of the samples of edged weapons of the Middle Ages were much inferior to the ancient prototypes.
During the Renaissance, the experience of blacksmiths, passed down from generation to generation, together with new technologies of that time, resulted in steel cutting products of quite high quality. But just at this time, firearms began to be used in battles, and interest in blades began to gradually fade away.
During the Industrial Revolution, the production of bladed weapons became widespread, moving from handicraft to factory production.
In factories, the manufacturability of the process reduces costs, which means that the product becomes cheaper and is already available to almost everyone. Soon, folding knives and world-famous centers for their production appeared - Russian Zlatoust, English Sheffield, German Solingen and Swedish Eksilstun.
Components
At first glance, everything is quite simple, however, the knife includes many elements. The handle and blade are the two main components. The tip, or toe of the blade is called its front point. The blade (cutting edge) is considered to be the sharpened side; it is made smooth, sometimes closer to the handle with a sawtooth shape.
There are knives where the sawtooth component is on the butt. The butt is the opposite side of the blade. Slopes are called planes that taper towards the sharpened part of the blade. The part that is attached to the handle and not sharpened is the heel of the blade.
Army photos on Shutterstock: Army and military photos.
The handle is that part of it that a person clasps with his hand when handling. A partition, or any other barrier, is built into the front of the handle, designed to protect the hand from slipping onto the sharpened part of the blade. The handle is attached to the tail of the blade. Different materials are used for production.
Anything will do. However, do not expect that such a blade will retain its cutting properties for a long time; most likely, you will have to sharpen it after any work.
High-speed steel, which is used in the production of hacksaws and saws, gives the blade good cutting properties, while maintaining an edge for a long time. However, a significant disadvantage of this raw material is its fragility and susceptibility to rust.
A good product can be made from plane blades. The material is first heated to a hot temperature, and after cooling in air, it is shaped with a hacksaw and ground with a file, or on abrasive wheels. At the end of manufacturing, edged weapons are hardened in water or oil. The disadvantage is the same - they rust very quickly.
But after each job, it’s enough to wipe it well, lubricate it with a special lubricant, and it will serve you faithfully for decades, keeping both its qualities and its appearance unchanged.
Making a cutting product from an ordinary file is simple; it does not require the use of complex tools. The file is heated, cooled in air, and the workpiece is processed with another file. Sandpaper or other abrasive is used to remove excess elements from the surface.
In order to obtain a high-quality knife at the end, proper temperature treatment and turning are necessary. Then it needs to be hardened again. You can not harden the entire knife, but only its cutting edge, but this is somewhat more complicated, of course.
How comfortable it is to use a knife depends on the design of the handle, and therefore this element is not inferior in importance to the blade. If the product is a souvenir, the handle is decorative
Wrapping cord around the tail section is a simple way to make a handle. This type of winding is used mainly on tactical and throwing knives.
Other manufacturers use bones and animal horns or wood to create knife handles. For this, pear, oak, walnut, ash, maple and apple are used. Another good resource is birch bark. After processing, the handle becomes grooved and pleasant to touch. And when used, it sits securely in the palm of your hand without slipping, even if the handle is stained with animal blood or fish scales.
Leather sheaths are universal and reliable because the knife is held in them by friction, which allows you not to be afraid of losing the weapon even during active physical activity. Sheaths woven from thick cord are also widely used.
But they are more suitable for throwing ones, they are heavy, and usually blunt, except for the toe, of course. The lace cannot provide sufficient friction force, and their use for weapons with a thinner blade than tactical ones is not recommended.
Types, features and drawings for DIY knives
There are many types of knives with different applications. Its design, shape, material for manufacturing, strength characteristics and much more depend on the scope of application of the blade. Let's consider the main types and sketches of knives for self-production, depending on their purpose.
There are a lot of types of knives, so it’s difficult to choose the right one. PHOTO: popgun.ru
Hunting knives
This is probably the most ancient and sought-after type of bladed weapon. Hunting knives were used to fight wild animals and cut up prey. High demands have always been placed on them:
- ease of use;
- The steel must be high quality, wear-resistant and maintain its sharpness for a long time. The best, albeit expensive, option is Damascus steel or damask steel;
- the handle is made only from durable wood;
- there is no need for a large guard that interferes with cutting the carcass;
- optimal parameters: length and width of the blade - 100-140×30 mm, spine - 3-4 mm, and steel hardness of at least 58 HRC.
All these characteristics must be taken into account when making a hunting knife with your own hands. Hunting blades are often the pride of the owner. They are decorated with thematic scenes, patterns, and the handle is made from the bones of wild animals. Some hunters collect knife collections.
Some hunting knives can be called a work of art PHOTO: rusknife.com Creating a sketch and drawing is one of the main stages of knife manufacturing PHOTO: popgun.ru The simplest drawing with dimensions PHOTO: rusknife.com
Watch a video on how to make a hunting knife with your own hands at home.
Watch this video on YouTube
Kitchen knives
A knife is a must-have item for any kitchen. It is used by both housewives and chefs of famous restaurants. To perform everyday tasks, 3 knives are enough, but there are sets of more than 10 items, each of which is designed for a specific job: cutting vegetables, meat, bread, etc.
For the manufacture of kitchen blades, metal was initially used, which had certain requirements. It must be durable, not oxidize and suitable for home sharpening. Modern knives are now made from ceramic. Such models are highly hard and retain the factory sharpening for a long time, but they are quite fragile and can break if dropped on a ceramic tile or cement surface. The lining of the handle of home kitchen knives is mainly made of plastic, but durable hardwood is also used.
Types of kitchen knives PHOTO: aggweb.ru A kitchen “troika” from a famous brand is quite expensive PHOTO: img.best-kitchen.ru
DIY kitchen knives PHOTO: i.pinimg.com
Knives for tourism and survival
You can't do without a good knife on a camping trip or fishing. When going into nature, you often have to deal with various problems that a high-quality, properly selected blade can help solve. A good camping knife is:
- the ability to easily chop branches of various thicknesses, cut slings and ropes;
- necessarily a fixed blade;
- wide blade and thick handle;
- the blade should be made of soft stainless steel for ease of sharpening in field conditions;
- The handle is made of plastic, rubberized and ribbed to prevent slipping.
Types of tourist knivesPHOTO: rusknife.com
Survival knives are derived from tourist models. They are additionally equipped with special devices (multi-tools), which should help a person in extreme conditions. However, often due to the pursuit of maximum versatility, the quality of the product suffers.
Knives for survival in extreme conditions PHOTO: outlivetheoutbreak.com
Combat knives
A combat knife is considered to be a knife designed to defeat an enemy in hand-to-hand combat, and is in service in the armies of different countries. In addition to performing the main task, such blades can be used for digging, cutting wire fences, cutting branches, etc. Distinctive features of knives used by the military are:
- double-sided or one-and-a-half sharpening;
- oval cross-section of the handle;
- the length of the entire product is 220-320 mm;
- the tip is in line with the butt of the blade and handle;
- reinforced guard;
- easy to remove with one hand;
- anti-glare coating.
Series of combat knivesPHOTO: unpictures.ru
Advantages of homemade models
Knives have a mystical attractive power. Men have always loved edged weapons. Possessing it gives a person confidence (although it is not always consistent with the law). Among some peoples (for example, in the Caucasus), a knife is a mandatory element of the national men's costume. Its appearance and its technical characteristics tell a knowledgeable person a lot about the owner.
Ancient metal knivesPHOTO: comp-pro.ruIn modern conditions, in everyday life, the knife has lost its function as a means of attack and defense of one’s own life. Of course, this statement does not apply to professional soldiers and hunters. But we will talk about them separately. A knife is a piece of kitchen utensil, a tool of a homemade craftsman, and a tourist’s companion. Specific knives for carpenters and electricians. The special product is in the emergency reserve of the cosmonaut pilot.
An ordinary person does not always manage to purchase the knife that he needs for something. And he begins to think about how to make such a knife himself, with his own hands.
Related article:
Polishing
Polishing is not only about giving the blade an aesthetic appearance, but also protecting it from corrosion. The smooth surface prevents water from accumulating in the recesses, which leads to the appearance of characteristic rusty spots on the knife.
Polishing can be roughly divided into 3 stages:
- Processing with coarse abrasive with large grain size.
- Processing with thinner stone.
- Finish polishing with fine grain.
As a result, we will get a shiny blade, but it will not yet have a mirror image. To achieve a mirror-like result, you will need to change a few more abrasives, gradually reducing their grain size, and eventually switch to a piece of leather with goya paste.
The whole process is quite simple - apply three abrasives along the blade until the entire surface becomes homogeneous, then reduce the grain size. This stage is one of the longest in the entire production, but at the same time the most exciting.
Drilling holes for attaching the handle
To form a handle from two wooden plates, you will need to drill 2 holes in the shank for rivets. This procedure must be carried out before heat treatment. It is even advisable to assemble the entire structure for a kind of test to make sure there are no defects.
We select the diameter of the drill based on the size of the purchased rivets. To speed up the process of drilling hard or thick metal, the location of future holes can be marked with a center punch. You can use any available drill.
Making a forge
Heat treatment is not an easy and very traumatic stage of knife manufacturing, during which all previous efforts can be ruined if done incorrectly. To heat treat a blade, it must be heated to a temperature that leads to structural changes in the metal; usually 750 degrees is enough.
Forge for hardening.
Of course, you can use a special burner that will produce the required temperature. But it is not recommended to do this, since the steel heats up unevenly, which can lead to defects in the future.
Therefore, to perform heat treatment at home, you will need a forge. They are also available for sale - this is not our method. Making a forge with your own hands is not difficult; a large number of instructions, articles, training videos, and diagrams can be found freely available on the Internet. The main materials used for manufacturing are sand and gypsum.
How to determine the temperature in such an oven without a special thermometer? There is an old proven method: we place ordinary kitchen salt in a steel container in a forge; if it begins to melt, then the temperature is quite suitable for hardening the blade.
When using complex alloys and grades of steel that are difficult to heat treat, it is better to seek the help of specialists.
Smooth or textured handle
If the task is to make an absolutely smooth surface of the handle, then at the final stage it should be tightly wrapped with durable polyethylene film or the irregularities should be sanded well and then polished. If, on the contrary, the final version should be embossed or rough, then grains of river sand or other abrasive must be applied to the surface impregnated with epoxy resin and the product must be left until completely dry. When the resin has completely hardened, any excess abrasive should be removed from the surface.
Read also: How to disassemble a Samsung laptop battery
If the knife handle plate is much smaller in size than the intended handle, then it can be placed in a pre-prepared metal tube or hollow handle. The existing cavity can later be used to store various necessary small items, thus increasing the functionality of the product. For example, you can put threads and needles or matches there, but provided that the cavity is completely protected from moisture. It is impossible to know what situation you will find yourself in in the future.
Manufacturing process
To make a folding knife correctly, that is, to eliminate the mistakes of beginners who decide to create such a product with their own hands, you need to work consistently and step by step. Below is the procedure for working with all the components of the design of a folding knife; it does not depend on the type of materials and equipment used, so you need to follow it exactly.
Preparing parts
First of all, the blade is sawed out and brought to an ideal shape, according to the drawing. The handle parts are then produced and sanded using a belt sander or a file and sandpaper. The next step is to drill holes in them to secure the decorative trims.
Knife handle linings can be made at the very end, when all parts are fastened with temporary bolts, the structure is checked for play, flaws are sharpened, and the metal surface is sanded with fine-grained sandpaper. Observe safety precautions when cutting and grinding parts, wear safety glasses and a respirator. To facilitate the process of making a blade, you can use Soviet detailed drawings and manuals for making folding knives (for example, from Do-It-Yourself magazines).
Align the drawing with the workpiece, cut out the blade
Then - the handle. We make the necessary holes for fastenings. We grind all the workpieces.
Hardening
Only the blade needs to be hardened; the metal frame of the knife handle does not need this. This procedure will allow the product to hold an edge for a long time, have flexibility, and at the same time be very durable. Since the knife blade is a small metal plate, you do not need a forge to heat it, but a regular gas or kerosene burner will do. A professional approach involves measuring the heating temperature, as well as bringing it to the level required for a particular type of steel. Having the necessary equipment, all the necessary information on the grade of steel used can be found on the Internet or in textbooks - there are special tables that indicate the quenching and tempering temperatures.
At home, you can use your eye, that is, heat the blade of a homemade knife until it turns evenly red, after which you need to dip it in oil, remove it, and let it cool. Waste machine or vegetable waste will do. The second stage of hardening is tempering. It is necessary to relieve stress on the steel so that it is not brittle. To do this, you can use a regular oven, heated to 200-250 degrees Celsius. The blade is placed in it for 1 hour, after which the oven is turned off. The steel should cool slowly, so you can remove it after about 1 hour, when it has cooled to room temperature.
Heating up the steel
Assembly
Assembling the knife is carried out after preliminary grinding of each part with fine sandpaper, as well as polishing the metal parts, preferably with GOI paste. It is necessary to select mounting bolts of the correct diameter for quality reasons, because they support the entire structure of the folding knives. If a pin lock mechanism is used, it is advisable to make the pin itself from titanium or a metal with similar properties. The fully assembled knife must be re-sanded at the attachment points. Decorative overlays are prepared in advance; if necessary, grooves are made on their inside for the heads of the fastening bolts, after which they can be attached with glue. The final processing of the product consists of polishing the metal parts and varnishing the decorative elements, if this has not been done previously.
We select the mounting bolts We check for the presence of backlashes We check the operation of the mechanism
Sharpening
The primary sharpening procedure must be carried out using special equipment to create the desired cross-sectional shape of the blade. The most popular types of sections are: flat-concave wedge, flat-concave wedge, wedge-shaped. The last option is conventionally called double-sided sharpening, and is the easiest to implement, so it can be done even without a sharpening device, using a regular file and a sharpening stone.
Bring the knife to the desired sharpness
How to make a grinder at home
If we describe the design of the grinder quite simply, then it is a motor, 2-4 rotating rollers, one of which is adjustable, and a sanding belt. A grinder is usually distinguished from a manual grinder by a fixing stand with the ability to change the angle of inclination.
The stand is necessary for precision work. We decided to make descents - fix it, set the desired angle of inclination of the stand and start the grinder.
As for the adjustable roller, it is a must. After all, the sanding belt stretches over time, and subsidence forms. The roller is pulled up and the work continues. There is another important point: sanding tape is suitable only on an elastic basis. Otherwise, it will break under the load.
To assemble the machine at home, you will need:
- Think over the design of the device and make drawings.
- Prepare all the necessary tools: jigsaw, drill, ShMU.
- Prepare the parts required during the assembly process or arrange with a turner for turning them.
First you need to decide on the tape, or rather its length. For domestic use, the optimal option is 915 mm; this is the length with which the majority of Chapaevsky machines work.
The base for the bed must be more than 12 mm thick. Bolted connections in this situation are unreliable. It is advisable to use welding.
When turning rollers, the roughness index is important, which should be at least 1.25. Otherwise the tape will wear out quickly
If the machine is planned to be made with four rollers, then it is customary to use the following dimensions: 150 mm for the leading one, 100 mm for the adjustable one, and 70 mm for the remaining one. It is important to position them without distortions to avoid the tape slipping
The cost of a finished pulley starts from 2000 rubles. Somewhat cheaper you can order from private turners.
Grinder made by yourself.
Particular attention should be paid to the drive for the grinder. If it is not possible to acquire a specialized engine, you can use an alternative
It is advisable to use an engine with a power of 0.75 kW or higher, and a speed of 1,200 or more.
Homemade grinder with a washing machine engine
With a drive pulley size of 70÷100 mm, the motor for the grinder must spin up to at least 3000 rpm. The motor, removed from an old automatic washing machine, has low power (below 300 W). It is characterized by good reliability and is unpretentious in operation.
The popularity of using just such a drive is due to its wide distribution.
The drive from the washing machine must be included in the preliminary drawing. A do-it-yourself grinder at home requires a motor with an output shaft. In this case, the shaft has a threaded connection, the design of which allows it to be connected to the pulley without much difficulty.
From a drill
A grinder for a drill is a special attachment that can be made in several stages. There are hundreds of different manufacturing options. Let's consider one of the simplest and most reliable, step-by-step instructions:
- Everything necessary for work is prepared: shaft with gears, bearings and sheet metal.
- Two plates measuring 110x250 mm are cut out.
- The necessary holes are drilled on each of the plates. In this part the bearings will be fed for adjustment.
- Next, take a “hairpin” and cut it into 120 mm pieces. Homemade rollers are installed on studs and secured with bolts. The tape is stretched and fixed on the other side.
- A base is made for attaching the grinder. The machine is mounted on the bed, and the drill is fixed with clamps.
- A corner is sharpened and attached for convenient fixation of the knife during sharpening.
From the Bulgarian
The main design difference between an angle grinder and other types of power tools is that its output shaft is turned at an angle of 90º to the axis of the electric motor and, accordingly, to the housing. For this reason, it is called an angle grinder.
This feature is perfect for longitudinal fastening of the drive roller and the “electric file” blade. The result is a tool that is elongated in a line and very comfortable to use. The same attachment for a drill is located at a right angle to the body, which is quite inconvenient for work.
To make a device, it is enough to make a metal base for the rollers, tension the tape, and adjust the dimensions of the drive roller to the ShMU guide, and the machine is ready.
What is required for production
When planning to make your own knife, you should keep in mind that it is impossible to make a universal blade. For example, tourist ones are designed for rough work, and you won’t be able to cut up game with their help. Hunting blades must be sharp and hard so that jagged edges do not form on the blade if it accidentally hits a bone.
The performance characteristics and scope of use of the future product directly affect the type of steel that should be selected for manufacturing.
The steel must be hard, although this indicator is achieved during heat treatment in a certain mode. In addition, the material must be moderately tough so that the blade is resistant to chipping and brittle fracture. It should also be taken into account that the steel must be corrosion-resistant and wear-resistant, because in the wild you will not have the opportunity to sharpen or properly clean the blade.
Necessary materials
Making a high-quality hunting knife requires the correct selection of materials. For example, such a blade can be made from a spring, because such steel is perfectly suited for this purpose in terms of its characteristics (Figure 3).
If you can't get high-quality steel, you can always melt down a piece of blade from a hacksaw or resharpen another blade.
The most suitable steel for making a knife with a wooden handle is considered to be 1095 or 1070 steel. For other materials, you will need paper and a pen (or a ready-made blade template), material for making the handle, as well as copper or brass pins with which the handle will be connected to blade.
Figure 3. Required drawings and materials
Optionally, you can make the handle of the knife from stone and the blade from a drill, but in this case the finished product may be too heavy.
What tool will you need?
If there are usually no problems with materials for making a miniature hunting knife, then you will have to be more careful in selecting tools for the job. This requirement applies to the manufacture of kitchen knives and blades that are used by tourists, fishermen or hunters.
Figure 4. All necessary tools must be prepared in advance
In order for all manufacturing processes to be successful, you will need an assembly table with a vice, emery for grinding, a set of files and a drill with Pobedit drill bits, sandpaper of various grits, several abrasive whetstones and diamond files, a set of chisels and hammers and other small tools.
In addition, you will need a belt sander, oven or other similar device to harden the blade and linseed oil to impregnate the handle material. Naturally, you need to prepare drawings in advance with the dimensions of the finished product (Figure 4).
Useful tips
We looked at what to make a knife from. But the procedure has a number of nuances that should be taken into account. The tips below will help you make a quality product that will actually be used.
1. If there are small irregularities or burrs on the workpiece, then process it with a needle file.
2. To avoid injury when installing the handle, wrap the blade with electrical tape.
3
When choosing a material, try to pay attention to its evenness and the presence of microcracks. This can greatly affect the quality of the future product.
4
The blades must be pulled out very carefully
5. If you decide to choose wood for the handle, then you can use a regular parquet board.
6. The manufacturing process of this product is quite noisy. Therefore, it is advisable to carry it out in the garage rather than in the apartment. In addition, you must wear work clothes.
Now you know how to make a good knife at home. Good luck!
Stages of making a knife with your own hands
If you plan to make a serious knife, then you should use high-quality alloyed high-carbon steel for it.
Selection of knife blank steel
When choosing a domestic brand of steel for a homemade knife, many contradictory conditions are taken into account. The most popular steel grades in Russia for mass-produced knives are 65Х13, 50Х14МФ. For weapons and hunting products, 9ХС and 95Х18 are used. Kitchen tools are made from 40X12 steel. Knives are easily sharpened with musat. Steel grade 45X13 is used for the manufacture of tourist knives, as it is resistant to corrosion. Inexpensive steel grade ШХ15СГ is very popular in making homemade products. The brand is deciphered as follows: The letter “Ш” indicates in the brand that it is ball-bearing steel, “X15” indicates the chromium content and its amount (approximately 1.5%), and the letter designation “SG” indicates the content of alloying elements silicon and manganese (approximately 0.34% and 0.4%).
There are many similar foreign grades of steel.
How knives are made
Any knife, even the simplest one, consists of several parts. And there are about a dozen and a half of them in the folding product. It is advisable to have access to simple machines - an electric sharpener, a belt grinder, a drilling machine, and a high-temperature electric furnace for heat treating metal.
Each part must be made in accordance with the drawing, otherwise it will be impossible to combine them during assembly. The entire process of making a knife is divided into successive stages.
Knife and its components PHOTO: warbook.club Parts that make up a folding knife PHOTO: clubsamodelok.ru
How to make a blade
The first step is to make a knife blade, another name for it is “blade”. The manufacturing technology is determined by what this part will be made from. As a rule, all workpieces have high hardness, making processing difficult. The hardened metal should be “released”. This is a heat treatment operation that involves heating the workpiece to approximately 200ºC and holding it for an hour at this temperature. Heating can be done in the kitchen in the oven; the part should cool down along with the stove.
The next stage is the formation of the future blade. If the workpiece is thick and of an awkward shape (for example, made from a file), then it must be forged. If the steel is not very thick sheet, then it can be cut or ground using rough sandpaper.
In the prepared blank of the future blade, it is necessary to drill holes in accordance with the drawing through which rivets will pass to attach the handle.
Now the workpiece can be refined a little - remove the burrs, begin to form bevels for the future tip. The thickness of the blade and the shape of the bevels determine the cutting and strength properties of the finished knife.
If the workpiece satisfies the master, then hardening can be carried out. Strictly according to science, the heating temperature for hardening is determined from a reference book for each grade of steel. This is approximately 800ºС. In handicraft conditions, you can use a magnet as an indicator. As soon as the metal loses its magnetic properties, it means it is ready for hardening, i.e. sharply lowering it into cold water, or even better, into a container with machine oil.
After hardening, the metal is tempered again. This procedure gives the material the necessary properties of elasticity and flexibility.
And the final stage of working with the blade is its cleaning, sharpening and polishing.
Related article:
How to make a handle for a knife
Making a knife handle is a creative process. Here you need to show artistic taste, imagination and not forget about common sense. The handle of the knife should fit comfortably in your hand.
The material for the handle can be any; the master chooses from what is available to him. Production also proceeds in stages. First, blanks of two halves are formed, then through holes are drilled, coinciding with those made on the blade. The handle parts are attached to the knife. You can coat them with epoxy glue before doing this. Pins are inserted into the holes and riveted. The final stage is when the handle is finished and polished.
List of steps and preparation of everything needed
The entire manufacturing process can be divided into several parts for a more complete perception of information:
- selection and preparation of materials with tools;
- template selection;
- choice of steel;
- shaping the workpiece;
- heat treatment;
- knife sharpening;
- making a handle.
Each of these steps is associated with health hazards, so each stage should be approached carefully and thoughtfully, following all safety rules.
So, to create a really high-quality knife, we need a list of such materials (if you have experience in this matter, you can use an alternative):
- steel;
- tree;
- brass rivets;
- gypsum;
- iron sieve;
- gas-burner.
Tools:
- Metal file.
- Hacksaw for metal.
- Hand drill and drill bits for it
- Permanent marker.
- Metal scissors.
- Hammer.
- Kerner.
- Long nose pliers.
- Gloves.
- Nozzle.
- Metal or plastic brush.
- Miter box.
- Saw on wood.
- Sandpaper.
- Clear varnish or stain.
Drawing of a kitchen knife.
Plywood product
To work, the master will need a sheet of plywood. It needs to be divided into three parts. On each of them there are drawings of the details of the future knife. On one piece of plywood you should draw the shape of the entire product, and on the other two - the shape of only the handle.
Using a jigsaw, all three elements are carefully cut out. The resulting two stencils with the image of a handle must be attached on both sides to the first stencil - with the image of a knife. Then, using metal pins or other fastening devices, all three parts are connected to each other.
The resulting product can later be painted and varnished. This knife is considered a souvenir. It can be used as a decoration, not a kitchen appliance.
DIY instructions
Basically, the production of any type of knife occurs using similar technologies. Following the subtleties and recommendations will allow you to get a blade no worse than the factory one. But on an industrial production scale, machine labor is used, but in our case everything will have to be done manually.
Standard throwing knives have the following characteristics:
- thickness - 4 mm;
- width - 25 mm;
- tip length - 15 cm;
- handle length - 10 cm.
Taking into account the parameters, we make a drawing and cut out a template from cardboard with a scale of 1:1. We apply this drawing to the already prepared steel plate and trace it along the contour.
Then we cut out the steel blank using a hacksaw. You can deviate slightly from the contour - this will delay processing, but will prevent mistakes that often happen due to inexperience.
Steel workpiece processing
As already mentioned, in order to get a quality product, when cutting, it is better to leave a margin of 2-3 mm. You can bring the edges to the intended line after we receive the finished workpiece.
To carry out this work, you can use any convenient and familiar method: bars, sandpaper, files. You need to get a blade thickness of 4 mm. It is better to lay this out when selecting or forging a steel sheet.
Steel blank for throwing knife.
Blade sharpening
We move on to this stage only after the workpiece has taken on the desired shape and thickness. A good throwing knife can only be obtained by following the technology. The sharpening process takes place from top to bottom, while the sharpening itself is carried out only to the middle of the narrow edge of the blade.
Triggering movements are carried out over the entire area of the abrasive used; work must begin with coarse grains intended for rough sharpening. We work alternately, first with one side, then with the other, doing the same manipulations.
After this stage, we get a knife whose tip is not yet sharp, since the descent was carried out only to the center of the blade. Now, using a thinner abrasive, we shape and refine the cutting edge, gradually reducing its grain. The final stage is polishing.
Product assembly
We have a ready-made steel blade with a bare tang and prepared wooden handles for the handle. All that remains is to connect everything.
The best option for overhead mounting of the handle would be rivets:
- If the blade does not yet have holes for the handle, then drill them, placing wooden pads on top.
- Holes are made to the diameter of the rivets.
- Next, we connect tightly, recessing the heads of the rivets into the body so that they do not interfere.
All that remains is to learn the throwing technique.
Previous KnivesHow to throw knives correctly Next KnivesTable knife: types, serving rules and purpose
Business concept
The business idea is related to the opening of an enterprise for the production of knives of various shapes and purposes. The main buyers will be individuals purchasing household appliances, as well as fishing, hunting and other stores.
But first, the source material is put under a roller weighing 80 tons. The result is a flattened plate on which the contours of the workpiece are traced. Steel for production is sold in sheet form.
After this, the workpiece goes through the stages of drilling, a hole is cut in it to attach the handle. The blade is then heat treated. The resulting shape is polished and pre-turned. At the final stage of blade manufacturing, polishing is carried out.
In addition to the blade, the knife also consists of a handle. The cheapest material used to make handles is plastic. But wood is considered traditional, although more expensive. Which specific material to choose depends on the quality of the finished product. For example, wood goes well with metal. But this does not mean that a plastic handle can only be found on cheap items.
At the last stage, the knife undergoes final processing, is packaged, transferred to a warehouse for storage or directly to the point of sale.
The quality of the final product depends entirely on compliance with the technological process.
Preparing tools
Forging a knife is performed using certain blacksmithing tools, which you can purchase without any problems in a specialized store. However, you can try to forge a knife with your own hands and using a non-professional tool. You will need:
The forging hammer should weigh 3-4 kg
- hammer weighing up to 1 kg;
- hammer weighing 3-4 kg;
- welding machine;
- vice;
- grinder;
- Bulgarian;
- blacksmith tongs (can be replaced with ordinary pliers, always without insulation on the handles);
- anvil (you can use a homemade analogue of this device from an I-beam);
- adjustable wrench;
- bake.
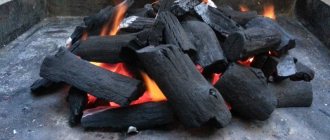
If with simple tools everything is quite clear, then about the stove you need to give separate explanations. To forge a knife, the steel must be heated to a temperature of 900 degrees. This is almost impossible to do in a simple hearth. Therefore, the hearth needs to be modernized a little. If you have never had to harden steel before, you will have to assemble a stove from thick-walled metal from scratch and connect an air supply pipe to it. The air can be supplied by an old vacuum cleaner or a fan. This design is perfect for heating workpieces up to 900-1200 degrees. The stove can be heated with ordinary charcoal. The best one is the one that burns as long as possible and produces the maximum amount of heat.
Meat knives
A very popular group of knives. Meat is a rather specific product in processing. It contains bones, skin, connective tissue, and veins. To cut it efficiently, different knives are used: a hatchet, a chopping knife, a fillet knife, and for cutting meat from the bone. This is a standard set for home cooking.
Sirloin
It has a thin, long (20–30 cm) and very flexible blade. Designed for separating meat and fish fillets from bones and skin. Thanks to its flexibility, the knife seems to glide over the bones, without leaving a single gram of pulp on them. It’s also very convenient to use a fillet knife to remove membranes from meat and offal.
For cutting meat from bones
The purpose of the knife is clear from its very name. It is also called a boning knife. Boning is the preparation of meat for sale:
- separation from bone;
- vein removal;
- removal of connective tissue.
The blade of the knife is thin, but relatively strong. The cutting edge line is located on the axis of rotation of the knife, making the tool easy to control. As soon as you turn the brush, the knife will take the desired angle, remaining in place. It easily goes around the bones, but does not bend as much as sirloin.
Cutting
Another boning knife. It is distinguished by its relatively large size - 20–26 cm and a durable blade. A carving knife is an all-rounder among meat tools. Thanks to the double-edged end of the blade, it has excellent penetrating properties. It can be used for different purposes:
- separate meat from bones and cartilage;
- remove cores;
- cut the meat into portions.
Hatchet
Hatchets are used for cutting meat that contains bones. The instrument is distinguished by a massive, thick blade. Moreover, its sharpness is less important than the weight and thickness of the blade. A heavy hatchet with a moderate blade sharpness will cut meat faster and better than a small and sharp one.
It is important to note that they do not cut with a hatchet, but work only in depth
We begin to apply a pattern to the steel blade of a kitchen knife
How to make a drawing of a pile foundation correctly?
First you need to find a drawing on the Internet that can be placed on the blade. In any graphic editor, it should be reduced to such a size that it fits on the blade and printed. Use scissors to cut out the image.
Next, a small amount of alcohol is poured into the saucer, sufficient for the printed image to be completely immersed in it. The drawing should lie in the alcohol until the paper is saturated. This will be noticeable in the image that appears on the back of the sheet. Don’t be afraid to keep it in alcohol - nothing bad will happen to the drawing, even if it sits in a saucer for a day, it won’t flow or blur.
The drawing must be thoroughly soaked in alcohol before transferring it to the blade.
Using an iron: this requires caution
The part of the blade to which you plan to transfer the image must be poured generously with alcohol. After this, carefully take the piece of paper with the image and place it on the knife blade with the printed pattern facing down. At this time, you can still correct it without fear of smearing it. What you should take into account here is that once you start working with the heating device, you won’t be able to correct anything.
We place the drawing in the right place on the blade, correct its position
When the pattern is laid out as needed, we begin to warm it up with an iron turned on at maximum temperature. When performing this work, you should be extremely careful not to move the sheet. The fact is that even slightly heated paper, if you move it, will smear the image, ruining it.
Warming up is carried out for 3-4 minutes until the sheet is completely dry. In this case, it is better to overdo it, warming up the blade longer than to stop working with the iron when the paper is still half-raw.
Heat the drawing with an iron until the alcohol dries completely
Cooling the blade and removing unnecessary paper
When the alcohol has completely evaporated and the blade has warmed up, it is necessary to cool it as quickly as possible. It was for this purpose that I had a basin of water, which was cooled with ice. The knife blade is lowered into ice water for 20-30 seconds. It is necessary to monitor the paper, waiting until it is completely saturated, now with ordinary water. After this has happened, we begin to slowly move our finger along it. The paper rolls and peels off.
In this case, there is no need to rush - there is a high probability that the blade has not cooled completely and the design will be damaged.
The blade is cooled in ice water, after which the paper is carefully removed from it
Basic materials for production
The material of manufacture plays an important role when choosing a product. One of the most popular is wood. A wide variety of breeds are used. Thus, a light and practical handle can be obtained from dense maple, walnut, cherry and oak. Options made from tropical trees are reliable to use, but have a higher price.
Other natural ingredients are also used to form the handles. Hunting knives are often decorated with the horns and skin of wild animals. The most common synthetic components are nylon, fiberglass, greyvari and carbon.
An excellent electrical insulating material is micarta - a polymer-type film with a resin base. Glued with fabric or paper with electrical insulating components. Micarta is distinguished by its pleasant appearance, moisture resistance, ease of processing and long service life.
One of the varieties of rubber, kraton, is used both as an insert and as the main element for the handle. It is characterized by high wear resistance and increased grip tenacity due to its anti-slip properties.
Less commonly used is G-10, a fiberglass laminate made from epoxy binders. The composition was originally developed for the production of circuit boards; today it has found application in handles. Advantages: high dielectric properties, moisture resistance, non-flammability, rich color range. A sharp decrease in temperature can lead to a decrease in the strength of the product.
Read with this
Financial calculations
Start-up capital
| Type of expenses | Amount, rubles |
| Paperwork | 1 000 |
| Rent | 30 000 |
| Equipment | 82 000 |
| Materials for production (blanks, handles) | 150 000 |
| 30 000 | |
| Total | 293 000 |
How much can you earn?
In a month, the company can produce up to 100 pieces of products. The average cost of one knife ranges from 1,500 to 2,500 rubles. At the same time, its cost will not exceed 800-900 rubles. Consequently, from one unit of goods you can earn up to 600 - 1,500 rubles (net profit about 80,000 rubles).
Payback period
The profitability of such production will actually be high (about 45%), and the return on the initial investment will not exceed 4-5 months.
Material for production
The best choice among all alloys and metals is steel
You should pay attention to the markings; different variations have differences.
But any brand must meet the following characteristics:
Resistance to various types of corrosion (especially important when working under the influence of water); High hardness; Wear resistance; Impact strength (prevents the material from crumbling).
Alloy steel is cheaper and more practical, and it will be much easier to forge. At this time, the following brands are available in Russia:
- X12MF is die steel, sharpens well, has good impact strength. The only negative is that it is very afraid of corrosion. Therefore, you will have to take more care of your knife.
- 95Х18. A very popular alloy due to its strength (despite the hardness of 64 HRC).
- HVG – excellent viscosity and hardness, the edge will not crumble under strong impact. Refers to tool steel.
- 40X13 – stainless spring steel, long-term use leads to reduction and cracking of the blade edge. You can also make a handle for a knife yourself using the following components:
- Tree. The unique unique pattern of annual rings will add beauty and brutality to your blade.
- Rubberized plastic. In another way it is called soft-touch or soft plastic. Does not slip in the hand, pleasant to the touch.
- Steel. Typically 3 mm thick sheet steel is used. Pros: durability and ease of creation.
Preparing all the details
At this stage, you need to make a hole and cut threads where the screws will be installed in the handle. You also need to warm up the holding lever and bend it to fit it into the handle.
Since ejection of the blade is ensured by a spring, we wind it around the axis of rotation of the blade - after this, it is necessary to cut out a seat for the spring in the PCB on the inside of the handle.
To do this you will need a drilling machine. We attach the spring itself to the blade with one end, and to the handle with the other, having previously drilled holes.
We weld a bolt to the trigger lever - this is the same “handle” that will activate the rotation of the blade. Cut off the excess part of the bolt. Next, you need to install the resulting “handle” into the handle of the knife - you need to carve a round groove for it.
Another spring in the handle supports the lever—for it, a stop is machined and installed, which we attach to pins or nails. With a simplified version of manufacturing - a folding knife, a trigger mechanism is not needed.
Blade hardening
If the blade is made of N690 steel, then its hardening temperature is 1071 degrees Celsius.
Since few people can boast of having an industrial oven, such an operation can be done with a torch “by eye”.
At this temperature, the steel has a yellow glow. Alternatively, you can use a magnet to determine the desired temperature regime - if the workpiece is not attracted to the magnet, then you can stop heating. Cooling is carried out in mineral/vegetable oil. By the way, in addition to the blade, it is also worth hardening the lever.
Blade hardening.
To stabilize the stresses in the metal, we conduct a tempering process - the temperature is 200-300 degrees Celsius, holding time is 1 hour. A regular home oven is suitable for this operation. We leave the blade to cool in a closed heating chamber.
You can check the quality of the result with a file - there will be no scratches on properly hardened and tempered steel. After this, the blade can be ground, polished and sharpened - seal the finished blade with electrical tape.
Assembly
It is necessary to install springs, a lever and a blade into the handle - we connect the halves of the handle with screws. To make the handle smooth, you can “recess” the screws by pre-drilling grooves for the heads.
After this, the handle can be sanded and polished with a special nozzle - the aluminum surface will look impressive.
It is clear that to assemble a simple folding knife, you do not need to mount a spring. Despite all the convenience of switchblade and folding knives, they have one serious drawback - if dirt gets inside the handle, and therefore the mechanism, the tool may fail.
So switchblades and folding knives made by yourself require careful handling - only in this case will they last a long time.
Previous Making knivesHow to make a knife from stone Next Sharpening knivesHolder for sharpening knives with your own hands