When you want something new, but there is no time to update your usual interior (and in general it is expensive). When the room lacks comfort and warmth. Then flowers for curtains will be a great solution. Made with your own hands, these cute and practical accessories will be the pride of any housewife.
Let's consider all kinds of options for making flowers: from fabric for curtains, ribbons and other materials; from the simplest (but no less impressive) to complex compositions that will not leave anyone indifferent.
DIY flowers made from fabric for curtains
DIY flowers made from fabric for curtains
Copyright to the text and photos of this site belongs to the administrator of the site lambrecen.ru. If you liked the article or master class, you can post part of it on your website subject to the conditions specified on the page: COPYING CONDITIONS.
You can see how to make such roses for picking up HERE.
If you would like to receive new articles from the site by email, then:
<<<SUBSCRIBE TO SITE UPDATES>>>
You can download patterns for fabric flower details at the end of this lesson.
STEP ONE:
I make flower stamens from fabric.
To do this, I string beads of a suitable color onto a wire with a diameter of 0.5 mm (you can make stamens in other ways, which are described in the section FLOWERS FROM FABRIC). I made the length of the stamen 8 cm, but 10 cm is possible. but you can make your own length. The length of the wire itself for each stamen should be 17-20 cm. At the end I put a bead, and then a bead:
Then I round the remaining end of the wire around the last bead and push the end of the wire into the hole of the bead:
Then I string all the beads that were collected for the stamen onto this end of the wire:
So I collect 3 stamens for each fabric flower. Then I twist the ends of the wire of the three stamens:
Stamens collected:
STEP TWO:
We make flower petals from fabric for curtains and leaves for a garland for curtains.
To do this, I first glued the fabric with non-woven fabric. I did this for both the leaves of the garland and the petals of the flower, but I advise you to simply gelatinize the fabric for the flower petals. It would be enough. You will find how to gelatinize fabric in the section FLOWERS FROM FABRIC.
We trace the patterns of the petals and leaves and cut them out:
For each leaf for the garland and petal for the flower, you need to make two blanks.
Then I simply cut out two blanks of the same size for flower petals with tailor’s pins, with the interlining inside:
And I glue the leaves for the garland for greater rigidity. You can do this with a web for appliques, but since in our city it is not always on sale, I found another way - I do it with an ordinary adhesive pencil, which is sold in stationery in unlimited quantities. You can also glue appliques, only by first gluing them with non-woven material . So, I smear one part of the leaf glued with non-woven paper with a glue stick, put the second part of the leaf on it, with the non-woven material inside. I press the two parts together with my hands, then I fix it all with an iron, ironing both sides of the sheet. As the fabric cools down, the leaf becomes hard like cardboard:
The details for the flower made from fabric for curtains and garlands are ready, the petals are simply pinned together with tailor's pins, and the leaves are glued:
In principle, if the fabric is well gelatinized, and besides, it is also dense, then you can do without gluing it with non-woven fabric.
Now I start finishing these pieces with bias tape.
I told you how to sew bias tape in lesson No. 1.
I talked about processing an acute corner of a part with bias tape in lesson No. 17. It tells you how to process an acute corner in a mold with bias tape , so I won’t repeat myself, I’ll just post a photo of how I do it. If you don't understand, refer to the above lessons.
Using a veil for sewing jewelry
Using voile to sew jewelry is a good way to express your creativity. For one flower you need to prepare square blanks of the following sizes:
- 1 piece each with sides: 7 cm, 9 cm, 11 cm, 13 cm;
- 2 pieces each with sides: 8 cm, 10 cm, 12 cm.
If desired, you can take more petals if you feel that the rose is “thin”. The creation algorithm is as follows:
- The squares must be placed diagonally.
- All corners are trimmed and petals are formed.
- Small pieces are laid diagonally; they need to be stitched to the middle and pulled together.
- Do the same with the remaining petals of large dimensions.
- All workpieces are connected and tightened.
- In this case, you need to twist the petals in a spiral so that the small ones are in the center and the large ones are at the edges.
- Now you need to untwist the flower.
- The product is re-twisted along the intended tracks, using a glue gun for secure fixation.
The last step is creating the leaves. It is necessary to make square blanks with sides of 13 cm. Similarly, the products are laid diagonally and pulled together. Now they can be attached to the color.
processing with bias tape
processing with bias tape
Ironing the finished parts:
Fabric roses
The process of making roses is very simple:
- Strips 5-7 cm wide are cut from any material. The resulting blanks are folded lengthwise, the ends are smeared with glue.
- One end of the tape is twisted to form a core.
- Next, the remaining shreds are wound onto it. The edges are rolled up.
- If necessary, the fabric is additionally glued.
- The rosette can be made either neat or a little careless. A few roses can create an original composition.
There is nothing complicated about making flowers with your own hands step by step. Every girl can definitely handle this. The main thing is to have a good mood and everything will definitely work out!
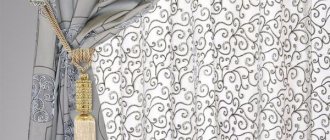
fabric flowers for curtains
flowers made from fabric for curtains
Garland of leaves is ready:
It can be hung on a curtain or lambrequin:
By the way, I already told you how to sew a flower from fabric with a garland of petals in lesson No. 10.
In that master class they sewed this decoration for curtains:
Now I start assembling the flower.
I put the petal on the table, apply glue to its base (since the petals turned out dense, I used hot glue, you can use instant glue, but I still advise you not to glue the petals for a flower made of fabric with non-woven material, but simply gelatinize them, then you can will use PVA glue, as described in the articles from the FABRIC FLOWERS section.)
Then I take the stamens and glue petal by petal to their base. The first row of three petals should be made of smaller petals. Then I fasten this row at the base with several turns of wire:
I do the same with the petals for a larger flower, gluing them one at a time to the base of the top row of petals in a checkerboard pattern. Then we fasten this row of flower petals with several turns of wire:
We secure this row of petals with several turns of wire, then twist the wire, cut off the excess and glue the base of the flower with corrugated paper:
How to properly attach the product?
How to properly attach the product? A similar question worries every person who has made a fabric flower. First you need to create fasteners on the wrong side of the element. This will allow you to easily attach it to the curtain. You can buy such a fastener at a fabric store. Alternatively, you can use a large pin or clothespin, but be aware that these may damage the curtain fabric.
The following tips will ensure high-quality mounting of unique decor:
- The fastener must be sewn on carefully so as not to damage the corrugated paper.
- The flower arrangement can also be decorated with a satin ribbon. This will make the flower beautiful and the clasp will not be visible.
Now the curtain looks incredibly interesting and harmonious.
Curtain classics
The classic is perhaps the easiest to execute and consists of straight-cut curtains combined with tulle.
The sewing process is almost identical to the previous version.
- It is advisable that the width of the fabric corresponds to twice the width of the window. In the case of cutting and sewing one curtain, you can use the instructions from the section on tulle curtains. If there is a need to create two curtains, then it should be taken into account that the width of each must match the width of the window opening, which will provide the required size and number of gathers.
- The marking on the surface of the spread out material is done as in the previous version, it is simply then cut lengthwise into two parts.
- Next, the seams are processed, the tape is sewn, but all this is done twice.
Decorative curtain
Zoning a room can be done using decorative curtains made of acrylic beads - this is a bright and unbreakable material, the cost of which is quite affordable. You can start making such a curtain with your child. Fluffy pompoms made of bright threads are a great option for separating the bed area.
Using multi-colored shells, feathers, bells and other unusual elements, you can create a one-of-a-kind curtain. It can be mounted directly on the window frame.
Foam option
Not only a wide variety of geometric shapes can be cut from pliable material:
- Cubes,
- Triangles,
- Balls, but also entire compositions.
If you beautifully alternate the figures of cute animals, snowflakes and geometric objects on the fishing line, you can get snow-white, airy curtains, the equivalent of which cannot be found in any store.
Window design methods
When decorating windows with curtains, we are faced with the fact that the choice of fabrics is huge, and it is difficult to give preference to just one. If you have several rooms, you can decorate them in different styles, using different materials, textures and models.
There are several ways to decorate windows:
- straight heavy curtains “to the floor” + light transparent curtains,
- the same set with the addition of a soft or hard lambrequin,
- light floor-length curtains without curtains,
- curtains made of decorative materials (threads, beads, etc.),
- short curtains to the window sill or slightly longer.
Patterns and sewing instructions for basic models
Before you start sewing, you need to find or create a product template yourself, which includes a sketch, pattern and the necessary material. The resulting dimensions are marked on the pattern.
Don't be afraid, templates made yourself are not inferior to store-bought ones if the measurements of the window and cornices are made correctly.
When deciding on a design, it is worth considering the organic combination with the overall style of the room. To create models of varying complexity, it is proposed to consider patterns of the most commonly used options.