Can artificial orchids be more beautiful than living dendrobiums or phalaenopsis? Quite if the inflorescences are carefully made by hand. By creating this beauty, like living nature, the master puts his soul into it, filling it with energy, albeit inanimate, but still beautiful bouquets for decorating a home or a very special gift. Apart from the makings of decorative talent, nothing special is needed for this. Today we will “grow” bright orchids and many other flowers from plastic bottles. Surprised? Then we will immediately begin our exciting master class.
Making a palm tree from bottles
Trees and flowers from this material are made according to a similar pattern, so after understanding the principle of this master class, you can build any plant on your site. For implementation you will need:
- Green bottles are usually beer plastic.
- The vessels are brown.
- Scissors.
- Scotch tape or glue.
- Wire.
There is no point in painting bottles, as many people do. Over time, the paint will begin to crack under the sun.
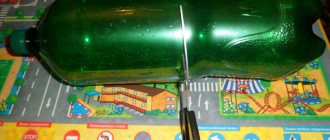
The foliage is made from the middle part of the bottles; it is cut with ordinary scissors. The barrel can be made from the neck part by placing bottles on top of each other. The amount of material used depends on the height of the finished product.
To keep the structure in place, it is recommended to use thick wire. Using this introductory tutorial, you can understand the basic concept of how to make flowers from plastic bottles.
Long-lasting flower beds in the garden
A finished flowerbed can not only become a decoration for the autumn and winter, but also become an ideal refuge for young plants. It's very easy to do:
- The bottles are cut into two parts, only the one with the bottom is used.
- Next they are painted with regular paint.
- Cover the sprouts of real flowers.
If you study ready-made examples of flowers from plastic bottles for the garden, which have already played a role in landscape design, you can find your own option.
colored hedge
Every summer resident has flower beds, even those who grow very little “for the table.” To prevent animals and children from trampling the harvest, you can build a fence in the form of flower vases made from a plastic bottle. There are several arguments in favor:
- Plastic is durable, unlike wooden stakes.
- You can paint it in different colors and design the area to your taste.
Summer residents recommend filling bottles with sand or stones for stability. Then dig the material upside down.
Note!
DIY fruit bouquets - TOP-200 photos with instructions for creating a bouquet of fruits with your own hands. Unconventional ideas with simple diagrams and work overviews
- Crocheted flowers: TOP-160 photos and step-by-step knitting pattern, review of finished products with your own hands. Crochet master class for beginners
Paper lily - TOP 100 photos of the best product options. Master class with step-by-step diagrams and drawings for creating an origami lily with your own hands
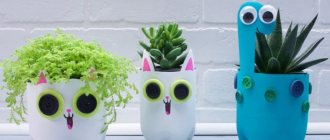
If space is very limited and the housewife wants to decorate everything with fresh flowers. The bottles can be cut into several parts, buried bottom down and a beautiful plant planted in each vessel. Anyone can make flower pots from plastic bottles.
Blank for peony:
Let's make a template on paper - draw a whisk in three sizes.
13:697 13:706
Now we make three blanks - this time we take a transparent container, and then paint it in the desired bright color. Be sure to cut through each petal almost to the core.
13:1018 13:1027
We give the whisks a “live” look by holding the workpiece over a candle.
13:1151 13:1160 14:1664
Pots for outdoor flowers
The bottles transform well under high temperatures. Therefore, you can make anything you want from an ordinary bottle. Moreover, after repair work, there are often “bugs” left from under the primer or concrete contact, and you cannot hand them over to any collection point.
You can store both seedlings and ordinary long-flowered flowers in such pots. All you need:
- Free time.
- Several empty bottles.
- Additional material for decoration - it can even be simple covers that were left over from the palm tree.
- Paint - to give the desired shade.
You can transform the bottle using a torch or lighter. For inspiration, it is recommended to study the photo.
Hot flower making technique
Natural flowers have petals that have graceful curves. Similar shapes can be repeated in plastic. To do this, the workpiece must be heated over a candle or alcohol burner. The part must be held above the fire, at a height of 20–25 cm. The heated plastic becomes soft and obedient. You can work on it using thin tweezers or a knitting needle. Nature itself will tell you what shapes to give the petals. Before work, you can look at photos of flowers on the Internet or get inspired by live examples. Don't strive for symmetry!
Making a sunflower from bottles
A sunflower made from plastic bottles will delight the owner even on the stormiest day. To implement the idea you will need:
- 3 empty bottles – it is advisable to choose transparent ones.
- 1 dark.
- Yellow paint – enamel.
- Glue dragon.
- Scissors.
Step-by-step instruction:
- Before creativity, the bottles need to be washed and rid of excess.
- Next, each transparent one is cut into three parts. The neck and bottom are carefully cut off.
- Next, the petals are cut.
Note!
- Crochet rose - diagrams and descriptions of how to crochet a rose with your own hands. Crochet technology + interesting craft ideas
- DIY edible bouquets - TOP 130 photos with instructions for creating a bouquet with your own hands. Creative ideas with simple diagrams and photos of finished works
- Craft primroses - simple instructions for creating crafts from scrap materials. Schemes of beautiful DIY products + photo reviews
From a regular 2 liter bottle you should get 7 pieces. The remaining 2 vessels are cut according to the same pattern. After this, take a brown one, from which only the bottom should be cut. Next, all parts are carefully painted and glued together. You can see the finished version in the photo.
Roses from bottles
Who doesn’t dream of roses that delight you with their beauty for several years? Anyone can make such a gift with their own hands. The color will depend on the bottle chosen. To make such a craft you will need the usual things at hand:
- Scissors.
- Candle.
- Plastic bottles.
How to do:
- Templates are made on a piece of paper. Using a marker or pen, you need to draw a flower consisting of 4 petals. There are 6 of these made in total, they should differ in size.
- Bottles are soaked in soapy water.
- Next, the plastic bottles are cut out according to the selected template.
- The leaves and stem can be made from green plastic.
A small hole is pierced in the middle of the cut flowers. You can secure it using wire or regular glue, and decorate the middle with a bead. To give the desired shape, a candle is lit. Thermal treatment is best done outdoors.
And to give shape, use a spatula or flat stick. These flowers made from plastic bottles for beginners are suitable even for a school exhibition.
How to make flowers from bottles: main stages of work
Anyone can make a flower, since the technology is simple. You should start by identifying the plant that you would like to make with your own hands.
- You need to draw a template on cardboard with a marker. The shape of the template is determined by the shape of the leaf or petal. Sometimes a flower consists of one piece.
- Then you need to cut out all the petals, leaves or flowers.
- A hole is pierced in the middle of the workpiece using an awl or soldering iron. The hole is necessary to attach the stem and corolla.
- Holding the product over the flame, you need to give the workpiece the desired shape. First, the ends of the workpiece are scorched over the flame, and then the petal from the bottom is held above it. As a result, it should resemble a petal. It is better to take the workpiece with tweezers and use it to give it the desired shape.
- Another option is a flower, the basis for which is the top of a plastic bottle. In this case, there is no need to cut the workpiece according to the template. A hole for the stem and corolla is cut out in the lid.
- The stem is made from a piece of metal wire wrapped in green electrical tape or green melted plastic. The leaves are attached to the wire in a similar way.
Chrysanthemums from plastic bottles
If the housewife did not have time to grow chrysanthemums on her plot, then she can make them from plastic. For sales, it is better to take colored bottles that do not need to be painted. Energy drink containers are especially suitable for this work. How to do it, master class for beginners:
Note!
- Crafting tulips from paper - TOP-100 photos of interesting ideas for creating tulips from paper + simple instructions for beginners
- Mimosa craft: TOP-160 photos of simple and complex crafts. Master class for children and adults on making mimosa with your own hands
DIY napkin flowers - a detailed master class with simple diagrams. Non-standard solutions for creating flowers + photos of finished crafts
- Each bottle is cut into noodle shapes. To reduce the labor process, it is recommended to take 0.5 liters.
- Each flower is held together with wire or Dragon glue.
- You can also use plastic instead of a stem. A small strip is cut out, carefully rolled and singed with a candle.
Such chrysanthemums will delight the eye for decades.
Clematis made of plastic
Reproducing the beauty of real flowers is difficult. However, they are ready to please the owners only for a temporary period. To fill the void during the cold period, you can make clematis blanks from plastic in advance. How to make crafts from plastic bottles:
- As in sunflowers, the plastic bottle is cut into 3 parts. In this case, you can use 1.5 liter transparent ones.
- In order for the flowers to turn out identical, a paper blank is made from which the details are cut out.
Clematis are distinguished by a large number of shoots and tendrils. They can be made from green plastic using a lighter. The center is usually decorated with a bead, and the structure is fastened with hot glue.
Option 3 – multi-layer plastic flowers
This requires the ability to properly heat the plastic and give it the desired shape. It is not recommended to melt plastic in a closed room without good ventilation. Do this operation under a hood or near an open window.
Work order:
1. Draw a pattern of petals if you don’t know how to apply the design directly to the bottle.
2. Any smooth surface of the bottle is suitable, where you can draw parts of the flower with a marker. Prepare a sufficient number of plastic bottles of different colors.
3. Mark the surface and cut out plastic blanks.
4. Each petal must be folded so that the parts (layers) of the flower are directed in one direction.
5. Using tweezers or pliers, grab the petal and slowly move the flower over the flame of a candle or lighter. The plastic will melt and the shape of the flower will change. You don't need to hold it over the fire for too long, as this can burn the plastic. Also, run the candle along the contours of the flower to melt the sections. Make all the required quantities at once.
6. After this, all that remains is to assemble all the blanks together. To do this, you can plant all layers of the flower on PVC glue, heat the parts to be glued, or first make two holes in the center of each workpiece with an awl. Then they can simply be sewn together, and the holes and thread can be covered with a small decorative button.
Plastic peacock flowers
Such products can protect crops from running animals and wild birds. Peacocks are very easy to make at home; you can use absolutely any bottle. To make the craft bright, I use enamel paint. How to do:
- One plastic bottle produces 1 flower.
- The neck part is cut off – “up to the shoulders”.
- Next, they begin to cut the bottle into strips, barely reaching the bottom.
- Each feather is sharpened with cuts.
- In the center you can make a “fur center” according to the principle of chrysanthemums.
To make the peacock bigger and more dangerous, you can fasten 2-3 parts of the finished products. For reference, you can use ready-made templates.
Making the core of the water lily:
You need to start from the middle of the flower. Take the yellow blank and make 8 petals with rounded ends.
17:772
For the stamens you will need a wide strip of yellow color, cut into noodles.
17:911
Over the flame, wrap the stamens inside, twist the part clockwise, securing with glue.
17:1083
Connect the stamens to the flower core using glue.
17:1188 17:1197 18:1701
Making water lilies
The product is well suited for artificial ponds. It's very easy to do:
- Take large plastic bottles. All they need is the bottom.
- Each is cut into 4 equal parts.
- Using a lighter or candle, they are straightened according to the concept.
One lily will take 3-4 bottoms. Next, the parts are fastened with glue, and a “fur” flower made of green plastic is placed in the middle. Such a lily can even serve as a feeder for the inhabitants of a pond.
Materials for huge magical flowers
For one such flower you will need:
10-12 plastic bottles with a capacity of 2 liters or 3-4 plastic bottles of water with a capacity of 3-6 liters;
- A rim from the wheel of an old bicycle, maybe a teenager's or a child's. If there is no wheel rim, you can take a children's gymnastics hoop, and instead of knitting needles, tightly wrap wire or rope;
- durable metal rod (reinforcement) or wheel fork;
- thin flexible hose;
- paint - color depending on the color of the flower, as well as green;
- wire - for fastening. But if you have a construction stapler, this will make the job much easier.
Asters for the garden
Usually this craft is made from plastic forks. However, if you can’t find them, then you can safely experiment with bottles. How asters are made:
- You definitely need to take a closer look at the natural flower.
- Next, take one piece for 0.5, 1, 2 liters.
- The neck of each bottle is carefully cut off at the shoulder. This is the part that will be used.
- Each is cut into small strips, not reaching the edge.
- After this, all parts are carefully fastened together. You can place a yellow cork in the middle.
Additionally, you can “break” each strip. Then the variegated flower will turn out curly and beautiful.
Recommendations for painting plastic
Over the years, paint tends to crack and products lose their appearance. To prolong the beauty of the compositions made, it is recommended to pay attention to the following nuances:
- The bottles are washed to remove excess glue and paper.
- For degreasing, it is better to use regular alcohol.
- To ensure that the paint adheres without any problems, the bottles are pre-treated with simple sandpaper.
Although working with plastic is considered a safe hobby, it is still worth adhering to the unspoken rules:
- Do not melt while in the house. The vapors are poisonous and dangerous to humans.
- When working with sharp ends, it is advisable to use construction gloves.
The selected schemes will allow you to equip even the adjacent area of a high-rise building. Photos of flowers from plastic bottles will inspire housewives.
Supplies for creating flowers
To make homemade flowers you will need:
- Plastic bottles;
- Wire for creating stems;
- Spray paint, preferably acrylic or alkyd;
- Fire source for heating plastic (lighter, candle, gas burner, etc.);
- Leaf and petal patterns;
- Buttons and beads for decorating the middle of the buds;
- Marker for marking workpieces;
- An old baking sheet or other container for heating so that the plastic does not drip onto the table;
- Sharp scissors.
