The most important element of comfort in a room is properly selected lighting. At the same time, lamps perform not only a practical, but also an aesthetic function. A beautiful table lamp or sconce can transform a room, giving it new features and uniqueness.
There is a huge variety of lighting equipment on sale. However, if you wish and have minimal skills, you can independently make an exclusive lamp that reflects the tastes of the owner. This article will discuss how to make a table lamp with your own hands.
The advantage of homemade lamps
Uniqueness, beauty and comfort are three positions that most of the planet’s inhabitants strive for. Every owner is concerned about the issue of improving their home, and having done this competently, people express themselves and get a lot of pleasure from what they have done with their own hands.
In the store it is not always possible to choose the right color or size of the lamp, so doing it yourself will give you the desired result. Such a thing will become an individual attribute. A table lamp made from scrap materials will become a 100% environmentally friendly device and will delight you for many years. You can brag to your friends and surprise them with your talent, and you can also sell it profitably. Such items have special value.
Table lamp from an old basket.
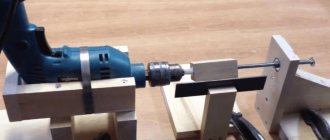
Drilling a vase
We turn the vase upside down and start drilling a hole in the middle of the lower part of the vase (in the future - the upper part of our lamp). Don't drill too fast as the vase may crack and don't put too much pressure on the vase.
Once the top hole has been drilled, we begin drilling on the side of the vase. It’s better, of course, to fix it somehow, or call an assistant first. The cord will pass through the side hole.
Holes are ready
This is what we got as a result of long and persistent work on the vase.
Materials for the lamp
A DIY table lamp is a creative work. Do not abuse particularly expensive materials or items. The main concept of the 21st century is simplicity, and build on that. Don't get hung up on hard-to-find materials; chances are you won't need them either. The main thing is the idea and what is at hand.
You will need to go to the store only as a last resort, for example, you may need the electrical part of the lamp, but it can also be used from an old one. To make an original lamp you will need all the unnecessary trash. Wood scraps, multi-colored paper and wire, pieces of metal, threads, various plastics, tubes, broken glass are perfect, even an old hanger will come in handy.
The idea of a table lamp is based on a hanger.
Design elements
There are several basic elements to any invention. When a person creates something, he must clearly see the future picture in front of him. Before you begin, think carefully about everything and write down what you might need.
Main design elements:
- Electromechanical element - think about how the lamp will be installed and how it should glow. If it’s a ready-made stand, just fasten the lampshade; if it’s a branch from a tree, you’ll have to file it down and bring it to perfection. The second step is to power the lamp. Do your work carefully; no fastening elements or traces of wire should be visible.
- Reflectors are an integral part of any lamp. In scientific terms it is a reflector, in popular terms it is a lampshade. Thanks to this element, the light flux is directed to the right place.
- Features of the hinge - it will give mobility to the design of your lamp. She will be able to rotate and change her position. If you are not planning a rotating lamp, you will not need it.
The design should be simple and functional.
Palette and style
Style is the signs that characterize the art of a certain century or type - this is what explains in a nutshell the manner in which the work is done. In our case, this is an individual style, which means the style can be unique. You can borrow something from every era, in this case the artist is you, and creating something unique is your responsibility.
There are many styles, note:
- Provence - the atmosphere of the French Riviera, fabric floral lampshade;
- Baroque - will transport you into an atmosphere of luxury and wealth; for this style, do not skimp on expensive fabrics, stones and gold foil;
- Eco-style - imagine that this style is recognized and welcomed all over the world, the main materials are everything that nature created;
- Modern – sophisticated and laconic, modest and restrained, warm and familiar;
- English style - as a rule, lamps have a simple but bulky design; rich fabrics are used for decoration.
Choose colors according to the interior and keep in mind that they set the mood. For example, red is an aggressive color, it symbolizes fire and passion, orange is cheerfulness and movement, green is calming and relaxing.
Experiment with colors - they set the mood.
Mounting the cartridge
After inserting the wire through the top hole, attach the rest of the lamp kit in the order specified in the instructions for the socket assembly. The lower part of the socket can be placed on glue so that it does not scroll along with the light bulb, and then everything is very clear. We pass a wire through the bottom of the cartridge, connect the wire directly to the cartridge and close it.
We put the lampshade directly on the socket, or pass it down through it and fix it on the vase. Here, too, it is possible to implement an endless number of options.
Original ideas
Thanks to modern lighting equipment, there is virtually no risk of ignition, heating of the light elements is minimal, and this allows you to experiment with almost any material. We have already said that works made with one’s own hand are original, let’s look at interesting table lamps made from scrap materials.
Video: Master class on making a three-dimensional chandelier.
Old vase
The originality and simplicity of this idea amazes many people. The design of the lamp is based on only two elements - a glass vase and a plastic food bowl. You can also use an old translucent jug.
This design does not require special installation skills. Use an LED strip as a light source and place it along the upper outer diameter of the vase. This lamp can be used as a night light. Make this lamp portable by using battery power.
The night lamp is made from household items.
We recommend: Homemade night light - step-by-step instructions with photos
Lamp Pinocchio
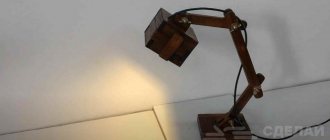
This lamp is made in eco-style. The material of the diffuser and base is wood, assembled using PVA glue. Thanks to the movable design, the lamp can be adjusted in height and direction of light.
Any solution can be used as a lighting element. The depth of the lampshade allows you to insert a socket and use a lamp with a standard or small base. The lamp will complement almost any interior and will find a place on the desk.
The wire is in additional insulation and secured with a rope. This type of mount gives an unusual effect. Even though the wire is visible, it does not spoil the overall picture. Every schoolchild will be delighted with such a lamp.
Wooden lamp Pinocchio.
Vintage bottle
This lamp is unique in its simplicity and pleasant diffused light. The support is a voluminous piece of wood, in which a hole is drilled for a conductive cable and the neck of a large bottle.
The electrical part is made in the simplest way - a garland is placed inside the bottle, and by freely lowering the wire is led out through a hole in the wooden base. The garland has a plug, so no intervention is needed here either.
This lamp does not require finishing and will perfectly complement an antique interior. The soft greenish color will create an atmosphere of comfort and tranquility.
The antique bottle lamp is the simplest in design.
It will be useful to read: 7 ideas for making lamps from bottles
TESTING:
As promised, comparison of the luminous flux of the new DIY lamp with the BlitzWolf BW-LT1 Eye Protection 15W lamp.
I moved the lamp to my daughter’s desk, where the BlitzWolf BW-LT1 had already settled, set the lamp shades to the same height relative to the table - 450 mm, and turned on the BlitzWolf BW-LT1 lamp in the “READ” mode, in which the maximum luminous flux of the lamp is observed. I measured it with a simple lux meter LX-101, which was switched to the X10 Lux measurement mode. The result of measuring the illumination of a workplace with a BlitzWolf BW-LT1 lamp (1610 Lux):
The result of measuring the illumination of the workplace with our DIY lamp (3020 Lux):
Quite a good result!
Solutions for different premises
Children's room - special attention should be paid to the materials from which the table lamp is made. It is undesirable to use elements that can break and have sharp edges. It is better to use LED strips and a closed-type power supply as a lighting source; this solution will protect children from electric current.
The table lamp is made of a figurine. Children's room.
The bedroom is an intimate and quiet place. There should be at least two lamps in the bedroom - so that one can create a pleasant atmosphere, and the other can be used to illuminate the work area, for example, to read a book in bed. You make a table lamp with your own hands, and therefore have the opportunity to make a comprehensive solution and equip the lamp with a lamp and an LED strip with the ability to switch modes.
Tightening the lampshade
The work is carried out as follows:
- Cut out wedges. The smallest seam allowance is 10-15 mm.
- Pull the cover over the frame so that the seams lie evenly on the ribs.
- Seam flaps are smoothed on both sides using a knitting needle.
- Sew the lapels in a line. As a result, each rib should be in a drawstring sleeve.
- Leave 1.5 cm of lapels unstitched near the top and bottom rims.
- To ensure uniform tightness, the ribs are trimmed with cuffs not along the circumference, but along the largest chord.
- Straighten the fabric, bend the lapel located at the bottom. Next, the lower rim is sheathed in the same way as the ribs.
- Straighten the fabric again and trim the top rim.
LED strip or lamp
LED strips and lamps can be installed as a light source in a table lamp. It is difficult to say which is better; it rather depends on the design and purpose of the lamp. LED strips require a DC power source; power supplies and drivers are used for this. With a lamp everything is much simpler, but LEDs have another important advantage: they give us a lot of shades and colors and operate on low voltage. So decide for yourself.
Video process of making a table lamp from bottles.
ACCESSORIES:
To manufacture our lamp, the following components were purchased:
- COB matrix 12 W
, with dimensions 120mm x 36mm: Ultra Bright 1300LM 12W COB LED Light Strip 12V DC for DIY Car Lights Work Lamps Home Bulbs 120*36MM COB Chip
Two matrices were ordered: 4200k – Natural white and 3000k Warm white, as a result a 4200k matrix was installed in the lamp. The matrix shines like a locomotive spotlight (shone it in your eyes - I watched the “hares” for a long time), and heats up like the power plant of the same locomotive - heat removal is necessary. In free mode, it is ready to consume 1400-1450mA, but the normal operating current for this matrix is about 1000mA, so for long-term operation and reducing the temperature of the matrix, a current limiting device is needed.
— UPS 12V 36W
, the same one I used to make a lamp for an aquarium (by the way, the lamp is in working order, there are no algae):
DC12V 18W 36W 72W 100W Lighting Transformers High Quality LED Driver for LE
— Dimmer board
, to adjust the brightness of the COB matrix, a dimmer potentiometer with a switch, which is very convenient for the lamp:
Mini 5A 90W PWM 12V DC Motor Speed Controller Module DC-DC 4.5V-35V Adjustable Speed Regulator Control Governor Switch 24V
— On/off button with fixation
, case diameter 16mm, button backlight color - yellow:
16mm High-Head Self-locking Waterproof Metal Push Button Switch LED light 3V 5V 6V 12V 24V 110V 220V RED BLUE GREEN ORANGE
— LED strip to illuminate the base of the lamp
, 2 meters, supply voltage - 12V, diode color - yellow:
DC 12V RGB LED Strip Light Waterproof SMD 2835 1 - 5 M 60LED/M RGB 12 V Led Strips Light Waterproof TV Backlight Living Room
— DC-DC converter on MP1584
, with a set supply voltage of 5.0V as a charger for phones and gadgets.
1PCS Great IT power module Adjustable MP1584EN DC DC 3A power step-down descending output module 12 v9v5v3 LM2596 24V
Useful tips
In conclusion, we note what you should pay attention to: use only flexible power cord, do not leave exposed parts of the wires and do not use damaged ones. The height of a good lamp is no more than 50 cm. If you do not have experience working with electricity, leave this part of the work to a specialist.
Plan the lamp in such a way that the light flux does not enter your eyes. When using incandescent lamps, take into account particularly strong heating; do not use table lamps in rooms with high humidity; there is specially protected equipment for this.
Color scheme and style
Selecting the color of the lampshade or lampshade is important. The table lamp should be in harmony with the overall style of the room. This does not mean that the lamp must be the same color as the interior. For example, a green lamp is suitable for a dark background - it will add liveliness to the interior.
Another interesting solution is to apply multi-colored lines and geometric shapes to the lampshade. This solution goes well with warm colors.
The most popular color schemes are:
- beige;
- sea wave;
- monochrome tones;
- black;
- golden;
- white;
- green (grass color);
- under wood.
Stylistically, a table lamp can be designed in different directions:
- classic;
- Art Nouveau;
- Art Deco;
- minimalism and hi-tech;
- modern;
- Empire;
- Asian styles (Indian, Japanese, Chinese).
