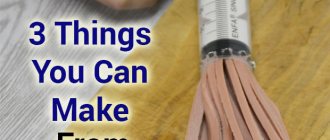
Despite the fact that in stores there is a sufficient assortment of a wide variety of hair clips and elastic bands, homemade ones are much more expensive. Even receiving one as a gift is much nicer, especially if it was made by the hands of a loved one. Learning how to make hairpins yourself is not at all difficult. A little theory and practice and you will have the opportunity to give original hair jewelry to your friends and family.
Necessary tools to make DIY hairpins at home
All materials and components needed for the work are sold in any store selling hand-made goods. If you want to learn how to make your own hair clips, you will need these for the tutorial. You need to start your purchases from the basics. It comes in different types:
- invisible;
- banana;
- alligator clip;
- latch;
- rubber;
- spring;
- automatic clamp;
- tick tock.
Almost any material can be used to make hairpins. Half of what you need for work can be found at home. This can be, for example, any fabric, finishing tapes, fur, leather, buttons, zippers, as well as rhinestones, beads from different materials, beads, polymer clay.
In addition, various tools will be needed for the job. First of all, you need tailor's scissors, needles, a hook, an awl, a sharp cutter, tweezers and clamps. You will also definitely need pliers, wire cutters and a glue gun. In the process of work, other tools that are not so difficult to get will also come in handy.
Decor made of beads and wire
To make a feminine beaded wreath you will need:
- satin braid;
- beads;
- wire of thick and thin diameter;
- scissors.
Work order:
- Place glass beads on a thin metal cord to the middle.
- Fold the wire in half and cut it so that its ends are 10 cm.
- Create several parts in a similar way.
- From a thick metal product, form a ring of a size equal to the diameter of the head and weave wire blanks prepared in advance around the resulting circle in the form of a wreath.
- To mask the gaps in the wire, wrap it with tape.
Using a similar technique, you can decorate any hairpin with beads. Hairpins and scallops work well as a frame. Many people choose such elegant homemade jewelry as wedding accessories.
Self-made hair clips are stylish decorations that will help emphasize individuality and exclusivity. When making original jewelry with your own hands, the main thing is not to be afraid to experiment and apply a variety of ideas. Then the new thing will turn out unique and attractive.
Article design: Vladimir the Great
How to make a hairpin from ribbons using the kanzashi technique
Everyone has heard about the kanzashi technique, but for some reason it is considered too difficult for beginners. To begin with, you can try making a hairpin made of satin ribbons in this style. Following the detailed instructions, it is not at all difficult to do. To make hairpins you need: 35 cm of satin or grosgrain ribbon (5 cm wide), an elastic band or snap for the base, a small piece of felt of the same color as the ribbon, a half bead and other tools for work.
The tape is cut into pieces of 5 cm each. You should get 7 identical square pieces. Their edges should be treated with a lighter to prevent the fabric from unraveling. Each square is folded diagonally, the ends are cut off and soldered together with a lighter. You should get a convex petal. Do the same with the remaining pieces.
The lower part of the petal is strung on a thread, pulled together well and secured. The petals are straightened. All that remains is to cut out a circle of felt; it should be about 2 cm in diameter. Glue a flower made of ribbons onto it. A half bead is glued in the center of the flower.
Make sure that no glue residue is visible. The last stage is to attach the flower to the base itself. Make several of these and give them your own hairpins made of satin ribbons; you will definitely like such an original set.
Basic techniques for creating petals and leaves
An ordinary sharp kanzashi flower petal is made from a square piece of ribbon. It is folded in half diagonally. Repeat the procedure again with the resulting triangle. The tail and base are cut off, the edges are singed.
Rubber bands using the kanzashi technique are made from different petals. For lush flowers, volumetric elements are appropriate. Take a square piece of tape and fold it in half horizontally. Each side is folded in half twice more. The edge is cut at an angle of 45° and treated with flame. Make two folds on the opposite side, hold with tweezers, and run the fire along the edge.
To create a flat petal you will also need a square of tape. It is folded in half diagonally, then again. Holding it with tweezers, the sharp lower edge is pulled to the base. The tip is cut off and soldered.
Kanzashi rose pins are made from other petals. You will need a piece of tape 2.5 x 6 cm. Two adjacent corners are bent down, aligned with the edge, and sealed. Additionally, the edges are folded and scorched with fire. For a small rose you will need 12 petals.
Leaves will help diversify the composition. A piece of green ribbon is turned wrong side out. The left side is bent 90° and the right edge is placed on top. They cut it off, form two folds at the base, fix it, and scorch it with fire. The size of the leaf depends on the length of the ribbon.
Hair ties can be made from bows. You will need a candle, ribbons, cardboard, glue, scissors and decor for the central part. The following are the instructions:
- A U-shaped template is made from cardboard (it is needed for the convenience of forming a bow). Insert the tape and wrap it three times, securing it with a paper clip.
- Sew the future bow in the middle and carefully pull it off.
- Two bows made of red ribbons are fastened crosswise in the center and secured with a beautiful bead.
The template can be used to create a brooch, hairpin, headband, or hair tie. Kanzashi bows and flowers can be either a central element or part of the overall composition. Two identical bows with elastic bands look good.
Rose petal
Ribbon petal 1.2 cm
Leaf
A soft petal can be made by carefully melting the tape over a fire.
Pointed petal with curved end Simple round petal
Simple sharp petal
Instructions for making a felt butterfly clip
To make a beautiful butterfly-shaped hairpin, you need pieces of felt of different colors, chenille wire, and a base for the hairpin. Choose the felt color as you wish. To begin, cut out two circles with a diameter of 7 cm; these will be the upper wings.
Change the color of the fabric and cut out two circles with a diameter of 4.5 cm for the lower wings. For the body of the butterfly, another fabric is chosen, for example, yellow. Next, the hairpin is assembled:
- A small gathering is done on the wings with a thread and a needle - first on the lower ones, then on the upper ones.
- The wings are glued or sewn to the body of the butterfly, and then the antennae.
- The butterfly is glued to the base.
- The wings are spread, the butterfly is ready.
Secrets of easy work
To make your work enjoyable, you need to stock up on basic auxiliary equipment, namely:
- A table lamp or another light source besides the main one.
- Tweezers. It will be needed for small details of decoration and structuring of folds (when working with ribbon).
- Candle or lighter. It’s worth noting here that work with candles is safer, since its flame is more loyal and even.
- Accessories (for decoration). It can be beads, stones, beads, berries, stamens. Everything is at the discretion of the master.
- Ribbon, braid.
- Scissors. It is desirable that they have flat, even cutters.
Hairpin in the shape of a rose from foamiran
Foamiran or foam rubber is a convenient material for work. You can give it any shape, make beautiful flowers out of it. A foamiran flower will be a chic decoration for any hairpin. Try making a hairpin in the form of a hairpin adorned with a beautiful rose. The materials you need are two pieces of green and peach colored foamiran, pink pastel, beads and a hairpin.
Make a template for the petals and leaves out of cardboard, and then cut out the petals and leaves using the Thomas template. Tint the tips of the petals with pastel to make them look more natural. Set three petals aside; they will become a rosebud. Heat them with an iron, fold them and gather them into folds. Secure them by twisting them together, and pull out the middle a little.
Cut a wire 15 cm long and string a bead of the appropriate size onto it. Leave a drop of glue on the wire so that the beads do not get lost. Insert the wire into the center of the bud and begin to collect the flower. Glue one petal to the bud, applying a little glue to the very edge. Iron the leaves. Using wire, wrap the flower to the hairpin itself and glue the leaves to the hairpin to hide the wire.
If you liked the first experiment, look for other DIY foamiran hairpins that you can also easily make at home.
Bow for a schoolgirl: popular options
Options for bows for schoolgirls:
- from tulle;
- in black and white with lace or polka dots;
- two-layer multi-colored;
- in the form of a butterfly;
- fan decoration;
- dragonfly made of colored stripes;
To design a two-color bow you will need:
- two multi-colored satin ribbons of different widths;
- thin shreds of one of the selected colors;
- threads
Execution step by step:
- It is worth forming a three-layer base from a wide braid. To do this, you need to select the diameter and evenly wind three turns of the tape, fastening the middle with thread.
- Make the top bow from two layers, located one on top of the other. Fasten the ends of the ribbons in the middle and tie the two layers together.
- The finished product will consist of a three-layer base, a two-tier blank and two thin hanging strips.
- To form, place all the layers one on top of the other and tie tightly with a ribbon in the middle.
- The decoration can be attached to the hair using a bobby pin or hairpin.
DIY leather hairpin in the shape of a rose flower
If you have an old leather bag or jacket at home that has not been used for a long time, do not rush to throw it away. This leather can be used to make beautiful hair clips or hair ties. Leather can be replaced with denim.
To work, take a piece of jeans or leather, beads and a hairpin, and prepare a glue gun or scissors as tools. Making a hairpin is very simple:
- Cut a straight strip from which you will later make a flower. The narrower the strip, the smaller the rose will be.
- Cut a circle out of the material.
- The strip twisted with a rope is glued to the cut out circle. Start from the center and continue in a circle. The end of the rose is hidden under the bottom and glued.
- The flower is given a neat appearance, irregularities and loose threads are trimmed.
- A bead is glued in the very center of the bud.
- The base can be different, depending on desire.
Centers for jewelry made of beads, beads and rhinestones
To make a center out of beads, you need to drop a little glue into the center and sprinkle the beads on top in an even layer, shaking off the excess. Apply more adhesive to the created beaded hill and, if necessary, add glass beads. Leave for a few minutes and smooth out the shape with your hands or a toothpick.
For the center of beads, you need to tighten 6 pcs with a thread. elements of the same size, and attach another one in the center. For the base, make a small felt circle and glue the prepared piece to it. Rhinestones can be sewn onto a round fabric base, or glued with glue.
Flat automatic hairpin decorated with beads: how to quickly make
If you want to know the fastest way to make a hairpin with your own hands, then this instruction is for you. To make it, you need a clean base for hairpins, beads, artificial stones, shells, and rhinestones for decoration. In addition, you will definitely need a glue gun and tweezers to make it convenient to work.
A piece of leather or suede is glued to the base; be sure to turn the edges inward and glue it. Next, glue the decor to the hairpin in any order. If the beads are very small, it is more convenient to help with tweezers. Once the glue is dry, you're done.
Making hairpins with your own hands is an exciting hobby that brings pleasure and sometimes additional income from sales of products made with your own hands. Try making at least one yourself to see for yourself.
Useful tips for beginners
Real kanzashi jewelry in Japan is made from natural silk. Budget options are quite suitable for beginning needlewomen: satin and grosgrain ribbons, lace, braid, brocade. These materials produce even squares, which is mandatory when creating perfect petals.
To prevent the material from crumbling, the edges are scorched with a flame. A candle or lighter will do. You can use a soldering iron with a thin tip. Before melting the edge, the tip is cut off. Then the flame solders the material and prevents the petal from falling apart.
Inexperienced craftswomen are recommended to start mastering kanzashi with simple flowers with sharp petals. Bows can consist of the same elements. With practice, the needlewoman will be able to create leaves, roses, lilies with curls inside, and combine several translucent ribbons to obtain interesting shades. The size of the element should be such as to cover the base of the hairpin, elastic band, or hairpin.
A step-by-step master class will allow every craftswoman to try herself in the art of kanzashi. The materials are readily available and can be purchased at any craft store. Just a little practice and you can start implementing complex shapes. An unusual hair clip made using the kanzashi technique will be an excellent gift for a girl of any age.
Luxury crown
You will need: wooden board, soldering iron, 2 medical clamps, rosin, soldering flux and fat, lead-free solder, soldering iron cleaning sponge, glue gun, instant glue, gloves, wire, dishwashing liquid, towel, headband, filigree, combs , metal ovals, decorative elements - crystals, Swarovski stones, beads of various colors and sizes.
Master Class
Follow safety precautions when working with a soldering iron!
- Plug the soldering iron into a power outlet and prepare the clamps to avoid getting burned.
- Apply flux to the surface of the rim.
- Soak the solder in rosin and apply to the rim. Pass the soldering iron tip like a brush.
- Try the filigree on the rim, mark the points, then apply fat to these places.
- Prepare the filigree for soldering. You need to solder them in three places - the places of adhesion to the rim, picking up solder and applying fat by touching the tip.
- Prepare all filigree in the same way.
- Mark the center of the bezel, rest the filigree, secure with a clamp and solder it. It is worth noting that the solder between the rim and the filigree should melt and flow, then let it cool for about 20 seconds before removing the clamp.
- Solder the remaining filigree around the circumference of the rim. It is worth noting that the side filigrees must be attached to the rim and to each other.
- Solder the ridges to the rim on both sides.
- Solder the filigree to the back of the metal oval, remembering to apply grease to the contact points. Make 5 of these blanks.
- Press one piece with clamps, apply fat and solder to the center of the crown. Solder the remaining blanks around the crown in the same way, adjusting the height of each part, creating a smooth transition.
- Rinse the crown base thoroughly with dish soap, then dry with a towel.
- Make decorative branches from wire and beads as shown in the image.
- Hot glue the crystals to the base of the crown.
- Glue twigs, stones and other decor to your liking, filling the entire crown.
The luxurious crown made of metal and stones is ready! Also check out the article: DIY crowns.
Origin story of Kanzashi
About half a century ago, oriental beauties changed their image: they decided to replace boring, traditional hairstyles with playful, high towers.
For a more stable hairstyle, they used hairpins, sticks, and combs. Thus, a simple comb turned into an extraordinary accessory that was loved by half of the world's population.
Japanese combs and hairpins became an expression of female character, social status and marital status.
Before the modern era, decorative combs and pins, known collectively as Kanzashi, were an important part of Japanese fashion and social culture.
Elegant classic
A simple but beautiful bow can be made in just a couple of minutes. It is based on the classic technique of making bows. To work you will need tape, sewing thread or hot glue.
A simple master class includes the following steps:
- Take a small piece of ribbon of any color.
- Alternately place the tape on both ends over your index finger, forming loops.
- Insert one loop into the other and tighten.
- The bow is ready.
The front and back sides of satin ribbons are different. When creating loops, you need to make sure that the front side is on the outside. It has a glossy effect, a calm shine, the reverse side is faded and dull.
Hat with clip
This hair decoration will look very original for a girl.
Materials:
- felt;
- alligator clip;
- lace ribbon;
- threads;
- beads or rhinestones for decoration;
- glue.
Manufacturing:
We cut out two circles of fabric, one should be larger, the second should be smaller. The size is determined by what diameter of the hairpin you want. We took 4.5 and 7 cm.
We cut out a small rectangular piece from felt, ours is 2x3 cm. It needs to be sewn to the back side of the large circle, in the center. The threads should only be on the sides, since the hairpin will go into the base.
We sew a lace ribbon along the entire edge of the large circle, try to fix it to the very edge.
We cut out a strip of fabric that is at least 80 cm long and 1 cm wide. After that, we begin to twist it to eventually get a cylinder. Then apply glue to the lower part and fix the cylinder in the center of a large circle, and cover the upper part of the strip with a circle of small diameter.
Now all that remains is to insert the hairpin and you can complement our work with various decor: beads, rhinestones and the like. This decoration can be used in everyday life: wear it to school or for a birthday.