The autumn and spring periods are often accompanied by heavy rains, mud and slush. Wet shoes at this time are a common occurrence that can ruin plans and interfere with urgent matters. Especially if they do not have time to dry completely before the next use. Wet shoes not only threaten to damage the pair itself, but can also cause a cold - which is quite sad. Therefore, after getting your shoes wet, you need to try to dry them as quickly as possible.
As an emergency measure, you can use homemade shoe dryers. The creation and use of such devices is not only useful, but also an interesting activity for lovers of everything unusual.
Advantages of a homemade dryer
Electronic goods stores can offer each customer a huge collection of ready-made electrical installations for drying shoes. However, homemade designs have a lot of advantages in use:
- The ability to independently adjust the shape and size.
- It can be built from a wide variety of materials, which are sure to be found in the household of every zealous home owner.
- Dry shoes quickly, but without direct exposure to high temperatures.
- Prevention of the formation of pathogenic fungus and long-term treatment of foot diseases in the future.
Most electric and simple shoe dryers are compact in size, occupying a small area in the hallway.
The advantages of choosing homemade designs include a large number of available instructions on how to make a shoe dryer with your own hands, video lessons and diagrams for work.
I'm doing preliminary assembly
With plywood I do the same thing as pine boards - I pre-drill holes for the screws so that the plywood does not crack when screwed to the frame.
I also mark and drill holes for the fan mount - to do this, I first mark points through the fan eyes with a pencil, then use a drill to drill holes for the screws.
I also prepare the bottom sheet of plywood for assembly by drilling several holes in it for fastening.
Requirements for a homemade dryer
Any home structure, especially electrical, must meet a number of requirements:
- Compact size and convenient shape. The upper platform must have a flat surface or a fixing part to hold boots, sneakers, and shoes in one position.
- When installing electric dryers, you should take care of safety in advance. The user should not have direct contact with the electrical network to avoid thermal burns.
- You should also consider the location of the electrical installation in order to limit the child’s access to it as much as possible.
All assembly work should be carried out according to a previously prepared drawing, so as not to make gross mistakes and not to disrupt the electrical circuit of the device.
I drill holes to prevent splitting.
To prevent the pine from cracking during the assembly of the box, I drill 4 holes in two of the four boards with a 5 mm drill.
Master classes on making a dryer
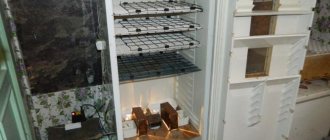
Today there are a huge number of ways to assemble an original dryer for outdoor shoes: from the simplest to complex electric models. Such devices can be used for one pair or intended for several wardrobe items (large drying shelves).
At home, you can create not only complex devices, but also simple design models. For example, wooden or plastic dryers with a built-in hairdryer (through a hollow pipe system) are especially popular.
These can be accessories without additional supply of hot air or water. Such models are simpler to implement, however, the process of drying shoes takes a long time (and the quality of the material suffers).
Assembling the frame
To assemble the frame, I connect the boards together at an angle of 90 degrees. I screw screws into the drilled holes.
Simple battery dryer
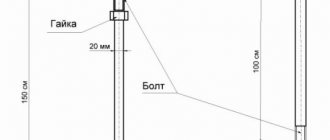
It is better for novice craftsmen to give preference to the simplest model of a shoe dryer for a radiator, made with their own hands. A similar design is a grille or mesh that is installed on a heating battery.
To make it you will need fittings, an angle grinder, and welding. An excellent solution would be to first draw up a drawing, which necessarily shows the location of the support posts, fasteners for the battery, and a net for drying shoes. The structure is assembled by welding adjacent parts.
At the same time, it is important to strive for the distance from the heat source to the grill to be at least 15 cm. At this height, moisture evaporates uniformly from the fabrics of boots, boots, and sneakers without deformation.
Cutting a hole for the fan
I use a jigsaw to cut out the center entry hole. First, I drilled a hole with a drill, then cut it out as close to the markings as possible with a saw.
Electric pipe dryer
A more complex version of the electric dryer is also available for self-assembly. To work, you will need to prepare corrugated pipes, a stationery knife, heat-resistant glue, wires, and electrical tape.
To install the power supply, you need 2 coolers, a power supply (a 12 V unit is enough), and a cardboard box of the appropriate size. Instructions on how to make an electric shoe dryer with your own hands:
- Assembling the power supply begins with installing the coolers on the bottom of the prepared box. To do this, you can cut two holes of the appropriate diameter and attach the coolers with glue.
- You will also need two holes in the side walls of the box. Corrugated pipes are passed through the prepared holes.
- The next task for the master is to connect the wires. It is important to ensure that when the coolers are operating, air enters the box and is forced into the pipes.
A stand of any shape and size is made from corrugated pipes. They complete the work by connecting the pipes coming out of the box to the finished rack.
Add a link to a discussion of the article on the forum
RadioKot >Schemes >Digital devices >Household appliances >
| Article tags: | Add a tag |
Snowboard and ski shoe dryer
Author: Sergey Galchenko Published November 16, 2011 Created with the help of KotoEd.
For those who prefer winter active recreation, I present a dryer for snowboard and ski shoes. The dryer takes up little space in your bag, operates quietly, consumes no more than 20 watts, and drying time is several hours. Traditionally, shoes are dried in this way - the inner felt boot is removed from the outer boot, and the whole thing is laid out under or on the heating radiator; as a result, there is not enough for everyone, and the smells leave much to be desired. The worst thing is that the boot overheats, does not dry evenly, the thermoforming may be disrupted, and you also need to constantly remove the inner felt boot, which is difficult if there is a heel strap. Store-bought dryers that are inserted into shoes cannot be dried overnight, but branded dryers with blowing had to be ordered and had to wait a long time, so I decided to speed up the process, since there was little time left before the season.
SCHEME
The temperature of the heated air is measured by the temperature sensor DA1, the output voltage through the divider R6, R7 is supplied to the ADC of the microcontroller DD1, which controls the heating element semi-storage VQ1 through the optocoupler VO1. Since the microcontroller operates at a temperature of about 60 degrees Celsius, an external thermally stable ION assembled on DA4 is used for the ADC. The reset circuit is implemented on R4, VD2, C3 and is mandatory, since without it, at elevated temperatures, the microcontroller does not always start. Key VT1 is used to control the fan. Indication and switching of modes is implemented on VDS1-VDS6 and SB1-SB3. Stabilizer DA2 is necessary to stabilize the fan supply voltage.
CONTROL
SB1 - sequentially switches modes: 30C - 40C - 50C - BLOWING. Indication by red (heating) and green (blowing) LEDs.
SB2 - turns the timer on or off for 1 hour. After this time, the drying will turn on. This may be convenient if the dryer has a noisy fan and the user has difficulty falling asleep due to noise. Indication by yellow LED.
SB3 - turns on or off the drying process. The drying condition and mode are recorded in the EEPROM memory of the processor, in case there is a power outage at night so that drying can continue again. Blue LED indication.
DESIGN
The dryer is made in a Z-52 plastic housing; I actually designed the printed circuit board to fit its dimensions. The heated air exits through the PG-21 cable glands, into which corrugated hoses with a diameter of 20 mm are inserted. Rubber seals have been removed from the cable entries so that the corrugation can be inserted freely. The length of the hose is selected so that in the working position the end of the hose does not reach the toe of the inner felt boot a few centimeters. I used the fan SUNON KD1204PKS2 (40x40x20 mm, 12 V), it is advisable to install it in the center between the hoses so that there is no temperature difference between them. The fan should blow on the heating resistor. All capacitors must be 105 degrees. The reusable thermal fuse should not be located directly next to the heating resistor. To ensure warm air pressure, all cracks in the housing are sealed with silicone sealant. I deliberately do not present the printed circuit board, since the topology turned out to be quite complex and there were improvements that are reflected in the diagram. Those who want to repeat the design will still develop a board for the case, fan and heating element, which will be available. If a larger fan is installed, I recommend choosing a similar capacity or a little higher, this is quite enough for drying. Cemented 10 Watt resistors were initially installed as heating elements, but the result was poor, severe overheating. Therefore, the choice was made on a 50 Watt TYCO resistor (https://www.te.com/prodimages/pdf/THS-1006.pdf), especially since its mounting holes were precisely installed on the screws securing the fan. If the specified nominal value of 680 Ohms is not available, a slight deviation of 50 percent is quite suitable; the PWM width should be sufficient to ensure adjustment.
SETUP
The temperature constant values of 30, 40 and 50 degrees are stored in EEPROM at addresses 0x01, 0x02 and 0x03, respectively. The temperature at the output of the cable gland was measured with a thermometer; it stabilizes in about half an hour. If the measured temperature differs from the set temperature by more than 2-3 degrees, it is necessary to change the constants in the cells. The processor should be programmed with the heating resistor turned off, which is connected after the functionality of the rest of the circuit has been checked. When the heating resistor is connected and the operating mode is turned on, the housing must be screwed in, otherwise warm air will dissipate in all directions, the temperature sensor will not heat up and the PWM will be increased to the maximum possible value, which will cause the resistor to become very hot and, if accidentally touched, a burn may occur. In addition, there is high voltage in the circuit.
CONCLUSION
A pair of assembled dryers successfully withstood two weeks of riding in the winter of 2011 without any failures. During the evening, as a rule, the boots were dried, but I turned them off only in the morning to put on warm ones.
A pair of assembled dryers successfully withstood two weeks of riding in the winter of 2011 without any failures. During the evening, as a rule, the boots were dried, but I turned them off only in the morning to put on warm ones.
Files:
Schematic in AcrobatReader Firmware and source Schematic and PCB in Altium Designer, as well as a template in PDF
All questions in the Forum.
| What do you think of this article? | Did this device work for you? | |
| 64 | 8 | 2 |
| 0 | 0 |
Water shoe dryer
The latest innovations that can be built at home include a water dryer for outdoor shoes. Instructions on how to make an original and practical heating dryer for shoes with your own hands:
- A section of profile pipe is soldered into the general system through a fitting.
- The pipe is carried to the location of the structure.
- The next step is to install the tap or valve.
- Now it is necessary to organize a closed circuit, for which the pipes are laid in parallel rows and then the ends are soldered (the heating circuit is closed according to this principle).
The final stage is bringing another profile pipe to the soldered section with a fitting. A DIY water shoe dryer has many advantages over other well-known models.
If you need to dry your shoes, just open the valve and let hot water flow through the additional channel. All the advantages of such a model can be appreciated in the photo of a handmade shoe dryer.
Materials I needed
To make a compact and productive dryer, I used:
- white PVC pipes;
- fittings and corners;
- soldering iron;
- metal-plastic scissors;
- roulette;
- jigsaw (a thin hacksaw will also work).
I recommend using connectors exactly the same color as the frame itself. This way the design will look more aesthetically pleasing. I also hasten to note that you must have pipes with special markings (designed for hot media, usually they are marked with a red stripe along the entire pipe).
Source tr.pinterest.com
Photo of a homemade shoe dryer
How to use it correctly?
Instructions for using the device are always provided by the manufacturer. You should act only according to it. The method of use differs depending on the design of the dryer. General tips for use:
- before use, you need to keep the new device for an hour at room temperature;
- the device should be inserted into the shoes and only then plugged into the outlet;
- The dryer must not be left unattended for more than 30 minutes;
- At the end of the cycle, you must first turn off the power and then remove the device from your shoes.
Before drying leather shoes, they need to be cleaned of dirt; further processing time will be about 6-8 hours. Suede is more demanding; it must first dry on top. Then you can remove the dirt and use an electric dryer. However, it is better to dry items made of suede, fur and leather on a mat.
Installation of a heated towel rail
Installation of the device is carried out in several stages:
- water distribution for the heated towel rail is being prepared;
- the device is installed.
Pipe preparation
Before installing the device in the chosen location, it is necessary to provide pipes to supply the heated towel rail with water. As mentioned earlier, water can be supplied:
- from the apartment heating system;
- from the hot water supply system.
To prevent supply pipes from spoiling the interior of the bathroom, they can be removed. How to hide pipes from a heated towel rail? There are two ways:
- lay the pipes in the wall, in a niche specially prepared for them, formed by gating;
Laying pipes inside the wall
- cover the pipes with a plasterboard structure. To do this, it is necessary to build a special frame from metal profiles, which will serve as the basis for the future box.
Special box for hiding pipes
Both when gating and when arranging the box, the final finishing of the room is done with the selected material.


