Useful tips
Watch the video if you are too lazy to read
Watch the video if you are too lazy to read
If you have old things lying around at home, such as unnecessary clothespins, old cardboard boxes, etc., you should not throw them away.
There are a huge number of options for crafts that you can make with your own hands from various things - old, unnecessary and useless at first glance.
Here is a small selection of interesting crafts, some of which you can do with your children.
Craft options for younger students
In autumn, it’s not difficult to find natural materials on the street or in the park and stock up on them for future masterpieces.
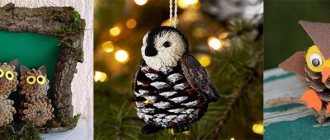
Autumn pleases with colorful colors on the trees and in the gardens: green, red, yellow leaves from the tree, chestnuts, Christmas tree cones.
This is a simple and free material for future products, with which children work with great interest and pleasure, making crafts for elementary school.
Crafts for elementary school students don't have to be complicated. Children are just beginning to learn new skills and develop their imagination and creativity.
This type of creative activity allows us to develop aesthetic qualities and creative thinking in younger schoolchildren, and also improves mental development.
We recommend reading:
- Crafts from plasticine: the best master class for children at school or kindergarten. 90 photos of the best ideas for creating plasticine figures
Felt crafts - the best patterns and templates. Step-by-step instructions and master class for beginners (130 photo ideas)
- DIY crafts from egg trays - the best step-by-step master class, with description. TOP 100 photos of original ideas for crafts
Decide on ideas in advance and choose beautiful and simple options. It’s better to start with the simplest things: cards, appliques, simple toys and decorations.
The material for production should also be simple: cardboard and paper, glue stick, scissors, pencils and felt-tip pens.
Crafts for the kitchen
The most functional and filled with things room in the house is the kitchen. Maintaining order in it all the time is the most difficult thing. We suggest making a stand for dishes and pockets for kitchen utensils for it.
Dish drying rack
It can be easily made from several wooden clothes hangers.
Dish drying rack
To make this model you will need a handful of small self-tapping screws and eight hangers from which you need to remove the hooks. And also remove the crossbars, leaving only two hangers undisassembled.
Next, three pairs of products are fastened to each other with a valet using self-tapping screws. Single hangers are installed between them, and the entire structure is fastened with the previously removed crossbars. They are attached under the crosshairs of hangers connected in a pair and along the outer edge.
If the hangers have recesses in the hangers, the crossbars are inserted into them. If not, they are screwed together with an overlap or the hangers are modified before assembly by making landing grooves.
Drainer. Application
Advice. In order for the dryer to last a long time, it must be coated with a water-repellent agent - paint or varnish.
Pockets for kitchen utensils
If the kitchen set is not equipped with a drawer for cutlery and small utensils such as ladles and spatulas, they can be stored in cute pockets made from wooden cutting boards and fabric. It can be replaced with kitchen towels or napkins, or even better - oilcloth, which can be easily washed if necessary.
Pockets for kitchen utensils
Step 1. Prepare everything you need in addition to the basic materials: glue gun, stapler with staples, scissors, tape for masking staples.
All you need
Step 2. Lay the board on the fabric and cut it along the contour, making allowances of 2-3 centimeters on all sides.
Uncover
Step 3. Fold the bottom edge of the fabric and fasten it with a stapler to the bottom edge of the cutting board, stepping back 1 cm from it.
Fastening fabric along the bottom edge
Step 4. Lay the fabric on the board and shoot the sides, gradually tucking the edges inward. At the same time, make sure that it is not stretched and does not fit tightly to the board, otherwise the pocket will turn out tight and you will not be able to put anything in it.
Fastening the fabric on the sides
Step 5. Lay the braid over the fastening line, masking the staples, and glue it with hot glue using a gun.
Fastening the braid
The pocket is ready, you can hang it on a hook and use it.
Original vase
The house needs not only useful things, but also those that simply give joy and good mood. Therefore, finally, we suggest making an original vase for small flower bouquets. This will take no more than a minute, and the only tools you will need are scissors.
Materials for making: a glass cup and a balloon. It is better to take a dense, opaque one with a matte texture. You need to cut off the tip with scissors, stretch it and pull it onto a glass, after dipping it in soapy water or lubricating the outer walls with oil.
You need to cut off the tail and pull the ball onto the glass
All! All that remains is to tuck the protruding tail inside, pour water into the container and place the flowers.
All that remains is to wrap up the protruding edge
Vase made of glass and ball
Such vases can be made at least every day, changing shape and color. Taking a balloon with a congratulatory inscription, you can give an original bouquet to your mother or teacher for her birthday.
Multi-colored vases
Festive decorations made from balloons
Flat applications
Flat applications of animal and plant themes made of colored paper. To simplify, you can print the picture on a printer and supplement it with an image of an animal or insect cut out of colored cardboard.
You can add convex elements to flat appliqués by doing the bulk of the work from pieces of paper. This technique is ideal for creating greeting cards.
Interesting DIY items: bag for small items
You will need:
- thick fabric (in this example it is a napkin under the plate)
- ruler
- pencil
- rubber
- button
- thread and needle (or sewing machine)
1. Prepare a piece of thick fabric and place it on a flat surface.
2. Fold the fabric in half lengthwise. Iron it (you can use your fingers).
3. Lay out the fabric and fold one part of it to the fold line (see image). Secure with a pin.
4. Do the same on the other side.
Volumetric works
Volumetric works surprise with their multi-layeredness and originality. They are performed using origami and other techniques, creating a composition from many individual elements.
We recommend reading:
- DIY crafts from Kinder surprise eggs - 125 photos of exclusive options with step-by-step instructions, master class and video
- Crafts made from twine - an overview of original design solutions. More than 100 photos of new products + step-by-step instructions for creating crafts with your own hands
- DIY crafts from candy wrappers: 150 photos of the best ideas from craftswomen. Simple instructions, master class, diagrams and video tutorials on creating crafts from candy wrappers
Pillow made of patches
You can use any patchwork technique to make these pillows:
- “Crazy” technique (Flight of fancy, any geometric shapes, asymmetry is acceptable)
- English technique (Clear symmetrical pattern, discreet flowers)
- Classic (One of the simplest patchwork techniques, the product is made only from square patches)
- Eastern (Use of bright colors, smooth patterns)
- Japanese (The most complex technique from the list, requiring the creation of integral compositions)
- Combined (Combination of knitting and patchwork)
- Quilting (Creating volume of patterns, drawings)
Craft options for School Day
Educational institutions also have birthdays, and it is called School Day. In this work, each student wants to prove himself a jack of all trades and make the most beautiful souvenir.
Help your child complete this difficult task: look for photos of school crafts on the Internet and purchase all the necessary things.
Remember, your child needs your support and understanding to complete their DIY school day crafts.
Patchwork
Undoubtedly, many craftswomen have a lot of leftover fabric. However, you shouldn’t rush to throw them away, since you can make crafts from leftover fabric.
Patchwork is a fairly common sewing technique. It allows you to use small remnants of fabric and assemble them into one harmonious composition.
School layout made from small boxes
To make it, you will need a base on which boxes and additional decoration items (trees, benches, people) cut out of colored paper or cardboard will be attached.
Advantages of handmade
Handicrafts have always been valued in Rus', and even today manual labor can become a good additional, and sometimes the main income.
Making things with your own hands will be a good pastime for the housewife herself, and maybe for the whole family.
This is a great way to get rid of unnecessary things that have been lying on balconies, mezzanines and closets for a long time.
Additional advantages of handmade include:
- an excellent opportunity to switch from work problems and everyday affairs;
- the likelihood of making an original or useful thing;
- the opportunity to get rid of unnecessary things for your own benefit;
- the ability to reduce the cost of purchasing gifts or earn a little money by creating unique crafts.
Making souvenirs will help develop perseverance and attention to detail, artistic taste and creativity. Small details of future gifts develop fine motor skills and help strengthen neural connections in the brain, which is especially important for children and the elderly.
Bouquet
A beautiful bouquet of dry leaves collected in the park, and sprigs of viburnum or rowan in a beautiful vase.
We recommend reading:
- Crafts flowers - 125 photos of the best ideas from craftswomen. Instructions on how to make it yourself from A to Z. Simple and complex options for crafts + video tutorial
- DIY crafts: TOP-200 photos of the best ideas. Schemes, master classes, modern design, new products, instructions with descriptions
- Crafts from plaster - 120 photos of the best ideas for creating original crafts with your own hands. Master class for beginners with examples and video lessons
Amurchik
You will need: a headband, a glue gun, soft golden wire, red felt, a felt-tip pen, a sheet of paper.
Master Class
- Trace the rim with a felt-tip pen on a piece of paper.
- Draw an arrow with a heart-shaped end.
- Cut out 2 hearts from red felt.
- Prepare pieces of soft wire for the arrow.
- Attach the back of the arrow to the rim as shown in the image.
- Glue the hearts on both sides of the soft wire and attach to the headband.
Amurchik is ready!
Winter-themed crafts
During the white season, long winter evenings are conducive to creative activities with children. With the onset of winter, the time comes to come up with winter crafts for school, show your imagination and make winter masterpieces.
Since in winter there are few natural materials for work, except maybe pine cones, stationery materials will be needed for winter-themed products.
Home interior decoration
Home decoration has always been a hot topic. After all, every person wants to return home and feel the comfort of home. It is not surprising that various fabric crafts for the home have now begun to become popular.
They are unique products and delight the eyes of their owners every time. The kitchen is one of the most important places in the house. She personifies home comfort. Below are a couple of examples of why crafts are needed in the kitchen and how they can be used practically.
New Year's decorations on the Christmas tree
Every educational institution holds matinees on New Year's Eve, where the main decoration of the holiday is a green tree.
Students are entrusted with decorating it with their own homemade toys, and each child wants to contribute by hanging a homemade craft on the Christmas tree.
Compositions from different types of products
At autumn exhibitions and “Harvest Festivals” you can often see original compositions of pumpkins, corn cobs, wheat, zucchini, onions and other vegetables and fruits. The gifts of nature are also used at school to make handicrafts.
Cabbage bunnies, crocodiles made from cucumbers, hedgehogs made from potatoes, a fairy-tale monster made from pumpkins, men made from corn - this is just a small part of the various ideas for creativity. Such work is short-lived, but every year a new harvest helps create new types of crafts.
Interesting panels are made from grains, cereals, pasta of various shapes, with dry twigs, paper and tree leaves. For long-term storage, they must be treated with any soil solution. After this they lend themselves well to painting. Cones, acorns, chestnuts, and dried berries are widely used in children's creativity.
Christmas balls
The variety of round toys made from improvised materials is amazing. The basis for them can be: knitting threads or twine, burnt out light bulbs, the tops of plastic bottles, disposable paper cups, Christmas tree cones, pasta, ice cream sticks, clothespins, etc.
Elastic band for bun using Kanzashi technique
You will need: satin white and black ribbon 2.5 cm wide; 1.2 cm and 5 cm, 14 transparent half beads with a diameter of 0.6 cm and 6 half beads with a diameter of 0.8 cm, white felt, white elastic band 2 cm wide, ruler, scissors, lighter, 2 decorative centers (black crystal), rhinestone chains , white thread, needle, glue gun.
Master Class
- Prepare for the future elastic band: 32 pieces of white ribbon 7 cm long and 2.5 cm wide; 32 pieces of black ribbon 7 cm long and 2.5 cm wide; 2 pieces of white felt 16.5 cm long and 2 cm wide; a piece of white tape 7 cm long, 1.2 cm wide; a piece of white elastic 17 cm long and 2 cm wide; 14 half beads and a black crystal.
- Treat each piece of tape with a lighter.
- Take a white and black piece, bend it at a right angle (each piece separately), then bend it again to make “houses”. Join the pieces together around the perimeter, placing the black on top, then stitch along the bottom edge to create a diamond petal. It is worth noting that you don’t have to stitch it, but singe it - use tweezers and a lighter for this.
- Make 32 black and white blanks this way.
- Divide the blanks in half, fold them in pairs and attach them to a felt base, as shown in the image. For fastening, you can use thread and a needle or glue.
- Connect the felt bases with the blanks.
- Glue 14 half beads along the entire length of the elastic.
- Wrap a white ribbon around the central part and glue a black crystal.
- Prepare for the future bow: 6 pieces of white ribbon measuring 5x10cm; 6 pieces of black ribbon measuring 5x9cm; 2 pieces of white tape measuring 5x9cm; a piece of white tape measuring 1.2x10cm; 6 half beads; black crystal; white felt base with a diameter of 3.5 cm; 3 pieces of rhinestone chain.
- Burn the edges of the ribbons.
- Gather on one side 2 white and 2 black pieces measuring 5x10 and 5x9 cm.
- Glue the black sections onto the white ones.
- Glue 6 half beads and 3 rhinestone chains onto the blank.
- Form a white bow from 4 white pieces measuring 5x10 cm, then a black bow from pieces measuring 5x9 cm. Also make a small white bow from pieces measuring 5x9 cm.
- Assemble the bow: take a blank with rhinestone chains and attach a white bow of 4 loops to it. Attach a black bow and a small white bow on top. Tie a white ribbon in the center and glue a black crystal.
- Make a blank from a felt circle and an elastic band, as shown in the image.
- Glue a bow to the blank and attach the blank to the elastic band.
The elastic band for the bun using the Kanzashi technique is ready! It looks very elegant, and thanks to the classic colors it is perfect for formal events.
Snowflakes
Snowflakes are made not only from paper and flat, they can be voluminous from a variety of materials that any schoolchild can handle: a snowflake made of wire, from beads of different sizes, from fabric, from felt, knitted lace snowflakes, from popsicle sticks.
Interesting do-it-yourself paper: an old mine
The main thing in this preparation is imagination. Use it to create your own interesting designs.
There is no “right” or “wrong” in this craft - just make it the way you like.
You will need:
- toilet paper cylinders
- paper napkin cylinders
- ice cream sticks
- glue gun or tape/duct tape/duct tape
- cardboard (large and small sheets)
1. Cut several toilet paper rolls in half lengthwise.
2. Start attaching slides from any point, moving down and up. You will need to choose packaging with a relief or create a relief yourself, for example from other, smaller boxes. In this case, all the boxes need to be glued to each other so that the structure does not fall apart.
3. The larger and taller your slide, the more popsicle sticks you will need to use to create the holding structure. Simply glue the sticks to the boxes, the base, each other and, if necessary, to the cylinders.
* Some cylinders can be trimmed, which makes it more convenient to build slides, especially when the slide turns.
4. You can make the starting section of your slide. It can be made from either cylinders or cardboard or plastic cups. There you will throw a ball/ball/bouncer, which will roll down the slide.
5. You can also decorate your slides, for example, by adding “Caution”, “Mine”, “Do Not Enter” signs.
Christmas tree made from improvised materials
The most common New Year's homemade item is the Christmas tree, which can be useful not only for display in a kindergarten or school, but also for decorating your home.
And the material can be completely unexpected things: plastic forks and spoons, pasta, feathers, satin ribbons (kanzashi technique), cotton swabs and makeup remover discs, small shells brought from the sea, newsprint tubes, etc.
Whatever the task before you, the main thing is to spend interesting and useful time with your child, develop his creative potential and give him an extra hour of parental attention and love.
Hot bed
To sew original coasters you will need:
- Any fabric
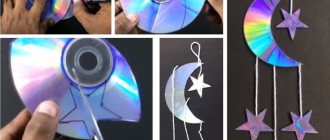
- Unnecessary CD
- Sintepon (you can use any filling you like)
The technique for making the stand is quite simple:
- Cut a circle out of fabric (not to the size of the disk, but with extra fabric so that you can wrap the disk).
- You begin to wrap the disc with fabric, before adding a layer of filler between the materials. The arrangement of materials should look like this: at the very top there is fabric, which should be enough to turn the disk; Next comes a layer of filler and at the very bottom there is a disk.
- Using a running stitch, sew the fabric in a circle and tighten it, wrapping it over the edge of the disc. Your craft is ready!
Photos of crafts for school
Did you like the article?
0
Bride's hair decoration
You will need: a sheet of paper, a simple pencil, a ruler, pliers, round-nose pliers, wire cutters, 5 meters of wire with a cross-section of 0.5 mm, metal beads, mother-of-pearl leaves, coral flowers, rauchtopaz, pearls (black, white, baroque and small freshwater), ivory beads, faceted Czech glass beads.
Master Class
- Draw a sketch of the future decoration on a piece of paper - a twig 26 cm long.
- Arrange beads, pearls, rauchtopaz and other decorative elements according to the sketch.
- Take the wire and string the beads from the sketch in the reverse order. That is, the beads that will be woven into the twig first should be strung last. It is worth noting that the wire does not need to be cut for the decoration to be complete and neat.
- Move the beads 50 cm from the beginning of the wire. This will be the central branch and branches will go from it.
- Take the first bead, bend the wire to make 2 wire pieces, step back a couple of centimeters and twist the wire, securing the bead as shown in the image.
- Take the second bead, move 1.5 cm away from the first piece, then bend and twist the wire to form a “second leaf”. Secure the 3rd and 4th beads in this way.
- Back off 2 cm, twist the wire and form branches with large beads.
- Twist the entire branch in this way. Don't forget to attach the decoration to the sketch.
- Secure the decoration by cutting and twisting the wire tightly.
- Check that there are no sharp edges, then decorate the bride's hair with such an elegant branch.
The bride's hair decoration made of wire and beads is ready! I recommend watching this video!
DIY TIARA / BEADED TIARA / DIY HAIR ACCESSORIES
Car tires in the garden
People with tunnel vision may not always see a car tire as an opportunity to create something new and not throw it in a landfill. Specialized websites offer many options for using old car tires.
You don't have to have a rich imagination. You just need to carefully study a few instructions for creating crafts with your own hands from tires and choose your option.
A huge tire from a wheeled tractor is quite suitable for installing a small pool on a personal plot. To do this, the wheel is placed in a pit of the appropriate size. Now it’s enough to cover the inside of the tire with plastic wrap, place decorative stones around the perimeter and fill the container with water.
The surface of such a pool can be decorated with artificial green leaves, lotus flowers, and waterfowl. An old tire from a car can be put to good use when arranging a small sports ground in the yard.
Tires are placed in a pre-dug shallow trench so that half of the slope is in the ground. You can paint tires with different colors of oil paint and give them to the children for use.
This unusual use of car tires for dynamic children's games will not only diversify the yard space, but will also appeal to children. Let them frolic and be healthy.
Origami style lampshade
This unusual craft will look quite impressive and beautiful. To make it you will need a very thin sheet of colored cardboard, which needs to be folded several dozen times in different directions and in different directions.
After the paper is ready, it is necessary to form the lampshade in the form of a cylinder, the edges of which should then be glued together.
Various boxes
Boxes can be made from different materials, even made and decorated in such a way that it will be better than the one you bought. If you want to make a box, then you need, firstly, to understand why you need it, and secondly, what material you will use to create it. Let's look at the most popular ones:
- Cardboard paper. Using this material you can quickly and easily make a box, you can decorate it with sparkles or confetti, and, in general, with anything, it all depends on your imagination.
- Using postcards. If you want to get a unique box, you can make it from a postcard, this is a fascinating process; First we cut out the shapes corresponding to the sizes, and then sew them up with threads. In the end, we combine the segments into our creative work and don’t forget about the decor.
- Wood. But still, wood takes the top first place, because it is beautiful, has patterns in itself, and also has good strength. There are many methods for creating wooden boxes, but the most profitable and easiest way is to use plywood. I note that this is a simple method, but if you have extensive experience in woodworking, you can make masterpieces.
Knitted accessories
There are so many crochet ideas and they are all good in their own way. You can make money from this and also have a lot of fun learning new skills. Let's look at a couple of things:
- The simplest thing that any beginner can do in this field. We are talking about "Napkin". Despite all its simplicity, it is a worthy gift and souvenir for a loved one.
- The same as a napkin, but it takes more time, since it is quite a large job, i.e. we will do
- "Tablecloth". It will decorate the interior of the house well, for example, a table in the living room or kitchen.
- Let's talk about "Plaid". This product may be of thick material, or it may be made of cotton, i.e. easy. The one made of wool is perfect for cold weather, but the second variation of the blanket serves as decoration or decoration. Those made from different colored threads have not yet gone out of fashion.
- Woven scarf or shawl. Serves as an accessory, by the way, is still in fashion, giving female faces femininity and majesty. It has some classification, namely; short, long. Any person can do it, the main thing is to follow the necessary instructions. Before making such a gift, make sure what color the person wants, but there are times when you don’t know what a person’s taste is, so you have to choose in your own way, because take neutral tones.
- Let's make a "Bag". This item will highlight the female image well and will complement it. Most women will be pleased. And if it is made of leather, then it’s absolutely wonderful.
- This souvenir is suitable for everyone, we are talking about a scarf. This item will be useful at any time of the day, not only for warmth, but also for a stylish wardrobe. A scarf called “snood” is in great demand among young people. For older people, a warm knitted scarf with a button closure is suitable. Don’t make one of the most important mistakes of beginners in this area, namely “spiky wool”; don’t take natural wool, but the acrylic mixture is just right.
- The same as the previous one has the versatility to suit everyone, at any time of the year, namely socks. The main thing is to take into account the size of the future owner; if there is an error, then it’s not so scary, because such things “spread.”
- Quite a difficult job is the sweater. A very large amount of workload, you need to do it in advance before the day when you will give it. It will take a lot of time, but will bring a lot of pleasure to the future owner.
- "Oven mitts." Just right for the kitchen, any woman who spends time in front of the stove will be happy.
- You can make a phone case. A wonderful surprise for young people. Everyone decorates their covers differently, some with confetti, some with sparkles.
There are a huge number of people who believe in wizards and that dreams come true. So, these things that were made by someone’s hands can rightfully be called magic and a miracle. Anyone can make a homemade product, the main thing is to take into account the interests of the person to whom the gift is dedicated.
Also improve your skills, because even from an ordinary postcard you can make a Mona Lisa painting. If you like to create something with your own hands, then take advantage of it and start making a living, as well as surprising and doing something nice for people.
Wooden home amulets
Charms come from the word “protect”, i.e. if there is one in the house, then most likely it will protect the family from troubles and bring good luck.
Most amulets are made of wood, so if you want this thing to bring you only good things, you need to understand what kind of wood is right for you, to do this, find the Druid horoscope on the Internet, indicate your date of birth and now you already know what kind of wood you need .
The most popular tree species:
- Oak tree. Has a positive effect on the health of the wearer of the amulet. Makes him lucky in business.
- Birch tree. Keeps the nervous system under control, protects the owner from dark forces.
- Hazel. Success at work, strong relationships with a loved one, its carrier becomes efficient and resilient.
- Trembling poplar (aspen). Protection from damage. Brings good luck. But it takes strength when worn for a long time.
- Mountain ash. It is believed that this tree is suitable for people with an iron will; it has many positive aspects and will protect the family from life’s adversities.
- Beech tree. A powerful and durable tree. Empowers a person to quickly assimilate new knowledge and also makes him wise.
- Spruce tree. Gives optimism, relieves stress, gives creativity.
- Cedar tree. The owner becomes a strong and stress-resistant person. Such people have rich lives. They live with optimism.
- Common maple. Gives love, care in the family, eliminates negative energy.
- Pine tree. Makes a person lucky in business and other areas.
- Apple tree. Can fulfill wishes, love in family and order.
Mosaic made of plastic lids
A rug in the form of a mosaic of multi-colored plastic bottle caps would be a useful craft for the home. Usually, after the summer season, enough of them accumulate to be enough for a small rug.
Plastic covers must first be cleaned of dust and dirt. For the convenience of further work, you should use disposable plastic cups and put lids of the same color in them.
After sorting the lids by color and quantity, they begin to select the design of the future mosaic. It could be a fragment of a national ornament, a fairy-tale hero, or just a beautiful landscape. The selected version of the drawing is applied with a pencil to the base. As a base, you should choose a durable material.
Now, using polyvinyl acetate glue, the lids are attached to the base in accordance with the colors in the picture. When the mosaic field is filled and there are no more covers, the base not covered with covers is cut off with sharp scissors. The mosaic field of lids is coated with colorless varnish.
This convenient and useful craft for the home is used in bathrooms, as bedside rugs, as paintings, and as a decorative element. The author of this incredibly beautiful craft is already squinting his eyes with joy.
Candlestick made of shells
To create this wonderful souvenir, you need a starter kit:
- Shells
- Glue (you can use a glue gun)
- Nail cosmetic (varnish)
- A little sparkle
- Any unnecessary disk (CD)
- Candles
- A few stones, decorative stones may also be needed.
Let's get started:
- Firstly, the shells need to be processed, namely: varnished and sprinkled with glitter. This is done so that the shells shimmer beautifully while the candle burns. We give the shape, for example, of a flower, then we make several rows, as if we were making petals, and we fasten everything with glue. Ideally, there should be three rows. To create a beautiful candlestick, you need to use a variety of these flowers, in some places we make large ones; with three rows, some small; two rows. Now let's move on to the “foundation” of our future candlestick, i.e. to the CD. We arrange our made flowers, decorative and non-decorative stones around the circle, and place a candle in the center. As mentioned above, the light from the candle light will be reflected on the shells, seeming to be unusual.
How to make money on handicrafts
The classic way to make money at home is to make money from handicrafts. It was different before, of course. Do you want something new? Be so kind as to sew it yourself. Now custom tailoring is an indicator of status and money. Therefore, everything related to clothing brings good income. Think about how you can turn your craft into a business. And we will give three ready-made options.
Sewing at home
When talking about handicrafts, people first think about sewing. Sewing at home is a very common part-time job. Typically this includes taking the client's measurements and preparing custom clothing. In addition, you can repair and alter things. Sewing curtains is another profitable service. Such work takes little time, but in the end you get a lot of money.
Taking orders for children's outfits for matinees will also bring in a lot of money. Who knows, maybe your parents will like your work so much that they will ask for something for themselves?
Dog clothes
Don't forget that providing unique services is profitable. Take on work that is not normally done in a workshop. For example, focus on tailoring costumes for dogs. Dressing up pets is very fashionable now. However, there is also a practical meaning here. If you live in a cold region, warm winter clothing is a necessity for many breeds. Including large ones. Pet stores sell products only for small dogs the size of a Chihuahua. Offer custom tailoring for large dogs, and in the fall there will be no end to orders.

