The art of macrame has never lost its popularity. And all because a simple rope, gray twine or just a cord in skillful hands turns into real masterpieces of handicraft. This “Cross” article has been prepared for beginners in mastering macrame. It will allow you to gain all the basic knowledge and master the initial skills of weaving using the macrame technique.
From the history of macrame
The first knots that people learned to make appeared at the dawn of civilization and were used for hunting and fishing. The first materials were animal wool and plant fibers.
The development of knot weaving began with the development of navigation. It is sea knots, known for their strength, intricate weaving and great variety, that form the basis of the art of macrame.
The sailors secured the gear and sails with ropes, tightening them with strong knots. And in his free time, he ties ship's utensils, bottles, and household items with twine.
Even now, modern sea wolves can give a master class in rope weaving. And their work will differ little from the hand-made panels of macrame craftswomen. More than 4,000 methods of tying knots have migrated from maritime crafts into the hands of needlewomen.
Macrame knots for beginners are made in fewer ways. We will look at them using examples of finished products, and you can also watch a video for beginners with a detailed step-by-step description.
From the very beginning
Macrame is a knot weaving technique that came to us from the Ancient East. It was once used by sailors to weave knots and tie sea ropes. In Russia, the peak of macrame popularity occurred in the 70-90s of the 20th century: in every women's publication of those times one could find wicker flower pots, decorative panels, bags, jewelry and even clothes. At the same time, creative macrame clubs for children appeared, where they learned to weave. But today interest has faded a little: gadgets have replaced handicrafts.
Macrame crafts
Using the macrame technique, they make small accessories for the home, cases for glasses and phones, boxes, pendants, earrings, as well as large works for office premises and public buildings, wall decorations with amazing ornaments emphasizing traditions and national flavor, macrame owl, which serves a symbol of wisdom and decorates many public institutions.
Flower pots allow you to place flower pots in a wide variety of places in the room, creating an interesting design.
The use of macrame for making furniture or to complement it fits organically into any interior; wicker chairs and shelves can transform a room, adding a touch of relaxed atmosphere; curtains and poufs will create a romantic mood.
Note!
- DIY gifts for February 23rd - a large selection of ideas for creating unusual gifts for Defender of the Fatherland Day
- What to give a 2-year-old boy - a list of the best options for an interesting and useful gift (120 photo ideas)
- Papier-mâché - TOP 120 photo reviews of original products. Detailed instructions for beginners on creating beautiful crafts
The photo of macrame shows various uses of equipment for furnishing premises.
Video
Master Class. "Trap" technique
Cord bracelet
Macrame lessons. Basic course No. 1
Basic course. Lesson 2. “Square Knot”
Basic course. Lesson 3. Loop knot.
Decorative heart knot
Chinese Lotus Knot
—Categories
- AND THIS IS MY WORK (524)
- Waldorf dolls (40)
- Scrapbooking, photo albums, etc. (thirty)
- Dogs, doggies. (4)
- Mice (2)
- Foxes (1)
- knitted toy (7)
- Hedgehogs (18)
- Bunnies (59)
- Cats, cats, kittens (10)
- Bears (198)
- my Master Classes (83)
- stoles (3)
- primitive doll (1)
- miscellaneous (40)
- Miniature, roombox (33)
- elephants, hippos, etc. (3)
- textile doll (27)
- Tilda (2)
- sewn toy (9)
- My city is Verkhoturye (10)
- Bodyflex (3)
- PAPER CREATIVITY (223)
- paper cases-weaving (76)
- quilling (8)
- scrapbooking (149)
- Exhibitions (18)
- EMBROIDERY (744)
- rococo (5)
- satin stitch embroidery (13)
- cross stitch (525)
- ribbon embroidery (16)
- embroidery on plastic canvas (27)
- magazines and books on embroidery (148)
- monochrome embroidery (24)
- miscellaneous embroidery (63)
- relief embroidery (17)
- embroidery stitches (19)
- KNITTING (1313)
- accessories, etc. (52)
- mittens, gloves, socks, booties, etc. (80)
- knitting - machine (11)
- knitting for home (43)
- knitting on a fork (2)
- hats (51)
- for children (102)
- for women (405)
- for men (27)
- craft magazines (185)
- bedspreads, blankets (35)
- work process (closing loops, etc.) (38)
- miscellaneous (angels, bells, butterflies, etc.) (78)
- napkins, tablecloths, potholders, etc. (123)
- bags, cosmetic bags. (45)
- crochet patterns (188)
- knitting patterns (100)
- shawls, stoles, headscarves (98)
- Computer matters (20)
- avatars (1)
- FOR YOURSELF LOVED (54)
- bathhouse (9)
- health (16)
- cosmetics (20)
- hairstyles (10)
- HOUSE (770)
- lampshades, lamps, etc. (24)
- everything for the kitchen (62)
- craft magazines (89)
- interior (38)
- how to decorate your home (114)
- carpets, rugs (39)
- indoor plants (19)
- master classes (89)
- pillows (185)
- bedspreads, pillowcases, etc. (2)
- work in the garden (66)
- various interesting things (32)
- napkins, tablecloths - sewn, embroidered, etc. (10)
- sachet (7)
- housewife tips (8)
- watch (15)
- how to decorate your home (99)
- curtains (22)
- PAINTING (153)
- batik, fabric painting (10)
- glass painting (32)
- stencils (70)
- drawing lessons (46)
- TOY (856)
- accessories for toys, furniture, etc. (15)
- butterflies, bees, insects, etc. (19)
- hippos, elephants, etc. (34)
- dolphins, fish, turtles, etc. (15)
- dragons, dinosaurs, etc. (1)
- hedgehogs (14)
- bunnies, squirrels, etc. (124)
- toy on a frame (2)
- cats, cats, kittens. (84)
- crocodiles (3)
- chanterelles (1)
- horses, moose, giraffes, etc. (34)
- lions, tigers, etc. (8)
- cars (6)
- bears (164)
- mice (27)
- monkeys (5)
- sheep, cows, pigs, etc. (23)
- doggies, dogs (31)
- birds (80)
- various knitted toys (124)
- textile toy (54)
- themed educational toy (33)
- tilde (32)
- felt toy (61)
- turtles (1)
- Games for children and adults (5)
- Historical moments (16)
- Competitions (26)
- Piggy bank of different thoughts and thoughts (94)
- poems, parables, etc. (42)
- humor (19)
- DOLLS (601)
- Waldorf dolls (7)
- knitted doll (25)
- other dolls (29)
- magazines and books on dolls and toys (100)
- clowns, clowns, etc. (9)
- doll on frame (8)
- felt dolls (21)
- matryoshka (11)
- clothes, shoes, etc. for dolls (74)
- face decoration (15)
- primitive doll (130)
- textile dolls (157)
- tilde (26)
- elves, gnomes, fairies, etc. (38)
- COOKING (106)
- Fish dishes (3)
- Meat dishes (15)
- Baked goods, sweets, etc. (29)
- Side dishes (9)
- cooking magazines (5)
- books and magazines on cooking (23)
- Canning and preparations. (1)
- Drinks (5)
- Salads, snacks. (15)
- Sauces, gravies, etc. (2)
- Soups (4)
- Decoration of products and table. (4)
- Personal (66)
- For cat lovers (11)
- Workplace organizer (49)
- covers for typewriters, scissors, etc. (13)
- Just a photo (17)
- Various videos, music. (21)
- FELT (147)
- felt stitches (2)
- A man with a capital letter. (9)
- SEWING (120)
- for children (46)
- accessories (6)
- for women (22)
- various interesting things (47)
- sewing technology (8)
- Encyclopedia of needlework (1375)
- applique (90)
- costume jewelry, beadwork. (180)
- roll everything (30)
- decoupage (63)
- pincushions (65)
- paintings, panels (27)
- books and magazines on needlework (170)
- boxes, caskets (101)
- modeling - from clay, from paper, from plastic, etc. (20)
- patchwork technique (140)
- macrame.weaving. (44)
- MASTER CLASSES (115)
- soap making (33)
- woodworking (13)
- leather work (7)
- different packaging (31)
- wedding theme (20)
- candles (5)
- salt dough (8)
- various souvenirs (31)
- bags, cosmetic bags, wallets.. (102)
- slippers (54)
- New Year theme (135)
- Easter theme (26)
- spot painting (4)
- tatting (11)
- flowers (knitted, beaded, sewn, etc.) (52)
- Exchange fair, prize draws (26)
Material for work
For work, threads of different thicknesses and different twists, from different materials, synthetic, natural animal, and plant are used.
Most often used in work:
- leg-split;
- twine;
- nylon cords;
- clotheslines;
- jutes;
- fishing line;
- cotton threads in several folds;
- dried plant stems;
- braid.
Curious facts about macrame
The history of macrame began with the peculiarities of knotted weaving, and initially knots had only practical meaning. The rope had to be tied to something, something to be fixed with it.
They used knots in work, in witchcraft, they made talismans and amulets from them, and later they learned to make jewelry for themselves and their homes.
- Many peoples used knot weaving, for example, the Incas - kippah, the ancient Chinese - happiness knots, Russian peasants - witches' and protective knots.
- Knots helped keep score, transmit messages, write memoirs, and protect against evil spirits.
Thin threads
Thin threads are used for small items: neck decorations, hair decorations, finishing of finished clothes. These include nylon, silk, cotton threads, floss. For ease of operation, they are combined several times.
The patterns turn out beautiful, and the crafts are light and elegant. Earrings, pendants, pendants, and women's ties are woven from thin threads.
Here are the main advantages of macrame for children:
- In macrame it is easy to move from simple to complex: there are many techniques and patterns that are suitable for different ages.
- Products made from macrame are strong and durable: a child will not accidentally damage them, and you can store the crafts in a visible place for a long time.
- You can make a variety of things, including useful ones: bags, bracelets, flowerpots, clothes. The child will be able to wear them himself or give them to you as a gift - it will motivate even the most restless ones.
- In macrame it is more difficult to make a mistake, but easy to correct. For example, it is enough to simply redo a knot or even a whole row - unlike painting with paints, where one random blot can ruin all the work. This encourages the child to be more active in their imagination in the creative process.
- For macrame you need the simplest and most accessible equipment - threads and a frame (you can start without it), and you can practice anywhere: at home, in nature, during breaks at school, at a party.
Features of material selection
Whatever threads are chosen for the job, certain requirements are imposed on the material:
The threads should be smooth. Too fluffy or voluminous will create an inexpressive design.
Macrame weaving for beginners begins with choosing soft, pliable threads of medium thickness. They are easy to work with, and distortions and errors in weaving are immediately visible in the drawing.
When choosing synthetic threads, pay attention to how slippery the surface is. Slippery ropes will not make it possible to make a neat knot or securely fasten the weave. The product will be loose and shapeless.
Note!
- Kinusaiga technique - TOP-140 photos of the best ways to create crafts using the Kinusaiga technique with your own hands + instructions for beginners
- Do-it-yourself passe-partout - a master class with step-by-step do-it-yourself schemes. Making tips + photos of the best examples
- Decoupage with napkins: TOP-150 photos of ways to decorate with napkins. Simple instructions for beginners at home
The material should be strong, but not hard. If the thread breaks in the middle of knitting, you will have to unravel the entire product and start weaving all over again.
Consider the twist of the threads and their flexibility. The “wooden” threads will stick out from the finished fabric. To soften hard material, the threads can be soaked or boiled in water for several minutes.
The material in thickness, density, color must correspond to the theme, model, and complexity of the ornament of the selected product. The quality of the thread can be checked by the label on the skein, which indicates the degree of twist, thickness, care of the finished product, washing, shedding, and strength.
description and weaving diagram of “The Frog Princess”.
"Princess Frog". Volumetric macrame toy
For work, prepare:
1. 150 m of synthetic rope 3 mm thick,
2. 15 m of rigid rope 2.5 mm thick,
3. 12 m of metal braid 2 mm thick for the crown,
4. 25 m of hemp rope 3.5 mm thick and 10 m of hemp rope 2.5 mm thick for the hummock.
1. Weave one thread 3 mm thick and 3 m long from the left edge, directing the ends in different directions, with horizontal rep knots
8 threads, having first found their middles. Tie the ends going up.
double flat knots from the ends pointing down
3. Hang double flat knots onto the working threads using method 2
one thread 3 m long in the middle and weave 3 double flat knots.
4.Hang 4 threads of 3 m each from the middle: two on the central threads and two on the edges.
5. Weave 3 rows of five, four and five double flat knots respectively.
6.Repeat step 4
7. Weave 3 rows of seven, six and seven double flat knots respectively.
8. Repeat step 4. and weave 2 rows of eight and nine knots respectively.
9. Leave 16 ends in the center, and hang the end next from the center for one eye using method 3
for the middle 5 threads of 2.5 m each.
10. Tie vertical rep knots
next from the center with a thread all 10 ends hung in step 9
11. Using the next thread from the center, wrap 5 of the 10 ends (i.e. through 1)
12. Using the next thread from the center, wrap 3 threads with vertical rep knots.
13. Weave the guide on which the eye threads were hung onto the outer thread of the outermost double flat knot. Weave the other eye in the same way.
14. Braid the ends hanging on the sides of the triangle formed when performing steps 2 - 8, left and right onto the continuation of the thread on which the ends were woven in step 1 with horizontal rep knots in 3 twists.
15. Repeat the guide and weave on it with horizontal rep knots in 3 twists the second briddle close to the first.
16. Proceed to weaving the belly, for which take the 8 ends that were discarded in step 1 and weave 2 double flat knots on them.
17. Hang the weaving on the left and right with 1 thread 2.5 m long in the middle and make a row of three double flat knots, again hang one thread 2.5 m long along the edges and weave a row of four knots, hang it again along the edges one thread and make 5 double flat knots.
19. Weave the back of the head by making 4 double flat knots at the 16 ends between the eyes.
20. Weave 4 more rows, making 5, 4, 5, 6 double flat knots in rows, respectively, connecting in each row 2 threads on each side from those that were not woven in the second and third rows when making the eyes.
21. Work 1 row of double flat knots in the round.
22.Take 6 ends from the corner of the mouth in one direction and the other and weave brides from the center to the left and right. The guides are the central threads.. After the brids are woven, tie the guides together with a weaver's knot.
23. Cut 1 thread 2.5 mm thick and 3 m long, pin its end to the pillow and braid the 12 ends in a circle with 1.5 cm vertical rep knots, which were woven into the bridles in step 22.
24. Add 2 ends of 50 cm to the guides, pin them to the weave to expand, and weave 4 cm.
25. Put 2 threads inside the weave and weave another 1.5 cm.
26. Take the 6 ends facing the back by the guides and weave 4 short rows with vertical rep knots, braiding them with the same guide, then make a row in a circle on 12 guides. It turned out to be an elbow.
27. Weave in a 1.5 cm circle.
28. Add 2 threads to the work and weave 4 cm, then remove 3 threads inside the product, make 2 rows of vertical rep knots, remove 2 threads again and make 2 more rows of vertical rep knots.
29. For the paw, leave 11 of the longest ends, cut off the rest.
30. Select the longest end and braid it in a plane with 2 rows of vertical rep knots, 5 guides - there are 2 ends in each guide.
31. Make 1 row of vertical rep knots on seven guides, braiding along the edges of the paws at one end.
32. Make fingers with one-sided tatting knots
on nine ends. Cut out the two shortest ones.
33. Repeat the work according to the description given in paragraphs. 22-32, for the second paw.
34. Turn the frog with its muzzle away from you and weave 2 rows of double flat knots in a circle.
35. Cut 2 threads of 2 m each and add them in the next row on the sides of the weave, hanging over the middle in method 2. Weave another 5 cm in a circle.
36. Weave 1 row in a circle, excluding from the weave 1 double flat knot in the center of the back and 1 double flat knot in the center of the belly (put 4 ends inside the weave.)
It is quite possible that the art of macrame has a “maritime” origin, having arisen and spread thanks to the sailing and fishing fleet. After all, where else is it necessary to tie so many knots: building ropes, weaving nets... Be that as it may, the technique of knot weaving remains attractive even in those days when the sailing fleet has become a thing of history.
Look at what success your colleagues have achieved in this ancient art; How were we able to attract children to this creativity? Bauble decorations and other original crafts using the macrame technique are widely represented in the materials of this thematic section. For many people, this type of handicraft has become a permanent hobby, one of the effective ways to relieve stress.
We'll take a rope and start weaving macrame.
Contained in sections:
Showing publications 1-10 of 34. All sections | Macrame
Theme "Weaving a bracelet"
.
Teacher: Toskorakova Victoria Yurievna Purpose of the lesson: the use of additional materials when weaving a bracelet (in this case, a ring. Objectives: - Learn to use a ring when weaving a bracelet; - Continue to master the technique of weaving macrame
; -...
Master class for parents “Horseshoe of happiness for good luck” using the “macrame” technique Good afternoon, dear guests, We invite everyone to our cozy home. Come in, don't be shy, make yourself comfortable. And we gathered for fun, To find out how our grandmothers lived, How they made bright amulets, And to make gifts ourselves. Today at the master class, we will talk about...
Weaving tools
Before you start weaving, you need to stock up on tools that will be needed during work and will help in creating a smooth, neat fabric with beautiful knots:
- Sewing kit: measuring tape, scissors, pins for fixing threads. It is better to choose large pins with large heads on long legs;
- Crochet hooks of different diameters, knitting needles, awls to help correct knitting inaccuracies;
- PVA, glue gun for fixing complex elements;
- Weight to hold threads in one direction and prevent tangling;
- Holders (clamps) will be needed to secure the base. They resemble a vice and hold wooden bars and rings from which to begin knitting;
- A hard pillow (can be replaced with a piece of polystyrene foam, a piece of plywood with foam rubber), covered with dense durable fabric (jacquard, barakan). Necessary for fixing threads and starting weaving. The optimal dimensions of the device are 30x45 cm.
- The work uses decorative fittings, large beads, and buttons.
Tip: to learn the macrame technique, choose threads of medium thickness and not very slippery. The pattern clearly appears on them and is easy to navigate. Thin ones are also not suitable due to small parts and unclear elements. Fabric made of thin threads cannot be altered.
Accessories
For needlework you will need the following materials and tools:
- Measuring tape, you can use a ruler, but it is not so convenient for taking measurements;
- Large crochet hooks;
- Pins for fixation;
- A hard pillow for creating horizontal weaving patterns;
- Glue;
- Scissors;
- Hanging weights, leveling threads;
- Professional clamps for textile work are a kind of vice that fixes vertical threads;
- Rhinestones, buttons, beads and other decorations suitable for bringing the craftswoman's ideas to life.
Methods of attaching threads. Beginning of work
All macrame lessons for beginners begin with the choice of model, material and careful study and analysis of weaving patterns. The step-by-step instructions explain in detail, step by step, how to weave threads together correctly and which knots to use in a particular case.
There are two types of working threads: axial and working. The axial ones are braided with working threads in such a way that they completely hide them. Working threads are several times longer than axial threads. They serve as the basis for attaching knots and various types of knitting.
You can attach the working thread to the base in the following ways:
Facial sketch. The working thread is folded in half. The fold extends over the axial one in the direction “towards you”. Thread two ends through the resulting loop and tighten.
Purl sketch. The working thread folded in half is thrown over the axial thread “from itself”, the ends are threaded into the resulting loop.
Rep cape. Tie a neat knot on the axial thread. It belongs to one of the types of knots and is also used to start weaving.
Double knit cape. Make a front cast plus additional fixation of the working threads on the axial yarn over on the left and right sides.
Schemes for beginners
Weaving patterns are very visual and practical. They help inexperienced beginners take their first steps. Many macrame masters draw sketches themselves.
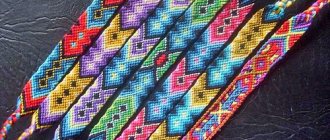
Fenechka
In Indian culture, the “friendship bracelet” was considered a very important gift: people became called brothers and sisters. Many centuries later, woven thread baubles became popular thanks to hippies.
Diamond shaped napkin
A patterned scarf with an ornament or a table napkin will be an excellent surprise for a Birthday or New Year.
.
Types of nodes
The technique of weaving macrame comes down to a sequential combination of knots. In the first lessons, craftswomen learn the basic types of knots, how to tie and alternate them correctly and accurately to create a beautiful pattern.
The basic ones include a square flat knot and a simple Hercules knot. On their basis, other types of knots are obtained, of which there is a very large variety. Remember the parable of the Gordian knot, which could not be untied, but the knots in macrame can be adjusted, they can always be untied and re-tied.
The Hercules knot is made by weaving two working threads together one turn and then another turn. Among them, right-sided and left-sided flat nodes are distinguished. The name depends on which thread is on top.
The diagram shows a detailed execution of the unit. To fix the weaving, two axial threads are used, which do not participate in the formation of the knot. A chain of simple flat knots forms a wrist bracelet or a decorative cord for a pendant.
A square flat knot is obtained by alternating left-hand and right-hand knots. At the base there are still two axial ones. From two flat ones a square is obtained, from the shape of which the name of the knot comes. This technique is more voluminous and is suitable for creating simple crafts, baubles, toys, and handbags.
About technology
At the very beginning of its development, this applied art was aimed at practical purposes.
Using this weaving technique the following were made:
- Cloth;
- Tackle;
- Various things useful for everyday life.
Gradually it turned into art.
Flower pots using macrame technique
As a rule, after studying the basic elements, they begin to create more complex compositions.
Macrame for beginners is suitable for making flower pots. The finished flowerpot is a special way of braiding a flowerpot or flower pot on long pendants, also decorated with macrame weaving.
To make it you will need:
- vase,
- nylon threads,
- tape, scissors,
- mounting base.
How to tie simple macrame knots
You can start weaving a narrow bracelet by tying all the threads into a knot and securing it to a pad. For a wider product, the best option would be to first fasten the horizontal thread (the width should be greater than the width of the product), and then attach the remaining threads to it while working.
Main nodes
In any macrame master class for beginners on bracelets, there are basic types of flat and shaped knots that are worth studying in advance. Let's look at the most common ones.
Hercules' knot. This is one of the traditional types of weaving, common in Ancient Greece. It will require two threads that need to be secured with a pin. The thread located on the right side is braided under the thread located on the left side. The left thread should form a loop, rising from bottom to top. Alternating threads, weaving continues to the required length. At the end of the work, tie a regular knot.
Step by step tying a knot
Straight knot. For it you will need two threads, folded in half and secured so that you get 4 “tails”. We will work with threads located along the edges, the 2 central ones form the base. We put the working thread on the right side behind the main and left ones. We also place the thread on the left side under the base from below. The same thread needs to be passed into the loop between the working thread and the main thread from below. To get a chain, tie 3 more knots and turn the work over. We continue to weave, turning the bracelet over every 4 knots, ending at the required length of the chain.
Using only a few basic components, you can create amazingly beautiful products
Step-by-step master class
Tip: thread consumption is calculated based on the height of the product. Multiply the length by four - this will be the required length of the material.
If the thread is used in two or four additions, then the length is multiplied by another two or four. For the final length, add one more height (for belay).
Step 1. Macrame for beginners for flowers is described in a detailed video. First make a loop for fastening. Place 8 threads together and secure with tape so they don’t fall apart (then remove the tape). Fold in half and make a knot, leaving a small loop on top.
Step 2. Divide the working threads into groups of 4 threads each. You will get 4 groups. From each group of threads weave a rope of square knots. You choose the length of the tourniquet yourself, approximately 8-12 cm.
Step 3. Make the base for the vase. Knit 4 strands in each group together. Crossing with adjacent threads, make a flat knot in two threads. There will be 4 nodes in total.
Step 4. Gather all the working threads into a bundle and tie to a length of 10 cm. Fasten at the end. The flowerpot is ready.
Belt
Making a belt requires a thick cord and a plaque.
Manufacturing Guide:
- Fold three cords in half and tie them on the plaque. For this purpose, auxiliary loops are used for fixation.
- When making a belt, you can use any type of knot knitting in weaving.
- It is necessary to take into account that the selected variant of knots must weave the entire product.
- Having knitted the workpiece of the required length, the last row is closed with flat double-type knots, since they have the greatest strength.
- The color of the material is chosen based on personal preference, but it is desirable that the belt matches the shade of the item of clothing with which the wicker product is intended to be worn.
- During the weaving process, you can add various decorations to the belt (small beads, rhinestones, etc.).
It is quite difficult to master all the intricacies of the macrame technique; many weaving options require perseverance and great concentration. However, when the skills have already been honed and fine motor skills have been developed, you can create a real masterpiece.
Many craftswomen, having mastered the technique, earn a lot of money from it. Thus, a hobby can be monetized, you just need to be diligent and practice more often.
Photo macrame for beginners
What is macrame and why you should do it
Macrame is a knot weaving technique. You can use different materials for this hobby; there is only one requirement for them - strength. Thick threads make products more textured, but thin threads make the patterns difficult to see.
Classic macrame is made in white or light beige tones. But you can use other colors too.
Here are some reasons to take up this craft:
- You will be able to create interior items and accessories with your own hands. There are a lot of options for using macrame. For example, making bracelets, bags, rugs, wall panels, bedspreads, coasters, curtains.
- Things in the macrame style are suitable for those who love minimalism or eco-style in the interior. For example, wicker flowerpots will definitely decorate your home. Or not yours - decorative items are a great gift.
- This hobby does not require large financial expenses. You don’t need expensive equipment; the most necessary tools cost pennies.