What would a holiday be without fireworks? It will be great if an artillery salvo sounds on your mother’s or grandmother’s birthday. And there is also New Year, Defender of the Fatherland Day, March 8 and other holidays, or you can just play pirates. So a fireworks cannon in the house is necessary.
I propose to make an antique ship cannon. The guns are loaded with ordinary firecrackers. Therefore, the main condition of our work is that the internal diameter of the gun barrel should be slightly larger than the diameter of the firecracker. I don’t give the size of the gun - it depends on your desire and capabilities.
About the “king of mathematics”
Recognized as one of the most brilliant mathematicians of all time, the German Carl Gauss lived in the 17th-18th centuries. Already at the age of three he was reading, writing and finding mathematical errors in his father’s calculations.
According to reliable data, it was Gauss who discovered the formula for arithmetic progression when a school teacher, wanting to keep his students busy for a long time, gave them the task of calculating the sum of numbers from one to one hundred.
Young Karl gave his answer within a few minutes. Until he was very old, and he lived for almost 80 years, Gauss carried out most of his mathematical calculations in his head.
Portable weapon - named after him, because. It was Gauss who laid the foundations of electromagnetism, and the method of mass acceleration powers the cannon named after him.
Tank T-34
By May 9, you must definitely learn how to sculpt a T-34 model tank from plasticine, because this is one of the most important serial units of wartime. Back in 1940, it was created by Soviet designers and put into mass production. Indeed, without such a tank it would have been more difficult to win the Great Victory. And this legend in many Russian cities decorates pedestals in the form of a monument, where people bring flowers and wreaths.
The T-34 model is a traditional fighting vehicle, which consists of the main parts, along with other tanks. These include a wide, thickly armored hull and a low turret with a muzzle, an additional machine-gun compartment with a long-barreled cannon, and tracks with wheels. The T-34 is the most recognizable wartime vehicle. All the boys are interested in technology, which means they will be happy to repeat the modeling lesson in order to get their own copy.
A master class on plasticine modeling was prepared by Elena Nikolaeva.
To sculpt a tank you must have:
- green (dark and light), black plasticine;
- a thin stick for the muzzle;
- stack.
How to make a T-34 tank from plasticine, step by step
1. Let's start modeling by creating tracked structures, so that we can then try on the future hull. Oddly enough, but at the first stage you should prepare a thin long sausage from green plasticine.
2. Cut the prepared sausage into segments. All segments must be the same length. In total you will need 10 of these parts.
3. Press each segment with your fingers on all sides to create a smooth cylindrical shape. These will be identical blanks for 10 wheels of a caterpillar structure - 5 on each side. And you also need to add 4 small wheels, using the same method, but from a sausage with a smaller diameter.
4. Knead the black block. First stretch it into a thin sausage. Then, using your fingers on both sides, create a thin cake. These will be blanks for the ladder - its surface does not have to be perfectly flat.
5. Place the black caterpillar ladder on the board, place 5 identical wheels on top, and one small wheel on both sides.
6. Wrap the tape on top, join the two ends, trim off the excess with a stack. Make 2 identical track parts with wheels.
7. Place a light green dot in the center of each wheel.
8. Using a stack, apply longitudinal stripes to the black ladder tapes. Prepare two green ribbons of the same size, and the width should match the width of the caterpillars.
9. Glue the green parts on top.
10. Prepare a rectangular block and an elongated green piece.
11. Stick a long piece as an axle onto the bottom of the body.
12. Glue the wheel to the axle on both sides.
13. Attach a low diamond-shaped tower on top, cylindrical blanks on the sides.
14. Insert the barrel, sticking plasticine onto the stick, as well as a double hatch cover.
15. Add a red star to the side to indicate that the unit is wartime. And don’t forget to add a small machine gun barrel in front.
The T-34 tank - a legend of the Great Patriotic War - is ready. All veterans remember it; not all were tank crews, but everyone knows the model of the combat vehicle. School-age children can master this type of modeling.
The simplest design
Even though we are talking about the most basic device, it will not be possible to get by only with the materials that are available in the house. Should be purchased:
- capacitors up to four hundred W, with a total capacity of up to two hundredths of a farad;
- insulated copper wire with a diameter of slightly less than one millimeter;
- toggle switch with button;
- battery compartments;
- five pieces of disposable cameras;
- relay;
- cocktail straws;
- a toy gun or any other children's weapon.
You will also need glue, scissors, a piece of cardboard or plastic.
Having the necessary set of parts in hand, you can safely begin manufacturing an electromagnetic gun.
Plasticine fighter plane
Fighter aircraft played a very important role during the Second World War. It was these machines that shot down enemy warplanes and destroyed their bases on the ground. On the eve of the great holiday, we suggest making a fighter plane from plasticine. Master class by Maria Klimova.
Materials and tools:
- Plasticine green, blue and gray;
- Knife for modeling from plasticine.
How to make an airplane, step by step
First you need to sculpt the body for the aircraft. Typically, fighter jets have a color that helps them camouflage themselves in the air. Therefore, most often they are not monochromatic, but have spots that look like stains. To achieve this effect, you need to mix green (dark) plasticine with blue or blue . But there is no need to mix completely. We need to get an uneven color. Now roll the resulting plasticine into a sausage, sharpening it at one end. This will be the nose of the plane. Photo 1
Now we need blue plasticine.
We will make the cockpit glass .
To do this, you need to make an oval and cut it in half. One of the halves needs to be stuck closer to the sharp end. Photo 2 Now we need to make the wings . They have the shape of a triangle with one acute corner. You need to try to keep the details as similar as possible. The wings must be glued strictly symmetrically. Photo 3
Now let's design the tail section of the plane . The tail parts need to be made in the appropriate shape. They are similar to a trapezoid, but without one side. The back of the plane needs to be slightly flattened. Photo 4
Now let's mold the upper parts of the tail, which help the car when flying. Photo 5, 6
A fighter is an aircraft primarily aimed at destroying enemy air vehicles, so each of them has shells for combat . To make shells, you need to take gray plasticine and roll it into 3 small sausages, slightly pointed at the end. Photo 7
Next, we glue these shells under the wings of the aircraft. On the second side we do exactly the same. Now you need to make 2 more shells and glue them under the tail. These parts do not need to be sharpened; we will make them in the shape of a cylinder. We wrap the nose of the fighter aircraft with gray plasticine. Now you need to inspect the fighter again and smooth out all the bumps and cracks so that the resulting product is smooth and beautiful. Photo 8
The military plane is ready!
Main part of the product
The inductor is the main element of the weapon. It is recommended to start assembling the product with the manufacture of this element:
- a pair of volumetric washers are cut out of plastic or cardboard;
- we string the washers onto a straw three centimeters long and arrange the workpiece as a bobbin;
- carefully, end-to-end, turn by turn, we wind the wire;
- Having completed the first row, grease it with glue and continue winding until we get a dozen rows;
- The washers are removed from the reel, a straw is attached, intended to serve as a gun muzzle;
- one end of the straw is tightly closed.
Checking the readiness of a manufactured weapon is very simple - you should connect the product to a standard battery (nine volts) and if the gun can hold a small metal object in weight, then everything has been done correctly.
Note!
- DIY induction heater ♨️ - reviews of the best manufacturing options. Varieties of homemade device designs + step-by-step master class (160 photos)
- DIY clamps - a step-by-step master class for beginners. Schemes for manufacturing different designs + 170 photos
- Do-it-yourself electric scooter - a master class with step-by-step instructions for doing it yourself. Tips and simple patterns for beginners + the best photo reviews
Landscape design Modeling construction Guns as yard decoration Wood Metal
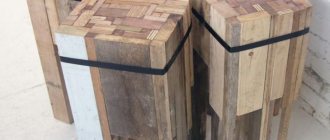
Antique cannons, in my opinion, look good as decoration for a yard or a place to relax. I made these two guns at the request of a friend. To make them, I used leftover building materials - boards, bars, scraps of tin.
The trunk is made of a round log covered with tin. The carriage and wheels are made from scraps of 50 mm thick boards and bars from old pallets. Decorative overlays were cut out of tin, embossed on them and painted to look like metal
The guns are easily disassembled into elements: barrel, carriage, wheels on axles. They can be freely rolled from place to place.
Decoration details. Using black paint and embossing, I tinted it with bronze metallic.
Testing the finished toy gun
Following the recommendations of the instructions on how to make a Gauss gun, the readiness check is carried out as follows. If a part of a paper clip is actively drawn into the straw, and after an impulsive connection to a power source, the “projectile” is thrown out of the barrel at a distance of up to thirty centimeters, therefore, the weapon is ready for combat operations.
We make a cannon from sewer pipes.
After installing the sewer system at the dacha, some sewer pipes and adapters remained, so that the property would not be wasted, it was decided to make a cannon! The gun consists of a 110mm revision, a hole must be made in the revision, through this hole fuel will be supplied and ignited. A 110 mm coupling with a plug is attached to the revision from below. An adapter from 110 mm to 50 mm is attached to the revision on top and a 50 mm pipe is attached to the adapter; the longer this pipe, the better.
For fun we need a “quick start”
And shells, our shells are potatoes. While driving from the dacha to the forest, shells of the pear and tomato model were also “tortured” along the way.
We try to fire a cannon. You don’t need a lot of “quick start”! There must be a mixture of air and “quick start” in the combustion chamber of the gun. If you overdo it, the mixture simply won’t explode. It will be necessary to open the audit and ventilate the gun. The first potato went, it went well, the plug was knocked out! It was decided to go to the dacha and secure everything with self-tapping screws.
Multi-stage gun
Having coped with the assembly of the simplest version of the weapon, you can move on to a more complex version. After all, a real Gauss gun must be multi-stage.
To generate a significant electrical impulse, it is necessary to create a whole battery of capacitors. This type of device is characterized by high capacity and the ability to transmit energy in a short period of time, allowing the “projectile” of the weapon to reach the central part of the coil.
Any capacitor requires recharging. Chargers of this type are available in cameras. When making a Gauss gun, elements of disposable photographic instruments are suitable, because in them both the capacitor and the charger are a single unit. Removing them from the camera is very simple.
What you need to know about the electric gun?
Unlike other types of heat guns, an electrical device can be made by almost any home craftsman familiar with the basics of electronics.
Although the efficiency of an electric gun is much lower than diesel or gas devices, it does not emit combustion products harmful to health and can be installed in any room - a residential building, a greenhouse, ancillary buildings.
The power of industrial guns varies from 2 to 45 kW, and the number of heating elements in them can reach up to 15 pieces
Let's look at how an electric unit works.
Design and principle of operation of the heat generator
Any electric gun consists of three main components: a housing, an electric motor with a fan and a heating element. The varieties of this type of device are described in detail in an article devoted to the classification and principles of operation of heat guns.
Additionally, the device can be equipped with any “bonuses” from the factory units - speed switch, heat regulator, room thermostat, housing heating sensor, engine protection and other elements, but they increase not only comfort and safety during operation, but also the cost of the homemade product.
The rate of heating of air throughout the entire volume of the room depends on the number and power of heating elements - the larger their area, the more active heat transfer will occur
An electric gun works like this:
- when connected to the network, the heating element converts electric current into thermal energy, due to which it heats itself;
- the electric motor drives the impeller blades;
- the fan forces air from the room inside the case;
- the cold air flow comes into contact with the surface of the heating element, heats up and, forced by the fan, is removed from the “barrel” of the gun.
If the appliance is equipped with a thermostatic element, it will stop the heater when the programmed temperature is reached. In primitive devices you will have to control the heating yourself.
Advantages and disadvantages of homemade guns
The main advantage of a thermal electric generator is the ability to use it in any room where there is a network of at least 220 W.
Such devices, even in a home-made version, are mobile, weigh little and are quite capable of heating an area of up to 50 m2 (theoretically, more is possible, but it is better not to experiment with high-power devices and buy a ready-made unit, and a gun from 5 kW will already require connection to a three-phase network) .
The performance characteristics of the device must correspond to the heated area. On average, for every 10 m2 you will need 1 kW, but much depends on the room itself - building materials, quality of glazing and the presence of insulation
Pros of a homemade electric gun:
- Saving money - factory units are not cheap, and you can assemble a heating device with a minimum of purchased parts or even completely from improvised means, removing the missing elements from old devices.
- Safety - of all homemade heat generators, the electric device is the easiest to operate, since it does not require a connection to gas or refueling with flammable fuel. With proper assembly of the electrical circuit, the risk of spontaneous combustion for such guns is minimal.
- Quick heating of the room - the work of a heat gun is much more effective than other options for homemade electric heaters, for example, fireplaces or oil radiators.
One of the disadvantages is the high energy consumption (the amount depends on the power of the engine and heating element). In addition, the operation of the fan is quite noisy, and the larger the wingspan and rotation speed, the stronger the noise produced will be.
Well, any drawback of a homemade electrical device is the likelihood of an error during assembly or connection, which can cause a short circuit in the network, electric shock and spontaneous combustion of the device.
Stages of work
When removing necessary parts from the camera, you should exercise extreme caution - do not touch parts of the electrical circuit.
Important! Close the capacitor terminals with a screwdriver, and only then can you begin work on removing the necessary parts.
Note!
- DIY rocking chair: TOP-120 photos of the best manufacturing options. Master class on creating a rocking chair at home
- Smokehouse from a gas cylinder - the best master class on making a homemade smokehouse with step-by-step photo diagrams for beginners
Do-it-yourself compressor: TOP-130 photo reviews of finished compressors. Step-by-step instructions + diagrams and drawings
Remove the battery brackets from the charger.
The capacitor should be unsoldered.
Then solder a jumper to the contacts of the charger button.
It is necessary to prepare five similar elements.
Plasticine tank
A tank is a powerful military weapon. The bulky structure looks terrifying and causes great destruction, like everything else associated with war. However, a tank is a defender if it operates on the side of its soldiers. It is difficult to imagine how difficult it would have been for the soldiers of the Red Army to win back in 1945 if the famous tanks had not been in the arsenal of the brave military. As a result of the selfless work of ordinary soldiers and people working in the rear, we won victory and today we live in peace.
The winning tanks that have survived from those times can be found on pedestals in many cities; they represent peace, the strength of the army, and victory over the fascist invaders. We will also make a small figurine of a tank from plasticine, and it will be an excellent craft for Victory Day.
To create a children's craft, you need to prepare:
- green, brown, black and gray colors of plasticine from the set;
- pen rod;
- stack;
- a long thin stick skewer.
How to make a tank from plasticine - step-by-step instructions
- To create a large combat vehicle, you need to make your own mixture of colors of green, brown, black and others. This will be an ideal option for simulating the nondescript color of a tank. Take soft pieces and mix them well, you don’t need to achieve homogeneity.
- Make a center block. Start pressing soft plasticine onto a hard surface with your palm, turning it over on all sides. You need to get a blank that resembles a matchbox. Press down the narrower side on one side with your finger, simulating a tilt. Smooth the surface of the plasticine with your fingers.
- Prepare another piece of clay to create the top as well as the side track structures.
- Create small black wheels that resemble activated carbon tablets. Make long gray ribbons, as well as flat bars for the wings, from the plasticine mixture obtained earlier. You can use not only your hands, but also your stack.
- Press 6 (or so) wheels onto the side of the case. Push the central part of each of them with a rod. Glue gray ribbons to the sides and bottom. Make notches with a stack. The resulting 2 running gears should be symmetrically located on both sides of the body.
- Mask the wheels with prepared wings on top. Lower the front of the pieces down and round them.
- Continue working on creating the tank turret and additional parts. The tank's turret may be shaped like half a walnut. Also make cylinders and thin bars for additional details.
- At the front of the turret, fix the long barrel. To do this, use a thin skewer and a small portion of plasticine. Glue the lid, machine and additional small parts on top.
- Assemble the structure. Place a turret on top, and add special parts on the sides and back in the form of fuel tanks and boxes of ammunition.
- A formidable powerful plasticine tank is ready. We received the craft by May 9th with our own hands. Now you can place your tank on a makeshift pedestal.
Optimal capacity
Selecting the ideal container for a weapon is a very important point. It is best to opt for the option of four capacitors with a power of four hundred watts, connected in parallel. After firing, you need to wait about a minute until the diode signals show that the voltage has reached the required minimum.
Note!
Do-it-yourself wind generator: TOP-170 photo reviews of finished devices. Detailed DIY instructions for beginners
- Do-it-yourself spot welding - the best master class on making homemade spot welding with step-by-step photo diagrams of do-it-yourself work
Do-it-yourself tennis table: TOP-150 photos of the best manufacturing ideas. Master class on creating a tennis table at home
You can speed up the charging process by connecting not one, but three chargers at the same time, but please note that “C” type batteries are too powerful for the circuit removed from the camera and can quickly damage it.
The presence of five batteries means the use of only one, and the rest are a kind of spare elements for the weapon.
Important! You should pay attention to the location of the charge-conducting tracks - each wire must be attached in several convenient places for use.
Safety precautions
Due to the fact that the total power of the weapon’s batteries is four hundred volts, it is better to entrust control of the trigger mechanism not to your own finger, but to a special relay.
The relay is controlled by the release button by connecting to a nine-volt battery. Carefully study the diagram for creating a cannon to avoid possible mistakes.
Important! When assembling a high-voltage product, it is necessary to use a wire with a cross-section of at least one millimeter. The charging and controlled circuits can be connected to the coil using any wires.
When checking the operation of your product, before touching the capacitors, you should discharge them using a short circuit.
Secrets of fighting
Minecraft offers players a wide range of opportunities, including when creating guns.
We reveal several secrets that will help players fight successfully:
- You can shoot with different cartridges. Instead of warheads, sand, gravel, and players are often used.
- Fortresses and castles protected by water are not afraid of cannons. Even a serious shot will not be able to destroy them, although it will still cause damage.
- To the west and east, the cannon will fire further than when firing a salvo towards the south or north.
- By creating an additional barrel for the gun, it will be clearly visible how and where the projectile flies.
- A long muzzle will slow down the speed of the projectile. Therefore, when creating a cannon with a muzzle, you need to place more dynamite in the charge to increase the speed of the projectile when fired.
- A muzzle made of ice will ensure a higher take-off speed, since during a salvo the resistance to the projectile from ice will be lower.
Carrying out shooting
Despite its toy purpose, the shot can cause significant damage. The process itself goes as follows:
- use the toggle switch to turn on the power of the product;
- we wait for the moment when the LEDs begin to glow, signaling that the required charge power has been reached;
- insert a “projectile” into the barrel of a gun;
- turn off the power;
- aim and fire.
With a shot using a nail as a “projectile,” you can pierce a can of beer or hit a wall from a distance of fifty meters.
Another weapon option
To make this version of the gun you will need the following parts:
- eight large capacitors, with a power of up to 50 volts each;
- switch;
- coil with two dozen turns;
- thick copper wire.
During the process you will need glue and a soldering iron.
How to make a paper gun that shoots rubber bands
For production you will need only 2 A4 sheets and rubber bands, which can be purchased at stationery stores. The color of the paper is not important, you can take regular white paper, the main thing is that it is of standard density (for printing on a printer), otherwise the tool will bend under the tension of the elastic band.
To make a pistol we will take:
- one sheet of red and one black paper;
- PVA glue;
- stationery erasers.
We will make a pistol handle from red paper. First, fold the sheet in half lengthwise.
Then we bend the bottom edge towards the midline. In this case, literally 2 mm should not be reached to the fold line itself.
Let's fold this side towards the middle again.
Fold the top edge symmetrically.
Fold the resulting red strip in half in the transverse direction.
Let's straighten it out, then fold it in half lengthwise.
Using the same principle, we make a blank from a black sheet of paper, which will then become the barrel of a pistol.
Next you need to be very careful. First we take the red stripe. Focusing on its middle, place a black stripe on the left side, and then bend the left edge of the red stripe at a right angle. Then we place a black stripe on the right.
Then we move the black stripe and place it to the right of the middle of the red blank. Now we bend the right edge of the red stripe at a right angle.
We continue to make the handle of the future pistol. To do this, bend the edges of the red strip so that they form an equilateral triangle in the center.
After this, fold the handle as follows.
We insert the prepared black trunk (it should be folded in half) under the folds of the red blank.
And we bring it to the end.
Next we need PVA glue. We need to use it to glue all the layers of black and red blanks, this will make them stronger. Under no circumstances should these pieces be connected to each other.
In principle, you can get by with tape or without glue or tape at all.
And our pistol will fire as follows. First we loosen the red part a little, lifting it up. We stretch the elastic band. To fire, you need to lift the back black part with your thumb, which will allow the rubber band to come off the gun.
Progress
Stage No. 1. Glue two capacitors together so that the positive terminals are together. In total, four groups are formed, which are superimposed on one another.
Stage No. 2. The terminals with the “+” sign are connected. A wire is soldered to them.
Stage No. 3. The same procedure is carried out with the negative poles of the terminals. The wire should cover the entire area of the structure being manufactured as much as possible.
Stage No. 4. We use a cocktail straw as a muzzle and prepare the appropriate projectile for the cannon.
Step No. 5. Attach a switch capable of operating at high current to the structure.
Step #6: Check that the connections are correct. Pay special attention to the correct assembly of the positive and negative poles of the terminals.
Thus, we have a Gauss cannon, all that remains is to try it in action.
The procedure for modifying a piezo lighter
We don’t bother with any electronic ignition. We will not use electronics or batteries. The device should be simple and reliable, and it is - a piezo lighter. The device works and does not misfire; the whole world uses it. You just need to have experience and the desire to bring this spark inside the volume. The cheapest kitchen lighter (37 rubles) is used as a basis. Believe me, the piezo unit on this or a gold lighter with diamonds is the same.
1. Disassemble the lighter.
2. Remove the piezoelectric unit and carefully handle the extension wire coming out of the piezoelectric unit.
3. We prepare two extension wires; it’s good if at least one wire is high-voltage (cut off from the line transformer of a broken TV).
4. We connect the extension conductors to the piezoelectric element and insulate it. There should absolutely be no twists between each other or loops on the conductors. These are additional inductances and capacitances that will weaken the spark.
5. Assemble the piezo lighter, strip the ends of the conductors at a length of ~5 mm and place them at a distance of 5 mm from each other. Click the lighter and a juicy spark should appear. If not, it means that something was assembled incorrectly somewhere.
Piezo lighter disassembled Piezo unit
Wire extension
Winding the second wire Assembling the piezo lighter The spark generator is ready
Is it really usable?
Theoretically, the Gauss cannon has an advantage over any other type of small arms. This:
- lack of sleeves;
- unlimited initial charge speed;
- the ability to fire in any environment including space;
- simplicity of design.
But there are also the following significant disadvantages:
- low efficiency;
- huge energy consumption;
- long time of energy accumulation for charging;
- the heavy weight of the actually functioning structure.
In fact, with the current level of technology development, using a Gauss cannon as a weapon is impossible. All that remains is to look at photographs of the Gauss cannon or observe the use of its analogues by super heroes like James Bond in science fiction films.
Creative project “Decorative cannon”
- Selection of manufacturing technology………………………………………………………6
- Relevance of the topic.
1.1. Justification for choosing the product.
Wood carving has always accompanied Belarusian wooden architecture and became most widespread where there were appropriate conditions. The development was facilitated by the ease of processing and availability of the material, the presence of skilled craftsmen, and rich traditions. How many beautiful examples of wooden architecture and artistic creativity our ancestors left us! Many museums in our country contain products of ancient craftsmen who, using a saw, an ax and a chisel, created unique works of architecture and carved decor.
The construction of new cities and villages, churches and monasteries, and fortifications also required many specialists in wood processing. Entire teams of carpenters, joiners, and carvers went from city to city, from village to village, where with their own hands, labor and talent they created amazing works of architecture and decorated their homes and everyday life with carved items.
The talent of the Belarusian people, their inherent sense of beauty and harmony made it possible to create deeply original works and contributed to the rise and flourishing of the high art of folk architecture and house carving.
Since ancient times, people have carved three-dimensional sculptures from wood using simple tools. These were idols and other religious figures, furniture and utensils, as well as wood carvings, which were widely used in wooden architecture, making souvenirs, toys, and utilitarian products. Unfortunately, wood is a short-lived material. Fires, natural disasters, wars, many things prevented us from preserving ancient examples of folk art, but what we inherited from the masters of the past, and what our talented contemporaries create, must be carefully preserved in order to pass on the national traditions of the Belarusian people to future generations.
Wood for me is the most accessible material, providing ample opportunity for creative activity in the manufacture of original decorative and applied products in a school workshop.
While thinking about the theme of the project, I decided to make a souvenir decorative cannon out of wood that can decorate the interior of my room or an arts and crafts exhibition at school.
- Goals and objectives.
When starting to develop the project, I set myself a goal
:
design and make a beautiful souvenir from wood.
While working on the project I solved the following problems
:
- to develop an economical, technologically advanced, durable and reliable design of decorative and applied wood products;
- develop a simple manufacturing process based on studied wood processing technologies using tools and devices available in the school workshop;
- manufacture a product in accordance with the developed technical documentation in a limited time
- Justification for the choice of design
I will analyze the design of a souvenir gun based on its appearance, compliance with the basic principles of design: strength, reliability, manufacturability, aesthetics and efficiency.
The advantages of the design include:
- beautiful appearance;
- the ability to change shape;
- product stability;
- strength and reliability of the structure;
- availability of materials, tools and machine tools
equipment.
The disadvantages of the design include:
- additional costs of materials and time for turning the gun barrel and wheels;
- insufficient manufacturability and cost-effectiveness of the design due to the complexity of assembly due to the use of a relatively large number of parts (8 pcs.).
In my design, I tried, while maintaining the noted advantages, to eliminate the identified shortcomings.
The use of only wood material provides both good bonding strength and the possibility of decorative finishing of the product by burning, painting, and carving.
The proportional ratio of the height and length of the product (1:2) gives the product the necessary harmonious integrity and artistic completeness.
- Decorative design
A flat-relief carving was chosen as a decorative design for the cannon barrel, and a geometric carving on a painted surface was chosen for the gun carriage. The contrasting color of the carving elements and the wooden base enhances the perception of the carved image.
When developing the design on the trunk, which is a stylized image of a flower in the form of a lily, vertical symmetry was used. I decorated the gun carriage with geometric carvings.
- Justification for the choice of materials
Wood selection
The choice of rock was carried out taking into account the decorative design of the product with geometric and flat-relief carvings. For the manufacture of the trunk and wheels, a light-colored wood species, widespread in our area, was selected.
The most suitable for these purposes are deciduous trees such as birch, aspen, linden
Aspen
It is distinguished by softness, whiteness and purity. Its homogeneous wood allows you to make cuts in any direction, does not chip or crush under the cutter, but, in comparison with linden, it is more fragile and more difficult to process.
Birch
- a native Belarusian carved material of white color with a slight reddish and yellowish tint, characterized by medium hardness, strength, uniformity and fine structure. The wood polishes well, but is much more difficult to cut than linden or aspen.
Linden
It has soft, fairly viscous wood, white in color, of uniform structure. It is equally easy to cut along and across the fibers, and is easy to process.
I am a beginner carver, so for the carriage on which the main carving is done, I chose aspen, for the trunk and wheels - birch, since birch lends itself well to turning, and for the frame and axles - pine.
- Glue selection
The decorative gun is intended for use inside heated rooms, so for gluing it you can use any transparent, non-waterproof glue that provides a strong connection, for example, wood glue (gluten) glue of animal origin or a synthetic water emulsion (polyvinyl acetate dispersion) PVA.
I chose PVA emulsion, which, compared to wood glue, is more convenient to use, as it is used for cold gluing and is sold ready-made.
- Choice of stain
For direct surface dyeing of wood, stains are most often used - aqueous and non-aqueous (including alcohol) solutions of natural dye, ready for use. The colors of stains are nut-brown, red-brown, yellow, and black. They paint wood to a depth of 1 - 2 mm.
Water and alcohol stains are not dangerous to human health when used, but, unfortunately, they are currently not sold in our area. Therefore, I decided to use a commercially available non-aqueous solution of mahogany-colored stain, especially since the wood will be stained to a lesser depth if the dye dries quickly.
- Varnish selection
Varnishing helps protect the surface of the product from moisture penetration and rotting. To preserve the color of the gun surface, you can use any varnish that forms a transparent film, for example, oil, alcohol, or alkyd and nitrocellulose varnishes that are widely used in everyday life.
Oil and alcohol varnishes are produced in small quantities due to scarce and expensive natural raw materials.
Nitrocellulose varnishes dry very quickly, but are very dangerous to work with.
Alkyd varnishes, which are commonly mistakenly called oil varnishes due to the fact that they contain vegetable oil, are less dangerous to work with.
I chose alkyd varnish brand PF-283. It is waterproof, gives a uniform glossy transparent film, and has a drying time of 36 hours with a single coat.
2. Manufacturing technology of a decorative cannon.
2.1. Choice of manufacturing technology.
To make a cannon, you will only need to perform learned operations, such as marking, turning, sawing, stripping, grinding, assembly and finishing.
Each operation is important and requires precision execution:
— high-quality turning will ensure a beautiful appearance of the gun barrel and wheels,
- high-quality marking and cutting increases the accuracy of assembly, reduces the time for cleaning the ends and edges;
- The quality of grinding affects the appearance of the product
- On a painted surface, inaccuracies in marking and making threads are not allowed due to the impossibility of subsequent grinding and correction of thread defects.
Increasing the accuracy of operations while simplifying the gun manufacturing technology is achieved by me by:
- marking carriage parts using one universal template;
- cutting out parts with an electric jigsaw.
2.2. Tools and accessories.
When making a decorative cannon, only the machines, tools and equipment available in the school workshop are used:
- lathe STD-120M;
- turning chisels;
- electric jigsaw;
- brush, swab;
- sanding paper;
- pencil;
- ruler;
- compass;
- blunt knife;
- semicircular chisel.
To mark the carriage parts, you will need to make a universal template from cardboard.
- Graphic documentation.
- Technological documentation.
- Economic justification for the project.
The cost of a manufactured product is mainly determined by the costs of materials, electricity and labor.
According to the calculations, the costs were:
- for materials - 23,000 rubles.
- for wood - 10,000 rubles.
- for PVA glue – 1000 rubles.
- for varnish PF-283 – 7000 rub.
- for stain – 5000 rub.
- for electricity – 1200 rubles.
- for time wages - 20,000 rubles.
Subject to the purchase of all materials, payment of electricity costs, payment of wages, the cost of the product will be 44,200 rubles.
Without taking into account the wages that I do not pay myself, and provided that scraps of planks from production waste are used, the cost of the decorative gun is 17,000 rubles.
Considering that there are no similar products on sale, you can compare the cost of the gun with the price of souvenirs that are sold in stores, which, depending on the availability and type of finishing, is 80-200 thousand rubles, and come to the conclusion that:
a) making a decorative cannon is very profitable;
b) the production of such souvenirs is economically justified, and sales are actually possible.
- Environmental justification for the project.
The decorative cannon is made entirely of wood - an eternal material due to its constant renewal, subject to the careful restoration of forest plantations.
The use of scraps of planks from waste wood and firewood contributes to more complete processing of wood and conservation of forests.
When completing the project, pre-planed planks and birch wood were used. If it is necessary to carry out planing and turning operations during the work on the project, the resulting shavings could be used, for example: as bedding for animals, in the fall - for insulating beds with strawberries or garlic, in the spring - to retain moisture and protect beds with crops of carrots and onions from possible cracking of the earth after watering.
The ash obtained by burning shavings and other wood waste can be used both as a fertilizer and as an environmentally friendly product for protecting cruciferous plants, such as radishes, radishes, cabbage, from pests.
The use of PVA glue, stain and PF-283 varnish in compliance with safety regulations eliminates the harmful effects of materials on the human body during the implementation of the project and further use of the product.
Based on the above, I believe that the manufacture and use of a decorative gun does not entail changes in the environment or disruptions in human life.
- Conclusions on the work performed.
When working on the decorative cannon project, all the tasks were solved:
- an economical and technologically advanced, fairly strong and reliable design of a wood product with decorative finishing with geometric and flat-relief carvings has been developed;
- based on the studied wood processing technologies, a simple manufacturing process has been developed;
- According to the developed technical documentation, the product was manufactured on time.
Therefore, I believe that the goal of developing and manufacturing a beautiful and inexpensive decorative cannon from wood has been achieved.
.
The developed technical documentation can be used in labor training classes and in technical creativity circles.
I had no difficulties making the decorative cannon and had great pleasure. In addition to the decorative cannon, I am involved in a ship modeling club and have made models of a sailing frigate, a Greek galley, the Golden Hind galleon, and a river boat.
In the process of making products, I fully mastered the techniques of planing, sawing, turning, assembling, and finishing metal and wood products. I plan to continue decorating my apartment with handmade items. I am satisfied with my work and I am sure that my work brings joy to all the people around me.
- List of sources used.
Sahuta Y.M. National traditions of Belarus. – Minsk: Belarusian Encyclopedia, 1997. – 286 p.
Sahuta Y.M. Belarusian folk dekaratyna-prykladnoe mastery: metadychny dapamozhnik. Recommendations for the Navukova-methodical centers of educational books and timely training of the Ministry of Education of the Republic of Belarus. – Minsk: Belarus, 1995. – 110 p.
Folk traditions of Belarus: metadychny dapamozhnik. Recommendations for the Navukova-methodical centers of educational books and timely training of the Ministry of Education and Science of Belarus/Uladalnik Y.M. Sakhuta. - Minsk: Belarus, 1996. - 167 p.
Wood carving. Mosaic: / Compiled by Ryzhenko V.I. - Moscow: ASTV Trust, 1997. - 130 p.