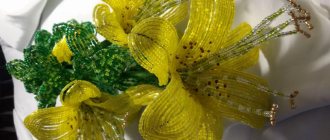
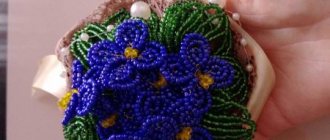
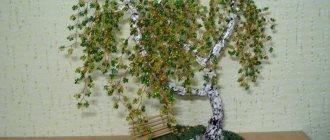
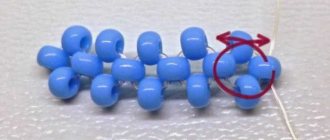
Rose is a very popular and beloved flower. But, unfortunately, all its beauty quickly fades. You can make this flower with your own hands from beads. A beaded rose will delight you with its blooming appearance all year round. If you don’t know how to make a rose from beads, then this master class with step-by-step photos will help you master the technique of weaving roses from beads.
Materials for creating one branch
- Red beads 40 grams,
- Green beads 30 grams,
- Red wire 0.3 mm,
- Green wire 0.4 mm,
- Gerbera wire 0.8 mm,
- Thick braided wire
- Red sewing threads
- Green floss threads
- Transparent glue or varnish.
Individual elements need to be woven in stages, and then connected into a branch with flowers.
How to achieve a good flower appearance
Before you begin, carefully read the description of the model manufacturing process, think over the color scheme of the product (it may be the same as the one proposed or differ from it) and select the appropriate material. It is not necessary to choose beads of the specified number - sometimes using a different material leads to very interesting and unexpected results.
It is very convenient to use special colored wire for making flower arrangements, which can be purchased in flower shops or in specialized departments that sell everything necessary for needlework. This wire comes in white, gold, red, green, dark green and other colors. If it is not possible to purchase special colored wire, you can use ordinary copper or steel wire, which is used in various electrical appliances in the form of transformer windings or filling insulated wires.
Beads are a fairly heavy material, and some complex or large products made from it turn out to be quite heavy. Therefore, sometimes to strengthen the stems of flowers they use a special floral wire with a diameter of 0.6-1.2 mm - it is sold in flower shops in the form of bundles of pieces 0.25-0.40 m long. Having a small diameter, such wire is elastic enough to give the flower the desired shape.
It may happen that while working on the product the wire breaks. If this happened at the beginning of the work, it is easier to start executing the element again. If a significant part of it has been completed, it is necessary to release the torn end, unraveling the last few rows, and secure it using one of the methods proposed below.
The first way is to pass each end of the wire back along the product (Fig. 1 a), repeating the weaving principle. This is only possible if the wire passes through the bead hole several times. If the beads are too small or the wire is thick, they resort to the second method: the ends of the wire are carefully passed through the loops between the rows along the edge of the product (Fig. 1b). If, during the description of the models, you come across indications of the need to close the ends of the wire, you can use any of the proposed methods.
Sometimes, to give a product the desired shape, it is necessary to fasten several elements together. To do this, an additional wire of the required length is cut, one end is threaded into the loop between the rows along the edge of the first element, and the other passes through the symmetrical loop of the second element in the same way. Then they cross and are threaded again into the next loops (Fig. 2a) - and so on until the end of the connection.
If it is necessary that all the petals of a flower or the elements of the cup are located at the same level, then with the help of additional wire all components are connected into a ring. The wire passes along the bottom row of each element - they are, as it were, strung on it one after another - and twisted tightly (Fig. 26). Sometimes you can not resort to additional wire, but use one of the wire ends from any element, if, of course, its length allows it.
If you did not make the flower stems from green wire, you will have to wrap them with threads or paper matched to the color of the leaves. Let's consider the sequence of performing this work. First you need to determine how long the stem will be and cut the ends of the wire at the selected level. Wrapping the stem begins from the calyx of the flower. To do this, a drop of PVA glue is applied to the base of the petals, then several turns of thread or paper are applied to this place - this way the end of the winding is secured.
After this, carefully, turn by turn, wrap the stem, and the places where the leaves are attached should be located between the turns of the winding. When the turns approach the end of the stem, you need to apply a little glue to it and secure the end of the winding. If the stem has a branched structure, then the side branches are wrapped first, and then the main stem, while the junctions of the branches are carefully masked with threads.
Petals
The petal of the first row is made with a wire 65 cm long.
- To do this, bend it 10 cm from one of the ends, making a loop, and twist the ends.
- Place 8 beads on the short central axis.
- Place 11 beads on the working wire.
- Twist the ends of the wire together to form a rounded arc.
- Cast on 11 more beads and make an arc on the other side of the central axis.
- Make a second row of arcs, adding 15 beads to each of them.
- Make 3 more such rows, adding several beads to each of them.
- From the upper edge of the petal, cut off and bend the end of the wire.
- On the other side, twist the ends of the wire together.
- For a rose you will need 2 of these petals.
The following rows of beaded rose petals are woven according to the following pattern:
- 2nd row – 80 cm wire – 8 beads on the axis – 6 rows of arcs – 3 petals;
- 3rd row – 95 cm wire – 8 beads on the axis – 7 rows of arcs – 4 petals;
- 4th row – 110 cm wire – 8 beads on the axis – 8 rows of arcs – 5 petals.
The fifth row of petals must be woven on a base of three axial wires. To do this, twist together a 15 cm long wire and a 100 cm long wire at a distance of 7.5 cm from the edge.
The three short ends of the wire will play the role of axes, and the long end, together with the beads, will be braided around them. For each of the arcs of the first row you need to collect two beads, then the number of beads increases.
In total you need to make 9 rows of arcs. Twist the ends of the wire. For a rose you will need 6 such petals.
For greater decorativeness, the last row of each petal can be made of beads in a contrasting color, for example, white, yellow or burgundy.
Home decoration
Beautiful openwork roses woven from small beads can easily diversify a relaxation corner in an apartment. In the winter season, such delights will remind you of warm spring days. Decorated gold tins can perfectly highlight an antique-style interior or give special attention to the place in which it stands. Crafts in a basket look homely and will undoubtedly contribute to coziness in those rooms where there is not enough light or a large pile of things.
Sepals
The sepal is woven in the same pattern as the petal, but its ends are not rounded, but triangular.
- For it you need to take a green wire 20 cm long, also make a loop and put 9 green beads on the short end of the wire.
- You need to collect a larger number of beads onto the working wire and screw it to the axial wire at an angle of 45 degrees so that the corners are sharp.
- You will only need to make one row of arcs. In total you will need 5 of these sepals.
Fixation in a pot
In order for your flowers to shimmer beautifully in the sun, they need to be placed on the windowsill and always in the most visible place.
Method one:
- if your handicraft turned out to be easy, you don’t have to bother with different solutions;
- Styrofoam is suitable for this purpose;
- insert the bouquet into the fixed material;
- plant flowers together with polystyrene foam in a pot;
- Decorate the top with decorative stones or beads.
Method two:
- this method is suitable for heavier fakes;
- if your bouquet is massive, use alabaster;
- dilute in a 1:1 ratio;
- seal all holes in the pot;
- pour the solution;
- fix the stem at the bottom of the pot with plasticine or stone;
- wait until it dries completely;
- decorate with elements to your taste. Can be decorated with coffee beans or artificial grass.
Leaves
For a rose you will need leaves of two sizes.
They weave in the same way as the sepals, according to the following pattern:
- Small leaf – 40 cm wire – 7 beads on the axis – 4 rows of arcs – 3 pieces;
- Large leaf – 50 cm wire – 9 beads on the axis – 4 rows of arcs – 3 pieces.
I want a bouquet!
Many girls liked compositions made of beaded flowers. But the question is: where can I get such beauty? There are two options to solve the problem.
Firstly, you can weave your own wedding bouquet. You can buy beads at any craft store. And you can quickly find the diagrams on the Internet. In addition, a master class from any experienced craftswoman will come to the rescue. Thus, you will be able to make your deepest desires come true, make the bouquet of your dreams, and take into account all the little things.
Secondly, a beaded wedding bouquet can be purchased upon request. Today there are many craftsmen who offer their beadwork. Moreover, the choice is very wide
You can buy a ready-made bouquet (masters always have them in stock) or order a composition to suit your taste, the master will be happy to listen and take into account all your wishes and take into account your preferences
Assembling a twig from leaves (instructions)
Large and small petals must be collected separately into two branches of three pieces.
- For the base you need gerbera wire 15 cm long and attach one end to the base of the leaf.
- Starting from the base, wrap all the wires together for a length of 2 cm with floss threads.
- Next, attach one more leaf to the stem on both sides and continue wrapping another 4 cm.
Collaboration
In older age, children are not very attracted to paper crafts and appliqué; beadwork will come to the rescue; parents can offer to work together on recreating various options. It is important to interest the child and try to collect a bouquet for the class teacher in advance; it will be a voluminous, beautiful composition containing several types of vegetation.
Come up with an interesting design of beaded petals so that when they see them, your classmates will be very surprised, and the teacher will feel the concern of the class to which he is assigned. It is possible that an interesting conversation will begin about the stages of creation with peers, there will definitely be like-minded people in these activities, communication will lead to trusting relationships and the creation of friendships at a young age.
Assembling a large branch
Cut a piece of thick wire 30 cm long. Cut off the braid from it with a stationery knife. Attach the end of the wire to the base of the center of the flower. Wrap it close to the base with red thread.
- Next, you need to roll both petals of the first row into a tube at one end and, connecting them to the stem just below the base of the center of the flower, continue to wrap them with threads. Bend the upper edges of the petals slightly to the sides. Each next row of petals should be attached slightly lower than the previous one.
- First you need to give each petal a slightly convex shape so that the petals seem to hug the base of the bud.
- They need to be attached one at a time, nesting inside each other. The petals of each subsequent row must be placed in a checkerboard pattern relative to the petals of the previous one.
- Having completed each full row, you need to straighten the ends of the petals to the sides. Cut the end of the thread and secure it with glue.
- Now you need to take the sepals and start screwing them one by one to the base of the flower with floss threads. Distribute all sepals evenly around the flower. Bend them in an arc in different directions. Continue wrapping the stem with thread.
- At a distance of five centimeters from the flower, attach the first small branch of leaves and continue wrapping. After another three centimeters, attach a second sprig of leaves on the other side of the flower. Continue wrapping the thread around the stem until the very end. Cut the end of the thread and secure with glue. Instead of floss, you can use floral ribbon.
- According to the flower assembly scheme, you can also collect one or two rose buds. Each bud will consist of a center and the first two rows of petals. When assembling a branch, the buds must be placed between the leaves.
A finished rose branch or even a whole bouquet can be fixed in a glass, vase or pot. To do this, you need to fill the ends of the branches with plaster or cement and decorate the surface with sisal.
Today we learned how to make a rose from beads. You can decorate your own home with a bouquet of such roses or present it as a memorable gift. Almost any woman will be delighted.
And since it is quite simple to weave a rose from beads using this master class, each of us has a chance to receive a bouquet of these flowers from our own children for their birthday, March 8th or Mother’s Day.
Video lesson:
Rose using openwork weaving technique
All the petals of this rose are completely different in size and shape, the master class explains the principle of openwork weaving, and then everyone can improvise as they want. The rose turns out tough and holds its shape well. Depending on the number of petals, you can get a bush rose, a bud or a luxurious flower. You can tie the cores and make the rose richer by placing larger petals on the edge.
Orange and yellow-brown beads were used. Weaving on a fishing line 0.2 mm thick. The formation of openwork weaving is described in detail; you just need to repeat everything after the instructor.
Photo of roses made of beads
0
