- March 29, 2019
- Crafts
- Nadezhda Korovkina
Elegant, fun and very, very pink. They will never go out of style. In this article we will talk about how to make a flamingo for party decoration or just to lift your spirits. Although you can combine business with pleasure and invite your friends to a handmade party for making flamingos with your own hands.
So, we offer you three original and easy-to-implement ideas.
Idea No. 1: DIY flamingo pinata
An ideal solution for both a children's party and a hen party in a beach style.
Materials:
- cardboard;
- corrugated paper in pink, white and black colors;
- paper adhesive tape;
- glue;
- scissors;
- stationery knife.
Steps:
- First of all, we need to cut out the main parts from cardboard: the body of the flamingo (2 pieces, the author of the project drew them by hand from a photo from the Internet), strips for the side walls 10 cm wide, 2 long narrow strips for the legs.
- Carefully bending the strips, glue the side walls to one of the body shapes using paper tape, then secure the second shape.
- We cut the corrugated paper lengthwise into strips, one side of which is cut into fringes.
- We begin to glue the fringe to the body of the flamingo from the bottom up so that each subsequent strip covers the top of the previous one. Having reached the beak, we change the pink stripes to white, adding black at the very tip.
- We wrap the legs in pink paper and glue them to the body. We place 1 eye on each side.
- We make a hole in the upper part of our flamingo and thread a cord through it.
If you want to follow Mexican traditions exactly, then you can put sweets and small souvenirs inside the structure, and at the end of the holiday, try to break the piñata with a stick. If you don't mind.
What you need to sculpt a flamingo from plasticine
A plasticine flamingo is a simple craft that requires only pink source material, wire, stacks and a glass of warm water. Making a bird will take no more than half an hour. Instead of wire, you can use sticks or tubes. They will serve as legs. It is better to paint the elements pink in advance so that they look harmonious with the entire product.
Warm water is needed to make the material softer and more pliable. Keep the bar in the glass for 3-5 minutes. If it needs to be made denser and harder, then it is dipped in cold water. In addition, the finished craft should be cooled in the refrigerator if it is to be used as decoration.
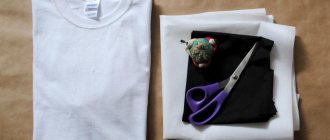
Idea No. 2 DIY flamingo gift bag
A great way to beautifully and originally decorate a gift or give small memorable souvenirs to those invited to your party.
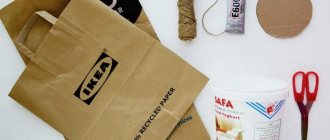
Materials:
- “Flamingo” pattern.
- White printer paper.
- A printer.
- Pink cardboard.
- A paper bag (like the ones they give you on airplanes or some bakeries).
- Glue.
- Scissors.
Steps:
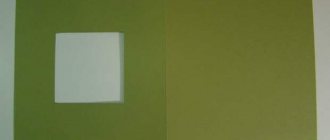
- Download, print and cut out the pattern.
- Using the resulting pattern, mark with a pencil and cut out 2 parts of the flamingo’s body from pink cardboard.
- Glue a head with a beak onto each of the two parts.
- We attach the resulting parts to a paper bag. We cut the bag so that handles are made from the flamingo's neck.
- Glue the body and head of the bird to the bag, first on one side, then on the other. We make sure that the handles do not accidentally stick together.
- We put a gift inside.
How to prepare plastic bottles
First, we make the body of the garden craft from one plastic bottle. In principle, you don’t need to do anything special with the bootle itself. Unless you pierce the lid and secure a strong metal rod in it, bending it like a flamingo’s neck. And in one of the sides of the bottle make holes for the bird’s legs.
Other bottles must first be painted with pink paint (preferably acrylic) - you will cut out bird feathers from them, and when the garden flamingo figurine from plastic bottles is assembled, it will not be possible to paint the lush plumage of the garden craft well.
Idea #3: Flamingo Easter eggs
This DIY flamingo Easter craft is perfect to make with your kids. An original and easy to implement idea.
Materials:
- Eggs.
- Pink paint or potassium permanganate.
- Black felt-tip pen.
- Glue.
- White pen or putty.
- Pink cardboard.
- Scissors.
Steps:
- Eggs can be used either boiled or empty shells (to get them, you need to make small holes in the raw egg at the top and bottom with a needle, then carefully blow out the contents. At this stage, the child will definitely need the help of an adult).
- It is best to paint eggs in a solution of potassium permanganate, but since it is now sold only by prescription, you can use any paints - watercolor, gouache, acrylic.
- While the eggs are drying, cut out the neck and wings from pink cardstock.
- Draw a black beak and eye with a felt-tip pen, and use a white pen or putty to draw a thick line at the base of the beak.
- Glue the cardboard parts to the egg using drops of glue.
As we can see, making a flamingo with your own hands is fun and not at all difficult.
How to make flamingo plumage
There are two options for creating plastic bird plumage .
First option:
- Cut large feathers from painted plastic bottles. You will need a lot of feathers - you will have to use 6-7 bottles for a flamingo figurine.
- Make frequent cuts in the bottle along the width of the feathers. There should be a lot of cuts so that the plumage of flamingos made from plastic bottles is thick, and they need to be made so that the plastic feather can barely be pressed into the slot (to hold on better).
Second option:
- Cut off the bottom and neck of the bottle.
- Cut the middle of the bottle lengthwise and unfold it.
- From one edge of the resulting plastic strip we cut out the feathers, making curves (about a third of the height).
- We make several (5-6) such stripes with feathers.
- We attach the strip to the bootle base (flamingo body) with wire.
- This is an easier way to make a bird's feathers; stripes are easier to attach than each feather individually.
And finally
Some more ideas for your flamingo party:
- Made from felt.
- From balloons.
- Headdress for a party.
These glamorous pink birds will not leave your guests indifferent.
LiveInternetLiveInternet
–Categories
- Autolady (8)
- wire (4)
- Beads (62)
- Paper (655)
- Quilling (56)
- Cardboard furniture (11)
- Origami (27)
- Newspaper weaving (125)
- Miscellaneous paper (267)
- Scrapbooking (109)
- Bottles (decoration) (5)
- Felting (77)
- Embroidery (224)
- Children's embroidery (73)
- Ribbon embroidery (42)
- Embroidery patterns (90)
- Rugs (10)
- Knitting (1794)
- Knitting + fabric (27)
- Knitting on a fork (32)
- Knitted toys (187)
- Knitted pillows (31)
- Knitted flowers, butterflies (150)
- Hats (knitted and not only) (90)
- Kettle warmers (27)
- For children (198)
- Jackets, cardigans, coats (77)
- Knitting magazines (85)
- Irish lace (71)
- Border (83)
- Rugs (88)
- Blouses, pullovers, etc. (114)
- Socks, booties, mittens (93)
- Dresses (74)
- Blankets, bedspreads (95)
- Potholders (60)
- Miscellaneous knitted (90)
- Napkins (83)
- Bags (38)
- Patterns, diagrams, details (260)
- Shawls, scarves, stoles (98)
- Decoupage (35)
- For cats and dogs (23)
- For the toilet room (16)
- Craft magazines (44)
- Health and beauty (82)
- Pincushions (49)
- Made from nylon (53)
- From light bulbs (5)
- From threads (60)
- From plastic bottles (68)
- Interesting (124)
- Interior (161)
- Living room (2)
- Children's (50)
- Repair (9)
- table setting (2)
- Bedroom (1)
- Curtains (32)
- Clipart, pictures with code, emoticons (161)
- Houseplants (15)
- Computer, Internet (71)
- Candy ideas (38)
- Cooking (223)
- Second course (20)
- Baking (31)
- Carving (12)
- First course (2)
- Salads, snacks (40)
- Cake, dessert (29)
- Modeling (111)
- Salt dough (48)
- Cold porcelain, mastic (62)
- Macrame (13)
- Fur (3)
- New Year (158)
- Panels in different techniques (43)
- Crafts for the garden, made of polyurethane foam (90)
- programs (35)
- Psychology (25)
- Miscellaneous (188)
- Thread (7)
- Glass painting (7)
- DIY (34)
- LiRu tips (40)
- Tips for decorating and making toys (74)
- Tips for housewives (34)
- Straws (5)
- Textile toy (303)
- Giraffes (7)
- Hares (31)
- Cats and cats (29)
- Doll (136)
- Bears (6)
- Various animals (136)
- Stencils (40)
- Hair care, hairstyles (33)
- Learn to draw (41)
- Tatting (1)
- Teapots, etc. (porcelain) (6)
- Balloons (6)
- Sewing (1161)
- Puffs (26)
- For children (103)
- Corset (4)
- Patchwork, patchwork (454)
- Small items for the kitchen (142)
- organizers for needlework (59)
- coats, raincoats, ponchos (14)
- Dress, skirt (164)
- Pillows (119)
- Educational games for children (27)
- Secrets of professionals (73)
- Stitch (8)
- Bags (73)
- Flowers + various little things (122)
-Music
–Search by diary
–Subscription by e-mail
-Statistics
Patterns for children's clothing. Free MASTER CLASS
Subscribe, set the bell, and then you will be the first to receive notifications about new MKs
I write posts about myself, how it all began, which I don’t always duplicate in the group, I plan to hold SFS, auctions for sets of fabrics and lace, I announce new items in stories
All current availability of fabrics, lace, accessories, etc. Here you can add to cart, select a delivery method and pay for your order! On the blog you will find all MKs and patterns for them
Patterns for children's clothing. Free MASTER CLASS entry pinned
Pattern for a dress of moderate volume, fitted silhouette, cut at the waist. V-shaped neckline. Turn-down collar. The bell skirt, front and back panels are assembled. Along the waist line there is a set-in drawstring into which a ribbon or belt is inserted. Placket fastening with buttons or press studs. The sleeve is long. There are pockets in the side seam of the skirt. Model Eva: height 110 cm, OD=52 cm, OT=49 cm, OB=57 cm. Show in full. https://blogflamingo.ru/shop/Sheri
The dress is made of warm cotton. Thin cotton, linen, flannel, denim, and soft corduroy are also suitable for sewing dresses. Size range 92-152, detailed video master class on tailoring on my YouTube channel (link in the profile header)
For two more days you have the opportunity to buy a new product with a 30% discount using the promotional code NG2021, i.e. for 105 rubles.
Graceful paper flamingo
This model is more complex than the previous one, but the bird turns out to be more realistic. Prepare a square sheet of paper.
- Fold the sheet in half diagonally.
- Fold the resulting triangle in half.
- Unfold the workpiece and fold a double square along the fold lines. Place it at a blind angle away from you.
- Fold the top layer up.
- Fold the lower left side towards the middle.
- Fold this element inward with a reverse fold.
- Repeat on the right side.
- Turn the workpiece over. Fold the side parts towards the middle and unfold.
- Open and straighten the top layer as in the basic bird shape.
- Lower the upper part of the workpiece down.
- Turn the workpiece over and flip the top layer from left to right.
- Lift the bottom corner up.
- Flip the top layer from right to left.
- Lift the corner on the other side in the same way.
- Bend the top corners to the sides with a reverse fold. Their bottom edges should lie exactly horizontal.
- Fold the side parts towards the middle, then fold the reverse fold inwards.
- Bend the upper part of the side corners down.
- Turn the workpiece over, fold the sides towards the middle.
- Bend the side corners in half downwards.
- Fold the workpiece in half in half.
- Bend one leg with internal folds.
- Bend your neck vertically inside out.
- Shape the head.
- Form a beak.
- Bend the tail downwards.
- Pull out the top layer of the ponytail and press it on the outside on the sides.
- Flamingo is ready.
Editorial Voice
Irakli
Lord of Paper Sheets
Ask a Question
All folds must be made clear and even so that the figure turns out neat.
If you have any difficulties, watch the video instructions:
Creative process
Creating a flamingo is a job of medium complexity. Compared to other birds made from plastic bottles, there is less hassle with cutting and attaching feathers due to their large size. But you still have to work hard.
Flamingo plastic bottles master class:
The formation of a flamingo begins with the body. A hole is cut out on the lid to fit the diameter of the plastic pipe. Holes for the legs are prepared on the sides of the container in the lower part. The result will be a similar blank.
Moving on to the plumage of a flamingo. In addition to five-liter bottles, 2.5-liter plastic containers are suitable for these purposes. This will allow you to cut feathers of different sizes. The neck and bottom of the entire container are removed, after which the cylinder is cut lengthwise. Pre-prepared paper sketches in several variations can speed up the cutting process. The more elements are available, the more spectacular the final result of the flamingo will appear. The blanks are painted before attaching them to the body, because it will not be possible to fully decorate all areas of the parts on the finished bird.
Feathers of different sizes are sorted into bags; this measure will prevent confusion when fixing the elements on the plastic frame. Flamingo plumage is carried out in several ways:
- If a dense canister is used for the body, I cut out the parts with the leg. Then cuts are made on the canister according to the number of feathers, into which the workpiece is then inserted.
- When using a large plastic bottle for the frame, the elements are fastened with wire, and holes are prepared in advance with an awl.
- Alternatively, a furniture stapler will help fix the parts on the flamingo.
The practicality of a particular method is determined based on the materials and rigidity of the bottles used for the body and feathers.
For the flamingo's neck, a 0.6 m piece is cut from a 2.2 m plastic pipe. Further steps:
- The workpiece is bent in a shape that imitates the throat of an elegant bird.
- The pipe is masked with corrugated material.
- One edge of the plastic pipe is passed into the neck of a plastic bottle, which serves as the body.
- The end is fixed with screws and glue.
- The flamingo's neck also needs to be painted to match the original.
Making the head will require painstaking work. But here too there is an opportunity to show the creativity and skill of a master. Options for forming a flamingo's head:
- The body of a plastic bird can be crowned with a plaster piece.
- It’s easier and more affordable to make a blank from foam plastic.
- Those skilled in the art of woodworking are also given the chance to demonstrate their skills.
- A compact plastic bottle treated with polyurethane foam can be an excellent basis for cutting out a head.
Painting with acrylic paints for exterior use is the final touch to decorating the flamingo’s head, which is based on a plastic bottle. You can highlight the eyes with paints or glue special blanks.
Let's move on to making flamingo legs for plastic bottles by hand:
- To keep the bird stable, a stand made of a sheet of metal is useful.
- Small pieces of pipe are welded onto it, the diameter of which is slightly larger than the plastic legs of a flamingo.
- The PVC pipe is shaped into a horseshoe; the distance between the edges should correspond to the size of the bottle from which the bird’s body is made.
- A plastic pipe is threaded through the holes in the body and secured in the stand.
When the entire frame is assembled, they move on to attaching the empennage. Work begins from the tail section, the elements are fixed in a checkerboard pattern. In order for the flamingo's outline to match the original, the bird will need wings. To do this, a frame is cut out of the chain-link mesh onto which the feathers are attached. Installation of the frame with plumage on the body is carried out using self-tapping screws.
Depending on the desired end result, the neck can also be decorated with small plumage elements made from plastic bottles.
The creative process of making an attractive exotic bird can be considered complete. Impromptu suggestions based on the proposed master class are welcome.
Preparatory activities
Despite the simple source materials, a little preliminary preparation is still required before starting creativity. You should have at hand:
- Main container for the flamingo frame. It is optimal to find a 10 liter plastic canister with a hole on the side. If such containers are not available, a 5 liter plastic bottle will do.
- 5 liter bottles in the amount of 9 pieces. These will form flamingo feathers.
- The function of the legs will be performed by a 2.2 m long PVC pipe.
- The neck is finished with a corrugated pipe about 0.6 m long.
- The head is cut out of foam plastic, the approximate size of the piece is 15x20 cm.
- Self-tapping screws and thin wire for connecting parts.
- Acrylic paint and brushes for finishing decoration.
If you do not pay due attention to this stage, bottle flamingos will quickly lose their original attractiveness due to contamination of unwashed areas. A solution of washing powder can also degrease plastic bottles. The procedure will ensure high-quality distribution of paint when decorating flamingos.