Decorating a wedding celebration is one of the most important points that should be given special attention. Nowadays, due to the popularity of handmade products, brides often create wedding decor with their own hands, involving their girlfriends in this process. In addition to the ceremonial decoration of the room, special attention is also paid to individual attributes. In this lesson, you will learn how to prepare original wedding decorations from satin ribbons using the kanzashi technique with your own hands, using the example of a champagne bottle, boutonniere, basket (bag) and wedding glasses.
Materials and tools
To work with tapes, you will need a set of simple tools that can be found in every home. If this is your first experience in decorating bottles, then it is better to start with simple design solutions to get the hang of it. To work you will need:
- Sharp scissors.
- Glue that adheres well to glass. It's better to use "Moment".
- Braid, lace, scraps of fabric.
- Accessories: beads, beads, buttons, cabochons.
- Tweezers for creating miniature elements.
- Ribbons.
The basic material also has a number of variations:
- Satin. Most commonly used due to its pliability and elegant aesthetic appearance.
- Silk. Thinner and more slippery material.
- Satin. They have a denser structure, and the fiber pattern is visible to the naked eye.
- Jacquard. Decorated with original drawings.
- Organza ribbons. The material is translucent and airy.
- Cotton. They hold their shape well, so they are suitable for creating three-dimensional compositions.
Each of the above types is used by needlewomen to decorate bottles, but the most popular material is satin. It combines the optimal ratio of quality and price.
Complex compositions made from combined materials look original. For example, cotton flowers surrounded by satin petals or the same background.
Feathers
One of the freshest ideas for decorating bottles for March 8 with your own hands is feathers.
This design will definitely become the highlight of the gift. Delicate and soft feathers look impressive and exclusive.
This bottle does not require additional decoration. The maximum that can be added in this case is a piece of ribbon or lace to hide the joint between the feathers and the label. And then, such decor may be needed only if the edge is not very neat.
To decorate your bottle yourself, you'll need feathers, glue, champagne, and maybe some ribbon.
Feathers are glued in rows, starting from the bottom edge of the bottle. The first row should be at such a distance from the bottom that the feather completely covers the container and extends 1–1.5 cm to the bottom edge.
It is better to use soft, downy feathers - if there are only hard flight feathers, then they should protrude beyond the edge by 0.5–0.7 cm. Otherwise, the bottle will be unstable.
It is advisable to hide the edge (the sharp edge that was used to write in the old days) of the top row under the label. If this is not possible, it is hidden under a layer of braid or lace.
Bottle preparation
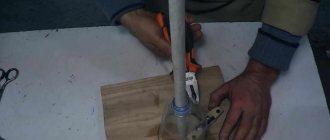
Both empty and full containers must be properly prepared for the procedure. First, remove the label and any remaining glue along with it. There are two methods for performing this procedure:
- Soak the label paper in hot water and then quickly tear it off. The method is not considered the most effective, since often the glue remains on the glass and has to be scraped off.
- Heat the label with dry, hot air and slowly tear off one centimeter at a time. A hair dryer turned on at full power can act as a source of flow.
After cleaning the glass, it is thoroughly washed and dried. Then the surface of the bottle is wiped with a cotton pad soaked in alcohol. This way the glass will be degreased, which will ensure good “adhesion” to the glue. Tapes are usually pre-cut after measurements are taken.
Decoration with ribbons
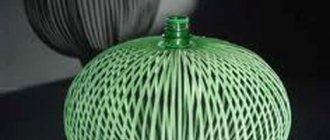
Decorating a bottle of champagne or wine with your own hands is not such a difficult task. Several master classes with a step-by-step description of the work will tell you about popular techniques and the features of their implementation, and the novice designer can only choose. The simplest option is to create a fabric covering on the glass in “layers”. Work starts from the neck. A “loop” is made from a piece of tape, which is placed on the thinnest section of the glass container.
Its ends are trimmed if necessary and glued to the surface of the bottle. Then they take the next strip, create the same “loop”, partially lay it on the previous layer (so that the base does not show through) and attach it in the same way. In this way, a continuous fabric covering is created with beautiful joints (overlapping). Colors and materials are combined. Then the resulting background is complemented with other decorative elements.
Creating relief
Another technique is creating a relief texture. The effect is achieved by gluing tapes or pieces of textile to the surface and then squeezing them with your fingers. As a result, folds are formed that most accurately imitate the thin fabric of clothing. It is necessary to glue the entire piece completely, and not its individual parts. As a base, paper or other fabric of a neutral shade is attached to the glass.
Kazashi technique
To create flower arrangements, they use the Kazashi (Kazashi) technique, which originated in Japan, where girls crowned their heads with similar decorations. Many have seen complex floral arrangements with hanging “buds” on long threads, adorned on the high hairstyles of Eastern women. The essence of the method is to specially fold shreds and pieces of ribbon in such a way that sharp and rounded ends of leaves and petals are obtained.
They are carefully collected with tweezers, and the free ends are fixed to the surface with glue. Elements with multi-layered flower buds look the most beautiful. In the Kazakh technique, they collect petals and place blanks of the same type on top of each other, but of different sizes and colors. This way a volumetric effect is achieved. Kazashi flowers are combined with openwork, beads, and braid.
Shibori technique
Another gift from Japan is shibori ribbons. Most often they are used to create body jewelry (necklaces, earrings, bracelets), but they are also suitable for bottles. The ribbon is a “crumpled” piece of fabric that is dyed in different colors with an ombre effect. When creating the material, it is crumpled and tied into knots so that the result is a rainbow color, opening the way for the artist’s imagination. Shibori tape is usually glued to a fabric base, but in the case of a bottle it is attached directly to the glass. It is worth noting that material without additional decor looks impressive, but boring. Ribbons are always surrounded by various kinds of accessories, among which beads, cabochons and glass beads to match the main color prevail. The composition gains volume due to the folds of the material and looks festive and solemn.
Safety precautions
Before you decorate a bottle of champagne with your own hands, you should definitely familiarize yourself with safety precautions. After all, if handled incorrectly, champagne can explode, causing dangerous injuries with fragments.
For the first experience, it is advisable to completely abandon the rather capricious champagne. It is better to start decorating experiments with safer bottles of non-sparkling drinks - since decorating bottles of cognac or wine is easier (the likelihood of being injured during the work is lower). Such drinks are not under high pressure and will not explode when decorated.
If it is necessary to design a bottle of champagne, then you need to follow a number of mandatory rules:
- Before starting work, you need to carefully inspect the workpiece . The slightest cracks, chips, uneven color of the bottle (glass thickness) indicate that it is not suitable for decoration;
- avoid sudden temperature changes . You cannot start working with a bottle recently removed from the refrigerator or brought from a cold street;
- Do not heat champagne while working (use a hairdryer to dry individual layers of paint, use a heat gun, etc.);
- Do not shake the contents of the bottle. Movements during operation should be moderately smooth and uniform; a sharp shake can lead to spontaneous opening of the plug.
It is worth noting that even strict adherence to all the rules does not guarantee one hundred percent safety, but only reduces the risk of injury to a minimum.
At the same time, decorating champagne with your own hands is an exciting and fascinating process; for many, such decoration becomes an original and interesting hobby.
Ribbon costumes
On the most “masculine” day, a non-trivial gift for a representative of the stronger sex will be a bottle of cognac, which is “dressed” according to its uniform. Such a gift will be of particular importance for a military man, rescuer or police officer. Satin ribbons are used to make a jacket, which is decorated with miniature chevrons, shoulder straps, buttons and ties with clips.
The costume is created using the technique of overlaying ribbons on top of each other. The first white layers are formed near the neck, which imitate a collar. Then the uniform is decorated with green, black or blue stripes (depending on the type of troops). Some craftswomen sew it separately from fabric and then simply put it on the bottle. Special attention is paid to the neck and plug. They are decorated with tiny berets, peakless caps, budenovkas, caps or caps. The elements are sewn separately and the finished miniature of the headdress is simply attached to the neck.
How to choose a decor style?
Champagne is the most traditional drink for wedding celebrations; any festive table is abundant with it. Many wedding competitions and games also use bottles of this drink. This is a good reason to make champagne a small highlight of the holiday.
You can turn bottles into real exclusives by showing a little imagination and ingenuity. You can do the decoration yourself, which will save money.
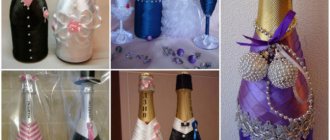
There are a lot of design options for champagne bottles. The most common option is to decorate the sparkling wine in the “bride + groom” style. Such a “couple” is usually placed on the newlyweds’ table. The classic color scheme in this case is black and white.
But if the celebration involves the use of some bright color (this is fashionable now), then the bottles can also have colorful elements.
It is popular to celebrate weddings using bright colors in addition to classic colors (white, ivory, champagne, milk). It can be turquoise, blue, orange, purple and even red.
The holiday will clearly become bright and unforgettable, but then it’s worth thinking about color accents in everything. Including in the decoration of wedding attributes.
There are a lot of design options - decoration with three-dimensional elements, fabrics and lace, pearls, scrapbooking, modeling. The drink looks good in bottles hand-painted with acrylic paints.
The most important thing is not to overdo it and create such decor that the bottle of champagne does not stand out from the overall style of the holiday.
Two beautifully decorated bottles are usually made and it is not customary to open them during the celebration. They remain for the couple for the future: one for their wedding anniversary, the second for the birth of their first child. Here is another reason to make a bottle of champagne beautiful and unusual.
The main rules of decoration are compliance with the given level of solemnity, combination with the furnishings, dishes, and outfits of the newlyweds
. For example, gold and silver engraved bottles would be completely out of place at a boho or Provence style wedding. But delicate floral motifs and lace are an excellent decorative option for a classic wedding with aristocratic notes.
If the wedding takes place under the auspices of a specific theme, for example, maritime, then the decor may include appropriate details. Bottles of champagne can be painted to resemble a sailor’s vest or decorated with anchors and chains, painted with sea waves, etc.
An autumn wedding in the Russian style presupposes the presence of autumn fruits and vegetables in the paraphernalia and the use of a red-red color scheme. Here bottles can be decorated with stylized painting, autumn apples or leaves.
The main thing in decorating is to show your imagination.
You can find many master classes on the Internet, which detail the sequence of actions and the necessary materials for the work. It’s these little things that make up the overall atmosphere of the holiday, so pay due attention to decorating not only the newlyweds, the cortege and the banquet hall, but also small accessories.
Bottles for a wedding
The bride and groom are always given two bottles of champagne for their wedding. This is an established tradition, the roots of which can no longer be found. At a wedding, they act as decoration on the festive table. After the celebration, they are hidden and the first one is opened exactly a year later, and the second one is opened upon the birth of the couple’s first child. As a rule, the container is decorated either in the form of a symbolic bride and groom, or to match the general theme of the wedding. The necks are decorated with doves (symbols of fidelity), rings and satin bows. They try to make the costumes of the “bottle” bride and groom look like the originals.
Men's clothing - a black jacket or tuxedo, with a ribbon, a bow tie, button beads and miniature cufflinks. To imitate a bride's dress, they use lace, openwork, airy fabrics, tulle, and sometimes even wire crinoline. Bottles decorated in a wedding theme are wrapped in layers of ribbons of beautiful colors, which are combined with artificial pearls, openwork stripes, beads, bows and voluminous flowers. The neck of the “female” container is decorated with a miniature tiara with a veil, and the “male” container is decorated with hats or top hats.
Compositions with candlesticks and glasses, which are decorated in the same style, look interesting. Some weddings also use boutonnieres, baskets woven from ribbons, or paraphernalia around the wedding chairs in the same color scheme and with similar motifs.
Sequins
Glitter decorations can be considered a form of decoupage. Before decorating a bottle of champagne using this method, it is advisable to cover the work surface with oilcloth and remove carpets and textile tablecloths.
The decoration technology is the same. The glass surface is removed from the label, primed, and after drying, covered with a layer of PVA. Then the container is generously sprinkled with glitter (or dumped into it).
After complete drying, the surface must be varnished in several layers, otherwise everything and everyone will shine.
It is worth noting that this decoupage of bottles for March 8 is easiest to do with your own hands. It is one of the fastest and safest.
When decorating champagne for the New Year, decoupage the bottle with salt in the same way. The result is the effect of a frost-covered surface.