Many people know that the foreign Father Frost, Santa Claus, leaves New Year's gifts in Christmas socks. Why don’t we ask him for gifts, because there are never too many gifts!
In this article, we suggest you make your own Christmas stocking from a plastic bottle and other available materials.
The finished Christmas stocking will become not only a decoration for your home interior, but also an original gift wrapping.
DIY Christmas stocking
To make such a cute sock for the New Year and Christmas, you will need the following materials: a plastic bottle, a knife, a sheet of thick cardboard, plaster (can be replaced with paper or polymer clay), paint and decoration items (ribbons, cones, sparkles and Christmas tree decorations) .
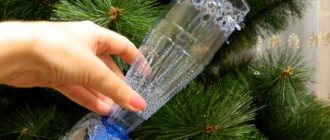
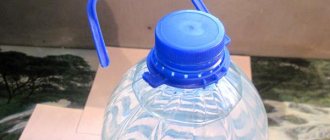
First you need to cut the bottle into three parts. We don't need the part with the neck, but the middle and bottom will be necessary.
On a sheet of thick cardboard you need to glue the middle and bottom of the bottle in a vertical position close to each other.
Now use scissors to cut out the cardboard to make a shoe.
Coat the resulting workpiece with plaster. This material can be replaced with paper clay or polymer clay.
When the layer of plaster has dried well, paint the Christmas stocking. The ideal color for this craft would be red.
Now the fun part is decorating.
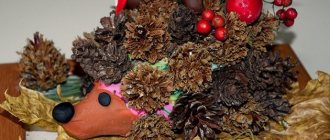
Glue a white edge, a white edging along the bottom, and decorate the Christmas stocking with pine cones, Christmas tree decorations, ribbons and fir branches.
Now you can fill the finished craft with a variety of small New Year's gifts: candy, cosmetics, etc.
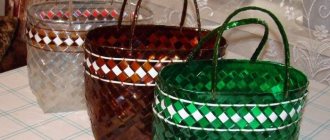
Candlestick made from a tin can and fabric
What do you need
- Can-opener;
- small low tin can;
- plate;
- ruler or measuring tape;
- pen;
- 2 pieces of multi-colored fabric;
- scissors;
- needle;
- thread;
- gold spray paint;
- glue gun;
- candle.
How to do
Using a can opener, cut off the top of the can. Using a plate twice the diameter of a tin can as a template, trace and cut out 9 pieces from the first piece of fabric.
Fold each piece into quarters. Sew a petal from it, as shown in the video, and the petals together, forming a circle along the diameter of the jar.
From a fabric of a different color, cut out 9 circles with a slightly larger diameter than the jar. Make the same petals out of them and sew them into a circle along the diameter of the jar.
Paint the jar gold. When it dries, put fabric blanks on it. To prevent the petals from moving, lift them a little and fix them with glue. Place the candle in the prepared candlestick.
DIY Christmas stocking
Another option for an original Christmas stocking that you can make with your own hands.
To make a New Year's craft, you will need the following materials: decorative red cardboard, decorative paper, glue, plastic bottle, scissors, hot glue gun and decorating materials.
On decorative cardstock, draw a Christmas stocking in the shape you want. Cut out two pieces in a mirror position.
Cut out the parts and glue them together using a strip of double-sided colored paper.
Cut off the neck of a plastic bottle.
Cover the rest of the plastic bottle with cardboard blanks. You should now have a Christmas shoe.
Cut out the sole from colored cardboard and glue it to the craft.
Now decorate the Christmas stocking with snow-white stripes and a bell cuff.
The sock in the shoe can be decorated with a snow-white pompom made of thread.
How to make a New Year's boot from paper or thin cardboard?
This craft is perfect as a napkin holder on the New Year's table. The boot can be made from either a square of colored paper or thin cardboard. Look how easy and wonderful it turns out!
We do it in stages:
Fold the square in half and in half again with the wrong side out.
We unbend the second fold and bend both edges towards the center, as shown in the photo.
We make a bend on the left side of our workpiece, then unbend it.
We make a similar bend on the other side and unbend it in the same way.
Now we do it along the fold lines as shown in the photo to create the “nose” of the boot.
We bend the edge of 1 cm at the top so that our boot has a white border.
So that the nose of our craft is not so sharp, we bend the triangular edge inward.
Now we fold the workpiece into a cylinder and tuck the edges, as shown in the photo. Ready!
Video master class - DIY Christmas sock/Christmas boot
If you want to make a Christmas stocking with your own hands from other materials, we would like to offer you options made from paper and felt. Master classes can be viewed on our website using the links under the photos.
DIY Christmas stocking made from paper
DIY Christmas stocking
Candlestick made from a glass
What do you need
- Wineglass;
- small roller;
- White paint;
- wide tape;
- red paint;
- brush;
- decoupage glue (or PVA and water mixed in equal proportions);
- narrow black ribbon;
- small decorative buckle with rhinestones;
- glue gun;
- bead stickers;
- decorative ornament or bow;
- candle.
How to do
Paint the entire glass white. To speed up drying, turn on the hair dryer. Cover the top of the glass with tape and apply red paint. When dry, remove the tape and cover the glass with decoupage glue.
Place a decorative buckle on the ribbon and glue it with a gun between the red and white parts of the glass. Attach two beads above and below the buckle. Glue a decorative ornament, bow or some other New Year's element to the base of the bowl.
Place the candle on the base of the glass.
For gifts
In order for a New Year's boot to withstand the weight of sweets, it must be of high quality and well stitched. Choose a thick fabric; handmade stores offer various options with images and prints. Determine the material for upholstery of the inner walls: you can choose cotton wool, padding polyester, holofiber or fleece. Cut out two sides of the workpiece from the fabric, use the same templates to make a development for the lining. The filling must be sewn on the wrong side. The decor will be located on the front.
Instructions on how to sew a New Year's boot for gifts with your own hands:
- Sew a loop. To do this, cut a long strip of fabric, fold the ends into the middle, stitch, smooth and fold in half.
- Turn the lining over and on the wrong side sew a loop to it at a distance of about 20-30 mm from the back side.
- Place the inner and outer elements of one side in a stack, sew them together with an internal seam, and then baste along the edge (just leave about 10 mm from the edge).
- Repeat this procedure for the remaining elements as well.
- Don't forget one thing: you need to leave a small hole in the lining so you can turn the boot inside out later.
- On rounded elements or even across the entire plane, make small triangular or zigzag notches. This is necessary so that the boot turned inside out does not puff up from the compressed fabric.
- Turn the product inside out and sew up the space left for the filling. Place the lining into the boot.
- You can decorate it at your discretion with felt, beads or lace. You can draw beautiful patterns with regular stationery glue and generously sprinkle them with glitter.
Accessories for napkins
What do you need
- Stationery knife;
- small twigs;
- brush;
- red paint;
- White paint;
- napkins;
- artificial spruce branches;
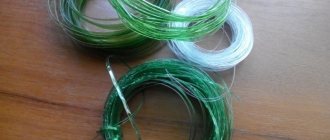
- green yarn.
How to do
Use a knife to slightly sharpen the branches. Peel off a little more bark from one side. Paint the top part with red paint, and under it and around the cut space with white paint. This will be the hat and beard.
Fold two opposite corners of the napkin towards the middle. Attach a spruce twig and a piece of wood to the center of each napkin and tie with a yarn bow.
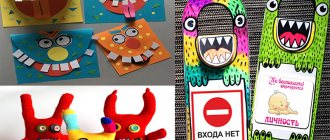
Snowflakes made from pasta
What do you need
- Figured pasta;
- Super glue;
- brush;
- blue paint;
- gold glitter;
- ribbon or thread.
How to do
Glue several pasta into a small circle. Glue another row of pasta above and between them. Then connect them so that the snowflake has several corners. Its design can be anything depending on the type of product and your imagination.
Carefully paint the snowflakes on all sides. While the paint is still wet, sprinkle them with glitter. Tie a ribbon or string to the snowflakes so they can be hung.