- April 4, 2019
- Crafts
- Ksenga
Do you have a passion for crafts? Then you will be interested in learning how to make a doll. Such a craft can play the role of a children's toy, or it can become a decorative decoration for the interior. Depending on the style in which you mold the product, it will fulfill its assigned role. The step-by-step process is described below.
Analogs
Don't know how to make a doll? People who are just starting their creative journey are always intimidated by the variety of styles and different options in which a product can be made. To make it easier to decide what you like, you should spend some time selecting analogues. To do this, look and save beautiful pictures of dolls on the Internet in a separate folder, find photographs of other people’s work in magazines, or look at dolls in museums.
This preparatory stage of work is very important. When looking for inspiration, you take in a lot of information and pick out what you like and what confuses you. Pay attention not only to nice works, but also to those products that you don’t like. Do your analysis. Why you don’t like a certain type of work and what mistakes, in your opinion, the masters made in their creations. After doing this kind of work, you will understand which dolls can be molded from plasticine, and which dolls should not be molded.
My beast
If sculpting seems like an overwhelming task for you, don’t despair. There are many simple options for making a simple but interesting figure from plasticine. This option is perfect for small children, because it requires minimal effort.
Let the figure be based on an oval and a plasticine ball of a suitable color, this will be the body and the head (you can only use the ball, it will be both at the same time). Now you need to add suitable parts to them, these could be wings, fins, legs or arms. Tell your child how to make animals out of plasticine using this principle and watch the process. You can make a lot of things from balls: nesting dolls, snowmen, frogs and penguins, if you only have your imagination.
It happens that children fail to attach additional parts. Eyes or ears may be out of place. Help your child by marking the places where the parts will be attached with puncture marks from a match or something else. Now the eyes will be on the muzzle, and the ears will be at the same level.
Sketch
After you look at other people's work, it's time to implement your own idea. But before you can realize your vision that is in your head, you need to draw it. If you cannot do this, it means that you have not fully formed an idea regarding the shape and detail of the future product. In order not to wonder in the future about how to make a doll, you need to draw it in detail. Start with the general shape. Do you want the product to look like a real person or are you planning to sculpt a cartoon character? Do you want your doll to be cute or do you plan to scare your friends with it?
Particular attention should be paid to details at the first stage. Artists who don't think through the entire process ahead of time can run into big problems. Therefore, try to provide for everything at once. Decide what materials you will need and in what quantity. Don't neglect small decor and don't lose sight of trivial details. After all, if you planned to make a gnome's cap, and then cannot make the gnome's eyes, the good work will never be finished.
Modeling classes
On the Internet it is not difficult to find photographs of plasticine fakes of varying complexity. But in order for the child to begin to show interest in this material, he should show by personal example the beauty of the classes. If mom or dad are passionate about modeling, the child will definitely join them.
For children, classes begin in stages. First, they are introduced to the physical properties of plasticine (crushing, pulling, rolling, drawing). Then you can begin to sculpt simple fakes, gradually complicating them and supplementing them with various objects. The main thing in this matter is a sufficient manifestation of imagination.
Before sculpting dolls, you should talk to your child. They tell you what the body is made of, discuss the outfit, hairstyle, and shoes. After the first time, children's imagination will do its job. Parents sometimes need to come up with ideas for interesting crafts.
So that the child does not succeed, he must be praised and encouraged. Parental approval promotes further growth and development of creative skills.
Modeling from plasticine will be an important stage of development. This is required not only for the development of motor skills, but also helps to understand the structure of the surrounding world, expand the imagination, and realize creative potential.
Form
Is your hand-drawn sketch ready? It's time to create the blank. How to make a doll? Before we begin to answer this question, we need to consider how to create a frame blank for a future product. It is best made from wire. Draw a sketch in the natural size of the product, and then, right on paper, bend a wire frame that will act as the basis of the product.
Remember that the wire will add virtually no thickness to the product. She can only make the doll more plastic. And in order to save material, cardboard should be wound on the wire. You should not use plasticine of colors you do not need as linings. If you need to modify the shape, you will not be able to separate one plasticine from another with the same ease with which you separate cardboard from plasticine.
Choosing safe plasticine
The child should only come into contact with safe objects. However, plasticine is a product of the chemical industry and may contain hazardous substances. There are several selection rules:
- Don't buy bright shades. It is better for a child to play with plasticine in calm shades.
- The mass should be elastic and pliable. It should knead easily in warm hands, mold without effort and not crumble.
- The composition should not contain toxic or other substances hazardous to health.
- For babies, it is better to choose edible masses, since there is a high probability of swallowing it.
- The smell should be pleasant.
- High-quality plasticine mixes well and sticks.
- The molded fake must retain its shape and not fall apart.
- The substance should not remain on hands or clothes and can be easily washed off with warm water.
- Supplements are only of plant origin.
- Easily cut into stacks.
- Good plasticine rolls on any surface, between the palms.
- The surface is easy to scrape off and leaves no stains.
- Easily sticks to paper, wood, cardboard, plastic.
- Prolonged exposure to the open air does not change the properties of plasticine.
Plasticine is an amazing material. It is popular not only among children, but also among adults. There is not a person in our country who has not held a plastic mass in his hands. You can use it to fashion any doll, which will become a complete replacement for a plastic toy.
The basis
When the frame is ready, you can start making the base. Knead a small amount of material in your hands and glue it piece by piece onto the frame, gradually giving the toy the desired proportions. At this stage, you should already decide exactly who you are sculpting. Plasticine is a plastic material. You can use it to make either a Barbie doll or a Chucky doll.
How to make a figurine from plasticine? There is no need to try to immediately shape large volumes. It is better to start work from the center and gradually move towards the edges. The head is sculpted after the body is ready. Why? So that with an awkward movement of your hand you do not ruin the most difficult part of the work. Therefore, first form the whole body and only then proceed to the head.
Pay close attention to the proportions. Even when creating a cartoon character, you must understand how many times the head fits into the body. Well, if this realization has not come to you, ask one of your friends to evaluate whether your product looks harmonious or not.
Plastic bottle doll, box.
On holidays, you should definitely give gifts, especially when they are made with your own hands. In this article you will learn how to make a doll from a plastic bottle, it will be a doll box in which you can store valuable things. ALSO, for the holidays, a good gift would be a slime or an exclusive postcard. The craft is easy to do, but to do it you need to follow the stages and not deviate from the course of production.
Craft materials:
- Plastic bottle. — A children's doll, preferably a Barbie. — Hot-melt gun with glue. — Two satin ribbons 3 and 1 centimeters. — Braid, preferably pink. — Regular lace, pink. — A small strip of chiffon. — Two sponges (these are cosmetic discs).
In most cases, all materials are necessary for sewing a dress for a doll. Step-by-step photo instructions are presented below, with short descriptions of the main points.
1. Take a bottle and cut off only the neck.
2. Next, cut off the front part of the bottle, and then the back.
3. Take the Barbie doll and cut it in half.
4. Using a heat gun, glue the upper part of the doll to the upper part of the cut bottle.
5. Now we are making a lining for the inside of the box; you need two sponges and a piece of chiffon. We repeat the steps in the photo.
6. Place chiffon on the sponge and sew it on a sewing machine. It turned out to be the bottom.
7. I gather a strip of chiffon on one side and sew it to the bottom.
8. Now we take both plastic parts and glue the bottom and the chiffon itself to them.
9. We connect both parts of our box with chiffon, folded several times.
10. Sewing a dress - you need to sew the lace and ribbons together.
11. We do the assembly.
12. Glue the completed assembly onto the lower part of the box.
13. The second assembly should be the same.
14. Next we glue the tape, at the very edge.
15. We make three frills on the top of the doll box from a plastic bottle.
16. We also cut out the material on the doll’s chest and glue it.
17. We make the upper part of the doll’s dress from lace.
18. We make a frill only from lace, with it we cover the part between the dress and the body.
19. Don’t forget to make a belt out of braid and, of course, add a frill.
20. Making a hat for a doll-box. We take the lace and ribbon, collect them in a circle, also sew the ribbon separately and stitch along, we make an assembly. The top of the doll's hat turned out.
21. Glue the two parts together and glue a bow at the top.
22. We put a hat on the doll, the craft from a plastic bottle and fabric is ready.
Face
When the body is ready and the head is proportional, you can start sculpting the face. First, draw two center lines on the surface. Then create the eye sockets and nose. If you don’t know the anatomy of the face, you can study it first. When you finish making the nose, you should make the cheekbones and highlight the temporal parts. How clear the detailed work will be is up to you to decide. If you plan to demonstrate your product at exhibitions, then you need to try. If you are making a toy into a table, then detailed work on the face is not required.
Continuing the story about how to mold a doll from plasticine step by step, it should be noted that the work should be done from top to bottom. When the basic proportions are outlined and you move on to sculpting the eyes, you should first make them, and only then work on the lips. If you do the work the other way around, there is a big chance of crushing your creation.
From simple to complex
It is commonly believed that plasticine is fun for kids, but this is not at all true. Many adults are just as passionate about sculpting and are willing to spend whole days working on models or sculptures. They are, of course, much more complex, but many can serve as interior decoration and pride for the creator. Products can be very different: they are inhabitants of other planets, fantastic dragons, castles or human figures. Let's consider the option of how to make a person out of plasticine.
Plasticine, a material that is both plastic and heavy at the same time, can cause difficulties. Therefore, all parts must be mounted on a wire frame. It will serve as a “skeleton” for the little man and everything else will be attached to it.
The figure itself also needs to be lightened in order to remove the load. All internal elements of the figure do not need to be made of plasticine. It is necessary to find a suitable material that will be put on the wire frame of a person and become the “skull” and “body”. This can be polystyrene foam, or a paper base well secured with tape. In general, everything that is suitable for this.
We will paste over the finished frame with plasticine. Let's dress our little man in a white shirt and suit. Let's sculpt boots for him and carefully draw all the details on the clothes with a stack: seams and folds of clothes, pockets, creases on the boots. We will pay special attention to the person himself: we will carefully sculpt every finger, facial features, and curls of hair.
The work is done, the figurine will be quite strong and light. All complex work with plasticine is performed using this principle. Many masters create entire collections and compete in skill and share ideas. Perhaps this activity will captivate you too?
Assembly
Not all people are comfortable working on a frame. Some creators create products from plasticine without it. They sculpt the torso, legs, arms and head in detail. This way you can make a Barbie doll. How then to attach the parts to each other? Artists have no problems. Plasticine is a malleable material. Therefore, you can simply join the parts and cover the attachment point using a simple stack.
A more complex assembly method involves assembling the product onto a frame. A person could sculpt various parts separately, but then he would thread them with thin wire. In this case, it will not be possible to save material - the wire must be without any paper overlays.
DIY dolls made from plastic bottles. Fast and beautiful
Natalia Kafanova
DIY dolls made from plastic bottles. Fast and beautiful
For work we will need:
1. Plastic bottles of various configurations; the appearance of the doll depends on the configuration of the bottle;
2. Sculptural plasticine;
Instructions:
1. Cut off the top of a plastic bottle;
2. Cover the lid with a pancake made of sculptural plasticine (it’s better to warm it up on batteries first, it will become softer and easier to sculpt);
3. Roll out a large pancake and wrap the bottle in it;
4. We stretch the plasticine evenly across the bottle, thereby securing it to the bottle;
5. We make a ball out of plasticine and attach it to the lids (this will be the doll’s head);
6. Roll a sausage out of sculptural plasticine (these will be hands);
7. Attach the sausage to the lid;
8. To make a doll's hairstyle, we roll thin sausages of various lengths, depending on the choice of hairstyle;
9. We place the sausages on the doll’s head and create a hairstyle that suits the meaning;
10. Sprinkle the doll evenly with flour and carefully sweep the doll with a soft brush;
11. We select a color palette for painting the doll with gouache for various types of painting (Dymkavskaya, Filimonovskaya, Gzhel, etc. or in free style).
I wish you creative success!
PS Involve children in creativity, they really like it. This develops fine motor skills, creativity, imagination, and instills in children a love for Russian folk crafts and culture.
Thank you for your attention!
“Consultation for parents “Christmas tree with your own hands - easy and fast”” Our group held a consultation for parents on the topic “Christmas tree with your own hands - easy and fast.” Parents visited the past Christmas tree.
Photo report “Do-it-yourself life-size puppets” I would like to share with you ideas for making life-size puppets. No, it won’t be a master class, since I’ve been sewing them for more than three years.
DIY key holder. Fast and easy! I want to share with you the idea of making a key holder. Nowadays, paintings that need to be painted by numbers are popular among children and adults.
Do-it-yourself doll boxes Dear colleagues, I present to your attention my new hobby of dolls - boxes. Such dolls can be a wonderful gift.
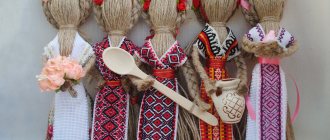
Do-it-yourself dolls for tabletop theater fairy tales “Puff” and “Turnip”. Stocking dolls To awaken children's interest in theatrical play, I sewed characters from the fairy tales “Turnip” and “Puff”. Children enjoy playing with stocking stuffers.
DIY puppet theater. Very simple and fast! In stores, a puppet theater is quite expensive, so I decided to sew it myself. This is a very labor-intensive process, but everything will work out if you want.
Massage mat made from plastic bottle caps Hello, dear colleagues! Many of us probably had to invent and make various aids and devices for.
Master Class. Plasticine dolls based on plastic bottles “Seasons” Plasticine is a wonderful material, obedient, warm, holds its shape well, does not require special precision, because a mistake can always be corrected. For.
Decorated Christmas tree in 3 minutes! Fast and beautiful! Master class Christmas tree, Christmas tree-forest scent She really needs a beautiful outfit. I offer my version of an elegant Christmas tree made of colored paper. Very fast and easy.
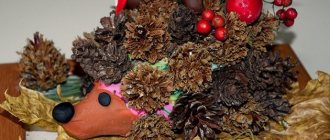
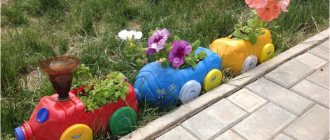
Crafts from plastic bottles This year we had a “gift to the earth” competition in our garden. We had to make crafts from plastic bottles. I want to show you what crafts I made.
Finalization of details
The assembled product is not yet completely ready. A person, in a fit of creative thought, misses a lot. And these points can be corrected after the product is assembled. When you make a toy, you will need to leave it for two or three hours. Looking at your product with an open eye after some time, you will definitely be able to find errors both in proportions and in the manufacture and fastening of parts. At the same stage, you should clarify all the nuances left for later. For example, you don’t always want to immediately cut out the folds on a dress or create the texture of the skin on your hands.
Modeling dolls from clay and polymer clay is no different from modeling from plasticine. Unless the parts in this case will be held together with water or slip. Otherwise, all stages of work are similar. Except the last one. You need to understand that plasticine is a colored material, but clay is not. After firing, the clay toy must be painted with acrylic paints. But with polymer clay such problems will not arise. This material is as colorful as plasticine.
Creative modeling with kids
Joint creative activities with children should be exciting, interesting and useful in terms of developing new skills and developing the child’s potential. The primary school curriculum for labor meets these requirements, however, it is quite limited in time and optimized for the number of students in one class. Additional activities are required to truly develop a child's specific skills.
The tools that may be required to sculpt any material are quite simple. This could be a set of stacks, or improvised items that are found in any home - toothpicks, fork and spoon, match, bead, felt-tip pen cap, etc.
Activities with children require additional measures that could protect the surrounding area from difficult to remove stains and dirt. Oilcloth or a special board will cope with this task. The child himself should be dressed in an apron and given a wet piece of soap to scrape with his nails before class. This will eliminate the need to clean plasticine from under your nails after class.
Attaching fittings
Have you completed your work? Now you need to bring your product to mind. Any doll is expected to be dressed. Clothes can be molded from plasticine, or they can be sewn from fabric. The combined version of the product looks more lively and interesting. How to make a doll from polymer clay was described above. How to decorate the finished product? To do this, you can use scraps of old fabric or various decorative materials. For example, beads and beads are suitable. You can use them to decorate a doll’s dress or accessories. As finishing, you can use ribbon lace or beautiful braid. Even colored paper can become a material for creativity. You can use threads or artificial wigs as hair for the doll. Don't be afraid to experiment and dress up your dolls in extravagant outfits.
Perhaps such a hobby will soon make you an incredibly popular creator, or your products will leave a mark on history. When making standard versions of dolls, it is not only difficult to stand out, it is almost impossible to do.
For girls
Tell your daughter how to make a doll from plasticine. It can be a simple figure or a complex one, depending on age and imagination. Turn modeling into a fairytale journey, where there will be Little Red Riding Hood and the Bear, and maybe a whole kingdom with a princess and court retinue.
Blind the body with the color of the clothes, head, legs and arms. Add a skirt, a beautiful hairstyle, draw a mouth and make eyes. It happens that the doll's head does not stay in place well enough. The loss of such an important element during the game can end in tears for a child. To avoid this, insert a piece of a match into the body and put the doll’s head on this frame.
What else can be made from plasticine? Girls will be happy to sculpt flowers or fruits and sweets to treat their plasticine friends with. This is a simple technique and is suitable even for very young masters.
A little history
The first vases served as vessels for liquid and bulk products. They were made from clay. The finished vase was dried in the sun or fired in a kiln to give the material more strength. As objects of art, these vessels were used to decorate tombs; even then, craftsmen applied various ornaments to Greek amphorae.
First of all, such vases were decorated with historical paintings depicting various important events. By conducting excavations and finding such objects of art, archaeologists can judge entire eras.