Decorating your home for the New Year is a wonderful tradition that has come to us from time immemorial. We transform houses and apartments in different ways, but in general, everything is similar: the same rain showers and garlands from specialized stores. Have you ever wanted to make your rooms for the New Year holidays different from your friends’ homes? Everything is not so complicated, and is accessible to literally everyone. There are many options for beautiful products made independently at home, which are quite capable of competing with the brightest toys from the supermarket. So, our article will provide you with 49 photos of ideas for easy origami crafts for the New Year 2022 with your own hands, which will enchant you and your guests with their unusualness and subtlety of execution. Don’t worry, our master classes will explain to you in detail how to work in this direction. Even if you have never encountered such work, you will learn without any problems and this activity will become your way of life.
Christmas tree toy “Star”
For New Year 2022, the main decoration of the house is, of course, the Christmas tree.
Therefore, all the attention of your visiting guests will be focused on it. Considering this important moment, it’s worth putting some effort into her festive outfit. Beautiful colorful toys can, of course, be purchased at the nearest store, which on the eve of the New Year holidays will simply be overflowing with such products. But it’s still better to create the image of a New Year tree with the help of original toys made with your own hands from any materials you like, especially paper. It is so malleable that people have learned to make wonderful origami crafts from it, even for New Year’s Eve. Let's create something interesting and simple, for example, a star for a Christmas tree, which is perfect for beginners. To work you will need:
- colored thick paper or cardboard A4 format - 8 sheets;
- a simple pencil;
- scissors;
- decorative thread.
Progress:
- Take thick colored paper or cardboard and fold it in half. We have a rectangle.
- We bend the corner of its small left side, pulling it towards the center of the folded paper, then you need to straighten it. Now we pull the larger side of our rectangle to its second parallel side. We straightened out the sheet of paper again and thus we got the intersection of lines, which will be our center of the star. Let's mark it with a simple pencil.
- Next, take the corner of its right side and pull it to our marked center. Iron it thoroughly.
- We attach the right corner, which we connected to the center, to its opposite side and fix it with a finger, pressing the resulting line. We have a kind of quadrangle.
- We connect the right side of the paper, on which we marked the center, to the resulting quadrangle, tightly pressing the straight connecting lines to each other. We also got a triangle this way.
- We fold two geometric shapes in half along the joint line, bending them inside out and carefully ironing all sides with a finger.
- Then we take scissors and trim the excess edge of the figure so that we get a small triangle.
- After this, we open our paper product, completely straightening it. As a result, we have formed a five-pointed structure, on which we draw all the fold lines with a simple pencil. Now it will be easier for us to navigate and assemble this New Year’s craft with our own hands.
- When you finish using the origami technique, don’t forget to attach a shiny thread to our five-pointed star, as this is a Christmas tree decoration.
This is how, with hard work, you can create a wonderful decoration for your Christmas tree for the New Year 2022. To help you quickly understand this sensitive matter, we provide our training video.
Master class on making a five-pointed star using origami technique
Browse our selection of photo ideas on this topic to make a lot of charming New Year's things.
New role of “Samurai Helmet”
One of children's favorite models, which is often used as an element of a New Year's costume, can easily be turned into a Christmas tree toy. Miniature “Samurai Helmets” in this case are used as modules from which the original pendant is assembled.
You will need:
- sheets of single-sided paper “kami” 15x15 cm;
- decorative cord matching the color;
- beads;
- scissors, glue stick.
Step-by-step instruction:
The toy will require 8 “Samurai Helmets”. Each of them is folded based on a square. It is most convenient to take ready-made sheets intended for origami. Stationery stickers also have the required format, but are colored the same on both sides - they will not make a toy so elegant.
Assembly diagram:
- Bend the square diagonally from top to bottom.
- We lower the side corners to the bottom point.
- Then we lift it to the top, folding the layer closest to us in half.
- We move the resulting valves apart, bending them along the dotted lines shown in the figure.
- The lower part of the figure has two layers. The top one needs to be lifted, folded along the dotted line.
- And then tuck it once, aligning it with the central axis.
- The module is ready. We need 7 more of the same.
Christmas tree decoration:
- We take two “Helmets” and place them opposite each other. We coat the triangular valve of one of them with glue and put it in the “pocket” of the other.
- We repeat the same action for all four pairs.
- When the blanks are glued, we connect them together.
- To do this, insert the remaining free valve into the “pocket” of the element from the next pair.
- We make sure that the smooth sides of the “Helmets” are located next to each other.
- Glue them together in pairs.
- Fold the twine or thick thread in half and use a needle to pull it through the center of the toy.
- We tie a loop at the top and string several different sizes and types of beads at the bottom.
New Year's days are full of magic. Even the combat “Samurai Helmet” can turn into a stunning Christmas tree ball.
And this is far from the only transformation. For example, the “Water Bomb”, familiar to everyone from childhood, does not douse with water on holiday, but becomes a miniature gift decorating the Christmas tree. All you need to “change your role” is beautiful wrapping paper and satin ribbon.
Snowflake made from origami modules
A snowflake created from origami modules will certainly be a very beautiful craft for the New Year 2022. Naturally, making such a miracle with your own hands will require a significant amount of time, and especially effort. But this should not scare you, because the end result is a fragile and elegant product made from ordinary paper. Let's see how all this is done at home.
To work you will need:
- white paper, A4 format - 5 sheets;
- blue paper, A4 format - 4 sheets;
- pencil;
- ruler;
- scissors;
- glue.
Progress:
To create this craft, you need to create 150 white and 120 blue modules.
- Let's start making origami modules with our own hands. To do this, take all the A4 sheets and divide them into 32 rectangular parts, then cut them out.
- Next, take one resulting rectangle and fold it in half horizontally, and then vertically, marking the center line.
- We bend the upper right and left corners to the center, after which we turn the workpiece over and bend the lower right and left corners.
- We lift the lower part, fold it in half and get the first module. We manufacture subsequent modules in the same way.
- Having completed the work of creating the modules, we immediately begin assembling them. In order to securely fix all the parts of our product, we use glue. We combine 2 rows of 6 white elements into a ring, inserting them into each other.
- Be careful, as the number of modules is doubled on the third row. This is achieved by dressing two by one, resulting in 12 modules.
- To make our decoration look more elegant for the New Year 2022, we decorate it with blue modules, starting to introduce them from the fourth row. It is identical to the previous one, so at this stage there are also 12 modules.
- In the next row we must double the number of elements in the row. This means that in the fifth row there will be 24 modules. We do the next sixth row in exactly the same way as the fifth.
- So we have done part of the work. Now we proceed to the seventh row, in which we collect 24 modules, alternating the combination in a circle: 3 blue, 1 white module. 6 sharp blue corners appear.
- Next we work only with blue rays. To each of the three blue modules we add two more, and then one part. A narrowing occurs.
- Now we are making white arches, which consist of 17 modules. In the seventh row, white modules remained - this is the basis of the arches. One module is taken, another pocket is put on it, thus framing the blue beam. It remains to collect 5 more white arches.
- And the last stage of assembling a snowflake with your own hands using the modular origami technique is composing small rays. They are made of 5 modules, inserted like a column and three modules on top, which make the tips fluffy. We attach them to our craft. There you go! This will certainly be the most wonderful holiday decoration for everyone, especially as your children will find it interesting.
Check out our interesting selection of photo ideas to enrich your imagination and thereby expand your capabilities.
For those people who are doing this business for the first time, it will not seem so simple, but after watching our video, you will quickly learn how to make such beauty.
Master class on making snowflakes from origami modules
Christmas tree toy “Ball”
Even simple products made from colored paper will help to perfectly decorate a room for any holiday, especially winter ones. So create origami crafts for the New Year 2022 with your own hands in a rather interesting form, using a simple master class for this. You'll see, you'll get a wonderful Christmas tree toy in the form of a ball consisting of stars.
To do this you will need:
- Colored paper;
- Scissors;
- Glue;
- Rope.
Progress:
- You need to make your own envelopes from small squares of colored paper.
- Then you need to make triangles from the resulting envelopes, which are then folded in half.
- To make one star you will need 14 parts. They need to be collected in a circle and glued together.
- You should thread a string onto one of the parts of our craft. Here is a wonderful Christmas tree toy for the New Year 2022, made using the origami technique. Your family will definitely like it, and for children it will be an incentive to create something of their own, but less complicated.
Look through our selection of photo ideas and you can create excellent Christmas tree decorations for the New Year holidays.
To understand this creative work in more detail, you should familiarize yourself with our video lesson.
Master class on making a New Year's ball for the Christmas tree
Herringbone
A craft in the form of a three-dimensional Christmas tree made of colored paper for the New Year 2022 can work out very well if you use the origami technique.
This handmade paper product is perfect as a decoration for the Christmas tree or just for indoors. To do this you will need:
- Green and red colored paper;
- Scissors;
- Glue.
Progress:
- On colored green paper you need to draw a Christmas tree, then cut out five such details.
- Then they should be carefully glued together, after which you will get a voluminous craft.
- To decorate our Christmas tree, you will need to cut a star out of paper for its top. Ready!
Thanks to the origami technique, we have created an excellent home decoration made from colored paper, made with our own hands for the New Year 2022. We recommend our training video, after watching which you will become familiar with all the intricacies of this work step by step.
Master class on making a Christmas tree from colored paper
There are a huge number of Christmas trees made using this method. They are so diverse and quite original that you can’t take your eyes off such an excellent Christmas tree decoration. Our photo ideas will prove this to you.
Option No. 3
You will need:
- felt-tip pens (or pencils) black and red,
- square sheet of paper 10 by 10 cm (you can take more or less). The paper should be two-colored - white on one side, red on the other. If you don’t have such paper, you can glue together sheets of white and double-sided red paper.
We need to bend our square diagonally.
Unfold the workpiece and also bend it in half along the second diagonal.
Now we see the markings made and continue to work on the white side.
We bend the outermost corner to the top of the workpiece.
We see we have a line drawn, we need to turn the corner back.
We turn back. We see that we have a line; we need to bend a corner to it.
Now we can completely wrap up our lapel along with the corner. You will get it like this.
We work with the bottom of the craft. We bend the bottom corner to the top point.
We make a bend to the bottom point.
Turn over:
We make narrow stripes on the sides.
The same on the opposite side.
We see the middle line and bend both sides towards it.
And the second one.
We take the white parts and make a fold along the red line to the white one.
We bend this strip and make a square.
We do the same on the opposite side.
And a square.
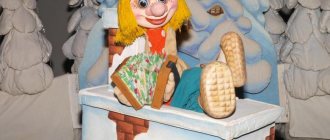
And when we turn the figure over, we can see Santa Claus.
You need to draw his eyes and nose.
And that is all!
This Santa Claus can be used to decorate rooms, or made into a Christmas tree toy by gluing a string. This craft is also perfect for creating and decorating a New Year's card with your own hands.
A selection of other DIY Santa Claus crafts
In order not to forget the page address and share with friends, add to your social network:
Volumetric snowflakes
It’s great to decorate your interior using origami crafts for the New Year 2022 with your own hands, thus making a three-dimensional snowflake from colored paper. This is a fairly traditional method that is used in probably every home. This New Year's decoration is very easy and quick to make, you just need to choose the material at hand in the color and texture you like, because your festive mood and a pleasant atmosphere in the house depend on this, which is very important for your children.
To do this you will need:
- Colored paper;
- Scissors;
- Glue;
- Thread.
Progress:
- To get a three-dimensional snowflake created using the origami technique, you need to create two parts of this craft and connect them together. First you need to cut out a small square and fold it in half, and then do the same.
- To make the snowflake round, the edges of the part need to be rounded. And all over the surface of the snowflake you need to cut out various patterns. When it is unfolded, you will get a beautiful drawing made by yourself. And after the two parts are connected, an unusual three-dimensional snowflake will come out. You can hang it on the Christmas tree for the New Year 2022, but make not just one copy, but several, and, preferably, of different shapes and colors. This way you will achieve liveliness and a dazzling effect. Of course, snowflakes can be created in other ways, but this craft instruction is considered the simplest and most accessible, especially for beginners. Watch our video tutorial to understand this work.
Master class on making three-dimensional snowflakes
Don't forget to look through our photo ideas that will amaze you with their unusualness.
Master class on making a garland with your own hands for a window
I really love decorating windows, and this year my daughter is also helping me)) Basically, we decorate this part of the apartment using templates and stickers, and everything looks super festive, and most importantly, the mood is lifted not only among the residents of the apartment, but also among passers-by .
Here are some photos of ideas for this type of design:
And you and I will try to get creative and make a super garland for the window, are you ready? Then let's go!
Cotton snowfall
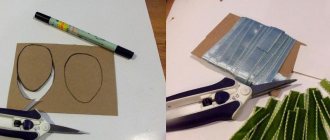
Manufacturing process:
- Pinch off small pieces from the cotton wool and roll them into tight balls, and do not make them the same size.
- Coat each ball with glue and let dry.
- Now measure the fishing line of the required length and make a knot from the top edge of the window to its middle or just below, thread the second end of the fishing line into the eye of the needle. We string one ball onto a fishing line and distribute them at some distance from each other.
- You need to make a lot of such threads. Do not forget to secure each of them to the window cornice or to the top bar of the frame.
Here are a couple more finished products:
Balls, deers and snowflakes;
Well, don’t forget about the purchased luminous garlands, after all, they are simply gorgeous!
While there are only a few days left before the main holiday of the whole country, manage to create the appropriate atmosphere at home! I hope it was useful.
See you soon and Happy New Year!
Christmas garland made of colored paper
In a rather original and beautiful way, you can transform your home for the New Year 2022 with a garland consisting of three-dimensional figurines made with your own hands from ordinary paper of any color. This interesting craft is quite easy to make using the origami technique. You just need to prepare the necessary materials at hand, such as:
- colored paper;
- scissors;
- glue;
- stapler;
- threads
Progress:
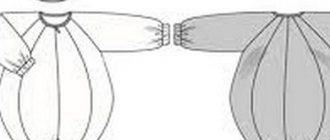
- First you need to make the base of the garland. To do this, strips 5 cm long and 1 cm wide should be cut out of colored paper. Then these parts should be fastened into a ring, connecting to each other.
- After this, we need to start working on creating decorations for our paper crafts. To do this, you need to cut the same strips as for the garland. For one toy you need to use 2 parts. They need to be folded like an accordion and fastened in the middle with a stapler. Then the resulting decoration must be unfolded, and the disconnected edges must also be connected using a stapler. It is these decorative elements that are added to the garland. If you hang such a product around the room for the New Year 2022, it will look great. And considering that this work was done with one’s own hands, and even using the origami technique, which, at first glance, seems difficult and inaccessible to many due to the abundance of small details in it, which require maximum perseverance and patience to create, it becomes more value in the eyes of your environment.
Photo ideas on how to decorate your home in an original way for the New Year holidays.
To avoid difficulties in this handicraft, you need to familiarize yourself with our video lesson, which will step by step tell and show you how to work in this type of art.
Master class on making a New Year's garland from colored paper using the origami technique
In order to create a postcard with a spruce you need:
- Print the spruce template, or draw it yourself. The spruce should be on two halves of paper;
- Fold the sheet in half so that there is a spruce on each half;
- Cut along the contour of both spruce trees;
- Bend them so that when opening the postcard, the spruce trees acquire a three-dimensional appearance;
- Decorate the spruce and hand it to a loved one if desired and with the kindest and most sincere emotions.
If you don’t get your own New Year’s toys right away, don’t be upset. You need to try a couple of times, understand the essence of how to do it, and then everything will work out with ease and quite originality, and the first successes will allow you to continue to develop in this direction, creating a fairy tale indoors, thanks to New Year's crafts.