Materials and tools
You don’t need any special knowledge or tools to wrap the handle with paracord. The materials that are required are also affordable for every average person. The list is pretty simple:
- paracord cord;
- scissors;
- knife;
- scotch;
- lighter;
- insulating tape;
- vice.
How to choose paracord
To make the right choice, you need to understand what it is. Paracord means a strong and lightweight rope. By unraveling the base, you can find any use for the cord. The range and colors of paracord are quite diverse.
Many useful things are woven from cord. It is suitable for all kinds of devices. Today, American products from . It is considered a certain standard and is labeled as 550 Paracord.
It is counterfeited quite a lot, you should be careful when purchasing a cord. As a rope, the product is quite strong. It can withstand loads of up to 250 kg. But such a cord is not used in mountaineering. In all types of tourism it is quite useful for passive insurance.
Expert opinion
Konstantin
Since childhood, I have been interested in knives and everything connected with them. I bring the accumulated knowledge to the masses. I make knives myself. I take criticism positively, but I also like to argue.
At the core of the paracord there are 7 cords woven from nylon, each of which contains three strands. The shell is made of 32 nylon threads, all of which are intertwined. If you come across a product from China, keep in mind that they use polypropylene instead of nylon. This rope can withstand no more than 150 kg.
How to distinguish real paracord from fake
As already mentioned, real paracord comes from the USA. There is a certain quality standard for cords. And it doesn’t matter in which country it was produced, the main thing is that it meets this standard.
But sellers often use the word paracord to sell anything.
But knowing some nuances about paracord, you can distinguish a fake from a real product:
- The first sign of a quality product is its softness. It is for this reason that it is convenient to weave various products from it.
- Taking it in your hands, set fire to one edge of the rope. It should burn with a smoky flame with black smoke. The smell will be like burnt plastic.
- Again about the combustion of the material, keep in mind that the shell and core do not fuse together. The outer layer will melt faster and expose the inner layer. The experience will be similar to stripping the insulation from a wire.
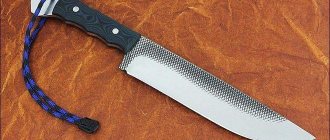
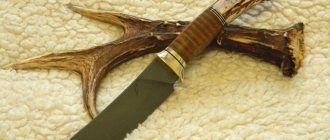
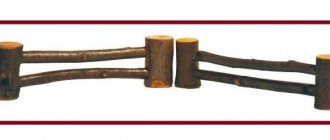
The handles are wrapped with paracord.
Types of devices
A simple leather loop on the handle has no useful properties. The skin tends to stretch, it will just hang out. Impractical option. Depending on the purpose of the lanyard, there are two main types of it: a looped one with extra length thrown over the hand, and a cord with a tail, which has a more aesthetic purpose.
According to the method of weaving, there are two main types of weaving, their names: simple knot and straight knot. A product woven from rope is quite suitable as a gift. Having studied the topic thoroughly and gained some experience, it is possible to do handicrafts for a fee.
Weaving pattern and process
There are many ways to wrap a knife handle with paracord. The most popular and not difficult is the criss-cross winding technique. It is performed as follows:
- Measure and cut a piece of cord. It should be four to five times longer than the handle. The excess can be cut off after coiling. Place the handle in the middle of the cut piece.
- The next step is to wrap the left end. It needs to be wrapped around the top of the handle and passed under the right end. In the process, directing it downwards away from the blade. Both edges should form a pellet across the handle.
- Let's take the second ending, which we haven't done anything with yet. And we pull it into the loop from the back. We pull it out from the left side. This edge must be pulled from the back of the loop, the one that is under the handle. Through its base we pull it through the top. This step will lock the loop into place. We pull on both edges of the cord, so the handle is grabbed. After this, the right and left edges will change places.
- Take the right end and bend it over the handle below the place where the previous loop was created. We pass the right edge under the left, pulling it from below and pulling it out from above. This results in a loose loop. Now the intersection point is on the left side.
- Next, you should wrap the left edge behind the handle. It should be taken and passed under the handle of the blade.
- We take in our hand the end that we operated on in the last step and pass it into the loop on the right side of the handle. We insert its edge from bottom to top. Tighten the cord. The ends should switch places again.
- At each step we mirror the previous movement. When tightening the loop on the right, we exactly repeat the movements on the left.
- This should continue along the entire handle until you reach the end of the handle. Try to make the criss-cross loops as tight as possible.
- The final step is to pass both ends of the cord through the hole on the edge of the knife handle. To complete the winding, tie the edges with a knot at the side of the hole.
- Both ends of the paracord are tied into a strong knot. The resulting loop at the end of the process will be put on your hand.
Various options for weaving paracord.
Resin coating
Now you need to completely wrap the blade and other parts that should not have resin on it with electrical tape. You can, of course, remove it from steel, but why waste time on it.
A knife with a handle made of paracord coated with resin.
Mix a small amount of fiberglass resin. 20 g is enough.
Take an inexpensive brush and use gentle strokes to apply the resin all over the lacing. Let it soak in, if necessary apply the resin again. Then clamp the blade in a vice to dry the handle. After a few minutes, remove the knife and turn it over so that the resin does not harden in a bead on the downward side of the handle.
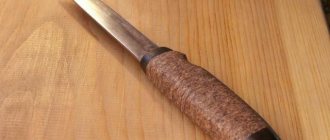
Knife leather trim
Before using the leather, it should be soaked in warm water. This will make it flexible and pliable. The pieces of leather should be kept in water for several hours. To finish the handle of a knife, tanned leather is best suited. The softened material should be wrapped around the knife handle.
This way you will be able to mark where the excess will be trimmed. They are then removed with scissors. But we should not forget about seam allowances; leave 2.5 mm on each side. Next, holes are pierced with an awl along the entire length of the flap. The overlock stitch will go through them.
After stitching, a knot is tied at the end of the thread. Next, the knife is put aside for a day to dry the skin. Be sure to wrap the blade with tape or plastic to prevent injury.
Leather braid
The process is not complicated, but there are some minor nuances. Before use, the leather should be soaked for several hours. It will become soft and comfortable to work with. The cord used should be 6-8 mm wide.
To braid the handle of a knife, you will need a cord four times the length of the handle.
A piece of leather should be attached to the handle with double-sided tape. One end of the strap is applied to the length of the knife handle. To secure the cord, we make several turns around. When wrapping, you should press the skin as hard as you can.
The first turns will hide the tape and you should continue further. We wrap the handle to the very end. There will be two ends left; they must be tied tightly and hidden under the skin. Make sure that there is no empty space between the turns.
Leather braided knife.
Preparing the cord
If you purchased a high-quality cord, then all you need to do is cut a piece of rope depending on the length of the handle. It is also necessary to prepare the workplace - clear it of unnecessary objects, place a computer with a circuit in front of you. The blade of the knife should be wrapped with tape or tape to prevent damage.
Pattern for weaving paracord onto a knife handle.
Sharpening for beginners
Before we talk about sharpening a hunting knife, we need to remind you that homemade knives made from the metals recommended in the article are very difficult and take a long time to sharpen, since the alloy steels used have high hardness. This must be remembered when using a knife for purposes other than its intended purpose.
Now about the sharpening itself. At home, knives are sharpened on special sharpening stones. Such stones are ceramic (the cheapest and most common), diamond, natural and Japanese sea stones. The principle of sharpening on them is approximately the same, so in the future, by default, we will talk about the most common ceramic sharpening stone. In order to sharpen a knife efficiently, it is advisable to have either two sharpening stones of different grain sizes, or, what happens more often, a sharpening stone whose sides have different grain sizes. For ease of sharpening, the size, or rather the length, of the stone should be greater than the length of the knife blade.
It is advisable to sharpen a knife with both hands, so it is advisable to place the sharpening stone on a separate board, securing it either in a hole specially cut for this purpose, or using six nails driven into the sides. Sharpening the knife begins on the roughest stone. At this stage, the whetstone does not need to be wetted. We place the stone arbitrarily on the table, the main thing is that it is convenient for you to sharpen on it.
The entire sharpening process consists of giving the edge of the blade an acute angular shape. When doing this, you need to remember a few basic rules:
- you need to choose the optimal knife sharpening angle and stick to it throughout the entire process;
- The knife is driven across the stone with the blade forward, as if cutting off a thin layer from it;
- in one movement you need to sweep the entire edge of the blade for uniform sharpening;
- the edge of the blade should always be perpendicular to the direction of movement;
- each next time the blade must be turned over and held with the other side so as not to displace the center of the blade chamfer;
- movements should be smooth, without pressure;
- It is better to sharpen both sides with a unidirectional movement, either towards yourself or away from yourself, since moving the hand away from you is always worse and weaker than moving it towards yourself.
Now regarding the sharpening angle. It can be from 450 to 300, in the first case the knife will hold an edge longer, in the second it will be sharper. It is better to sharpen a hunting knife exactly at 300, this is not difficult to achieve, just when sharpening, move the knife as if you were cutting a thin slice of butter or cheese.
After you have turned the initial sharpness and brought out the angle of the blade edge, you can move on to a stone of lesser dispersion. It is advisable to periodically moisten it with water so that the edge of the blade glides better and metal dust does not clog the pores. You can finally sharpen the blade to a mirror shine and razor sharpness by sharpening it on an old leather belt with GOI paste. The main feature of straightening with GOI paste is that the knife is guided in the opposite direction to the blade, i.e. butt forward.
Popular option
This pattern is very similar to the “cobra”, but much easier to make.
To create a bracelet we will need:
First, we need to cauterize one end of the rope, and then make four loops in the fastener slot. Next, make a loop from the long part and pull it through the four loops in the fastener for about 5 centimeters, then tighten all the loops in turn from right to left.
Then loosen them using tweezers. Between pairs of loops, pull out three more loops, leaving the fourth on the side. Then turn it over so that the left side is in front.
Pass the running cord through them, as in the second point. Tighten the loops from right to left.
Repeat all previous steps. When the length is suitable for your size, stretch the running cord to the last row and make three more loops for the second part of the fastener.
Burn the unnecessary part of the cord with a lighter and thread it through any loop, tying it in a knot. The bracelet is ready! This knitting is especially suitable for brutal men.
“I took refuge in the basement, I cut... the leather straps that tightened my weak chest...”
Back to cutting and sewing. I prepare three parts: the front, the back and the top. I won’t give you the exact dimensions, as I did it almost by eye, cutting it a couple of times. I think everyone will choose a suitable option for themselves. I select the size of the bag so that several important items for me can be installed on the back wall.
I apply the front part to the rear part and trace it according to the difference in thickness (for greater accuracy, it is worth “filling” the workpiece in order to reproduce the required volume).
Making a sheath (case) from leather
One of the necessary accessories for a hunting knife is a sheath. They are needed to protect the blade from dulling, and everything around from cuts and damage to things.
You can make a homemade sheath yourself at home, from a small piece of leather about 3 mm thick.
For this, in addition to the skin, you will need:
- scissors;
- a sheet of thick paper for a template;
- pen;
- an awl (a sharpened nail or nails can replace it);
- small nails and a hammer;
- universal glue;
- fork;
- paraffin candle;
- fine sandpaper or grinder;
- nylon thread and one or two large needles;
- pliers;
- snap clasp;
- wax or cream.
The procedure for making the cover will be as follows:
- Making a template. Applying the knife blade to a sheet of paper, trace it along the contour. Then around this contour with a centimeter indent we draw another contour, it will be the main one. Cut out the template along the outer contour. Separately, we cut out a T-shaped part for the fastener, the width of the harness is about 20 mm, and we measure the length of the harness along the handle of the knife.
- Mark the details on the skin. Having attached the template to the leather, we outline the part for one side of the sheath, then, moving the template to the side by 5 - 8 mm, we outline only one side to get a part for half of the insert. Then, turning the template over, we repeat the steps, outlining the second side and the second half of the insert. We apply and outline the T-shaped part of the fastener.
- Take scissors and carefully cut out all the details from the leather.
- Applying it to the knife, we try on all the details to see if they match.
- We rub the ends of the insert on the clasp with paraffin candles, and then sand them using sandpaper.
- We apply the fastener to one half, and using an awl and nails we mark and punch holes for the thread, in two rows.
- We sew the fastener; the thread can be pre-lubricated with paraffin.
- For ease of subsequent stitching, we glue the parts together. We cut out a part from the template along the contour of the blade itself. We place this part on the half of the sheath and coat it with glue so that the glue does not come out beyond the inserts. Glue according to the instructions on the tube. Lubricate and glue the inserts.
- At the tip of the sheath, between the inserts, we cut a groove for ventilation.
- Glue the other half. We place the sheath under the press for a while for high-quality gluing.
- We check how the knife fits and sits.
- Use sandpaper to sand the edges of the sheath.
- Using a fork, running two prongs along the edge of the sheath, outline the outline for stitching. Use a fork to mark the holes for the thread.
- If you want, you can get fancy by cutting a thread groove into the face of the scabbard so that it is flush with the leather. In this case, it will then need to be polished with wax or cream in the same color as the scabbard.
- Punch holes for the thread with an awl.
- We sew the cover. You can sew with one thread, or with two threads, threading them through the holes one at a time.
- Attach the button clasp.
- We finally grind and polish the scabbard with wax or cream.
The scabbard is ready.
I bring to your attention a new lesson. Today I will tell you how to create a stylish pen without spending a lot of money and time. We will need:
- Ordinary ballpoint pen
- 8 meters of floss threads
It is also possible to use colored wire with a diameter of 2-3 mm, which requires 4 meters. So. Step 1.
We disassemble the handle, we only need the rod.
Step 2.
Now we need to measure 4 meters of thread in each of the two colors. Fold in half, and then in half again. At the bend we get a loop:
At this point we place one color across the other to create an even cross.
To prevent the threads from getting tangled while working, I formed small skeins of them.
Step 3.
Let's remember our core. We place it upside down exactly in the middle of the cross.
Then we do the following. Take any of the threads and put it on the next one clockwise so that you get a loop. I took the top blue thread first. Here's what happened:
We do the same with the remaining three threads:
We thread the last thread into the first loop, and our circle closes.
Step 4, where we need a little ingenuity and skill.
The difficulty is that you have to simultaneously hold the rod vertically and tighten the threads. You can ask someone to hold the rod, but if no one is nearby, hold it like I do. That is, with our teeth :) One by one (carefully!) we pull on the opposite threads (they should have turned out to be the same color), until all the loops are evenly tightened. The result should look like this:
Repeat this step as many times as necessary to braid the rod to the base. My handle after five reps:
After 20 reps:
Step 5. Last.
After about an hour of work my handle looks like this:
It's time to fasten the threads. I have a little less than a centimeter of rod left to make the final knots. To prevent the threads from fidgeting, you can coat this part of the rod with glue (a glue stick is suitable, you can also use PVA). You need to regroup the threads, moving one to the left or right. Like this:
Now you need to tie several knots between adjacent threads, as you please, this is not critical. The main thing is that it stays securely. We will cut the threads to the very root! Therefore, we will lubricate them again with PVA. Be careful not to cut the knots. P.S.
This is the handle I got:
Not all knives have a wooden plastic handle. Sometimes the design means leaving a bare shank, which can slip out of your hand or make it cold. To avoid this, the steel handle is wrapped using a special method - a pattern of paracord weaving onto the knife handle.
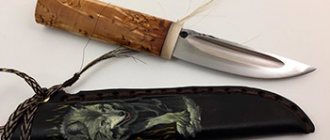
Paracord knife handle.
What is paracord
The first step is to understand what the material is and in what areas it is actively used. It is worth immediately clarifying that the connection is very stable and durable, therefore it can withstand even a lot of weight.
Thanks to its characteristics, it was loved in the military sphere, but ordinary citizens also found excellent use for it. Paracord is used in hiking conditions and for weaving.
The main differences between paracord
The differences between paracrod are based on the purposes for which the material is intended:
- military. Quite dense and thick material;
- civil. It can be several times thinner than a military one and is used for other purposes.
- decorative. This is the material from which it is made for souvenir purposes. The likelihood that it will be suitable for an emergency situation is very low.
Reference! Decorative is called commercial.
What the material is not suitable for
Paracord is not intended for mountaineering. This is not a certified product and is not intended for extreme sports.
Although many climbers believe that paracord is ideal for such purposes, it is best to play it safe and not use it intentionally. The material is not strong enough to support the climber's heavy weight for a long time. Therefore, you should think about your safety, and if you use paracord, then only woven and thicker ones.
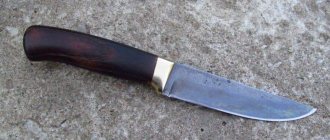
Handle
Knives are decorated with different handles. The choice of material for their manufacture depends on the purposes for which the knife is intended, ease of use and personal preferences of the owner. Below are two ways to make a knife handle at home.
Wrapping the handle with paracord in a few minutes
Using a paracord cord as a knife handle is not only easier and faster, but also more practical. You will always have a couple of meters of cord with you, which can be used for a variety of purposes when surviving in extreme situations.
For the winding we need:
- cord, 2 – 2.5 m;
- thick adhesive tape or electrical tape;
- lighter or matches;
- scissors;
- gloves;
- screwdriver.
Before you start winding the cord, decide whether you need a lanyard loop and if so, where it will be, on the side of the blade near the stop or at the end of the handle. If it is available, in addition to the ability to hang the knife, in the first case you can insert your thumb into it to make it more convenient and secure to hold the knife, in the second, you can use it to remove the knife from the sheath, etc.
Paracord is wound in the following order:
- We wet the cord, and it stretches better, and when it dries, it will sit more solidly on the knife.
- We seal the knife blade with tape or tape to avoid accidental cuts or cutting the cord. It is better to perform all operations with gloves.
- We press one end of the cord on the head of the handle so that 10 cm remains free.
- We form a loop from the cord, laid along the handle so that the top of the loop protrudes a couple of centimeters beyond the cord winding area.
- Then, holding the knife in your left hand and pressing both ends of the loop with your thumb, with your right hand we begin to wind the cord around the handle, starting from its head. We make the winding tight, turn to turn, do not tighten it too much, keep in mind that the cord will still shrink after drying.
- Having brought the winding all the way to the blade, we thread the remaining end of the cord into the protruding part of the loop.
- We cut off the excess cord, leaving about 3–5 cm, and burn the end of the cord.
- After this, pulling the free end of the cord from the side of the handle head, we pull the loop under the winding until the end threaded into it is hidden under the winding. Avoid pulling the loop completely out, otherwise the entire winding will unravel.
Winding is complete. With this option of winding, we will not have a loop for a lanyard. If we want to form it, the winding is somewhat more complicated. Initially, two loops are placed on the handle on both sides of the knife.
To form a loop for a lanyard on the head of a knife, the end of the cord is pressed onto the head of the handle and one loop is pulled to the blade, then the cord is thrown over the head and a second loop is placed on the other side. The winding starts from the head of the knife. Having finished the winding, the remaining end is threaded through both loops near the blade and pulled under the winding by the loop in the headband, thereby forming it.
So that the loop is near the stop, we do the same thing, but on the contrary, we start laying and winding from the stop, and pull the loop there to tighten the clamped end under the winding.
Making an overhead handle as an alternative to paracord
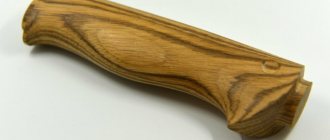
If you are a classicist and want to make a regular handle, use wood for this purpose. It is more accessible, easier to work with, the wooden handle is more pleasant to the touch, does not get cold, slips less in the hand, and if processed correctly, does not absorb moisture. The handle of a knife can be made of oak, beech, maple, birch, walnut or mahogany. In order not to waste time and effort on preparing and drying wood, there are two simple ways to get it. The first is parquet, you can buy it in a special store, where, by the way, expensive varieties are sold individually. The second is old furniture, in the attic, in the garage, at the dacha, with friends, you can always find unnecessary household rubbish and use it. For the handle you need two dies, if you have a standard size hand, then 10 - 15 mm thick, this includes a margin for processing so that the thickness of the future handle is about 20 mm. The length of the workpieces is 150 - 200 mm, so that there is room for fixing them during initial processing.
In addition to the tree, we will need:
- dowels made of aluminum, copper, brass, iron according to the number of holes and the corresponding diameter;
- drill with drills or drilling machine;
- drills according to the number of holes in the handle of the same diameter;
- a sharpening or grinding machine, it can be replaced by a wood file and a lot, a lot of time;
- jigsaw or hand jigsaw, or see previous paragraph;
- an engraving machine or a file with a needle file;
- sandpaper of different numbers down to the finest;
- epoxy based adhesive;
- linseed oil;
- thick adhesive tape or electrical tape;
- vice, clamp.
We make the handle as follows:
- Before starting work, wrap the knife blade with tape or tape to avoid accidental cuts.
- The first step is drilling. We place the knife blank on a wooden block, press it with a clamp or, at worst, wrap it with tape and drill holes. To make the hole neat, first drill with a thin drill, and then drill out to the desired diameter. After the first hole has been drilled, we insert a key or a drill of the same diameter into it, this is done to fix it so that the die does not move. Let's move on to the next hole.
- We drill the second die in the same way.
- After drilling, we assemble the dies on a knife, using keys or drills, to make sure that all the holes match.
- Then, attaching the dies one by one to the knife using dowels or drills and a clamp, we outline the contour of the handle along the contour of the knife. It is advisable to mark the handle with a slight indentation, 1 - 2 mm, for subsequent processing.
- After marking, we cut out the handle with a jigsaw or grind it on a grinding wheel; in extreme cases, the file is in your hands.
- Preparing the dowels. To make the homemade knife look aesthetically pleasing, we will not rivet the dowels, but glue them in. To do this, use an engraving machine or a file to make chaotic cuts on the keys, in which the glue will harden and set. At the ends of the keys we remove an inclined chamfer at 450.
- Since after gluing it will be inconvenient to process the cheeks of the stop, we finally process and polish them using sandpaper.
- We carefully sand the handle halves from the inside so that they fit tightly when gluing to the plane of the knife shank.
- Before gluing, we make a final test assembly.
- We carry out the gluing itself according to the instructions for the glue. The assembly procedure is as follows: lubricate the inside of one half, insert dowels coated with glue into it, put a knife on them, and then the lubricated second half. We clamp the assembled handle in a vice and remove the excess squeezed out glue. Leave the clamped handle for a day.
- After the glue has hardened, using files, emery, a grinding wheel, and so on, we finally shape, grind and sand the handle of the knife.
- When the handle is completely polished, it's time to soak. It is best to saturate wood with linseed oil. You can buy it in a store for artists, they use it to dilute oil paints. The handle is kept in oil for three days to a week. The process can be speeded up by boiling the handle in oil for a couple of hours, but you must strictly monitor the temperature, otherwise the glue may leak.
- Then the handle should dry at natural temperature for about a month, during which time the oil will polymerize and the wood will harden and become impervious to moisture.
- After drying, the handle is finally polished with a soft cloth.
Main functions of a lanyard
The best solution when making a lanyard is to make an adjustable loop. And attach a carabiner to it. This way you can quickly attach the product to your wrist. Among other things, the lanyard can perform the following functions:
- takes part of the load upon itself during chopping blows;
- allows you to change your grip without stopping the fight;
- prevents the loss of a weapon if it accidentally falls out of your hand;
- you can quickly free your hand without dropping the weapon;
- protects against injuries from piercing blows;
- helps store weapons;
- is a decoration of the blade;
- can distract the enemy's attention;
- Thanks to the bright color, you can quickly find the item;
- increases amplitude during swing movements.
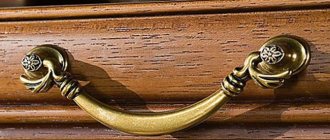
Various lanyard options.
Why is it better than twine?
- Paracord is lighter than standard twine. If you are planning to go on a hike or expedition, this point is important. The equipment of military personnel also meant that every gram was taken into account, so paracord has a clear advantage here.
- It's stronger. Well, this is all clear.
- The weather has no control over him. If the twine rots in dampness, the paracord will dry quickly. Even mold does not attack it, so paracord bracelets can be left on even while swimming.
- It is easy to weave and unravel. Over time, a knot made of twine will become impossible to untie. Paracord is easy to untangle, but this does not make the knots any less secure.
Mounting methods
Before you begin creating this unique accessory, you need to think about methods for attaching the lanyard to a knife or other tool .
For example, you can attach the decoration to the handle through a special hole. This is the simplest and most reliable fastening option.
It is also possible to mount it through a ring or shackle; this method is compact, movable and allows you to quickly find a pocket weapon by touch. You can attach a lanyard using different techniques: with a knot or with a clip, on a loop or with a special clip. Each method is good in its own way and depends on the tastes and wishes of the owner. The main thing in this matter is to secure the accessory in such a way as to ensure maximum comfort and safety for the future owner.
Lanyard as an accessory
Today, the lanyard is more of a decorative decoration for the knife. It gives the blade style and an aesthetically pleasing appearance. It has become less used for traditional purposes. But in the past, this accessory carried a lot of useful functions.
For the military, the lanyard was part of the uniform; it was used as an addition to the award weapon. Then they made a lanyard from an order ribbon. This use of a lanyard is not very relevant today, but leather lanyards have their fans.
The accessory is especially popular among the peoples of the Caucasus; men believe that the blade should have a bright continuation. When performing a saber dance, it adds spectacle to the performance. Thanks to which, dancers are able to perform various tricks.
In some cases, in everyday life, a lanyard serves as decoration. Men like to decorate the handle of a knife. Today there are plenty of ready-made products on store shelves. And in some cases, you can weave a beautiful accessory yourself.