In order to be able to enjoy cycling in winter, it is important to have high-quality tires with studs. Do-it-yourself winter tires for a bicycle will help out in this situation. It will cost the owner much less than a purchased one, and in terms of clutch quality it can even surpass the factory options.
Do-it-yourself winter tires for a bicycle will cost much less than purchased ones
There are three main ways to make your own winter tires for your bike:
- Screwing self-tapping screws into a tire with a large tread.
- Using bolts for rubber with shallow tread.
- Chains for bicycles without rim brakes.
Service
Due to the fact that a wheel with studded bicycle tires has a small contact area with the road surface, high pressure in the wheel can negatively affect the condition of the tires. Due to the high pressure, the spikes fall into the snow or ice. With reduced pressure, the total weight is distributed over a larger surface. At the same time, the contact area and controllability of two-wheeled vehicles increases.
Too low tire pressure is also undesirable. In this case, the side cord is subject to increased friction, and the tire quickly fails.
Read also: Fixing a bad tattoo
It is important to constantly monitor this and maintain normal tire pressure. Optimal pressure maintenance parameters:
Optimal pressure maintenance parameters:
if driving around the city on compacted ground - 3-3.5 atm. A bicycle rolls on the ground - 2.5-3 atm.;
Read also: Snot and cough in a child
Important! Consider the weight of the cyclist. If it is more than 80 kg, then an additional 0.5 atm should be added, but not exceed the maximum permissible value
if the bike is a road bike - 3.5-4 atm.
It is not possible to immediately select the required pressure value. To do this you need to ride a bike for some time. Since each cyclist has a different riding style and weight, the same pressure will be normal for one and low or high for another.
When changing tires, you should not lose sight of the choice of direction of their rotation. Otherwise, when the load vector on the spikes changes, the tire will quickly wear out. This can damage even the most expensive tire.
Self-styling of bicycle tires
50rub;
Total: 1000 rub.
To install the screws, I chose rows of treads running on the sides of the central part of the tire. To begin with, I had to drill holes in the appropriate places with a drill with a diameter of 2 mm. (I would like to warn you that there is no need to drill large holes!) In total, there are more than 108 holes in the tire. Next, you need to degrease the inside of the tire; for this I used smelly acetone. (Remember, all work with such nasty stuff as acetone must be done in a ventilated area and preferably with gloves and goggles. Those who are most concerned about their health can wear a rubber apron). Now we take glue and coat the screws with it and screw them into the inside of the tire. Believe me, it is not difficult, the self-tapping screws, lubricated with glue, are easily screwed into the intended holes. After all the self-tapping screws are screwed in, you need to wait time for the glue to “set.” At this time, we take the camera and cut strips 5 centimeters wide from it. We wash them of talc, dry them and degrease them. By this time, the glue on the screws should already have dried (30 minutes is enough) and we will begin the second part of making winter tires. We coat the inside of the tire and the cut strip from the unnecessary tube with glue. Let it sit for a couple of minutes and glue the rubber strip inside the tire, right on top of the screw heads. I advise you to glue in small sections of 10-20 cm, this makes it easier to deal with quick-drying glue. It is necessary to ensure that the rubber strip fits tightly to the tire in all places. After this, you can leave the tire to dry for 20 hours.
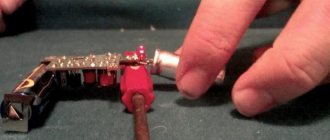
The mighty heads of the self-tapping screws appear under the rubber strip.
Here you are holding your first homemade tire in your hands, but something clearly confuses you. Oh yes! The sharp screws sticking out a centimeter remind you of wheels from racing motorcycles for ice tracks! This can be fixed. Find the most powerful nippers and bite off the excess. You need to bite off so that about 3-5 mm remains on the outside. It won’t work out exactly anyway, you don’t have to try. To be honest, the most painful procedure in the manufacture of these tires is precisely the shortening of the protruding screws. Moreover, this is proportional to the hardness of the metal of the screws. The total time to make one tire is approximately 8 hours, but it is worth it, so be patient and strong.
Some tips for using these tires.
- 1. Always inflate the tubes in such tires to the maximum, otherwise, when hitting a hard object, the tire will “pierce” the screw head to the rim, and this will result in two holes in the tube at once. So far I have been experimenting with pressure, punching the chamber three times, and each punch produces two holes.
- 2. Remember - the tires you made are not a complete analogue of the WXC 300 :), so don’t forget and drive carefully.
- 3. Do not leave the tires wet for a long time, the screws will begin to rust.
- 4. In any case, show off your custom tires to people you know and not so well.
Now my observations and feelings: The tire grips well on well-trodden sidewalks, and grips on soft ice (the kind schoolchildren roll on in the middle of sidewalks). It is better not to turn the steering wheel on bare ice. During the entire time I was riding, and I rode about 750 km on them over the winter, I only fell 3 times. In all three cases I tried to drive on smooth ice at a speed of about 15-25 km/h and perform a turning maneuver