DIY coin album
Numismatics only seems like a simple hobby on the part of people new to this type of collecting. In fact, this is a whole science. A collector needs to not only study the types of valuable coins, but also learn how to clean and store them correctly.
Without this, new acquisitions will eventually lose their former appearance. An important area of concern for a numismatist is where coins are stored. Most of their albums are incredibly expensive. You can make a product to house your collection yourself.
How to make an album for coins with your own hands quickly and economically? This will require available materials and patience.
Basic storage rules
Storage rules must be observed, since if they are violated, the coins may darken, deform their relief, and cause corrosion. The following recommendations are distinguished:
- Coins are stored separately from each other;
- Products should be protected from exposure to sunlight;
- It is better to place the album in a dark place at room temperature;
- The storage location must be dry, as humidity provokes the appearance of corrosive deformations and stains;
- You need to remove collectibles not with your fingers, but with plastic tweezers;
- If you pick up a coin with your fingers, you need to take it by the edge to prevent fingerprints from appearing;
- The product must lie freely in the cell intended for it.
Following the rules will allow you to keep your collection in pristine condition.
Instructions
1. The most difficult thing is to correctly calculate the dimensions of the product. I came up with the following arithmetic: rings with a diameter of 4 cm, a coin insert measuring 20x25 cm. 20 + 3 + 1 = 24 cm, where 3 is the height of the rings protruding inside, 20 is the length of the sheet, and 1 is the margin to the edge.
2. I cut 3 parts from thick cardboard: right and left sides 24x27 and a spine 25x5 cm long. 2. On the spine I mark where holes need to be made for the rings, to do this I simply place a coin sheet on top of it. I poke holes. 3. I cut a piece of material to the size of the spine + 2 cm allowances on the sides. 4. I glue the spine with the fabric. I seal the back side with paper. I put 8 eyelets in the designated places.
5. I insert the rings so that most of them are located on the inside. 6. I cut the outer spine 27x7 cm from scrap paper. Big detail. It determines how the entire cover will bend.
7. At the “Joiner” moment, I glue the right and left parts of the cover to the outer spine, going 1 cm onto it. 8. Now I glue padding polyester to this entire structure on the outside.
9. I apply fabric glue and glue the material to the padding polyester on top, fold the remaining edges inward and glue there, carefully tucking in the corners so that many layers of fabric do not form. 10. I bend the cover and glue the inner spine to the sides of the folder behind the protruding edges of the fabric. 11. I cut out two pieces 23 x 26 cm for the endpapers and paste them into place in the folder. 12. I attach the inner spine to the cover, as well as the entire cover around the perimeter. I love my Janome! The machine coped with all the thickness with a bang. 13. I attach decorative corners to metal corners so that the edges do not fray and lose their appearance over time.
14. I open the rings and insert coin inserts. There is room for 30 inserts and there is still plenty of free space left. All is ready! A homemade album has more than enough advantages: - any capacity, - freedom in choosing the appearance and material, - unlike ordinary albums on rings, in this version the rings do not stick out and do not fall apart in different directions, but are clearly in their places, securely hidden inside the product.
Ways to make an album for coins
You can make your own coin album from the following materials:
- Sheet A4;
- File;
- Soldering iron or sewing machine;
- Scotch;
- Stationery knife.
Tools for making an album
Using these materials, you can make a coin album with your own hands using two methods: with and without a soldering iron. But, in any case, before work you will need to prepare a stencil. For it you need to take the largest coin and draw a cell for it on paper. The cell size should be several millimeters larger than the collectible item. Cells can be standard or custom sizes. In the second case, you need to outline cells for coins of different sizes.
For the first method, you need to attach the file to the completed stencil and secure it with paper clips. Then, using a soldering iron, the outline of each cell is outlined. To place the collection in the resulting chambers, you should cut the top of the file in each cell. The resulting cuts, after the coins are placed inside, are sealed with tape.
In the second method, the file is replaced with dense plastic. Similarly, 2 sheets of plastic are attached to the stencil, but the cells are formed not with a heated soldering iron, but with the help of a sewing machine. It must be powerful enough to handle the plastic sheet.
You can replace a sewing machine with an awl.
They manually punch the material, after which it is attached to the sheet with a thread and a needle. The top layer of plastic is cut using a stationery knife. After placing the coin inside, the cut is sealed with tape. The resulting sheets can be placed in a file. Collection files are placed in a folder.
There is another way to make an album for coins with your own hands, but it will require an additional voluminous business card holder and cardboard. First, a stencil is prepared. It is placed under the business card folder file. Using a soldering iron, draw lines according to the stencil. Once the chambers are ready, cuts are made on the top of the chambers and coins are placed inside.
For the best appearance of the collection, it is recommended to place cardboard of the appropriate size in each cell. This album looks very aesthetically pleasing. It is both reliable and compact.
Creating an Album Using a Soldering Iron
However, working with a soldering iron requires experience. At first, prepare for burning through the paper and uneven lines.
To reduce the damage from your inexperience, it is better to first practice on unnecessary files.
What will you need?
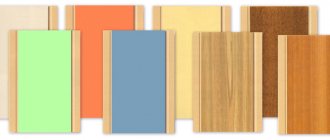
You will need approximately 2 free evenings. 1. Thick and thin cardboard (1-1.5 mm and 180-300 g, respectively). 2. A piece of fabric: thick cotton with a pattern, suede, tapestry, velvet, I chose nubuck. 3. Thin padding polyester. 4. Coin sheets: the main thing is that they are the same in external size (mine are 20x25 cm, bought at Leonardo). 5. Rings for covers 4.5-5 cm in diameter: 4 pieces (sold in hobby stores). 6. Metal corners - 4 pcs (we look for them in handicrafts or hardware stores) 7. Fabric glue and “Joiner” moment 8. Eyelets 5-6 mm: 8 pcs. 9. Sewing machine
Placing coins in albums
Before placing the collection in an album, pre-processing will be required. It suggests dehydration. This can be done using acetone. Coins are soaked in it for 20 minutes. However, this method is only suitable for products with a strong patina. In other cases, coins are placed in a drying cabinet.
The systematization of the collection is determined by its owner. It can be chronological or thematic. Systematization is very important, as it eliminates the need to frequently move items from one album to another.
Storing coins in albums helps preserve their shine and aesthetics. Plastic serves as protection from the sun, dust, and moisture. Products can be placed independently from each other. The album facilitates the convenience of reviewing the collection and its convenient systematization. The storage space itself, if done well, is a thematic addition to the collection.
Varieties for numismatists
Albums with coins are sold in special stores for numismatists. There are many types of albums, but most often sellers offer customers separate special sheets with special money holes of different sizes. There is a special space for signatures. Such albums have a very high price, so not every collector can afford this luxury; it is easier to make an album yourself.
There are 2 ways to make a coin album. Our material will describe both methods in detail.
Pocket albums
These portable storage units are intended more for carrying than for permanent storage, but they are necessary for those who, for example, go to certain gathering places of like-minded people to exchange, buy and sell, or simply communicate. In fact, these notebooks differ only in their smaller format and lightness. In addition, they do not have intermediate sheets designed to place information and arrange according to certain sorting principles.
Necessary materials
The main components and tools for a quality holder for your coins with your own efforts and hands:
- sheets of white paper, the most common A4 format;
- metal ruler;
- dark and bright marker;
- office files (preferably those that are denser);
- binder folder;
- ordinary soldering iron;
- a good knife and tape;
- hard paper clips.
Everything is quite inexpensive and can be bought at any stationery store.
Folder coin coins
The next category of these simplest and inexpensive coin albums is a folder similar to a regular office one. Sheets can be added or replaced in it. This is convenient and makes it possible to model the storage as the collection progresses. Between sheets or sections there may be special dividing inserts made of cardboard or plastic with headings or the ability to make them yourself, including a detailed description. You can find folders that provide for placing the necessary supporting information on the sheets themselves.
Thematic capsule classers
Since in a regular album only one side of the coin is accessible to visual inspection, it must be removed from the cell if detailed inspection is necessary. To avoid this need, you can buy a capsule-type album, in which the cells have a transparent window on both sides of the sheet. The cell itself is a protective capsule to create optimal storage conditions and protect against oxidation under the influence of an aggressive external environment. Of course, this does not completely guarantee the perfect safety of the coin, but it greatly increases the chances.
The most respectable and expensive albums for capsule-type coins are recognized by the absence of a tacky colorful design and are most often monochromatic, made in a noble color (burgundy, dark green, dark blue, etc.) strict album-type tablets. The necessary explanatory inscriptions on the pages are made in gold or silver. The number of sheets of such classifiers varies depending on subjective requirements. Often they can be supplemented with additional purchased pages. As a rule, they all have a shuber (a special protective outer case), the corners of which, in expensive versions, are reinforced with metal inserts.
Thematic albums for series
Nowadays, albums that not only have pockets of the same size, but storage areas designed in the appropriate theme are becoming popular. You can buy them anywhere, in almost any numismatic store, including online markets; today there is no shortage. Their attractiveness lies not only in their external design, but also in the fact that for each anniversary series there is a page with the exact number of cells for a given collection. In addition, under each pocket there is a description of the corresponding instance, or you are given the opportunity to make it yourself.
Modern technologies make it possible to make these storage facilities bright and of high quality in the printing sense. For collections tied to graphic places (countries, states, etc.), the album can be produced in the form of a map with cells located at the corresponding places of the “planet”.
Purchasing and filling thematic albums is not only about order and the proper appearance of the collection. For beginning numismatists, these are the basics of organizing and understanding what you need to pay special attention to when looking for, because a missing piece, a “hole” in a collection, is the most important excitement and sacred meaning of collecting.
Collector for stamps or banknotes of different sizes:
No matter how many collectors you buy, there are still very few of them :) And when the collection of stamps, bills, stickers, greeting cards or envelopes is continuously replenished, the need for a place to store them also increases. Everyone, even a novice philatelist or numismatist, knows where to buy a collection book, but not everyone can afford it. It is especially difficult to choose and buy a suitable bookkeeper when the collected specimens have different sizes. And this is where the advice of craftsmen comes to the rescue. I would like to say right away that most of the proposed options for homemade stock books involve long and painstaking work. Although collectors are patient people by nature, but... A book collector should be simple, cheap, convenient, reliable and versatile. It turned out to be quite easy to combine all these qualities. The idea of my version of a homemade book is quite original and simple.
How to make a stamp album with your own hands?
- Cut paper to fit the size of a file or photo album page.
- On the resulting sheet, arrange the stamps in the required order and mark their position with a simple pencil. You should end up with a sheet of paper marked with rectangles marking the places for the stamps.
- Carefully remove the stamps.
- On the bottom side of each rectangle in the middle, draw a small equilateral triangle with a side length no more than a centimeter.
- Make holes in the vertices of the triangle with a thick needle.
- Using thin scissors, a scalpel or a blade, cut the two sides of the triangle; there is no need to touch the base. Instead of two sides of a triangle, you can cut an arc. You will get a small triangular or arched “tongue” that will press the stamp tightly to the sheet.
- For larger stamps or blocks, you can make more “tabs” so that the stamp or block is secured both at the bottom and at the top.
Now you can insert stamps. The completed sheet must be carefully inserted into the package page of a photo album or into a file. If the marks have moved, you can correct them with tweezers. The homemade stamp album page is ready. Two sheets are placed in one file, inside out to each other. In the photo album package, if it is not single transparent, but double - only one.
If you wish, you can paint the sheet to match the theme of the series of stamps that will be placed there. Or use thick paper with a ready-made design. Both old photographs and thick pages of old magazines are suitable for sheets.
This method allows you not only to carefully store stamps, but also to create beautiful compositions from your series. And in addition, you can make notes on the sheet if they are needed - the history of the brand, the history of the acquisition of the brand, notes about missing stamps in the series, prices and other important information. These marks can become part of the composition.
The disadvantage of such an album is difficult access to stamps. If you need to remove the stamp, you will have to take out the entire sheet - and do it very carefully. And it is not very convenient to examine the stamp through the cellophane - the cellophane must be of very good quality, completely transparent.
- A wedding is a period filled with events. You always want every moment to remain in your memory, so a handmade album can be an excellent wedding gift for yourself or a friend.
- Corrugated sheeting is a modern, practical and economical material that has a long service life, corrosion and deformation resistance, thanks to which it has gained unprecedented
- All parents know how important it is for a child to love a book, and also how important it is to educate it. You need to start studying as early as possible and it doesn’t matter at all whether the book contains a coherent story. kids
- Penoizol is one of the brands of insulation. It is based on foamed and hardened urea resin. The understanding of some people who believe that penoizol is obviously erroneous
- There are basic criteria by which electronic cigarettes are selected, and it is better to consider them in order. It is necessary to take into account the style, brand, amount of steam produced by the cigarette, the size of the
As it turns out, making a stamp album with your own hands is not as difficult as it might seem at first glance. A stock book can be constructed from a draftsman's kit sold in stores (the other necessary materials are named later in the text.) Paper bends more easily along than across the fibers from which it is made. By bending the sheets first along and then across, we divide the paper into two piles according to this feature. For each sheet of stock book, you will need two sheets of lobular (i.e., with a longitudinal arrangement of fibers) and one transverse. This combination will not allow the paper to bend when gluing.
On each of the divided sheets, glue a sheet of black paper of the same size with PVA glue. Stack it all up, interspersing the sheets with thin paper spacers. The foot is covered with a suitable piece of board or thick plywood and a load is placed on it - a glass jar filled with water (about 1.5 liters) or another object weighing up to two kilograms. When the sheets are dry, the weight is removed, the foot is leveled by hitting the table surface with the left side, and marked by leaving a small dent with the tip of the scissors. Here, on the left side, there will be a spine field of sheets.
Now take a pre-cut template from one and a half to two millimeter cardboard using a bookbinding knife and a ruler. Its format is the same as that of drawing paper, the dimensions of the “windows” are visible from the drawing, and “top” and “bottom” marks are made in the appropriate places. By placing the template on each sheet taken from the stack separately, slits are made on them using the same bookbinding knife. The margin for both the sheets and the template remains on the left. The tilt of the knife during operation is about 45°.
Blanks for pockets are cut from film or tracing paper by running a knife pressed to the side of a thick ruler lying on a sheet of this transparent material along its fibers. The resulting strips are inserted all the way into the slots made according to the template and glued - on all sheets at once - first on one side and then on the other, moderately pulling each of them separately and pressing the end to the paper with a finger until the film sticks properly. On the reverse side of the sheets with stripes, newspaper paper of the same size is glued. Then, as described above, they are collected in a pile with thin paper pads and dried under weight.
After three hours you can continue the matter. The side of the sheet of paper protected by newspaper is smeared with glue, a transverse sheet is placed on it, smoothed and another sheet of paper is attached on top, again with the newspaper side coated with glue. The result is a booklet sheet with pockets on both sides. It is followed by the second, third... tenth. After trimming, their edges can be edged with strips of fabric 15 mm wide for greater strength. In the meantime, stack everything again with spacers under the load - now for two days.
Align the dried foot (block) on the right side, along its front margin, and trim the left radicular margin by 3-5 mm so that it also becomes even. This is a difficult and painstaking operation. It is advisable to clamp the block under a press or, if there is none, in some other way - the sheets should fit tightly to each other and not move to the sides. Along the way, the knife is sharpened several times with a fine-grained stone and sandpaper, and the sharp blade is drawn along a thick ruler placed on the block with almost no pressure.
Trimmed? It's time to prepare folds - strips of calico or other dense fabric. They are made by cutting the material from a piece using the same knife and ruler. Each fold is smeared with glue, and the book stock sheets are placed on its sides with the edges facing each other, leaving a gap of 2-3 mm between them. Soon, instead of ten separate sheets, you will have five double sheets in front of you. They are folded so that the fold is inside, the edges are aligned and dried, having previously been lined with clean paper pads. After ten minutes, four double sheets are connected in pairs in the same way. They are also dried and also fastened together with a fold. Finally, after another ten minutes, the remaining double sheet is attached to the resulting eight-sheet block in the same way, using a fold.
To prevent the stamps of adjacent pages from touching each other, sheets of tissue paper of the appropriate size are glued between them end-to-end to the folds. Now we need to complete the work—first of all, level the block in thickness. To do this, spacers are inserted between the pages of such a size that they reach the folds of the spine. Did you insert it? This means that you can glue endpapers to both sides of the block - sheets of not very thick white or colored paper folded in half, connecting it directly to the binding cover.
The next operation is gluing the spine: it is lubricated with glue, having previously pressed down the block placed between two pieces of cardboard with a weight. After two hours, when the glue has completely dried, tap along the top and then, turning the block over, the bottom edge of the spine with a mallet; the spine is rounded. Bookbinders call this procedure knockout. Mallet - a carpenter's wooden hammer can be replaced, for example, with a similar kitchen hammer, used for beating meat.
Make sure that the curves of both edges are the same, and secure the spine in this state, pasting it in the middle with a wide strip of starched gauze or bandage, and on the edges with captals - this is the name for pieces of tape thickened on the side, which can be replaced with a suitable braid, stitching, if necessary, one of its edges with threads.
Finally, it came to binding. It requires calico. Some other fabric will also work, but in this case it must first be covered on the inside with newspaper or tissue paper and dried under tension, for example by nailing nails along the edges to a sheet of plywood. The size and shape of the piece of calico that you have to cut can be seen from the drawing. The sides (two sheets cut from the same cardboard as the template) and the back - a strip of thick paper between them - are glued to the calico. Let the sides be 6 mm larger in height than the block, and, on the contrary, 2 mm smaller in width; the gap is the same length, and the width is 2 mm greater than the thickness of the block. The edges of the calico are folded inward and also glued. After drying, almost the final operation is to glue the sides of the binding to the outer surface of the endpapers. Now all that remains is to press the finished book between two pieces of cardboard in a press or dry it completely under a board pressed down with a fairly heavy load.
Handmade items are always distinguished by a high degree of originality. Having made any souvenir or accessory with your own hands, you can be sure that no one else will have one just like it. This is their main difference from store-bought analogues. At the same time, you can do almost everything yourself, using a little imagination, dexterity and patience. This also applies to such an item as a book. The main material for its manufacture is a draftsman's kit, which can be found in any office supply store. And you can fill the album with stamps from the hobby group store.
The simplest coin coins
The simplest, most uncomplicated and cheapest storage albums are called coin boxes. They include sheets divided into standard pockets that have the same square shape. More complex coins may have pages that differ in the number of cells on each of them. There are specialized coin coins for collectible items of a certain category. They can take into account various parameters, such as the approximate number of the collectible denomination or the complete line of certain years.
Such coin albums can be purchased quite cheaply, depending on the material used and the external design. The main disadvantage of such storage is the fixed number of sheets and their rigid fastening in the album. It is impossible to increase the space of a simple coin coin.