In this master class we will tell you how to make the Kremlin with your own hands. We will make it from paper. The task is not easy, however, here you need to make allowances for quality; the more realistic the Kremlin you want to get, the more you will have to tinker with its creation and the more difficult it will be. We will make, so to speak, a three-dimensional stand. The Kremlin tower will be in the middle, on the edges of it there will be walls that will be both the Kremlin walls and the basis for fixing pieces of paper, for example, children's drawings. By the way, such a stand is perfect for a school. We also note that if you are interested in Moscow, or more precisely its attractions, you should definitely visit the website moscowinfocentr.ru. On this resource you can find out all the news of the capital and, in addition, get acquainted with its sights, and in all details.
Master class on making a model of the “Nizhny Novgorod Kremlin”
Kosonogova Daria Igorevna
Master class on making a model of the “Nizhny Novgorod Kremlin”
I bring to your attention a master class on the layout of the Nizhny Novgorod Kremlin, performed together with students for the Day of National Unity.
Master Class:
1. STAND:
Any surface with a dense base (cardboard box) with an area of 30x30 must be covered on one side with plasticine in green shades.
This is what the guys and I ended up with:
2. TOWERS: To make towers, you need to make blanks on a printer in the form of printed strips measuring 2x15 cm each. The sheet must be printed on both sides in 4-5 copies.
We cut each strip into two parts. We got 12 pieces, since there are 13 towers in the Nizhny Novgorod Kremlin, but the central one will be made differently. The remaining strips will go on the walls of the Kremlin.
We make round towers (9 pieces). Roll each strip into a cylinder.
We make roofs in the shape of a green cone: draw 9 even circles, draw two radii from the center of the circle to make a right triangle.
Cut out a circle and a triangle in it.
We coat the sides with glue and securely roll the cones.
We glue the bases of the towers with the roofs.
We make square towers (3 pieces) . We prepare cubes with sides 2x2 cm from plain paper.
We cover the paper cubes with blanks.
We make roofs in the shape of pyramids with a quadrangular base: To do this, I took a pattern from the Internet (a pyramid with sides of 2 cm, printed it on plain paper, and then transferred it to green cardboard.
This is how the roof turns out.
Next we glue the roofs with square towers.
Making the central tower: To do this, I took a template from the Internet in advance and printed it in 4 copies (height 4.5 cm, width 4 cm).
Next, we make a paper cube with sides 4x4 cm and glue each side with a blank.
Here are the parts you should get:
3. ASSEMBLY:
We place all the towers on the stand in the correct sequence, glue each tower to the wall, giving the desired shape to the structure.
This is what the guys and I came up with:
Master class on making a model "Village Estate" Master class on making a model "Village Estate" Description: Master class on making a model "Village Estate" maybe. Summary of a lesson on familiarization with the origins of Russian folk culture “Nizhny Novgorod Kremlin” in the preparatory group Synopsis of a lesson on familiarization with the origins of Russian folk culture in the preparatory group on the topic: “Nizhny Novgorod Kremlin”. Nizhny. Lapbook “Nizhny Novgorod Kremlin” We’ll walk around and remember all the towers of the Nizhny Novgorod Kremlin. And first, let’s lay down the truth, The number thirteen cannot be forgotten.. Master class on making the “Arctic” model Good evening, dear colleagues! In various environmental programs, prototyping is considered as an environmentally oriented form.
Source
The Importance of Resourcefulness
Sometimes a wife or husband, in the desire to do something useful, finds the strength for creative insight. This usually happens when something is needed in the family. For example, a shelf. Or a box. Ordinary things in the apartment.
Except that they are made in an unusual way. Because every such craft for the home is new. Made from a material unusual for this item. Or done in an unusual way.
Showing ingenuity is possible only when absolutely necessary. For example, a family came to their dacha by car. But they forgot the barbecue grill. Everyone wants barbecue. Everything is. There's just no grill. And it’s a long way to go to get a barbecue.
A resourceful person will make a barbecue structure from scrap materials. And the kebab will turn out no worse than under normal conditions.
Features of paper layouts
A DIY paper Kremlin helps parents develop their child’s imagination and fine motor skills, and teaches them how to work with cardboard, scissors and other tools. If you are just doing activities with children, it is enough to choose an easy-to-make craft in the form of a flashlight, flower or animal.
A do-it-yourself model of the Kremlin is made only in the following cases:
Regardless of where the Kremlin model will be used in the future, it must be assembled from paper according to the instructions.
Crown for the princess
No little fashionista will refuse a crown made of chenille wire. Any headband will be suitable for the base, and decorations can be made from chenille:
- from sharp ice floes, like the snow queen's;
- gold and silver stars for a glamorous beauty;
- with glitter and pompoms for a real cutie.
How to do
For production, you can use ready-made templates or make them yourself based on real photographs. Design of layouts occurs manually or through computer programs. The first is a simplified version, suitable for classes with children, and they themselves can draw a template for later cutting. The second option is complicated, but helps to obtain a design similar to the original.
Required materials and tools
To make an applique or voluminous paper kremlin, you need to prepare materials and tools for the work. Depending on the type of craft, you will need the following items:
Manufacturing will also require additional elements used as decoration. You may need felt-tip pens with which children can color the paper blank.
Step-by-step assembly of a three-dimensional craft with step-by-step photos
Before you start making the Kremlin, you need to study the instructions for action, as well as prepare the paper and other materials needed for the work.
Model of the Nizhny Novgorod Kremlin
First of all, you can adopt the Nizhny Novgorod Kremlin made of paper. It is simplified in implementation, but you can go the hard way and do everything efficiently and fully. You can recognize the reliable diagram - the one located on the wall of the building in Nizhny Novgorod.
The model of the Nizhny Novgorod Kremlin is presented in a simplified version. There is only a wall and towers, but the entire complex structure can be safely restored by analogy.
The presented layout is enough to print. This can be done on a black and white or color printer. Black and white print will require coloring. If you want to make a craft from cardboard, the cut-out template should be glued to it and cut out. Next, glue the parts in accordance with the existing instructions.
If you want to make the Kremlin larger, you can print out several sheets of the template provided. The blanks are cut out and connected to each other. It turns out that it is not quite an example of Nizhny Novgorod construction, but the dimensions of the craft are larger.
Moscow Kremlin
Schemes for the manufacture of Moscow buildings are proposed. There are many of them, but you should choose according to your own capabilities or according to your own and your child’s wishes.
Layouts vary. Masters in the manufacture of paper structures can make complex crafts that fully convey all the buildings.
But novice paper designers should take on the easy option. For example, making only the wall and the Spasskaya Tower.
The Moscow Kremlin made of paper is assembled from several parts. To do this, you need to print several templates at once. In the future, they are assembled into a building, which will consist of several structures in the layout. Which ones - the designer will decide on his own.
The Spasskaya Tower is assembled separately. There is also a separate template for it, which is cut and joined according to the sample.
The production of Moscow buildings always attracts craftsmen who prefer to work with paper and create the beauty of buildings. They are often made from cardboard, but thin, which bends and sticks better.
Tula Kremlin
Most craftsmen, after the Moscow Kremlin, take on the production of other similar structures. Thus, the Tula Kremlin made of paper is attracting more and more attention. Here you can also make only a wall and a tower. But it is possible to restore a full structure.
If there is a need to make a simplified version, you can take on the production of only a few structures. It is recommended to use a schematic representation of the building in Tula.
The lack of ready-made templates for assembling one of the many towers can be made up for with any similar layout.
Zaraisky Kremlin
The model in the city of Zaraysk is also popular, so there are many ready-made templates for its production. Each master should use only those examples that are within his power. For inspiration, it is recommended to use ready-made works of experienced craftsmen. Thanks to them, a novice needleworker will be able to create designs that are unrealistic for themselves.
Before you start making a model of the Zaraisk Kremlin, you need to familiarize yourself with the diagram of its structures located in reality.
To begin with, it is enough to take into work only the walls and one of the towers. Gradually they begin to manufacture the cathedrals and the Spasskaya Tower.
Applications
It is impossible to make an origami Kremlin, but you can make an applique with three-dimensional elements. These are simple templates that are easy to make yourself. It is enough just to decide on the choice in buildings. As a rule, first of all they pay attention to Moscow construction.
The application with the Moscow building is formed in the following varieties:
It is recommended to complete the crafts in accordance with the children’s imagination and their own wishes. You should not refuse the child’s opinion if he wants to do something, but cannot or does not know how to do it. He should be helped.
Cutting templates
Everyone, without exception, can create the layout of the Kremlin. It all comes down to the capabilities of the child or adult, as well as their wishes. In accordance with the presented factors, the complexity of the craft is determined.
Source
Bee image
It is advisable to record what you have done and take a photo of the crafts made from fluffy wire. You can continue your kindergarten inventions of crafts by creating a bee.
Fluffy yellow wire is intertwined with a black stripe. When weaving, you should get a spotted body of a bee.
The front part is only yellowish, ending with black antennae. Glue in black eyes. And make the tail tip black too.
Make the outline of the black wings in a semicircle. This will be enough to make a realistic bee craft.
Model of the stone Nizhny Novgorod Kremlin for acquaintance with the Nizhny Novgorod Kremlin in the past
Marina Kuznetsova
Model of the stone Nizhny Novgorod Kremlin for acquaintance with the Nizhny Novgorod Kremlin in the past
More and more attention began to be paid to the patriotic education of children. Raising patriotism is not a simple and continuous process; much depends on the child’s environment, on what is ingrained in consciousness from childhood. Most parents do not pay enough attention to introducing their child to their hometown, traditions and cultural heritage. Therefore, the role of preschool education in instilling patriotism in children is very important, since it is at preschool age that a person’s moral qualities are formed. In our group, we are constantly adding various materials, manuals, and illustrations. We started exploring our city from the street where we live, the kindergarten and finally got to the main attraction of our city, the Nizhny Novgorod Kremlin . We looked at illustrations and pictures in books, but we wanted something that the children would always have in sight. So I decided to make a model of the towers of the Nizhny Novgorod Kremlin from the past , in stone form . After all, as we already know with the guys, the Kremlin went through three stages of construction : wooden, stone and finally brick . I took ordinary round glasses as a basis and crocheted them in a circle. Collecting it into a single “necklace” we got a model for a visual acquaintance with the Nizhny Novgorod Kremlin . Now the guys proudly answer all the guests in our group what it is!
“Without memory of the past, there is no future” On the eve of Victory Day celebrations last year, my youngest son asked me: “Mom, has anyone been in the war?” I replied that.
Lesson in the senior group “Towers of the Nizhny Novgorod Kremlin” Lesson summary Topic: “Towers of the Nizhny Novgorod Kremlin” Purpose: To generalize and clarify knowledge about the Nizhny Novgorod Kremlin. Objectives: 1. Consolidate knowledge.
Lesson on FCCM (Cuban studies) “My favorite city in the past and now” Objectives: to expand children’s ideas about the “small Motherland”. To give an idea of what the city of Anapa was like at the beginning of the 20th century and what it is like.
Notes for the lesson “Towers of the Moscow Kremlin” Notes for the lesson “Towers of the Moscow Kremlin”. Objectives of the lesson: will expand children’s understanding of the history of the Moscow Kremlin, the construction of the Kremlin;
Lesson summary “My city in the past, present, future” Lesson summary for students of the preparatory group “My city in the past, present, future.” Educational area: Social.
GCD construct “Counting and measurement in the past and today” Age group: 5–6 years. GCD form: “River of Time”. Purpose: To introduce counting and measurements in the past, to clarify knowledge about counting and measurements of the present. Track significant changes.
Literary and musical composition “With pride in the past, with care for the present, with faith in the future” Video The literary and musical composition “With pride in the past, with care for the present, with faith in the future” was presented at the regional competition.
Source
The result of insight
A replacement for the barbecue will be an ordinary oblong hole in the soil. Carefully dug. Trim the edges of the hole and make it vertical along the hard edge of the soil. Take 4 metal beer or juice cans.
First, punch holes in 2 jars and place skewers on the sides. One can at the beginning of the skewer, the second at the end. Then comes the turn of two other cans, at right angles. You will get a square structure of 4 cans and 4 skewers.
All that remains is to slightly strengthen the jars in the soil along the edges of the coal pit. Then everything is as usual. The poured coal is lit. Skewers with threaded meat are placed on a crate of skewers.
And further. Not everyone can figure out this simple method. But it would seem easy to come up with such a structure. But insight comes to people when they really want it. Every person has these moments of insight.
Master Class. Making the Kremlin from plasterboard.
Maria Shevchuk
Master Class. Making the Kremlin from plasterboard.
A new day has arrived and it's time to learn something new. Hello dear colleagues. Today I hasten to teach you how to make a model of the Moscow Kremlin .
To begin, select the size of the future layout and make a wooden frame.
Now cut out each wall separately (I worked with a stationery knife or chisel)
The material is quite fragile, so be careful.
Screw the plasterboard pieces to the wooden frame with self-tapping screws until you have sheathed the entire frame.
Color the Kremlin . (I painted it with regular brick-colored floor paint, white paint for the windows) Cover the corner joints with plastic corners, glue them with polymer glue, you can buy this at a hardware store. Cut three dials out of plywood, paint them, attach the hands, the numbers can be drawn with any gold outline. Attach a star from the Christmas tree to the top.
Choose a place in the kindergarten, install a layout, decorate the walls with a Kremlin wall (also made of plasterboard )
. Hang up a few photographs of the capital of our Motherland. A magnificent corner of Moscow is ready.
See you again! I wish you creative success!
Model of the Syzran Kremlin Syzran is a small city on the Volga. On September 8 we celebrate City Day. I held a series of conversations about the city, its attractions, it was organized. Design of kindergarten recreation areas part 4. Models of plasterboard buildings. Hello again! Want to see something new? I present to your attention my models of the Moscow Kremlin from plasterboard and ours.
Source
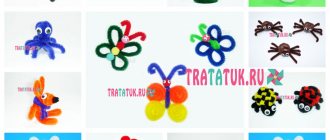
Chenille in decor
It is wrong to think that only children's toys can be made from wire. This is an excellent material for decoration. Using fluffy or shiny chenille it is easy to update boring interior details: vases, mirrors, wall clocks, lampshades, flower pots.
Chenille will make a Christmas wreath that can be hung on the front door, or a bride’s wedding bouquet. It is used for carnival masks, tiaras, and glasses.
Fluffy earrings, necklaces, bracelets, and other jewelry will become the center of a themed girls' party. Chenille is useful for decorating gifts and bouquets. It is used to make unusual greeting cards, soft symbolic toys - the talisman of the year, fashionable topiary.
You can make a surprise for kids and adults using chenille wire with your own hands in a couple of hours. It is enough to decorate the room with colored fluffy stars for any holiday, hearts for Valentine’s Day, flowers for March 8th.Cut out numbers from thick cardboard, wrap them with colored shaggy cord - your date of birth is ready as a background for a unique photo shoot. You can start a celebration, because a fun start has already been made.
The bright holiday of Easter - the Resurrection of Christ - will not go unnoticed. From chenille you can make a nest for eggs, make a composition of chickens or an Easter bunny. The fluffy material imitates willow, soft grass, cute rabbits, and chicks.
Crafts made from chenille wire develop imagination and provide an opportunity for creativity that knows no bounds.
Slide captions:
Old Russian cities Nizhny Novgorod Kremlin Gerasimenko Olga Borisovna MBOU Lyceum No. 87 named after. L. I. Novikova, teacher of fine arts, artistic work and drawing, higher education at the Gorky State Pedagogical Institute, 1982. specialty: teacher of general technical disciplines, drawing and labor. Work experience 29 years. highest category
Children's reports Independent work Technological maps for constructing parts of the Ivanovo Tower
Goal: Acquaintance with the towers of the Nizhny Novgorod Kremlin Make a model of the Ivanovo Tower Objectives: Formation of graphic skills. Develop design abilities. In the education of a creative, strong, viable personality.
TOPIC: “Construction of the towers of the Nizhny Novgorod Kremlin” 3 hours 5. Reading the drawing. The sequence of constructing the development of the base of the tower is 1 hour. Technological maps. Blueprints. Models of towers Combined 6. Development of the superstructure of the Ivanovo Tower (prism and pyramid) 1 hour. Educational demonstration Practical work 7. Assembling the Ivanovo Tower 1 hour. Educational demonstration Independent work
The Kremlin in children's drawings.
Making a model of the Ivanovo Tower of the Nizhny Novgorod Kremlin
4th grade students should know: 1. Geometric figures. 2. Geometric bodies. 3.Types of lines. 4. Designations of radius and diameter. 5.Names of the towers of the Nizhny Novgorod Kremlin. 6.History of the Nizhny Novgorod Kremlin. 7.Names of Nizhny Novgorod residents associated with the construction and reconstruction of the Kremlin.
Have concepts such as: 1. Sketch. 2.Drawing. 3.Linear drawing. 4.Technical drawing. 5.Sketch. 6. Product outline. 7. Development. 8.Drawing. 9.Model. 10.Layout.
There is no desire more natural than the desire for knowledge M. Montel
Drawings by fourth grade students Ivanovskaya Tower Nikolskaya Tower
Drawings by fourth grade students Ivanovskaya Tower Nikolskaya Tower
Drawings by fourth grade students Round towers
Drawings by fourth grade students Round towers
Comparison of the Moscow and Nizhny Novgorod Kremlins
4 Cut out the development of the base of the tower with scissors 5 Prepare a template for the arch using cardboard and a pencil 6 Cut out the arch template with scissors
7 Trace the template on the edges of the pyramid (one at a time) with a pencil 8 Cut out the “arches” with scissors 9 Bend the development of the base of the tower along the fold lines
Making a development (central part), calculating loopholes 1 Calculating material consumption Length - 7 cm. Height - 8 cm. ruler 2 Perform a development of the prism: mark points 7, 14, 21, 28 cm along the horizontal edge, lower the ruler and mark again points 7, 14, 21, 28 cm; connect them vertically to the 8 cm mark. 0 7 8 ruler, pencil 3 Calculation of loopholes. Retreat 2 cm vertically from the edge; move the ruler and mark another 2 cm. two points, connect a line along the entire length with a pencil, ruler
11 Cut the loopholes 0.5 cm wide with scissors 12 Bend along the fold of the marking 0.5 cm.
Development of a prism (superstructure) 1 Calculate the material consumption: the side of a regular quadrangular prism is 5 cm, height is 2 cm + 1 cm for gluing. Consumption - 21 cm by 4 cm ruler, cardboard, pencil 2 From the horizontal edge, mark points 5, 10,15, 20, 21 cm with a ruler. Lower the ruler lower and once again mark horizontal points 5, 10, 15, 20 , 21 cm. Connect the dots in pairs, draw lines 0 5 10 15 20 0 5 10 15 20 ruler, pencil
1 Make a circle with a compass 2 Place a compass needle on the line of the circle and take a “step” along the circle with the same radius, making a stroke. Move the needle of the compass to the point of intersection of the circle and the arc, making the next stroke (4 times) compass Technological map. Pyramid development.
3 Connect the resulting points with a broken line to each other and to the center of the circle (ruler, pencil) 4 Add “wings” of adhesive for the base and side of the ruler, pencil
Owl
To make an owl craft from soft wire with pile you will need:
- chenille wire in 3 colors: dark brown, light brown and orange;
- scissors;
- cylindrical pencil;
- glue;
- plastic eyes.
Procedure:
- Prepare 3 equal pieces (about 5 cm long) of light brown wire.
- Wind a 30-centimeter piece of the darkest wire onto a pencil and remove it. Retreat 2 top turns. Between the 2nd and 3rd turns, stretch the spiral a little. Insert pieces of light-colored wire, bend the upper and lower ends inside the spiral.
- From a strip of dark-colored base material, form the ears and wings of a bird according to the following scheme: bend the wire in half, bend the ends down (the shape should resemble the letter M), place the element inside the spiral so that the bird’s ears are in the upper part of the workpiece, free sections at this is passed into the widened gap between the 2nd and 3rd turns of the spiral on the sides, forming wings.
- Use orange wire to form the beak and legs of the bird. Secure the beak under the 2nd turn of the spiral element. Attach the paws to the bottom of the craft.
- Glue the eyes; they should be located on the top 2 turns of the spiral part.
Options and ideas
We have already said that such homemade elements are perfect for decorating a book or notebook, work notebook or diary. Plus, you can easily attach these hearts to a greeting card, photo, or gift bag. They will look like an unusual detail on a bag or school backpack.
You now know how to make a heart out of a paper clip, so try experimenting. By making several of these parts in different colors, you can form them into absolutely any decorative elements. For example, a garland of hearts on the wall in the bedroom of a romantic young girl will look very advantageous.
Advice: if ordinary metal clips are suitable for making bookmarks, then for the production of interior decorations it is better to take colored ones with a soft plastic shell. They are more convenient to use, especially if a lot of parts are required.
The next option for crafts made from branches is a chic candlestick
Prepare for it:
- Thin eyelids, 30 to 40 centimeters long. Paint the branches with spray paint in any color, such as silver or gold. Let the branches dry.
- Glass glass with straight sides, low.
- Glue gun
- Candle, longer than a glass
Next, as in the photo below, carefully glue the prepared branches to the glass. We put a candle in the glass, our chic candlestick is ready. Again, your imagination will help you. You can add some decorative elements, for example, tie a candlestick with a satin ribbon somewhere in the center of the glass. Whatever you can think of.
Beautiful DIY crafts. Fairy lights.
A few more examples of beautiful and very simple garlands.
1. Tied ribbons.
Just cut a few ribbons and tie them to a rope or branch. You can use different colors and textures.
* In the same style, you can tie bows to the rope.
Prepare several sheets of thick colored paper or cardboard. Cut them into a flag shape, punch holes with a hole punch, and thread them onto a string.
* In the same style, you can put paper hearts or any other shape on the rope.
Folding letters or patterns
You can use paper clips to make not only cute shapes, but also letters of the alphabet, numbers and punctuation marks. With the help of all this wire alphabet it is easy to construct a message. Having understood how to make a heart from a paper clip, it is easy to collect the necessary symbols by analogy.
This decoration will perfectly complement a postcard, box, or even a photo album. For design, you can use both colored paper clips and ordinary metal ones. To make the decorative inscription look more festive, you can paint it with a spray can, or you can add it with sparkles or beads. This is a good way to write initials or short messages. Long inscriptions will not look impressive, as it will create a busy effect.
And ideas for rest and relaxation of office workers. Some Western companies have come to the conclusion that office workers need to take short breaks from time to time
and be distracted from their immediate responsibilities for rest and unloading. The advice is to take up some simple game, preferably collectively. At these moments, work tension is relieved, jokes are heard and, thus, a warm atmosphere is unintentionally created, which helps to unite the team. And this in turn will lead to more productive work in the future.
Here are a few ideas that can be used to give office workers a short break.
Mini-bowling Table bowling can be made with your own hands from available materials
Crossbows from office supplies
Darts from improvised means
A couple of minutes to relax. This is much better than smoking cigarettes one after another during a break or traditionally drinking coffee.
Office supplies fighter
Crafts from paper clips
Crafts from paper clips
Some may find the game too childish. But for those who love humor and want to relax their brains, this opinion is not a hindrance.
Problems for office nerds
Dodecahedron of 120 paper clips without a drop of glue and other fasteners
Möbius strip made of 110 multi-colored paper clips
Only six clamps... It would seem the simplest design. Try it! The secret is that when creating such a thing, your fingers should not be strained any more than when using normal clamps.
Сosidodecahedron of 30 clamps.
Shadow theater on the office desk. The working day was not in vain.
This creation requires thorough preliminary preparation in the form of accumulating coins. But the result is masterpiece!
Trinkets and pleasant bright little things make our lives more fun. Today we will talk about how to make a heart bookmark from a paper clip. For those who love to read or just want to decorate their work notebook with a nice and economical detail, this method will be useful. By the way, such a bookmark is a stylish and cute romantic gift on the eve of Valentine's Day.
Making earrings
Such decoration will not be of the status of an adult lady, but a five-year-old girl will come in very handy. First you need to do all the preparatory work from the point on how to make a heart out of a paper clip. And then the creative process begins. If you don’t have any materials at hand other than office supplies, it doesn’t matter. We fasten a rubber band for money on one side of the heart, and without pulling too much, we wind it to the other side. After three such manipulations, the elastic band should run out. But this is a standardized parameter. Everything will depend on the size of the heart and the length of the elastic band. For a good result, you need to wrap two to three rubber bands on one heart. If you have a spool of thread at hand, you can use it. It will turn out especially beautiful if the mesh is shiny. The final stage is to put on the earrings. That's it, the earrings are ready.
DIY garden crafts
1. Prepare bunches of long spruce needles and, using plasticine and toothpicks, attach them under the scales of the cone.
*If you wish, you can trim the needles a little.
2. You can make a hedgehog’s face from plasticine.
3. Using black peppercorns, make a spout.
Using an awl or nail, make holes in the acorn and insert matches, toothpicks or sticks into it.
Simply glue all pre-prepared parts with thick glue (it is better to use a glue gun).
You can turn the shells over to put something in them.
Take a closer look; in the place where the cone is attached to the spruce, there is a small tail. It is this that can be used as a beak.
The owl's eyes can be made from acorn caps, and its wings from maple noses.
The most important thing is to find a branch that has a small branch, and when cut, you will get the eyes of a dragonfly.
Step-by-step instruction
How to make a heart from an ordinary paper clip? It's simple: we need a nice wire product. It is better to use metal clips in a plastic shell for this purpose. They are bright and catchy, which means they will look impressive on white paper. It is advisable to choose a larger paper clip than a regular paper clip. But this is a matter of taste and possibility.
Let's start making it. Let's take a step-by-step look at how to make a heart out of a paper clip.
DIY crafts (photo). We print using leaves.
You can leave imprints of leaves on paper or clothing (if you use special fabric paint) and create beautiful, bright and original designs.
It may take some practice as there are several techniques for applying paint and the results will depend on the type and quality of paint and paper you use.
You can also involve children.
- brush, sponge or roller
* Try experimenting on paper first before you decide to apply designs to fabric.
Using a brush, sponge or roller, apply paint to the leaf. You can put a sheet of paper on top or vice versa, turn the sheet over and attach it to the paper. The main thing is to find the right amount of paint.
Apply some ink to the leaf and carefully place it on the paper. Cover the top of the sheet with paper and gently press to transfer the colors to the bottom paper.
* You can place a towel under the paper, which will allow you to transfer more details.
Everything about making molds for casting fishing weights yourself
Hi all! Today I want to share my ideas, best practices and experience in making lead weights for spinning fishing.
I’ll say right away: this method is only suitable for small batches and simple shapes of sinkers. For example, I would recommend making collapsible Cheburashkas using aluminum molds, which I use myself)
Before the start of the season, I decided to add “bullet” weights to my collection for the increasingly popular jig-rig.
Samples
These are ready-made sinkers, purchased or previously manufactured. Any thing can serve as a model. I made one sample from a real bullet)
The shape can be slightly adjusted with plasticine, but only a little, because... When the gypsum sets, it releases heat and a large volume of plasticine will simply melt. In this case, I took the bullets I had previously made and equipped them with wire loops, fixing it all with green plasticine.
Pros and cons of making your own sinkers
The most important advantage is the low cost of the resulting weights. It is also important that you can always cast the missing weights within 10-15 minutes if you have ready-made molds. I practice this quite often; before fishing, I quickly cast a dozen weights, if necessary.
Another plus for these homemade products is that you can choose a special shape and weight of the sinker for your fishing conditions, equip it with any accessories, “play” with the diameter and size of the loops, etc.
Also, this is a quite exciting and educational lesson in physics and chemistry for your children! Children are happy to get involved in the process, even for this alone it’s worth trying to make a mold and cast weights yourself!
Now about the disadvantages: the most important one, as I already mentioned, is the fragility of the form. You can add reinforcing additives to gypsum, such as lime and others, but this will not fundamentally change the situation.
Also, one of the disadvantages of this method is a certain amount of flash on the finished weights, this applies to collapsible forms. A mold for a “bullet” with a hole is the most successful option both in terms of durability and ease of making the mold, and in terms of casting the sinkers themselves.
I 105% recommend making a mold for bullets! I would also consider the difficulties of marking such cargo as a disadvantage. The grams have to be marked manually.
In general, making such sinkers does not require any special equipment or any special knowledge or skills, everything is extremely simple!
DIY garden crafts. Multi-colored stones.
If you have planted tomatoes, cucumbers, herbs, etc. in your garden, then for convenience you can make these beautiful stones on which you can write the name of the plant and leave the stone where this plant is located.
Use regular non-toxic acrylic paints. You can paint each stone in the colors of the plant.
For example, if you planted tomatoes, color the guide stone red, add a little green to indicate the tail and make the stone look like a tomato. In this case, the inscription need not be made.
As always, everything is quite simple and beautiful!
What you need
So, how to make a bookmark from a “heart” paper clip, and what is needed for this? You will be surprised, but for this you don’t even have to run to the nearest store and spend money. Everything you need for work is already at hand.
Surely, in every home there is a package of ordinary paper clips. These are exactly what you will need for the job. You can choose regular paper clips, or you can purchase the same office accessories in bright colors or with a pattern. Here only your imagination will limit your actions.
Progress
Let's get started and figure out how to make a heart-shaped paperclip. The method is very fast and simple. The main thing is to bend the paper clip in the right place. To begin with, we determine where the longest part of the product is located. Try to bend the paperclip in such a way that the other parts do not bend or become deformed. As a result, you should get an obtuse angle.
All that remains is to give the final shape of the heart with your fingers, and the bright, unusual bookmark for books is ready. That's all. Now you know a quick and easy way to make a heart out of a paper clip.
Lead casting: making a mold, casting weights, machine, crucible
No need to feed the fish anymore
A school of fish is around your hook within 5 minutes of throwing the Fish MegaBomb into the water. There are no analogues! 53% discount only for New Year!
For summer fishing
For winter
Read more…
The sinker is one of the consumable components of the tackle and often disappears along with the hook when biting large and strong prey. In stores, the cost of sinkers increases in direct proportion to their weight. Therefore, if catching large fish is carried out using several tackles, then purchasing sinkers becomes quite expensive.
At the same time, this element of equipment is quite simple to manufacture and practically does not require careful processing and complex preparation for use.
The material for the sinker is also quite common and accessible, so even complex sinkers can be made independently using appropriate blanks.
- Materials
- Samples
- Mold making
- Casting sinkers
- Pros and cons of making your own sinkers
Hi all! Today I want to share my ideas, best practices and experience in making lead weights for spinning fishing.
I’ll say right away: this method is only suitable for small batches and simple shapes of sinkers. For example, I would recommend making collapsible Cheburashkas using aluminum molds, which I use myself)
Before the start of the season, I decided to add weights to my collection - “bullets”, for the increasingly popular jig-rig.
Temperature and characteristics of lead melting
Lead, designated by the symbol Pb (plumbum), is one of those metals that have been known to mankind for a long time. Lead finds in the form of beads date back to 6000 BC.
In Ancient Rome, lead water pipes and dishes were made until the toxicity of lead compounds was proven. Now it is a strategic metal, it is used in the defense industry. Explosives and current sources are made from it.
Lead is inexpensive to produce and the metal is extracted from naturally occurring minerals. First, a rough alloy is obtained, then a pure one.
It is not difficult to melt lead at home; the melting point of lead and its alloys is not higher than +330–450°C, and that of solders is not higher than +230°C. The metal is not subject to corrosion damage, is ductile, malleable, and is used in many industrial fields. It is used to make household items, fishing gear, and do-it-yourself solders by filling molds with liquid lead.
How to melt lead
In factories, the following are used as melting tanks:
- special crucibles made of refractory ceramics or refractory metals; they are placed in electric furnaces that provide the necessary thermal conditions;
- heating baths, they are equipped with built-in shades, maintain the required temperature of the metal around the entire perimeter.
You can melt lead yourself at home, in the yard, garage or workshop in a tin can, it will replace the crucible. On one side of the tin a groove is made for pouring metal into the mold. The edges of the form are folded so that they are securely fixed in the clamp. Instead of tacks, it is more reliable to hold the hot container with pliers; the melting pot will not burn your hands while filling the mold.
You can use old household utensils to melt lead scrap: pots, pans, stainless or enamel kettles, or other heat-resistant cookware. The slag layer is removed with a special spoon with a long handle. This is done immediately before pouring the metal into prepared molds.
Application of metal
Lead has been known to mankind for several millennia. Even in ancient Rome, it was used to make pipes for transporting water.
There are approximately 180 minerals in nature that contain chemical element No. 82. Lead deposits are often combined with ores of copper, bismuth, zinc, and silver.
Today, the use of metal in industrial production makes it possible to produce:
battery plates;
power cable sheaths;
alloys and solders;
alloys for the manufacture of bearings;