What it is?
A screwdriver battery charger is a device that allows you to replenish battery energy lost due to the use of the tool. Due to the ability to charge the battery many times, the battery itself can have a relatively small size and capacity, as long as the number of recharge cycles is large and the charger provides a high rate of restoration of the original charge.
All chargers can be globally divided into 2 classes: built-in and remote. In the first case, there is no need to specifically remove the battery for charging - the cable with an electrical plug is attached directly to the body of the instrument (or even permanently attached to it), which is quite convenient. Remote chargers are a separate mechanism that involves removing the battery from the screwdriver body, inserting it into a special clamp, and the latter has the same cable with a plug and is plugged into a socket. Each of the solutions has its own advantages and disadvantages, but more on that later.
If the above division into classes does not fundamentally affect the operation of the mechanism, then matching the type of charger to the type of battery is critically important. The fact is that even today batteries for power tools are available in several types, each of which has its own operating characteristics. If the charger does not meet the required parameters, this can lead to very rapid battery damage. To understand what criteria a charger should have, let’s briefly consider the features of all the main types of batteries.
- Nickel-cadmium batteries are quite rare today - their popularity is falling due to many factors, including the toxicity of the contents, the ability to quickly self-discharge, high weight with a relatively low charge, and the “memory effect”. The last criterion means that the battery must always be first completely discharged and then fully charged; if this rule is not followed, its capacity, already low, will begin to decrease literally before our eyes. Perhaps the only huge advantage of this type of battery is its ability to operate normally at any low temperature. At the same time, they are also capable of withstanding high loads, which is why chargers for them are often made with the ability to charge as quickly as possible - this is very important, since you always need to charge from 0% to 100%.
- Nickel-metal hydride batteries are considered an improved version of nickel-cadmium batteries - the disadvantages are generally the same, but they are all expressed to a noticeably lesser extent. In addition, the contents of such batteries do not contain toxic components. The advantages are also very similar to those of the previous type of battery, which is why these batteries are already much more common, and the chargers for both types are very similar. The only indicator in which metal hydride power supplies are worse than cadmium ones is cost.
- Lithium-ion batteries are rightly considered the most modern and technically the best. They are devoid of most of the disadvantages of the batteries described above, for example, they weigh little with a significant amount of charge, self-discharge by a few percent per month of inactivity, and are completely devoid of the “memory effect”. For a long time they were criticized for a somewhat accelerated discharge when working in frosty conditions, but in recent years this problem has been gradually solved. True, there are still disadvantages, and the highest cost is far from the only one. So, it is extremely undesirable to completely discharge such a battery - after this it may not restore its original capacity, although the advantage is that it can be recharged at any time due to the absence of a “memory effect”. Another problem is the possibility of a battery exploding when overheated from overcharging, so the charger for such a battery must be equipped with a microcontroller.
Among other things, chargers can differ in voltage - 12, 14.4 or 18 volts (this indicator must correspond to that recommended in the instructions for the screwdriver). Additional options include a special option for accelerated charging, as well as an indication of the charge level and automatic shutdown in case of a full charge or some unforeseen situation. The presence of additional functions negatively affects the cost of the charger.
Principle of operation
The charger should not be perceived as a simple cable that allows you to power the battery from an electrical outlet - this device is always somewhat more complicated. Depending on the exact set of functions of a particular instance, it may be structured differently, however, in general, the methods for achieving the goal are always approximately the same. Since it is impossible to charge a screwdriver battery directly from a 220 V outlet, the key part of any charger is a step-down transformer, which provides a significant reduction in voltage. He himself, as a rule, does not lower the voltage to the required value - the current acquires the necessary characteristics only later, passing through diode bridges and microcircuits.
To prevent the entire contents of the charger, not to mention the battery or the screwdriver as a whole, from burning out due to too high voltage in the power supply network, a fuse is installed at the very beginning of the circuit. Charge limitation is usually achieved in one of the two most common ways - either the microcontroller measures the current in the battery, or the charging time is limited by a timer.
The first option is good in the case of lithium-ion batteries, since they can be charged at any time, which means that the exact charging time cannot be determined. In this case, overcharging threatens to explode, so it is very important that the microcontroller is able to determine the charge level and turn off the power supply in time. The timer is good for recharging different types of nickel batteries - they are not afraid of overcharging, and they must be completely discharged before the procedure, so the charging time is always approximately the same.
For increased ease of use, some expensive charger models are also equipped with indicators, which are usually ordinary LEDs. Often they perform different functions - one can demonstrate the fact that the device is connected to the network, another shows that the current is not lost anywhere in the microcircuits and flows into the battery, others can even indicate the approximate charge level, highlighting only a certain part of the line in which they are lined up.
How to make a charger for a screwdriver?
Often the original charger included with the screwdriver works slowly, taking a long time to charge the battery. For those who intensively use a screwdriver, this greatly interferes with their work. Despite the fact that the kit usually includes two batteries (one installed in the tool handle and in use, and the other connected to the charger and in the process of charging), owners often cannot adapt to the operating cycle of the batteries. Then it makes sense to make a charger yourself and charging will become more convenient.
Types of batteries
Batteries are of different types and their charging modes may be different. Nickel-cadmium (Ni-Cd) batteries are a very good source of energy and are capable of delivering high power. However, for environmental reasons their production has ceased and they will become less and less common. Now they have been replaced everywhere by lithium-ion batteries.
Sulfuric acid (Pb) lead gel batteries have good characteristics, but they make the tool heavier and therefore are not very popular, despite their relative cheapness. Since they are gel (the sulfuric acid solution is thickened with sodium silicate), there are no plugs in them, the electrolyte does not leak out of them, and they can be used in any position. (By the way, nickel-cadmium batteries for screwdrivers also belong to the gel class.)
Lithium-ion batteries (Li-ion) are now the most promising and promoted in technology and on the market. Their feature is the complete sealing of the cell. They have a very high power density, are safe to use (thanks to the built-in charge controller!), can be disposed of favorably, are the most environmentally friendly, and are lightweight. They are currently used very often in screwdrivers.
Charge modes
The nominal voltage of the Ni-Cd cell is 1.2 V. The nickel-cadmium battery is charged with a current of 0.1 to 1.0 rated capacity. This means that a battery with a capacity of 5 ampere hours can be charged with a current of 0.5 to 5 A.
The charge of sulfuric acid batteries is well known to all people who hold a screwdriver in their hands, because almost all of them are also car enthusiasts. The nominal voltage of a Pb-PbO2 cell is 2.0 V, and the charging current of a lead sulfuric acid battery is always 0.1 C (a fraction of the current of the nominal capacity, see above).
The lithium-ion cell has a nominal voltage of 3.3 V. The charging current of a lithium-ion battery is 0.1 C. At room temperature, this current can be gradually increased to 1.0 C - this is a fast charge. However, this is only suitable for batteries that have not been over-discharged. When charging lithium-ion batteries, the voltage must be strictly observed. The charge is made up to 4.2 V exactly. Exceeding it sharply reduces service life, lowering it reduces capacity. When charging, monitor the temperature. A warm battery should either be limited by current to 0.1 C, or disconnected until it cools down.
ATTENTION! If a lithium-ion battery overheats when charging above 60 degrees Celsius, it may explode and catch fire! Do not rely too much on the built-in safety electronics (charge controller).
When charging a lithium battery, the control voltage (end of charge voltage) forms an approximate series (the exact voltages depend on the specific technology and are indicated in the battery passport and on its case):
| Number of elements | Denomination eg, B | According to the passport, B | End of charge, V |
| 1 | 3.6 | 3.6 | 4.2 |
| 2 | 7.2 | 7 | 8.4 |
| 3 | 10.8 | 10 | 12.6 |
| 4 | 14.4 | 12 | 16.8 |
| 5 | 18 | 18 | 21.0 |
The charging voltage should be monitored with a multimeter or a circuit with a voltage comparator tuned exactly to the battery used. But for “entry-level electronics engineers,” only a simple and reliable circuit, described in the next section, can really be offered.
Charger + (Video)
The charger offered below provides the required charging current for any of the listed batteries. Screwdrivers are powered by batteries with different voltages of 12 volts or 18 volts. It doesn’t matter, the main parameter of a battery charger is the charge current. The voltage of the charger when the load is disconnected is always higher than the rated voltage; it drops to normal when the battery is connected during charging. During the charging process, it corresponds to the current state of the battery and is usually slightly higher than the nominal value at the end of charging.
The charger is a current generator using a powerful composite transistor VT2, which is powered by a rectifier bridge connected to a step-down transformer with sufficient output voltage (see table in the previous section).
This transformer must also have sufficient power to provide the required current during long-term operation without overheating the windings. Otherwise it may burn. The charge current is set by adjusting resistor R1 when the battery is connected. It remains constant during the charging process (the more constant the higher the voltage from the transformer. Note: the voltage from the transformer should not exceed 27 V).
Resistor R3 (at least 2 W 1 Ohm) limits the maximum current, and LED VD6 lights up while charging is in progress. Towards the end of the charge, the LED glow decreases and goes out. However, do not forget about precise control of lithium-ion battery voltage and temperature!
All parts in the described circuit are mounted on a printed circuit board made of foil PCB. Instead of the diodes indicated in the diagram, you can take Russian diodes KD202 or D242, they are quite available in old electronic scrap. The parts must be arranged so that there are as few intersections as possible on the board, ideally none. You should not get carried away with high installation density, because you are not assembling a smartphone. It will be much easier for you to solder the parts if there is 3-5 mm between them.
The transistor must be installed on a heat sink of sufficient area (20-50 cm2). It is best to mount all parts of the charger in a convenient homemade case. This will be the most practical solution; nothing will interfere with your work. But here there can be great difficulties with the terminals and connection to the battery. Therefore, it is better to do this: take an old or faulty charger from a friend that is suitable for your battery model, and remake it.
- Open the casing of the old charger.
- Remove all former filling from it.
- Select the following radioelements:
| Pos. | Description |
| VD1-VD4 | 1N4001 rectifier diode |
| VD5 | diode |
| VD6 | VD6 LED, red or green, any type |
| C1 | C1 K50-35 or similar 220-1000 mF from 50 V |
| C2 | C1 K50-35 or similar 220-1000 mF from 50 V |
| R1 | variable resistor 10 kohm, preferably wirewound |
| R2 | resistor MLT-0.25 330 Ohm |
| R3 | resistor MLT-2, 1 Ohm |
| VT1 | transistor KT361V, G |
| VT2 | transistor KT829V (installed on a radiator with an area of 20 - 50 sq. cm |
| T1 | Power transformer 220 V / 24 V, power 100 W |
- Select the appropriate size for the printed circuit board that fits in the case along with the parts from the diagram above, draw its tracks using nitro paint according to the circuit diagram, etch it in copper sulfate and solder all the parts. The heatsink for the transistor must be mounted on an aluminum plate so that it does not touch any part of the circuit. The transistor itself is tightly screwed to it with a screw and an M3 nut.
- Assemble the board in the case and solder the terminals according to the diagram, strictly observing the polarity. Output the wire for the transformer.
- Install a transformer with a 0.5 A fuse in a small suitable housing and provide it with a separate connector for connecting a converted charging unit. It is best to take connectors from computer power supplies, install the male in a case with a transformer, and connect the female to the bridge diodes in the charger.
The assembled device will work reliably if you carefully and thoroughly
instrument-blog.ru
Block diagram of a screwdriver
Screwdrivers from different manufacturers are built on different element bases, but the structural electrical circuit for all is approximately the same. The power tool consists of:
- removable battery;
- control boards;
- trigger switch combined with speed controller;
- frequency control range switch (may be missing);
- electric motor (commutator or brushless).
When making your own power source for a screwdriver, you need to pay attention to two parameters:
- voltage;
- rated output current.
With voltage, everything is simple - the new power source must have an output voltage equal to the rated supply voltage of the power tool. A decrease leads to a loss of torque, an increase leads to a decrease in resource. Operation of the control board at low voltage is not guaranteed; at high voltage, it is likely to fail.
The required operating current is more difficult to determine. Manufacturers of power tools rarely indicate current consumption. A little more often they indicate power in watts. But on the nameplates of screwdrivers you can find the following data:
- operating voltage (in volts);
- rotation speed (in revolutions per minute);
- torque (in newtons per meter).
These data seem sufficient to calculate the operating current.
Label with electrical characteristics of the DEKO DKCD20FU screwdriver.
In fact, not everything is so rosy. If you use data from a real screwdriver and try to calculate the rated current, you will get an absurd result.
First, the output power is calculated using the formula:
P=T*RPM/9550, where:
- P – power, kW;
- T – torque, N/m;
- RPM – rotation speed, rpm;
- 9550 is a coefficient that combines the conversion from one unit to another.
For the given data it turns out:
P=42*1350/9550=5.9 kW.
This developed power must be divided by the efficiency (approximately equal to 0.8), resulting in a power consumption of about 7 kW. At a voltage of 20 volts, the batteries must deliver a current of 350 A!!! With a capacity of 2 Ah, the battery will be discharged in 20 seconds (even if theoretically the battery provides such a current). This is the promised absurdity. The reason for this may be crafty declarations of revolutions or torque. Perhaps the greatest torque is produced only at a certain speed, but even if you know it, there will be little practical sense. After all, a screwdriver operates at different frequencies.
Therefore, you need to focus on the following figures obtained experimentally:
- idle speed – 1..2 amperes;
- average load – 4..6 A;
- maximum load – 8..11 A;
- current surges during full braking – up to 30 A.
You can clarify these figures for a specific screwdriver by measuring the actual current consumption in different modes, putting together a simple circuit for this, and driving the power tool under different loads.
Circuit for measuring current consumption.
Or you can not specify, but focus on the numbers indicated above. A power supply will be needed for a maximum current of 10 A (but not less than 5..6), preferably with overcurrent protection.
Operating principle of the charger
If a memory device fails, it makes sense to first try to restore it. To carry out repairs, it is advisable to have a charger circuit and a multimeter. The circuitry of many charging devices is based on the HCF4060BE microcircuit. Its switching circuit forms the delay of the charging time interval. It includes a crystal oscillator circuit and a 14-bit binary counter, making it easy to implement a timer.
The operating principle of the charger circuit is easier to understand using a real example. This is what it looks like in an Interskol screwdriver:
This circuit is designed to charge 14.4-volt batteries. It has an LED indication showing the connection to the network, LED2 is lit, and the charging process, LED1 is lit. The U1 HCF4060BE chip or its analogs: TC4060, CD4060 are used as a counter. The rectifier is assembled on power diodes VD1-VD4 type 1N5408. PNP transistor type Q1 operates in key mode; the control contacts of relay S3-12A are connected to its outputs. The operation of the key is controlled by controller U1.
What is needed for remodeling
To remake a screwdriver, you need to briefly familiarize yourself with the electrical diagram of the tool. The tool is driven by an electric motor. Depending on the power and class of the tool, the voltage can be 12, 14, 18 volts. The electric motor receives power from a battery of batteries of the appropriate voltage.
The engine transmits torque to the cartridge through a mechanical gearbox. Engine speed is changed both by the gear reduction system and by a reversible electronic speed controller combined with a power button.
Screwdriver device:
- Accumulator battery.
- Speed regulator.
- Power button.
- Electric motor.
- Gearbox.
- Cartridge.
The main difficulty in converting a screwdriver to operate on a 220-volt network is that it requires more power. Nickel-cadmium or lithium batteries provide it without problems. But not every power supply can produce the required power.
How much power does the power supply need and how much does the screwdriver consume from the power supply?
Calculating the required power of the power supply is not difficult - you need to multiply the current consumed by the electric motor of the tool by the voltage. For example, the tool is powered by a battery with a voltage of 12 volts. The current that the electric motor needs to operate is 10 amperes. We get 120 watts. But this is the minimum value.
To ensure normal operation under loads, for example, when driving a screw into hard wood, the power supply must be selected with a margin of 30-40%. Otherwise, the screwdriver will not be able to work normally under load or the power supply will fail.
The current strength, depending on the model, can be 7-10 A for household screwdrivers and 30-40 A for professional models. The battery voltage can be 12 V, 14 V, 18 V depending on the specific model.
Important! The current required by a screwdriver to operate depends on the load. At idle, the current is minimal and increases significantly during startup or when tightening a screw.
The required voltage, power and battery capacity parameters are usually indicated on the label of the tool itself or in the technical documentation for it.
If the operating voltage of the instrument is 12 V, the number of options for choosing a power source increases, for example, you can connect it to a computer power supply. It is quite possible to purchase an old one with a power of 300 W for a low price. In addition, the output power is sufficient with reserve. The advantages of this option include: ease of modification, as well as the fact that a computer power supply with a power of 300 W or more is relatively easy to find.
The block parameters are indicated on a sticker located on the wall. For example, it states that a voltage of 220 v is supplied to the input, a current of 25 A is supplied to the output of 12 v. We get a power of 300 W.
If desired, you can use the following as a 12 V power source from the mains:
- LED driver;
- electronic transformer for powering low voltage halogen lamps;
- car battery charger.
If the instrument is designed to be powered at a different voltage, say 14 V or 18 V, there are few options for choosing a power supply. For a tool operating on a voltage of 14 V and having a maximum current of up to 25A, a universal power supply unit AIDA BSh 14 PRO is available for sale. There is also an 18 V power supply, designed for current up to 20 A, AIDA BSh-18 PRO.
It is not recommended to consider using the original included charger or power supplies for laptops. Such power supplies are not able to supply the current required for normal operation of the tool.
You can make your own power supply for the required voltage. But this requires certain knowledge of electronics. A diagram of such a power supply can be viewed here. There are power supply circuits that can be mounted instead of batteries.
When connecting power from the charger to the screwdriver, you must use a wire with a cross-section larger than 2.5 mm². Otherwise, the wire will become very hot, which can lead to melting of the insulation and a short circuit.
The level of voltage loss also depends on the length of the wire. The longer the wire, the correspondingly greater the losses. If you choose the wrong wire length, it may turn out that the screwdriver “does not pull”, it cannot be used to tighten a screw into hard wood, etc.
The quality of the wire connection also affects the voltage loss. Wires connected by twisting will have a high transition resistance, which will significantly affect voltage losses.
Important! Do not connect the screwdriver to the power source with a wire having a small cross-sectional area. This threatens failure of the tool itself and a fire.
Benefits of cordless tools
The main advantage of power tools in this category is autonomy. The built-in rechargeable battery ensures the functionality of the equipment without connecting to a stationary power supply of 220 or 380V. This feature is used to carry out repairs in new buildings, in “camping” and other difficult conditions.
Other benefits:
- Without the interfering power supply cable, it is easier to carry out individual operations;
- Low battery voltage reduces the risk of electric shock;
- This tool is much quieter compared to an alternative autonomy solution based on a gasoline generator.
For your information. To be fair, it should be noted that adding a battery adds weight, cost and complexity.
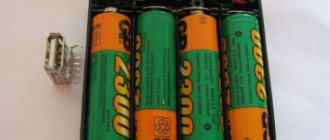
DIY screwdriver charger
The problem of making a charger yourself does not arise very often, due to the large number of options suitable for almost all models of screwdrivers. It’s just that sometimes situations arise when the charger is missing, or it suddenly fails, and there is no way to purchase a new one. In this case, you can try to make a charger yourself.
You should first stock up on all the necessary materials. You will need a non-working battery, a battery cup, a soldering iron, a hot-melt gun, a regular Phillips screwdriver, a drill and a sharp knife with replaceable blades. After this, you can begin making the charger. First of all, the charging cup is opened, after which all conductors are unsoldered from the terminals. Next, the internal electronics are removed. When performing this operation, the polarity of the terminals must be observed to avoid confusion and errors in the future.
The case of a non-working battery must be opened and the wires carefully unsoldered from the terminals. For further work you will need a connector and a top cover. Plus and minus on the terminals are marked with a pencil or marker. At the base of the charging cup, holes are marked through which the prepared lid and the terminals of the supply wires will be attached. The conductors are carefully passed through the holes, observing polarity, after which they are connected to the terminals and connectors by soldering.
Next, the body needs to be fastened with special hot-melt adhesive; the bottom cover is attached to the base of the glass using self-tapping screws. The resulting structure must be inserted into the battery and the charging process begins. A flashing indicator will indicate that the device is assembled correctly. Only a few chargers are equipped with so-called smart systems that significantly extend the battery life. An 18-volt screwdriver charger can solve this problem.
A voltage stabilization system and charging current limitation are added to the design of conventional charging. The result is a nickel-cadmium battery design with a capacity of 1200 mAh. Charging will be performed in a safe mode, with a maximum current of no higher than 120 mA, but it will take more time than usual.
A screwdriver is a tool that almost every home craftsman has. Like other electrical devices, it requires connection to the network or accumulates charge. The last option is the most common. To recharge the removable battery, you need a charger. Usually it is included in the set. However, like any other device, a screwdriver charger is not immune to damage. To restore the functionality of the tool, you will have to purchase a replacement or make it yourself.
There are many chargers available to suit specific brands and models of tools. All of them can be divided into main types.
Analog with built-in power supply
Analog ones with a built-in power supply are quite in demand. This is due to its low cost. Usually they do not belong to professional equipment, they quickly break down and “do not grab stars from the sky.” The minimum task that their manufacturers usually set is to obtain the constant voltage and current load required for operation.
The devices operate on the principle of a stabilizer. You can do it yourself using the diagram provided. To work you need to remember:
- The voltage at the output of the charging unit is greater than the battery rating.
- Any type of battery is suitable.
- You can use a regular circuit board.
- Such stabilizers use a compensation principle: unnecessary energy is removed and heat is removed. To dissipate it, you can take, for example, a copper radiator. Area - 20 cm².
- The input transformer (Tr1) changes the voltage from 220 to 20 V. Its power is determined by the current and voltage at the output.
- The current is rectified by a diode bridge (VD1).
- You can borrow the manufacturers' solution: an assembly of Schottky diodes.
- After rectification, the current is pulsating, which is harmful. For smoothing, an electrolytic capacitor (C1) is needed.
- KR142EN is used as a stabilizer. For 12 V its index is 8B.
- Control is based on a transistor (VT2) and resistors (tuning).
- Automatic shutdown after charging is usually not provided. You will have to determine the required time yourself. Alternatively, you can use a circuit that includes a diode (VD2) and a transistor (VT1). After charging, the LED (HL1) goes out. There are also more serious options with a switch and an electronic key that turn off automatically.
If the tool is a budget one, the circuit of its “native” charger may be simpler. It is not surprising that such products quickly fail. Sometimes a relatively new screwdriver is left without charging. Using the scheme discussed above, you can approach the issue responsibly and the device will most likely last longer than the purchased one. A suitable transformer and stabilizer are determined individually for a specific screwdriver.
Analog chargers with external power supply
Analog with an external unit, as the name suggests, consists of:
- from the network block;
- charger
The block is normal, includes:
- transformer;
- diode bridge;
- rectifier;
- capacitor filter.
Factory assemblies usually do not have a heat sink. Its role can be played by a high-power resistor. One of the typical causes of breakdowns is due to thermal conditions.
To correct the situation, you first need to find out whether the power source is working. If it functions, it is supplemented with a control circuit; if not, another one is sought. It is quite suitable, for example, from a laptop. It has 18 V output, which is quite enough. The remaining parts are usually not difficult to find. They cost very little and can be borrowed from other equipment.
The control unit diagram is shown below. The transistor KT817 is used, for amplification - KT818. Need a radiator. Approximate area: 30−40 cm². Up to 10 W will be dissipated here
Many Chinese manufacturers are trying to save on literally every little thing. This should be avoided if you need more or less decent quality. The homemade circuit has a 1 kOhm trimmer. It is needed to accurately set the current. At the output there is a 4.7 Ohm resistor. It dissipates heat. The LED will notify you when charging is complete
The resulting control board is about the size of a matchbox. It will fit quite well in the factory box. There is no need to take the radiator outside for the transistor. Enough air movement inside the housing
Charge modes
Nickel-cadmium (sulfuric acid) cells are charged with a voltage of 1.2 (1.8-2) V, respectively, while maintaining a current of (0.1-0.15) * C. In lithium-ion models, the voltage is increased to 3.3 V A standard 18 volt screwdriver charger maintains the same level during charging. The end of the operation is controlled at level 21 V.
Important! Lithium cells are especially sensitive to overheating. A temperature increase of more than +60°C can cause not only structural destruction, but also fire
To eliminate dangerous situations, this parameter is carefully monitored.
Tags: machine, ampere, beat, sconce, type, harm, generator, , capacity, clamp, like, capacitor, , installation, power, multimeter, voltage, nominal, limiter, connection, polarity, potential, wire, project, manufacturer , start, , work, size, resistor, relay, repair, row, light, LED, network, connection, resistance, term, stabilizer, zener diode, circuit, ten, type, current, transistor, transformer, , shield, power tool, effect
Features of proper storage to increase service life
Knowing how corded and cordless screwdrivers work, it remains to figure out how to care for them in order to extend their service life. Everything is as simple as the principle of operation of a screwdriver. When storing, the following recommendations are taken into account:
- Prevent water from entering the instrument
- Do not miss or drop the device, as in addition to damaging the housing, internal devices may fail.
- Ensure that the chuck is regularly lubricated to increase its service life
- If various contaminants get inside, then before using the device again, you should disassemble and clean it.
- Do not store the tool with completely discharged batteries.
- The device should be stored and operated in a temperature range not lower than -5 and not higher than +30 degrees
- Cool the bit when drilling
Only by following all of the above recommendations can you ensure long-term use of the tool without breakdowns. The service life of the device also depends on the quality, since a cheap Chinese screwdriver cannot serve for a long time a priori, because only low-quality components are used in its production.
To summarize, it is worth noting that not only the master whose work is related to the operation of the device, but also beginners who use the tool for the first time should know how a screwdriver works. This will extend the life of the screwdriver, and will also eliminate the need to take the device to a service center if malfunctions occur.
How to connect a screwdriver directly to a laptop charger
This method requires minimal technical knowledge from you. If there is a need to convert a screwdriver into a network one, an unnecessary laptop charger can help you, since it has similar characteristics and can easily be found in any home. First you need to look at the output voltage of the charger. 12-19V chargers are suitable.
It is important to check the voltage and current of the charger
The battery pack will need to be modified; to do this, you need to disassemble it and remove the failed batteries.
- Take a laptop charger.
- Cut off the connector and strip the wires of insulation.
- Take the bare wires and solder them. If this is not possible, tape them with electrical tape.
- Make a hole in the body for the wire and assemble the structure.