A plumb line is used to determine the evenness or presence of deviations in a vertical plane (wall, cabinet, picture, etc.).
When carrying out any construction activities, it is important to clearly carry out all measurements, the correct location of the various elements and their relationship to each other.
And to ensure that all measurements are carried out correctly, there are many special devices that greatly simplify such manipulations.
One of these tools is a plumb line.
Simple plumb line: device
The principle of its operation is simply simple. The load provides the necessary gravity; during operation, the lace is tensioned, accurately determining the vertical direction. Established standards are used in production.
What is included with the device? It consists of a head, body, insert, strip and cord. Durable steel is suitable for the body and head; polyamide can be used for the insert. Planks are made from sheets of aluminum grades AD-1 or AD, the thickness of which should be no more than two millimeters (other types of non-ferrous metal can be used).
To ensure more precise work, sharp edges must be dulled. The cord used is chlorine or nylon fibers twisted into a rope. You can replace them with other materials that have adequate strength and reliability. It’s easy to make such a device yourself; you can use suitable materials at hand.
Peculiarities
Along with the construction bubble level, the plumb line is one of the devices without which almost all basic construction work cannot be done. List of some operations:
- checking the straightness and verticality of the walls;
- control of the correct assembly of furniture and household appliances;
- checking the evenness of the brickwork.
A weight suspended on a thread is applied in turn from both sides, checking the distance to the cord along its entire length. It should be identical everywhere. Distance control is performed at several different points. The verticality of surfaces constructed from logs or timber is checked using the same principle. If non-cylindrical elements are used, it is necessary to take into account the difference between the sizes of the crowns.
Despite all the practicality and simplicity of the device, it has a significant drawback. Since construction operations are often carried out outdoors, gusts of wind do not allow fixing the device. The problem can be solved very simply by first lowering the load into a container of water. A slight wind in this case will not be a particular hindrance.
Device and characteristics
The design of a conventional plumb line consists of a weight, which has the shape of a cylinder with a pointed end (visually the object resembles an oblong bullet) and a cord attached to the center of the base of the weight.
Using this device, you can quickly check the verticality of various surfaces or buildings, and, if necessary, mark vertical lines on a wall or other covering.
The price of plumb lines is more than acceptable.
You can buy such a product for an average of 100 rubles.
But it is worth considering that more modern models equipped with additional functions will differ significantly from the declared cost.
Principle of operation
The principle of operation of a laser level is that a projection is created on the required object or group of objects. The role of the laser beam is played by an LED emitting a luminous flux. Special prisms and lenses make the beam bright and directional. Such equipment is simply irreplaceable when carrying out finishing and construction work both indoors and outdoors.
A homemade laser level is an excellent alternative to an expensive laser level. Manufacturers supply mainly 2 types of levels: static and rotary. The main difference between them is that the rotary one is equipped with an electric motor, through which the laser rotates, and a focusing lens, while the static one consists of a prism onto which the rays are projected.
The diagram above shows how the level works. The operating principle of the device is actually not complicated, but accuracy is very important. The high cost of such instruments is due to the high cost of components that are used for the production of levels. If you need a laser level to use at home, you can make it yourself.
How to make a laser level with your own hands
The easiest way to make a level is to use a laser pointer. The costs of manufacturing such a device will be insignificant, since you only need to buy a laser pointer and make all the other parts yourself.
When starting to make a level from a pointer, it is necessary, first of all, to ensure reliable fastening of the element, which at the same time could rotate around its axis. To make a homemade device, you will need a list of the following materials, tools and parts:
Let's start making a laser level from a pointer:
An important rule when using a homemade level is reliable fixation of the support. After manufacturing such a device, it should be checked for quality of operation. It is recommended to carry out the check in the evening so that the point can be clearly seen. Initially, you should hang the instrument by a cord in the center of the room. After this, the level should be turned in the desired direction, and then a mark should be made on the wall. Such a self-leveling level can be directed in any direction where marks are needed, and then begin work.
The second option for manufacturing a laser level involves using foam plastic and a container of water. Initially, you need to take a small container, as well as a piece of plasticine or tape. You will also need a laser pointer and a piece of foam.
The manufacturing process is as follows:
It is quite difficult to call such a design ideal, but, nevertheless, this level will have a high degree of marking clarity.
Testing a homemade laser level
Now you can resort to testing your homemade device. To do this, you will need to secure the product with a pointed stick. Use a bubble level to level the surface horizontally.
After turning on the laser pointer, it should be aimed at the surface. After projecting the first point, you need to make a mark. By rotating the homemade device, marks should be made. All the resulting points are connected using a metal profile and a pencil.
Pros and cons of homemade levels
Once the laser level is ready with your own hands, you should not expect it to perform any complex tasks. This unit is intended for one-time work, so if your type of activity is related to construction, then it is better to purchase a professional tool. The advantages of a homemade device include:
The disadvantage is the fact that this is a homemade tool, so you shouldn’t expect high precision and complex work from it. With a little ingenuity, you can make a level with your own hands, without resorting to purchasing expensive factory models.
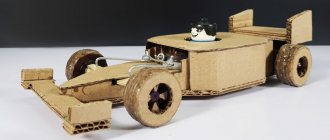
Construction plumb line with cord
A plumb line with a cord is a small metal weight on a long rope. This device comes with an additional fastener for tight fixation on a hard surface. This tool is designed to determine the vertical plane of walls and any buildings.
Thanks to this device, it is possible to make an even vertical or horizontal line in relation to the ceiling. It is often used in the initial stages of construction of a residential building. It ensures even laying of the building material.
The product has a low cost, which makes it accessible to every consumer. You can make such a device yourself using available materials.
The photo of a construction plumb line shows a modern model of the tool.
Set of tools for gluing
So what you might need:
1. Hand tools:
- construction bucket for glue (10-12 l);
- rectangular tray for a small amount of glue;
- low stepladder;
- a wide flat brush for the edges and a round one for the main canvas, where a roller cannot be used;
- tape measure (5 m) for measuring and cutting wallpaper, measuring the length of walls, ceiling height;
- a square and a protractor for the correct design of angles;
- plumb line and construction level for gluing the first strip and checking verticality after passing the corners;
- wallpaper knife with replaceable blades for cutting strips;
- scissors for cutting or making a figured cutout in the wallpaper;
- pencil for marking walls;
- a screwdriver for unscrewing sockets and switches;
- metal spatula;
- fur roller with medium length pile;
- pressure roller for joints;
- large rubber roller for smoothing wallpaper;
- plastic spatula for final smoothing;
- wide metal spatula for even cuts when removing unnecessary parts of the canvas;
- hammer with nail puller;
- pliers;
- sponge for removing excess glue;
- masking tape to protect the ceiling and floor coverings.
2. Electrical tools:
- a drill with a mixer attachment for mixing glue or putty;
- hammer drill for installing skirting boards.
In the video you can see in detail the set of tools for wallpapering:
History[ | ]
The use of a plumb line, it must be assumed, originated in Egypt during the construction of buildings. Plumb lines dating back to the end of the Third Dynasty have been found[1]. The Egyptians invented a tool resembling the letter E, from which a plumb line was suspended from the upper outer part of the E. Testing the verticality of the surface is achieved by applying a plumb line to it. The position of the surface is vertical if the thread touches the lower protrusion of the plumb line, while remaining level. Oddly enough, this useful tool appears to have been forgotten for many centuries and has only reappeared in modern times.[2]
In conclusion
Despite the development of progress, homemade or classic plumb lines remain the most popular representatives in their category. They are distinguished by their simplicity of design. With a little experience and skill, it can be used to obtain accurate readings without spending a lot of labor and money. But it is not recommended for beginners to use such a device without the supervision of a specialist, since there is a high probability of errors occurring. This is especially true when constructing large-scale structures.
The second most popular device for measuring the vertical position of a surface is laser modifications. What a plumb line is in this design is discussed above. From the above, the conclusion suggests itself that its relevance is due to its simple operating principle.
Despite all the advantages, not everyone is willing to pay the price that similar versions have. It is worth noting that the error of these devices is only 0.4 mm, and they are produced by well-known brands, including Bosch, Spectra, Dewalt, and Ebon. In conclusion, a few words about electronic applications: they are easy to use, but not all specialists are inclined to trust them.
Where is it used?
A plumb line is an indispensable thing during construction. The scope of application of the device is very wide. It is needed for the following construction processes:
- control of surface evenness;
- installation of a plaster beacon;
- drawing vertical lines;
- installation of door and window openings;
- installation of roof rafters;
- placement of formwork.
If there is a need to adjust vertical surfaces, then it is necessary to use a plumb line. It should be noted that excavation work is accompanied by the use of a plumb line. This device helps determine the evenness of the walls of trenches and pits. Masons also use a plumb line when performing their work.
If you are engaged in repairs and plan to hang wallpaper, it is the cord plumb line that will ensure even and high-quality gluing of the material.
Kinds
The modern market is overflowing with various types of construction plumbs. You can choose exactly the one that is suitable for a certain type of work. Such instruments are divided into the following types.
- Classic. The constituent elements of this type of plumb line are a metal boning and a cord. A representative of this class is a magnetic plumb line. It is characterized by the presence of a built-in magnet. This feature makes it possible to attach the device to a metal surface. The device can also be used when working with wooden surfaces - there is a special needle that is used as a fastening element.
- Laser. This plumb line is often used in the construction process. The device is characterized by its small dimensions and the ability to operate on both battery and battery power. When turned on, the device directs laser beams to the desired surface. To determine the discrepancies, you just need to look at the screen where all the indicators are visible. Today this device is very popular. This is due to ease of use and functionality.
There are models of laser plumb line that record and display not only vertical indicators, but also horizontal ones and even angular deviations. Of course, they are more expensive than standard ones.
- Electronic. This is not the name of a device, but an application for a mobile phone. Its installation is possible if the phone is based on Android OS. This application is becoming more and more popular every day, because it is very convenient to use - it is always at hand. All you need to do is install the gadget on the surface under study. The application will independently determine all deviations and show them on the smartphone display.
I would also like to highlight homemade plumb lines with a cord, which are the simplest design. The structural components are, for example, a heavy nut or bolt and a thread of the length you need. Such a device can be made independently if necessary.
Electronic type of device
Electronic models are still rarely found in separate form. They can often be found as an attachment to smartphones (such as iPhones) or other electronic devices. But for specialists and craftsmen this is a good helper. The name of one such application, translated into Russian, means nothing more than “carpenter with hands.” It will not replace a real tool, but it will help with some work. With it you can always check the evenness of the walls when finishing, or check how a pillar or rack stands. This device does not take up much space and is always at hand.
But it’s not at all difficult to understand how to correctly use a plumb line when laying, especially since gadgets have long been helping us in many matters. There is a virtual weight on a cord on the screen; it points with a shadow at the coordinates of the virtual system. To make the readings more accurate, there is a special “top view” diagram in the right corner, and there a red dot marks the deviation from the vertical axis. The deviation can be seen in degrees, both horizontally and vertically, that is, along the X- and Y-planes. Using the control buttons, you can fix all the indicators, and after the work done, return them to their original position.
Often there is a bubble instead of a weight; it also shows the level of deflection of a wall or other surface.
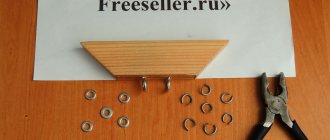
How to make a plumb line with your own hands
The key is to find or make a weight that is well centered. Then you need a short bolt of decent diameter (now you’ll understand why). Exactly in the middle of the bolt - through the head, along the rod - drill a hole.
Now a hole is drilled in the body of the load to the size of the bolt and the corresponding thread is cut. A thin, strong cord is threaded into the bolt from the side of the cap. At the exit of the bolt, it is tied into a knot so that it does not jump out. The bolt with the cord is screwed into the prepared hole. That's it, your construction plumb line is made with your own hands.
The second option for attaching the thread is this: make a through hole exactly in the middle of the weight and pass the cord through it, only the loop needs to be made long, and the diameter of the hole should be much larger than the diameter of the cord. All this together will allow the load to take a strictly vertical position.
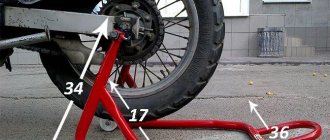
Magnet: to align vertically on a construction site
There are different types of such tools, the most popular ones are corded and magnetic plumb bob. Recently, such devices as specialized construction devices, electronic devices, painting devices, laser devices, and cone devices have also been encountered. Construction models can be considered simple and at the same time reliable measuring instruments. More often they are a metal cylinder with a steel cone at the end, and the whole thing is suspended on a strong cord.
The upper part of the metal cylinder has a threaded hole and a bolt is screwed into it. A cord is inserted into the hole itself through the bolt, but a knot is made on the side of the head for strength. The bolt is screwed into the base itself or into the body, and a rope is also threaded there. The most important thing in this design is that the top is located along the axis of the cylinder; this is calibrated at the manufacturer, although it would be a good idea to check this before use. Sometimes the device is made entirely in the form of a cone, then they say that the plumb line is conical, although its shape does not affect the operation.
Construction plumb line with cord - how to use?
Using a plumb line, check the degree of verticality of sides, walls and surfaces. To carry out measurements, it must be fixed at the highest point of the object or plane being measured.
Some model variants are equipped with a washer whose diameter is equal to that of the cylinder. There is a washer at one end of the device and a weight at the other.
By applying a washer to the plane and waiting until the weight stops oscillating, you can see the difference between the plane being tested and the vertical thread.
The shadow of the thread is also located vertically, so you can also navigate by it.
Some models are not equipped with a washer; in them, the cord is simply wound on a special piece of plastic, on which markings can be applied.
There are tools in which the cord is hidden in a plastic case, like a tape measure. The body in them can be used as a support for the cord.
For some types of work (for example, when plastering), the plumb line should be in front of your eyes at all times - this makes it more convenient to level the surface.
In such cases, a special fastener is arranged for it, the role of which can be played by a hammered nail or self-tapping screw. A cord is attached to it, and the weight is lowered down in an ideal vertical. Having this standard in front of your eyes, you can constantly monitor the evenness of the surface.
This is how they check the evenness and verticality of the walls, the correct assembly of furniture and the installation of household appliances. When bricklaying work is carried out, a plumb line is necessary to check the wall to see if it has fallen off. It is applied alternately on both sides, checking the entire distance from the surface to the cord. It must be strictly the same. Control must be carried out at several different points.
The quality of construction (verticality) of walls made of timber and logs is controlled in a similar way. However, in cases of using non-rounded logs, the control process is complicated by the difference in the size of the crowns. But you can notice a deviation in such a situation.
You cannot do without a plumb line when installing formwork, rafter systems, or installing doors.
Almost all construction operations cannot be carried out without the control of this simple device.
But even such a simple device has one significant drawback. After all, construction work is often carried out outdoors. If there is wind outside, it makes working with the plumb line extremely difficult: the weight swings, which makes it very difficult to fix it. But the solution to this problem turned out to be quite simple - the weight is immersed in a pre-prepared container with water. If the wind is not very strong, then it is quite possible to work in it.
Construction plumb line magnetic
Additional fuss with the cord cannot please installers and builders. In addition, it often gets tangled and knots appear on it that have to be untangled.
To get rid of these shortcomings, an improved type of device was developed. Its thread is wound onto a spool in the housing.
For convenient mounting on the work surface, special magnets are built into its body. They provide easy fixation of the tool on any metal surface.
Using a magnet, it can be attached at any height. For working with wood, there is a special needle built into the body.
Laser plumb line
The simplest representative of this type is an ordinary laser pointer. There was this type of tiny keychain that kids loved to play around with. Only this device, unlike a children's toy, must be calibrated. There are very few laser devices on the market that perform exclusively the function of a plumb line.
Eubon-PB01-
This is, for example, a simplified model of the Eubon PB01 brand, which is a metal case, on the pin of which the pointer itself is placed.
The device generates two points, on the floor and on the ceiling, and has no additional functions. The device is leveled by itself, using a special design reminiscent of that of a simple cord plumb line.
The operating range of the device is 30 m, while it has fairly high accuracy and is powered by batteries. The price of such a construction plumb line is quite high.
Products manufactured by unknown companies have a lower cost. On trays you can find similar models at a price several times lower than the original. Before using them, you should definitely test them with reliable tools.
Well-known serious manufacturers also produce devices of such models. Their price, naturally, corresponds to the status of their manufacturers. The LED of the device is enclosed in a durable plastic case; it has a special self-leveling system at a certain degree of deviation from the horizontal.
Laser equipment of this type is produced by Bosh, Spectra, DeWOLT and others. The accuracy of their measurements is up to 0.4 mm.
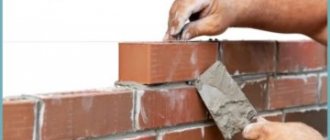
Electronic plumb line
Application screenshot
It is rather not a construction tool, but an application installed on the iPhone, bearing the original name “Handy Carpenter” or iHandy Carpenter.
It is not a professional measuring device, but it is quite capable of assessing the evenness of a particular surface, determining how smoothly the finishing is done or the furniture is installed.
How does the application work? After starting it, the device is applied to the surface that needs to be checked.
There is a coordinate system on its screen, and a weight is also depicted there: the deviation can be seen visually, in addition, the results are displayed at the very top of the monitor. The deviation relative to the conventional system is also displayed, which is expressed in degrees.
A similar program is provided for tablets and smartphones - Plumb-bob. It allows you to measure distances, angles, determine horizontal and vertical lines. You can take a photo by first setting and measuring the necessary parameters, and all the results of the measurements taken will be saved. They will be displayed on the device screen, where they can be carefully examined.
Is it possible to make a construction plumb level yourself?
Suppose you started renovation work in your house, and you didn’t find a plumb line among the tools. What should we do, should we really wind up everything and urgently go to the store to buy a plumb line for work?
Don’t despair if you don’t have the necessary device; anyone can make it with their own hands.
If you need to level any surface, you can use a homemade product made from improvised materials. How to make a painting plumb line with your own hands? You will need a strong, reliable cord about a meter long, to which you need to tie the load. Its role can be played by an ordinary nut, heavy enough for this.
We can assume that the tool is ready and can be used. When taking the necessary measurements, you should hold the twine tightly and make sure that the nut does not unscrew in different directions. If the surface to be leveled has a small area, then instead of a nut you can take a small perfume bottle.
It is important to follow the rule when working with such a tool: it should not come into contact with the surface, at least a small distance should separate them.
If larger-scale work is planned, for example, masonry on a suburban area, then a larger plumb line will be needed. A thick clothesline will replace the cord; even a plastic water bottle will do instead of a weight. But it is more advisable to use heavy parts made of metal.
Overview of components
To assemble a reliable, stable and strong structure, the master must have a certain supply of components from which the scaffolding will subsequently be made. Let's take a closer look at exactly what elements will be needed to carry out such work.
- Sturdy vertical posts. They will bear the brunt of the load. They are placed on a pre-prepared site, after which all other necessary structural elements are attached to them.
- Spacers that can be placed diagonally or horizontally. These elements subsequently serve as connecting nodes for the racks. With their help, the entire structure becomes stronger and more stable.
- The lintels on which the plank flooring will be placed in the structure. Typically, their width ranges from 1 to 3 m. The height of the tier primarily depends on the exact location in which all installation work is carried out. Basically, this parameter is 1.8-2 m.
- Stops are very important details of the future design. They are necessary so that the structure can stand level and securely on the prepared ground.
- Stairs on which craftsmen can safely and easily climb up or down from scaffolding.
- The necessary fasteners with which all elements of the structure will be connected to each other. Often, to assemble the products in question, a special fastening component is used - a ring screw or a welded hook.
- If the structure is planned to be adjustable, screw supports are used.
Mesh fabric also effectively protects from the aggressive effects of sunlight, rain, and snow. It is much more comfortable and easier to work with such an element than without it. A significant drawback of the mesh is that it certainly begins to accumulate and trap dust. When grinding the surface of the façade or when working with toxic components, it is better to remove the mesh and use respirators for additional protection.
Popular plumbs
The most popular and frequently used building levels, according to specialist builders, are products from the following brands.
- Matrix. This company guarantees high quality, reliability and a guarantee from the manufacturer. Absolutely all hand tools with a Matrix marker comply with the requirements and standards of construction acts and documents. The brand's plumb line is characterized by high measurement accuracy, compact dimensions and a relatively affordable price.
- "Practitioner". This company is also one of the leaders in the production of construction hand-held measuring tools. Praktik products are in demand among both professionals and amateurs. The brand guarantees the quality and reliability of its products.
It is also worth noting other manufacturers whose products are represented on the modern construction market: GROSS, Unitraum, JTC, Autel, TORTUL, Baum, Sumake.
Laser modifications
The vertical position of the surface under study can be checked with laser plummets. The simplest representative of this category is the pointer. It is made like a keychain with a laser target pointer. There are not so many similar devices focused exclusively on construction work. One of the modifications is a metal body, on the pin of which the pointer is located.
The device generates points on the floor and ceiling. The leveling process occurs automatically using a special mechanism that vaguely resembles an analogue of a cord plumb line. Well-known manufacturers in the construction market offer devices with an operating range of up to 30 meters. They are highly accurate, powered by batteries, and quite expensive.
Inexpensive products from little-known companies and homemade versions are widely offered in the markets. Such an instrument requires control testing using reliable reference instruments. One of the design options is a plastic case with an LED placed inside and a self-leveling system that responds to a certain degree of deviation in the horizontal plane.