Firework
Even those who have recently started going to kindergarten have to prepare crafts for City Day with their own hands. And for them, one of the easy options is to display ceremonial fireworks. It is believed that one of the simplest ways to present these subjects is through decorative drawings. They are also very durable and will delight you even months after the holiday. The basis is usually cardboard or black paper.
If there is no dark material, simply paint a regular sheet as needed.
It is necessary to darken the base for the reason that the plot implies evening or even night time. You can paint with gouache and finger paints. Please note: it is hardly worth using watercolors - it will not create a festive mood. To diversify your skills and not constantly make the same type of images for every city holiday, you can focus on different techniques. Along with drawings, you can make applications and even miniatures that have volume.
This version of crafts on the theme of City Day should be done with older children. Still, this requires an understanding of the essence of the plan, the ability to maintain proportions and the general aesthetics of the city symbol. However, much depends on the general and artistic development of a particular child. The easiest way to prepare a coat of arms is to cut it out of colored paper. Gluing, especially the origami technique, is a slightly higher level.
Important: despite the relative simplicity of cutting, you must work carefully. All parts of the composition are transferred separately, and as carefully as possible. It is useful to mark individual fragments and put numbers on them from the inside out. Then it will be possible to control the process effectively.
In addition to the coat of arms and fireworks, the little ones can also do:
Crafts for City Day
Every year on a certain day, Russian cities celebrate their birthday. For example, Moscow celebrates on the first Saturday of September, Bryansk on September 17, Pskov on July 23 or 24, St. Petersburg on May 27, and so on.
On this day all the townspeople walk:
- watch a festive performance with dances, songs and competitions;
- participate in master classes;
- buy treats at the fair, look at exhibitions of drawings depicting the hero of the occasion, as well as at exhibitions of collections of holiday crafts with their own hands.
Thanks to them, you can visually express your love for the place where you live. It is desirable that they be related to:
- history are monuments. This idea can be realized using compositions from various materials: polymer clay, plastic, porcelain material, natural resources;
- symbols - the city anthem, flag or coat of arms. Implemented using embroidery and modern decoupage elements;
- the life of the city – key or favorite places in the city. Capturing them in paintings or creating minimized structures.
Preparation for the anniversary of your hometown is especially important. With the help of creativity and creativity, all kinds of ideas for a beautiful exhibition are discovered.
Ideas for schoolchildren
Crafts for school dedicated to City Day are much more varied than those done in kindergarten. Schoolchildren can “get theirs” due to the scope. An excellent option is a model of a city or its central square made from boxes. It would also be a good idea to imitate the most iconic landmarks in the same way. It is very useful to prepare a plan for a future craft on paper.
The structures are assembled from single parts. They are printed and glued. You can simplify your work if you print out individual elements of historical buildings and other structures. It is quite possible to draw them with your own hands. The sheet will have to be bent so that it can “stand” and maintain its geometric shape.
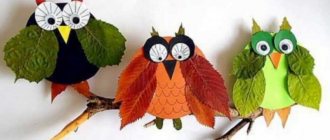
If the city day falls in autumn, then it is quite logical to use fallen leaves, cones and acorns. Easy to use, available at no additional cost, the material allows you to create a variety of compositions. You shouldn’t chase particularly complex plots; you need to choose relatively simple solutions. Postcards and toys, appliques and decorative ornaments are a very obvious option. You can also show images of plants and animals characteristic of the area: this is fresh and original.
Crafts for City Day can also be based on those ideas that are used for school holidays. We are talking about:
Lapbook “My city. My region"
Irina Viktorovna Sinitsyna
Lapbook “My city. My region"
Hello, colleagues, friends!
Today I want to continue the story about lapbooks, about my first independent (author’s) lapbook “My City. My region".
After showing my colleagues the lapbooks “What do they teach at school?” and “The Labor of a Miner,” as they say, I signed myself up to continue this topic.
At this time, our kindergarten was preparing to welcome guests at the Forum of Pedagogical Excellence 2022. “Festival of Master Classes” and I was instructed to prepare a master class on getting to know each other and making a lapbook. The topic of the master class was determined and I began to prepare materials.
And now about everything in detail and in order.
The basis of the laptop is cardboard covered with self-adhesive film.
Pockets – plastic corner folder. It seemed to me that the color of the folder corresponds to the theme of the laptop.
Cover – picture from the Internet
Our city is almost 400 years old and it is impossible to collect all the materials about the city in a laptop, so I have identified for myself exactly those moments that I will really introduce to children. I dedicated 3 collections to the city:
Poems about Novokuznetsk
7 wonders of Novokuznetsk.
In 2008, citizens chose 7 city attractions that have historical, architectural or cultural value. From 60 applicants the following were selected: Kuznetsk Fortress, Transfiguration Cathedral, Novokuznetsk Literary and Memorial Museum of F. M. Dostoevsky; Kuznetsk Metallurgical Plant named after. V. I. Lenin: plant management building; Boulevard of Heroes, Residential building on Metallurgov Avenue, 39, Vodopadny Stream.
Before and now.
In the pocket are paired pictures of historical places in our city at different times, which can be used to trace their changes.
Most of the materials were dedicated to our Novoilinsky district. Our district is young, formed in 1998. Naturally, I wanted the children to learn something new about the place where they live.
Area map and historical information about our area.
The professions of our parents.
The pocket contains riddles about the professions of a lawyer, a miner, a security guard, an educator, a salesman, a teacher, etc.
Streets of my area.
Cards with the name, photograph and brief description of our streets and avenues are posted.
Our "Yantarik".
Photos from various events of the kindergarten and our group. Looking at them, children enjoy communicating with each other, remembering holidays, exhibitions, and competitions.
Solve the puzzle.
Puzzles have been collected in which words on the topic are encrypted: fountain, square, streets, houses, people, monument, etc.
Holidays.
This pocket contains photographs from various holidays that take place on the square of public events: “Victory Day”, “City Day”, “Children’s Day”, etc. Children remember who they were with at the festival, what they saw, what they liked, who met, etc.
Collect and name correctly.
There are cut-out pictures of significant places in our area.
This is how my first independent laptop turned out.
Well, how, who and where helped me put together the lapbook “My City. My area" I will tell you in the next publication .
Thank you for your attention!
Short-term project “My home, my city Nizhny Novgorod” PROJECT: “MY HOUSE, MY CITY!” Project duration: short-term Project participants: teacher, children, parents. Implementation timeline:. Lapbook “My small Motherland. My city Nizhny Novgorod" Lepbooks - a homemade little book or daddy. I assembled this folder myself, glued the individual parts into a single whole, collected the material. Lapbook “My city Yurga” Lapbook “My city Yurga” For children of senior preschool age. The goal is to introduce children to the history of the city of Yurga. Objectives: Educational:. Lapbook “My Hometown” This year our city of Kulebaki will celebrate its 85th anniversary. In April, a competition was held in our kindergarten: the best lapbook on the theme “My dear.
Planning on the topic “My home, my city” for the second junior group 09 SAMPLE PLANNING OF EDUCATIONAL WORK (for the week of 10/17-10/21___) Group: ___Second junior.
Project for children of senior preschool age “My home, my district” Project for children of senior preschool age “My house, my district” Project matrix Project problem field How to form among preschoolers.
Entertainment script “My beloved city, my green city!”, dedicated to the anniversary of Zelenogorsk Educator: Good afternoon, dear guests! Make yourself comfortable! Guys, you probably know that there are a lot of big and small ones in the world.
Source
Interesting options for adults
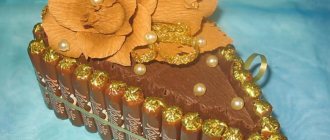
An excellent three-dimensional craft is a box with decoupage. The box can be woven in a few hours. The design is applied to the surface using a printer. The bottom of the product is covered with natural fabrics. Decoupage of the board can be done using the two-step craquelure technique.
An alternative option is a craft based on colored paper, plasticine and corrugated cardboard. To work you will need:
To begin with, cut out the necessary silhouettes from cardboard. For example, a row of houses to create a street. Then the template is drawn along the contour with a pencil. The parts that will be connected are equipped with a cutout in the middle. Particular attention should be paid to the elaboration of small details.
Holidays can be celebrated using paper flowers. Artificial bouquets are in demand for any celebration and are made according to approximately the same pattern. Corrugated paper is usually used as a basis. Additionally, you will need soft wire, which will allow you to create stems. Flower decoration should be done as carefully as possible; The petals are made from cardboard.
If you don’t like a paper bouquet, you can try appliqués and homemade cards with suitable images. A good alternative is a panel made of twigs. It is obtained using a stencil, because the shape must be maintained carefully. The selected stencil is transferred to colored cardboard and cut through. The twigs are glued using PVA glue; it is quite possible to break off unnecessary sections of the twigs.
But adults can also build on the ideas that preschoolers use. There is absolutely nothing wrong with that if the idea is implemented skillfully and intelligently. Examples:
There is another version of the composition “My City”. The use of boxes and colored paper allows you to create imitations of both multi-story buildings, monuments, and even private houses. The territory of the city and suburbs is designated using green (grassy) Whatman paper. Blue paint will help to show off a lake or river.
We must not forget about the gray asphalt paths, about the paths or pedestrian paths trodden in different directions.
Each house is made from a couple of blanks. After painting and drying, one piece is inserted into another - this is how stability is maintained. Private houses are imitated with squares with a side of 80 mm. It is best if they are made of brown paper. The higher the desired private houses, the more “logs”, that is, brown tubes, will have to be put on them.
The roof is done last. Its parts are installed using PVA glue. Usually they strive to achieve the feeling of a thatched roof. But you can also create a flat top in some cases - the more varied the houses, the better; steles, Eternal Flames, and remarkable monuments of your city are made separately. It’s very good if the schematic craft is supplemented with inscriptions on the theme of the holiday or placed next to a homemade poster.
There are many other ideas for holiday decorations. For example:
In the next video you can watch an interesting master class on making a “City” craft.
Source
Everyone loves to receive gifts in the form of exclusive handmade items. But not everyone knows that they themselves can easily make a lot of creative crafts without spending a lot of time. In this article we will look at some easy crafts for the home.
There are many ideas for home crafts, however, not all of them can be brought to life. Some require certain skills and abilities, others require expensive materials that not everyone can afford. But there are also crafts that anyone can repeat, even if they don’t have a full hand. Here are some of them:
Carnival themed crafts
No matter what age a person is, everyone loves to transform into fantasy and cartoon characters. To do this, they come up with original images using costumes and masks. In this form you can appear at a theater ball or New Year's party. Any everyday day will turn into an unforgettable one in this outfit.
The color is matched to the shades of the suit or dress.Making a carnival mask does not require much time and effort, but the result will surprise you with its grace.
You need tulle, velvet ribbon, a stationery knife, black paint, cardboard, cling film, glue, tape. This is done according to the following algorithm:
- A sketch is drawn.
- Cover it with film and secure it with tape so that it lies flat.
- The tulle covers the template and paints on top.
- All you have to do is wait until the workpiece dries.
- The tulle is removed, the blank is cut along the contour, and holes are made for the eyes.
- Two ribbons are glued along the edges to secure it on the head with a bow.
Wine cork rug
Even a child can make such a rug. You can make a large mat for children to play while sitting on. For the rug we need:
We take all the corks that we managed to get and cut them in half lengthwise. You need to cut strictly evenly, otherwise the rug will be lumpy and uneven. You need to put all the cut corks in rows to form a square. Decide on the shape and size of the rectangle. This is what your future rug will be.
Now you need to cut a piece of linoleum or laminate, at your discretion. This will be the base on which we will glue our corks. The shape of the cork rectangle and the shape of the base should match.
Now you can glue the cork halves. Glue them to the base with the cut side down. Try to glue the plugs, tightly attaching them to each other so that there is no gap between them.
The rug is ready. It can be placed in the bathroom so that your feet receive a massage after a bath, or in the hallway under the door. Looks very original!
The house where the gnome lives
In a similar way, you can construct a house from almost any natural material. Even a stump left at the dacha after a tree has been cut down can be adapted into a gnome’s home.
- Using plumbing tools, we hollow out the window and doorway in the stump, and remove its inner part.
- We make simple furniture from unnecessary wooden materials. This could be a table with chairs and a chest in which you can place colored pebbles or beads.
- We decorate the window with colored curtains.
- We place an LED candle on the table.
- We cover the house with a roof.
- We attach a ladder made from scrap materials to the door. We place a gnome figurine on it.
This composition will look especially impressive in the evening garden, pleasing the eye with a soft glow.
By involving children in the creative process, you can have a fun time. This results in an original craft that will delight the child for a long time.
Ottoman made from plastic bottles
This ottoman turns out to be very beautiful and light.
Prepare 37 plastic bottles. They should all be the same height and width. It is advisable that these bottles come from the same drink from the same company. Arrange the bottles so that they form a circle. They should stand close to each other. Then wrap them with tape in a circle. The base for the ottoman is ready.
Next, take the plywood and cut out two circles in diameter equal to the base of the eggplants. Place these circles on top and bottom of the bottles. Glue with hot glue or other adhesive. For example, "Moment".
Cut out the same circle from foam rubber as from plywood. Also cut a strip with a width equal to the height of the eggplants and a length equal to the perimeter of the future ottoman. With these pieces of foam rubber we will wrap our base made of plastic bottles and plywood. Now you can glue the foam rubber to the ottoman, wrapping it from the sides and top. Then these pieces should be sewn together along the edges so that they do not slip off the bottles.
Now you can safely sew a material cover for our ottoman. To do this, you need to measure the area of the circle from above and below. Cut them out of fabric. The same should be done with the width of our craft. Cut out and sew the patterns together. Place the sewn cover on our interesting and unusual ottoman. You can place it in your living room at home and admire your new product, or install it in a gazebo in the garden.
Wreath to decorate the entrance to the room
You can make an original one from corks or bottle caps, painted in tricolor. Hang on a white satin ribbon. The garland is made according to the New Year's principle, only in accordance with the desired colors.
You can make a country flag from puff pastry and, after it dries, glue a magnet on the inside with Moment glue. A gift for decorating the refrigerator is ready.
Soft sock toys
If you use your imagination, you can even make a cute children's toy out of a sock.
The sock needs to be stuffed with cotton wool or padding polyester up to the heel. Tie that place with thread. The result will be something like a pear. Cut off the remaining part of the sock; it will be needed for the hat. The pear needs to be divided into two parts, one larger than the other. This will be the head and torso.
You can use beads or buttons to make eyes and draw a smiling mouth. You can sew a hat from the remaining part of the sock by tightening the cut side with thread and turning it inside out. Put the cap on your head. Our new creation is ready - a snowman!
These crafts can be done with your child. In this way, you will introduce your child to new ideas and awaken his interest in this kind of needlework. You can create crafts from paper. There are many step-by-step photos and master classes on making beautiful products from different materials.
Fairytale carriage
To create a carriage you need a pumpkin, zucchini, skewers and thin wire. The main part is pumpkin. You need to remove all the contents from it, cut out the door and windows on the side. Cut 4 approximately identical wheels from the zucchini.
Thread on two skewers in pairs. And they are connected using wire. You can decorate the top using toothpicks and foil at the discretion of the master.
Floating cup with coffee beans
These cups are very popular. They can be safely given as a souvenir to decorate desks or shelves in rooms.
Place the saucer and bend the fork at the base so that it rests completely on the saucer. Then bend the top of the fork so that it touches the inside wall of the cup. Now glue the fork with one end to the plate and the other to the inner wall of the cup. You need to pour enough glue so that it covers the fork well on the plate. Now you need to press down the fork on the plate with a weight so that the entire structure stands level and does not fall over.
Then take the coffee beans and glue them to the fork on all sides and along the entire length. You also need to pour beans inside the cup and glue them, simulating coffee spilling out. The same must be done on the plate. Try to cover the fork and the weight on the plate. The fork handle should also not be visible.
Do not leave gaps during gluing. If this happens, then such defects can be painted over with dark brown paint.
House roof and decor
Now proceed to making the roof - bend a sheet of cardboard in half, make cuts from the edges and bend it again.
- Then glue the triangles on both sides - the roof slope.
- The roof will be installed on the walls.
- All that remains is to decorate the yard around the paper house - a garden, a well, trees - as your imagination dictates!
Coffee table made from old tires
An excellent coffee table can be made from worn-out tires that are unusable.
You need to take two tires and carefully paint them on the outside in a color that you like. White, yellow or green are most suitable in this case. Then put them on top of each other.
Now take a piece of glass and cut out a circle with a diameter 10-15 centimeters wider than the diameter of the tires. Sand the edges of the glass to avoid accidental cuts.
It will be better if you carefully glue the edges or paint them with the same paint as the tires.
If you paint, try to ensure that everything is done smoothly and aesthetically.
Now place the finished glass on top of the tires. The coffee table is ready. You can put it on the terrace at your summer cottage. This table will give you a wonderful spring mood.
Wonderful hand-made things can be made from literally any unnecessary item. This requires only desire and imagination. And we are sure that every person has too much such wealth. And there are also a dime a dozen unnecessary things ready to go to the trash heap!
Read articles, look for many ideas and instructions for making crafts from old things and you will buy new ones at a very low price!
Source
Basic recommendations for work
The basic algorithm for working on a holiday craft:
- Examination and analysis of the sample.
- Determination of a step-by-step sequence for work planning.
- Selection of material and tools.
- Selection of a suitable method for connecting parts and elements.
- Making a toy.
- Analysis and evaluation of what has been done.
To make crafts unique and special for the day of celebrating an important event, it is important to use creativity and imagination. Manufacturing techniques can be very diverse depending on the materials used.
Bookmarks for books made of paper with step-by-step photos.
Origami heart bookmarks
I also liked the idea of mittens on a string. You can draw these mittens yourself, or you can cut them out of paper for scrapbooking.
The next idea is anti-stress bookmarks, although they are indirectly crafts, however, this is also a type of creativity associated with paper, and besides, in our turbulent times they can be very useful. They can be printed or redrawn from the monitor screen.
Flag as a postcard decoration
The most popular and easy option is to draw with colored pencils or watercolor paint on white paper. For a three-dimensional flag from paper for the holidays, you need to cut strips 5 cm long and 5 mm wide. Form loops from them, gluing the free ends together. Starting from the edge, moving towards the handle, glue the parts to the cardboard onto the drawn sketch.
Volumetric 3D paper crafts for interior decoration.
The next useful thing is interior decoration. With the help of paper we can create additional comfort in the house or set a certain atmosphere. You can also use paper crafts to decorate an area for photo shoots or create decor for a holiday. In general, there are a lot of ways to use it, so let’s move on to ideas.
Garlands of butterflies for decoration
You can also decorate the photo zone with butterflies, so that the butterflies are voluminous; you only need to glue the middle of the wings to be free.
Well, let's return to the garlands for now, they can be made in all sorts of different ways, for example in the form of such 3D hearts.
Or these glowing stars
You can also make voluminous droplets, circles or clouds, in general, anything you want and attach it however you like. At least make a garland, at least stick it on a wall, or even on a postcard in the form of an applique.
And for interior decoration, here’s an original idea)
Paper Wedding Decor Idea
But with such rosettes you can decorate any joyful event, be it a wedding, a children's party or a photo shoot.
Crafts for Orthodox holidays
Many church holidays are celebrated not only within the walls of the church, but also with festivities in the city, matinees in gardens and schools, and celebrated while sitting at home or in a cafe. These include: Nativity of Christ, Epiphany, Easter, Bright Resurrection of Christ, Trinity Day and some others.
Note!
- DIY New Year's gifts - interesting New Year's ideas for crafts. Master class on creating New Year's souvenirs
Easter eggs made of beads (interesting weaving patterns) - how to weave an egg with beads with your own hands?
- What to give to a classmate: how to make an unforgettable surprise with your own hands (Video + photo master class)
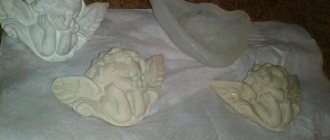
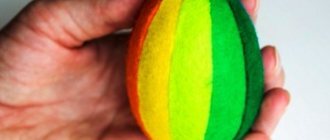
For example, they prepare for Easter in advance. In the evening, everyone bakes Easter cakes and paints eggs during the day. They also figure out how to decorate the holiday table, what the child will take to the exhibition, and what to give to the guests. To do this, foam and wooden eggs are decorated with ribbons, sequins, beads, seed beads, and painting.
How to make paper rosettes step by step:
And from semi-sockets you can make a very beautiful garland
Making a house from stones
- Sea pebbles are the ideal material for making such a masterpiece.
- The size of the pebbles should be small and of different diameters.
- Also stock up on silicone glue to hold the stones together.
- Plan what size the product will be and what side the door will be on.
- The base will be a small sheet of plywood.
- First of all, glue the main row of pebbles.
- Then assemble the next rows so as to fill all the gaps between the stones.
- Leave gaps in the walls for doors and windows, which you can make from cardboard or wood.
- Now make a roof out of cardboard and stick one layer of pebbles on it.
- Place the roof on the walls. The stone house is ready, now you can decorate the area around the house.
Volumetric fruits made of paper.
To decorate your festive interior, you can make different voluminous fruits out of paper. In this master class you can see how to make tangerines or pumpkins, whichever you prefer. Using the same principle, you can make other fruits, for example: a pear or an apple, the main thing is to choose the right colors and make the proportions look like real fruits.
You can take paper in different orange shades. And green for leaves.
The paper needs to be cut into strips 4 cm wide and 18 cm long - 2 pcs, 23 cm - 4 pcs, 28 cm - 4 pcs. You should get 10 strips.
Each strip must be bent in the form of an accordion or fan.
Next, the paired strips must be glued together and closed into a ring.
There should be 5 pieces
Then you need to glue the middle of each ring
We collect all the rosettes together with glue.
And as a final touch we glue on the twig and leaves. The tangerines turned out just a sight for sore eyes)
Fruits or vegetables can be made in another way
For example, this children's paper craft “carrot”
Option number 4. Hut in the clearing
This is a more complex design, and therefore the manufacturing process can take a long time.
Hut in the clearing
For work, prepare:
- wire;
- scotch;
- cardboard box;
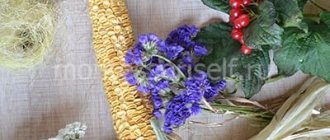
- pine needles;
- chestnuts (several kilograms);
- scissors;
- dry branches;
- fallen leaves of different colors;
- glue;
- handle;
- berries.
Autumn crafts for an exhibition
Having prepared everything you need, start working with your child in order to instill in him curiosity and useful skills.
This toy is easy to assemble
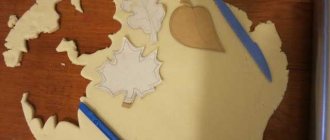
The sequence of actions is as follows. First make a foundation on which the structure will stand. Make a house out of a box, preparing a 40x40 cm square. Also cut out the house elements from cardboard, and then connect them with tape. Then attach to the base.
What kind of house can you make with your own hands?
Cut out the door with windows from white paper and glue it. Draw the curtains with a pen, and decorate the walls with chestnuts. The roof and ground around the house can be decorated with berries, pine needles, and leaves.
Matchstick house
On a note! Using this algorithm, a house can be made from almost any material, using glue and tape to connect the components.
A beautiful house can be made from any material
This kind of pastime will definitely please your baby; he will be happy to help you make it.
Do-it-yourself house made of branches for the garden
The new time spent together will delight the child, and he will enthusiastically help in collecting it for a long time.
Children's crafts, postcards with paper applications.
Beautiful cards with appliqués can be made from colored paper and regular table napkins or corrugated paper.
And with younger children you can make this cute hedgehog from narrow strips of paper.
Or a polar bear applique
Three in a boat
We need to get some zucchini. Cut it lengthwise and remove the core and seeds. This is a boat. Add sails made from toothpicks and white pieces of paper. Plant three swimmers in it - three onions. Make faces, arms and hair from plasticine or non-drying dough.
Note!
- How to make a snowman with your own hands from cotton wool for a window, for a kindergarten, from scrap materials
- How to make a snowman from plastic cups: step-by-step photo/video instructions + master class
- DIY wedding decorations, crafts and accessories: photos of original wedding decor
Flower ball made of corrugated paper step by step.
Our website also has an article on how to make paper flowers for candy bouquets
Until then we continue
Paper houses from ready-made templates
On the Internet there are many ready-made diagrams and templates for crafts of paper houses. You can print the finished template on a color printer; all you have to do is cut it out and glue it together.
These houses are designed by designers and look very stylish. They will decorate not only the Christmas tree, but also the table in the office, because at work you also want a feeling of celebration.
And if you print them on thick paper or cardboard, assemble them and pour candy into them, such a house will become a nice gift for colleagues.
Origami, kurigami, kusudama paper crafts step by step.
A selection of paper stars using different techniques.
I also consider beautiful boxes that you can assemble with your own hands to store various small items or even for gift wrapping to be useful crafts. For more ideas on paper gift wrapping, see here
Ball using kusudama technique.
And finally, a few more ideas
Option No. 7. Santa Claus's Hut
DIY Santa Claus house
Not a very complicated craft, for the manufacture of which you will need:
- scissors;
- polyurethane foam, gun for it;
- cardboard box;
- brushes;
- sandpaper;
- paints;
- stationery knife;
- scotch.
Step 1. Take a prepared cardboard box and make a house out of it. To do this, cut the box into parts, and then glue them together.
Step 2. Cut out the doors and windows using a utility knife. To do this, first draw them with a pencil.
The house is decorated with polyurethane foam
Step 3. Decorate the house with polyurethane foam, applying it in strips about 1.5 cm wide. The foam will swell as it dries, and therefore you can leave a few millimeters of gap between the strips when applying.
Step 4. After covering the house with foam, wait half an hour (during this time the foam will dry).
The foam should dry for 30 minutes
The house is completely sealed with polyurethane foam
Another photo of the result of the work
Step 5. Start making the stand. Cut a rectangle out of cardboard, slightly larger than the base of the hut. Glue the house to the stand, decorate the perimeter with the last mounting foam.
House stand
On a note! Instead of polyurethane foam, snow can be imitated with ordinary cotton wool glued with PVA glue. In addition, you can additionally cut out snow slides from cardboard/paper, a Christmas tree, a snowman, and snowdrifts. All this can be glued to the base by bending the bottom part and applying glue to it.
Step 6. If using foam, cut off the excess material after it has dried using a utility knife. Then apply sandpaper treatment.
Trimming excess polyurethane foam
The foam is cut with a stationery knife
Step 7. After this, paint all the parts in the color you like.
Finished house after painting
Video – House for a hedgehog
Origami for children
That's all I have for today! Inspiration flows like a river, while I was writing this article, my daughter and I have already tried to make some crafts, my daughter is now happy with new toys, and I am glad that I didn’t do this labor-intensive work in vain. At least one of my dear people is happy, I think we will return to this article more than once.
If you also liked this collection, add it to your bookmarks so as not to lose it. And I will also be grateful to your comments, because this is the only way I will know that my work was not done in vain.
Source
Option #2. A hut on chicken legs
What child doesn't love fairy tales? Therefore, the baby will definitely help you in creating the house of the famous fairy-tale character - Baba Yaga. To make this craft you will need:
- dry moss;
- glue;
- cones (pine or spruce), always open;
- plasticine;
- leaves pre-ironed with an iron;
- clothespins;
- dry berries.
Baba Yaga with her hut on chicken legs
Stages of making a hut (continued)
Stages of making a hut (completion).jpg
Here is one of the simplest schemes for making such a hut. The templates, of course, can be any, but with this option there will be no difficulties for either you or your baby.
Black hut on chicken legs
Another version of the hut
On a note! It is important here that the scenery matches the atmosphere of the fairytale forest. After all, we are talking about Baba Yaga’s house, and she, as you know, lives in places inaccessible to outsiders.
Original house with pen stand
What materials can be used
When creating a house, you can use the following natural materials, which are always easy to find:
- vegetables like pumpkin, eggplant;
- scales from cones, large chestnuts;
- cardboard boxes left over after purchasing equipment or some shoes;
- tree branches, clothespins, wood cuttings;
- plasticine;
- cardboard, much more.