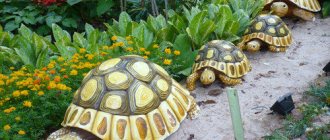
It seems like a popsicle stick is useless, but that's a false premise! Wooden blocks can be reused.
From them it is possible to build both a household item, such as a stand for hot dishes, and an authentic bracelet that expresses the character of the owner.
First of all, DIY crafts made from wooden sticks will be of interest to creative people, families with children and those who are thinking about sorting garbage.
Simple crafts
Simple crafts made from popsicle sticks will be great fun for home holidays and summer groups. They are easy to construct; glue is enough to connect the sticks. The pleasant emotions that such creativity will bring will be preserved in the craft and will become a wonderful memory of the summer.
pencil
One of the easiest crafts made from popsicle sticks is a pencil holder.
To create it you will need:
- Ice cream sticks – 20-30 pieces;
- Acrylic paints - any colors;
- Simple pencil;
- Plastic glass or tin can;
- Strong glue;
- Beads, rhinestones or any other decorative material for decoration.
The procedure for creating a pencil holder from ice cream sticks step by step:
- Paint the bottom of the base glass with acrylic paint. Ice cream sticks can also be painted in different colors. Dry all parts.
- Using glue, secure the sticks to a glass or jar.
- Decorate the pencil holder with rhinestones, beads or other material.
A pencil holder is a wonderful craft for a summer cottage or vacation at a resort.
Frame
A simple photo frame or holder for some flat objects can be made from popsicle sticks. Building such a structure will be not only simple, but also interesting.
For work you will need materials:
- 16 popsicle sticks;
- Wood glue;
- Rhinestones and paints for decoration.
Procedure for creating a frame:
- Lay out the square with a frame of 6 sticks. 2 sticks, one at a time, will be parallel to each other, and on the other edges the edges of the square will be formed by 2 sticks.
- Turn the workpiece over and glue one stick on top of the internal parts.
- Glue 2 more vertical sticks on top. This will create a slot for photographs or pictures.
- Glue three separate sticks together, glue another one perpendicularly to them and secure them on both sides with two more parts.
- You need to fix the frame itself on the stand and decorate it with decor.
The craft is ready.
Paint the finished frame with paints and decorate it to your liking.
Bookmark for a book
Bookmarks are the easiest crafts you can make from popsicle sticks. You can use one stick, but it will be too boring. It is much more interesting to make a set of bookmarks.
For this you will need:
- Sticks;
- Paints, pencils, felt-tip pens;
- Colored paper;
- Jewelry templates or patterns;
- Glue, scissors, pencils.
Operating procedure:
- Using the template, cut out the applique for the bookmark. Decorate the animal's face.
- Paint the stick the color of the muzzle.
- Glue the muzzle to the base and cover the reverse side with paper.
The colorful bookmark is ready.
Bright stand for pencils and pens
Using a similar technique to forming a bird feeder, it is easy to make a stand for writing instruments. To simplify the process, you can take a can of canned food, process the top edge, removing any sharp parts, and seal the outside of the can with vertical sticks.
At the decoration stage, the formed layer of wood is coated with varnish or bright colors, and decorated with drawings or inscriptions. Even more ideas on using ice cream sticks can be found on the website dnevnikmastera.ru, where there are photos of ready-made crafts and simple master classes.
House
The house will be a more complex version of the craft. This will require lots of popsicle sticks, scissors, wood glue, pencil and decorating materials.
The order of work is step by step:
- Make 4 identical squares from sticks and glue them together. These will be the walls of the log house. Also make the slopes and base of the roof. This will require 3 of the same squares.
- Seal all squares tightly with sticks.
- Make two triangles from other sticks and secure them. Glue the triangles to the base. Then secure the roof slopes to them. Glue sticks into the small ends of the roof, gradually reducing each detail.
- Use a knife to cut out windows and a door on the walls using a ruler. Glue the walls together.
- Secure the roof to the walls.
The house is ready, all that remains is to decorate it. Half the house doesn’t need to be sealed, then you can put any toy in it.
Games with ice cream shelves
This unique material can even be used to create board games!
How do you like this version of cards, for example? You can take it with you on the road and play on the street - such cards are not afraid of the wind, they will not fly apart from its breath.
What can you say about such original puzzles? Make them for your little kids. To do this, print out a design (no longer than the length of the stick), stick the sticks on the back of it and cut it, again dividing the sticks, but with a design on them.
By attaching magnets to the back, you can use the puzzles on a magnetic board.
Bird feeders
Crafts made from ice cream sticks can be useful for others. For example, it could be a bird feeder. Such a product will be interesting to assemble for schoolchildren during a labor lesson. The children from the kindergarten will also be proud of this craft. You will need 20-30 sticks, glue and ropes for hanging.
The procedure for creating a feeder step by step:
- Place a square of sticks on the table. Glue 4 parallel pieces on top that will hold it in place.
- Turn the workpiece over and use the following sticks to lay out the perimeter. Repeat 2 more rows.
- Make a bird stand from the stick halves and glue it on. Lay out the perimeter again in 4-5 rows. Secure each row with glue.
- The feeder is ready. All that remains is to thread the rope through the perimeter rows and hang it.
Well
From such improvised material it is quite possible to build a toy well for dolls. The child will be interested in making it and playing with it. To do this, you need to take 20-30 sticks, a plastic cup, glue, a knife or scissors.
The procedure for creating a well step by step:
- Cover the glass with chopsticks.
- Using three sticks, construct the base of the well roof in the form of crosses. Secure the blanks to the glass.
- Connect the sidewall with parallel parts on the sides and in the middle. Seal the slopes on top with the rest of the material.
The unusual and colorful well is ready.
Bench
The bench will be another creative craft. To create garden and doll furniture you will need:
- Cardboard;
- Designer paper;
- Part templates;
- Wooden ice cream holders;
- Glue, pencil, scissors;
- Paints.
The order of work is step by step:
- Cut out the side parts of the bench according to the template. Cover with paper. Make slits in the middle according to the shape of the base.
- Connect the two sides with a wooden piece. Glue other seat parts on top.
- Decorate the back in the same way.
- All that remains is to creatively decorate the bench and place the dolls there.
Furniture for dolls
You can make beautiful furniture for dolls from ice cream sticks:
- Bed;
- Bunk bed;
- Armchair;
- Table;
- Chairs;
- Rack;
- Closet.
The principle of creating furniture here is simple: first, the main frame is created. Then miniature boards are glued to it. After this, the furniture can be decorated and played with.
Popsicle stick frames
This material makes very cute photo frames. Step-by-step instructions for making such a frame are presented in this photo instruction:
Airplane
The plane will be an interesting craft for the holiday on February 23 or May 9. Such an aircraft can even fly, but over short distances. To construct it you will need several sweet parts, a cocktail tube, a screw, glue and scissors.
Step by step procedure:
- Glue several parts together and attach them perpendicular to one. This will be the body and wings.
- Cut 1 cm pieces from the tube and glue to the ends of the wings. Glue another ice cream piece on top.
- Shorten one stick so that you get a small detail. Attach it to the body in the tail area.
- Cut one wooden piece in half and trim it. Fold the blanks into a cross. Screw it to the nose of the plane using a self-tapping screw. This will be a propeller that spins.
- All that remains is to decorate the toy.
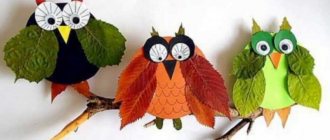
Toys
Why buy expensive games or dolls in stores. Homemade characters become beloved friends and gain character.
To get cute little animals, you should glue the wooden parts onto the workpiece. Then paint and attach additional elements (ears, eyes, mustache, tail, wings, feathers, etc.). Children's rooms are furnished with such heroes or animals.Such wood chips also make good objects for didactic lessons. With bright sticks it’s fun to learn to count, or study shapes and colors.
You can build a miniature puppet theater. We draw eyes and a mouth on the tip, a fringe of cotton wool on top, a scarf made of rags, and the hero of your favorite fairy tale comes to life. The big advantage of such “actors” is their low cost, and therefore it doesn’t matter if your son or daughter takes them for a walk or to a children’s group. Lost - let's draw a new one!
It's easy to create an army of planes. Additionally, you will need clothespins. We glue the wings. Like a hang glider, we can color the tail to your taste.
Casket
You can make an original box for little things and secrets. To do this you will need 29 wooden pieces, paint, cardboard, glue, satin ribbon and scissors.
Stages of creating a box:
- Paint the details. Using templates, cut out the sides of the chest and the lid from cardboard. The sides should be rectangular, and the lids should be semicircular.
- Place 7 pieces on the table. Attach cardboard rectangles to them perpendicularly.
- Form the long sides from 6 parts.
- Connect two semicircles with the remaining sticks.
- Trim the edges of the chest with satin ribbons. Glue two tapes to the lid and to the base. They will replace loops and fasteners.
A small but original souvenir is ready.
Bracelet
You can create an original decoration from wooden parts. To do this you will need 1-2 wooden sticks, satin ribbons, rhinestones, glue and a pan of water.
The procedure for creating a bracelet:
- Soak the sticks in water. To do this, they need to be left overnight. You can also just simmer for 40 minutes.
- The soft parts need to be twisted and placed inside the glass. When the tree dries, it will take a semicircular shape.
- Connect the two halves together with glue. The bracelet needs to be decorated with ribbons. To do this, tapes can be wrapped around the base and secured with glue. After this, all that remains is to decorate with rhinestones.
Preparing for creative work
To make the work enjoyable, you need to decide in advance on the model of the product and prepare the sticks.
To do this you need:
| 1st option | 2nd option |
|
|
| |
The importance of the procedure is that dirt and unnecessary food layers are removed from the workpieces. The material becomes elastic, which makes work easier.
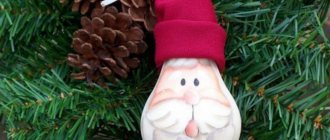
New Year's crafts
Crafts made from ice cream sticks for children can also be Christmas tree toys or decorations. It’s so nice to make decorations with the whole family first, and in winter hang them on the Christmas tree or place them around the house, remembering summer and ice cream. The preparation program for the New Year can be diversified with such creative master classes.
New Year's toys
The sticks themselves can serve as toys if they are decorated in a New Year's style. You can also make snowflakes. They will look beautiful on a Christmas tree or in your home interior.
Another option is to fold Santa Claus and his beard. You can also make stars. Decorated with rhinestones, beads or sequins, these crafts will look colorful on the New Year tree.
Christmas tree
It’s easy to make a Christmas tree from this material. To do this, you need traditional tools: glue, scissors, paints and decorations.
The procedure for creating a toy:
- Cut 5 pieces so that each is 1 cm shorter than the other.
- Place the parts on one stick, which will be the base. Leave some space between the pieces. Secure everything with glue.
- Paint the Christmas tree. Glue stars or other decoration on one edge, which will be the top of the Christmas tree. Attach a loop to the top of the head for hanging.
All that remains is to decorate the Christmas tree and stick on rhinestones, beads, and sequins.
Educational materials for home study
Natural wood absorbs paint well, so sticks can be used to create educational materials. To color sticks, it is better to use natural dyes, such as tea, turmeric and purple cabbage juice, beetroot or carrot juice, parsley or dill extract.
After painting the sticks, it is not recommended to varnish or use other impregnations; over time, the color may fade and can be easily renewed. Colored sticks are used to study basic colors and shades, teach simple counting, concepts of whole and parts, singular and plural numbers of objects.