One of the most beautiful and graceful representatives of the animal world, the deer is a frequent subject of crafts.
Before starting work, you should decide for what purpose you are going to make the figurine. If the task is to make a craft together with a child for kindergarten or elementary school, then you can limit yourself to the simplest execution technique.
To make a souvenir, you will need to use more complex elements in production, and making a figure for a summer cottage is a completely different matter.
Useful secrets when constructing crafts from pine cones
Note! To create a unique and cute craft from pine cones with your own hands, both blossoming and not fully ripened fruits are suitable, it all ultimately depends on what is planned (on the idea).
To glue the cones together, as well as other auxiliary elements for them, materials such as ordinary PVA glue or simple children's plasticine can be used. For very small children, when creating crafts from pine cones, plasticine is more suitable, and for older children - preschool or primary school age - you can use glue when constructing crafts.
crafts made from natural materials
Before you start making crafts from pine cones with your own hands, you need to familiarize yourself with some of the nuances when working with them, namely:
- To give the cone the desired shape, you just need to soak it in water and then use a rope (tying it around) to give it the shape that is needed. After all these procedures, in the end, the modified cone will just need to be thoroughly dried and the intended product will be made.
- Since cones tend to open up when warm, before starting work with it, it must be dipped in a warm solution of wood glue. Soaking the pine cone in the solution will take about 30 seconds. Next, drying will be required and, as a result, the finished product will no longer be deformed.
Having familiarized yourself with and taken advantage of all these nuances in your work, you can create quite neat, memorable and beautiful collectible crafts from pine cones with your own hands.
A few rules
Before you get to work, you should decide on the rules for choosing the location, shape and color of your garden sculpture.
- The decorative figure must fit harmoniously into the landscape.
- You should not place a large number of sculptures - this will distract attention.
- It is advisable to cut out the outlines of the future composition from cardboard and see how it will look in the place chosen for installation.
Materials for sculpture can be:
- stones;
- gypsum;
- polyurethane foam;
- papier mache;
- concrete;
- tree;
- plastic bottles, old tires, etc.
How to prepare natural material
Cones are a very common and accessible natural material, but they require preliminary preparation, especially if children will work with them.
Attention! If specimens with unopened scales are needed, then it is advisable to collect them in September-October.
After removing the cones from the tree, they are soaked in water, slightly dried and varnished.
In any other case, the collected natural material is soaked in a vinegar solution (take 2 tablespoons of acid per 1 liter of water) for approximately 20 minutes. Then dry in the oven at a temperature of 95-105 degrees for 30-40 minutes. Afterwards they are coated with varnish or molar glue. If the weather and time permit, you can dry the raw materials in natural conditions outside, but this will take from three to five days.
Roses from autumn leaves
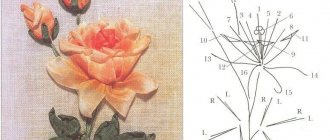
Our favorite fall craft is leaf roses. We use fresh leaves that are still easy to fold and do not tear. Fold the sheet in half.
Fold the sheet in half
Then cut in half again.
Now twice more
And carefully twist it, forming the core of the rose. We tie the twisted leaves with a thread.
Twist to form the middle
We cover this core with the remaining leaves, forming a flower. We fix the “petals” with thread. We will get a neat flower head.
We fix the leaves around the bud
But the most interesting thing will happen after the leaves dry. They will twist in different directions, and the rose will look like a real one!
Rose of leaves
It’s like a fresh bud will bloom before your eyes. The more leaves you use, the more magnificent the flower will be. We twist the numerous stems of the leaves together, forming the stem of a rose.
You can make a bouquet from several flowers, complementing it with large autumn leaves.
You can leave the bouquet in this natural form. Or fill it with color using acrylic paint or gouache.
The leaves can be curled quite tightly, then the buds will be more elastic.
Roses from leaves
These roses are made from maple leaves rolled into a tube.
Roses from maple leaves
Rose from leaves on video:
Look at the video on how to make an autumn bouquet with roses from leaves:
Step-by-step instructions for making a deer from pine cones
An autumn craft in the form of a deer from pine cones can be made in several ways, using only this natural material or, in addition, using acorns, plasticine, and cardboard. And, in order not to think about the idea for a long time, you can rely on already existing options, the step-by-step execution of which is presented below.
Little deer
In addition to a large deer with branched antlers, you can also make a fawn from pine cones. For this you will need:
- spruce and pine cones;
- spruce branches;
- pistachio shell;
- birch bark;
- peppercorn;
- scissors;
- hot melt adhesive.
Step by step execution:
- A fir cone is used as the body. Four branches are inserted into the side between the scales (they should be the same length) - these will be the legs. They also add another branch at an angle on the opposite side, a little shorter, it will act as a neck. Everything must be fixed with hot glue
- Next, they begin to make the head. To do this, a pistachio shell is glued to the place of the stalk. And in the center, birch bark is fixed horizontally with glue. A nose is made from peppercorns. If there is no birch bark, this element can be made of thick cardboard
- Then the eyes are made, they are also made from birch bark (thick cardboard), rolling small pieces into rolls. A little black plasticine is inserted inside. The resulting elements are fixed over the improvised nose. Ears are made from pistachios. Eyes can be made from plasticine
- The figurine is completed by gluing a tail from a piece of birch bark and horns from thin twigs. The finished craft is placed on a stand
Deer made of cones and plasticine
Children often make their own crafts on an autumn theme in the form of a deer from pine cones, but in this case they use plasticine as a fastening element. And to do similar work, you can resort to the following master class:
- They start the craft by sculpting the neck of the future deer, and use it to connect both cones.
- Circles of different sizes made of white and black plasticine are glued as eyes.
- Then they insert two branches into the upper cone, and mold flagella from brown plasticine on them, thereby making the horns branch. The ears are also made from the same plastic mass, additionally fixing the branches.
- Four branches are inserted into the body below - these will be the legs. Hooves are formed from pieces of black plasticine.
- The figurine is completed by gluing a tail made of brown plastic mass.
Advice! To keep the branches firmly, they should also be fixed between the scales on plasticine.
Finished goods
Of course, some craftsmen can try to make a sculpture on their own, but not everyone is naturally given the ability to delicately wield the architect’s tools - a stack, a gravel, a scraper, a scraper, and maybe even the most ordinary chisel.
In this case, you should turn to the services of online stores, many of which offer various types of figurines of the beautiful animal. Moreover, buyers have the opportunity to choose both northern, sika, and red deer.
Prices for the products offered are suitable for any budget. There are garden sculptures at very high prices, but you can buy cute little deer at very reasonable prices.
Christmas deer
To work you will need:
- cones of different sizes;
- scissors;
- thin branches;
- red bead;
- glue gun;
- additional decor (optional).
- We connect cones of different sizes using glue.
- Carefully attach branches of equal length to the bottom of the main cone.
- We attach two more branches to the deer’s head.
Glue a red bead to the place of the nose. If desired, you can add other decor. For example, a bell or a ribbon.
Interesting ideas with photos
In addition to the presented master classes, there are still many ideas for creating deer from this forest material. And for inspiration, you can check out the following photos of successful works.
Little deer covered in gold paint
Craft using half a walnut shell
Beautiful white deer for the New Year
A simple craft using plasticine
Deer made from one pine cone and chenille wire
Craft: deer made of fir cones and plasticine
For several years now, my daughter and I have been collecting natural materials and making crafts from them. We periodically replenish supplies by discarding dried chestnuts or damaged leaves. We must dry some of the leaves for future use, placing them between the pages of massive books. All the wealth during the winter will be used to make foxes, bears, birds and other animals.
Today we will make a deer from pine cones and branches. The creation of the hero was inspired not so much by natural materials as by a trip to the zoo. The children enthusiastically fed cabbage to a family of deer until they realized that llamas lived behind the fence. The antlers and appearance of artiodactyls are similar, except that the deer will be larger.
So, let's get ready for work:
- - two cones of different sizes (one closed),
- - rowan bunches,
- - plasticine,
- - autumn leaves to decorate the area with the deer.
Let’s immediately decide that the closed cone is the head of the craft. Let's sculpt diamond-shaped eyes for her. At the same time, we will leave the sharp corners as they are, and smooth out the blunt ones. Black pupils will add expressiveness to the eyes. We cut out the eyelashes from rowan leaves with scissors. But we’ll shape the mouth in the form of a barrel, in which we’ll push a narrow strip through with a stack. It seemed to work out well.
We place the details on the pine cone: the eyes are on the sides, the mouth is on the top. Let's start decorating the horns and hooves.
It’s not for nothing that we first pointed to bunches of rowan berries. They are ideal for craft purposes. We will pick off the ripe berries, put them away, and attach the resulting branched horns to the top of the head using a piece of brown plasticine.
The horns stretch upward, decorating their owner.
We attach the finished head to the body. We get a female deer in a flared dress. Probably getting ready for the autumn ball. We deliberately abandoned other methods of designing the body. Thin legs will not support the weight of the cones.
As for the forelimbs, we will make them from broken branches, the ends of which will be decorated with plasticine hooves. All that remains is to attach the limbs to the sides of the cone and you can call your parents and show the result.
Our heroine is quite stable on her feet. This means that the bump for the body was successfully chosen. Otherwise, we would have to figure out how to decorate the animal’s legs.
Place the craft on a hard surface and place multi-colored maple leaves next to it. All that remains is to go to the kitchen, ask mom for cabbage and feed the guest.
From cups
A great option for a children's party or party. You will need brown cardboard cups, without drawings, patterns or inscriptions. You also need to get a sheet of beautiful textured cardboard - for example, with glitter, or velvet. Color - to your taste.
Cut out horns and a round nose from cardboard. We glue the horns to the top edge of the cup, and the nose to the cup itself. Draw in the eyes with a black marker.
You can draw rosy, round cheeks with a red pencil or paint. And glue a red and white New Year's ribbon or a strip of red shiny paper to the top side of the glass. Five minutes - and the New Year's glass is ready!
Be bolder in your creative processes, don’t try to copy crafts - add something of your own. And have fun creating!
Options for making a deer made from cones
Our story will be devoted to crafts made from coniferous fruits. There is a common phrase - “red deer”. In fact, the appearance and habits of this animal are very graceful and majestic, full of strength and power. He is the hero of many folk and original fairy tales; not so long ago, clothing and kitchen utensils were decorated with his images.
The symbol of the deer is an integral part of our culture, so I would like to share some ideas on how to create this slender and fleet-footed beauty together with your baby.
Before you begin the process of making a toy, you should become more familiar with the properties of the material and the features of its collection.
Main qualities of conifer cones:
- long shelf life;
- ease of processing;
- a light weight;
- pleasant resinous aroma;
- safe use.
Collection and preparation for use have their own characteristics. Let's consider the main conditions:
- It is best to collect in the fall, on a warm sunny day, so that it is possible to sort last year’s rotten specimens from fresh ones that are not yet damaged. In addition, this will save time on drying the raw materials;
- You will have to dry it in any case, because everything that remains on the surface of the earth for a long time is saturated with moisture, and for crafts you need only dry material. To do this, the cones are laid out on a surface covered with paper, or even better - in an ordinary shoe box. This is done so that small insects and flying seeds located inside the fruit do not spread throughout the room.
- It will take more time to dry pine cones than spruce. In addition, they tend to open in warm conditions, which is not always necessary;
- if unopened samples are needed for the craft, they are coated with PVA or ordinary wood glue type d2 or d3 to fix the shape in the desired form. Varnish is also used for wooden surfaces;
- sometimes colorful pine cones are required. In this case, the paint is applied using a spray can or by immersing it in an acrylic color solution, and the cones are also painted with a brush.
Having prepared everything you need in this way, you can join in the work together with the children and gradually, step by step, reveal the secret of how to make a deer.
From plasticine, two fir cones, an acorn and thin twigs we will make our first handsome one. Once you have mastered the principle of the sequence of actions, we will move on to creating a whole series of crafts on this topic.
Step-by-step implementation of the toy
When starting the main process, distribute the cones in this way: for the body - larger and denser, and for the neck - a little smaller.
- First, let's attach the legs. To do this, we insert the branches into the scales of the cones in the right places, adjusting if necessary.
- Having decided on the limbs, use a glue gun to fix them to the lower body.
- Having placed the body on its legs, we begin to shape the neck and head. Let's free one end of the second cone from unnecessary scales so that a small depression is formed in the middle, where the deer's head will be planted.
- Apply a small amount of glue there and put the acorn on it with the blunt end. Press down lightly and hold for a while to adhere.
- Connect both parts. Apply glue to the wide base of the body and place the neck and head perpendicular to it.
- Roll very small balls from plasticine, flatten them and form eyes. Another one will go to the nose, which is located at the narrow tip of the acorn.
- Let's make a tail: shape a small plasticine block into a tail and attach it to the narrow part of the torso.
- Horns can be made in two ways - openwork miniature branches are glued to the head or sculpted from plasticine. Both will look very harmonious, but if you take into account the development of the child’s fine motor skills, the second option - modeling - will be more useful.
- We finish the craft by placing it on the hooves, which serve as a reliable support for the toy. Roll four plasticine balls of the same size, slightly flatten them on both sides and stick the legs into them. Our deer will stand firmly on its feet.
The picture shows an approximate diagram of the entire process:
This cute, intricate toy can become a character in children's role-playing games or be used as an original decoration for the New Year's table.
Continuing the theme of decor, let's look at other variations of deer crafts made from pine cones.
Master class: fawns made from pine cones
Deer faces made from one medium-sized spruce fruit can become unusual Christmas tree decorations. Harmoniously integrated into their coniferous environment, they will give the green beauty a natural festive look.
A deer created from pine fruits will also not leave anyone indifferent, especially children, since only baby deer can be made from spherical pine cones.
So, for the muzzle you will need:
- an oblong fir cone, always closed and secured with varnish or glue;
- a pair of small toy eyes;
- 2 colored balls for the nose and hat;
- thin light brown felt (for ears);
- multi-colored threads;
- holofiber;
- twigs-horns, or as an alternative, wire covered with pile is suitable;
- a narrow ribbon of any color, with the exception of dark green, as it will blend in with solid wood;
- wood glue or PVA and scissors.
Don’t take on the whole process; entrust your child with simple, manageable areas of work, such as cutting out ears, attaching parts with glue, tying a bow.
Let's look at the entire manufacturing procedure step by step:
- To begin with, let’s agree that the blunt end of the object will be the top of the head, and the sharp end will be the nose;
- Apply several windings of colored knitting thread to the top of the head, dripping glue in some places. This will be the deer's cap;
- trim it with any printed material - padding polyester or holofiber. You should end up with a headdress that looks like a Santa Claus hat or a gnome's cap. If you like to bring everything to perfection, then crochet such a cap in advance;
- Decorate the top with a mini-ball, a thread pompom, and a tassel;
- bend horns from fleecy wire. If you don’t have one, you can pick up and attach ordinary branches;
- Glue ears cut in the shape of a leaf under the horns on both sides;
- Attach the eyes to the desired location. They should be located at the bottom, slightly away from the edge of the cap;
- decorate the nose of the deer with a ball;
- Glue a bright ribbon to the center of the crown and tie a bow.
The original decorative element - the muzzle of a deer - is ready.
Toy "Deer"
The baby deer craft consists only of natural raw materials, with the exception of small elements:
- two pine cones of different shapes and sizes - one large oblong, the other smaller cone-shaped;
- 2 branches and 4 twigs;
- wood glue;
- wire cutters;
- bead;
- mini bells, ribbons for decoration.
Making such a toy is simple and quick—you can make a whole family of deer in an hour. See for yourself:
- The first step is to turn on your imagination and work on a suitable arrangement of two blanks - the head and the body.
- When you find an interesting angle for the head and the scales of the cone match up like a puzzle, glue the structure together and press it with your fingers for a while until there is sufficient adhesion.
- The next stage is the legs. They should not be made short, since a deer, even a young one, is an animal famous for its graceful and fast legs. Having selected suitable rods, carefully align them along the length with wire cutters and place them in their place. To make the figure stable, glue the legs in the form of triangles or spacers. Also make sure that they are not too thin, unable to support your body weight.
- The horns are selected from delicate, thin and openwork branches and attached to the head with an adhesive solution. If desired, you can tie a small bell or ribbons on them.
- Mark the nose with a red bead.
Additionally, apply acrylic paint to the craft in a dry brush style. Dilute an ocher shade of color. Dip the brush into it, wipe off the excess on the paper, and use the minimum that remains on the brush to paint using tangential movements.
A product made from a material of a different texture will allow you to expand the selection of toys. We're talking about a paper deer. We'll tell you where it can be used and how to do it.
Leaf applique "Lion"
You can even make the king of beasts, the lion, out of the leaves.
Lion made of leaves
Part of the “lion” applique can be made from colored paper.
Applique of leaves and paper “lion”
The lion's face can be printed and painted, and its luxurious golden mane can be made of maple leaves. First, we need to draw or print the face of a lion (the template is at the end of the article).
Paper lion face
Take a blue sheet of paper and cover it with bright yellow maple leaves. The lowest leaves should be the largest and located closest to the edge. We glue smaller leaves onto them layer by layer. We place them a little closer to the center, but leave the very middle free.
Cover the base with leaves
We glue the face of a paper lion onto it.
Glue the lion's face out of paper
You can make the lion's nose and cheeks from leaves, and paint the rest. Application “Lion from leaves” - ready!
Lion made of leaves
Watch how to make an applique with a lion in the video:
Each lion will be bright, magical and unique.
Lion with a mane of leaves
DIY deer made from pine cones: master class with step-by-step photos
A deer made from pine cones is a craft that anyone can easily make! Arm yourself with some old plasticine, grab an acorn, a couple of fir cones and a few thin branches, and get to work! So, how to make a deer with your own hands from pine cones?
DIY deer made from pine cones: master class with step-by-step photos
Using plasticine, we fasten a pair of fir cones at a slightly pointed angle. Using plasticine greatly simplifies the process, so this craft becomes accessible even to kids. At the same time, well-fixed parts will hold quite firmly, which opens up the possibility of participation in various exhibitions and competitions.
We fasten the fir cones
From the bottom of one cone we make plasticine fastenings for the legs. We just roll small plasticine lumps and stick them where the legs should be - two lumps in the front of the cone, opposite each other, and two lumps behind.
We attach plasticine fasteners
We insert pieces of a thin branch into these fastenings. It is advisable to saw the branch or cut it with a knife into equal fragments so that the cut is even. Then the deer will stand well on a solid surface.
You can fix the figure on a solid base - for example, a piece of thick cardboard, using the same plasticine.
Please note that the legs should not be too short or long; it is important to find the optimal proportion.
Attaching the leg
So, the legs have taken their rightful place, and we already have the silhouette of a deer drawn!
Attach all the legs
Using the same plasticine, we attach the head – an acorn – to the top cone. In the absence of an acorn, you can make a head from a small spruce cone, if you can find one, or sculpt it from plasticine. There are many other options - for example, find a pebble of a similar shape, a physalis nut and other natural materials. You can use a wooden bead or a small cut from a branch.
Attach the acorn head
We decorate the head with beautiful branchy horns. You will have to work hard to find a suitable twig, but the result is worth it. You can assemble horns from several thin branches, fastening them with thread or the same plasticine.
Attaching the horns
We fix the horns with plasticine, and our forest prince is almost ready!
Deer made of cones and twigs
All that remains is to correct all the details and think about the design in which the craft will be presented. If desired, you can decorate the deer's chest with pieces of moss or a dry leaf to emphasize its nobility and beauty.
Deer made from natural materials
That's all! You learned how to make a deer from fir cones, building your work step by step. Using pine cones of different sizes, you can make a whole family of deer, or you can create a beautiful arrangement in which the deer play a key role.
New Year's surprise
Not only children, but also adults live in anticipation of a miracle before the New Year. So, this very miracle, in the form of a fairy-tale animal, can be made with your own hands. Let's look at how to make a deer from wire.
Necessary materials
The basis of the future figure is wire. The whiter and stiffer it is, the better - this will make the homemade sculpture more stable. The recommended diameter of the material is at least four millimeters.
You will need a can of spray paint and a Christmas garland.
Step-by-step instruction
- Step No. 1. Select a picture on the Internet depicting how to make a deer from wire.
- Step No. 2. Start making the frame of the animal with horizontal lines.
- Step No. 3. For such large parts as the neck, head, legs (next stage), use whole and long pieces of wire.
- Step No. 4. Work out the design of the legs with special care: at the base of the body they should be thicker, and the knees should be slightly curved.
- Step #5: Maintain symmetry while making the horns.
- Step No. 6. Color the figurine. This will help hide all minor errors in the work. The color can be any - it all depends on the taste of the master.
- Step No. 7. Attach the New Year's garland and turn it on.
The original glowing deer is ready!
Good old craft
A small figurine of a deer made from scrap materials can be created even by children. For such a deer you will need:
- spruce cone;
- five straight branches;
- two branches with branches;
- fluffy willow flower;
- two peppercorns;
- one rowan berry;
- one acorn with a cap;
- two sunflower seeds;
- brown plasticine;
- glue;
- awl;
- stationery knife.
The fir cone will play the role of the body. To one of its sides you need to glue four small balls of plasticine in a rectangular projection to attach the legs and one ball closer to the base of the cone, on the opposite side from the previous fastenings.
The legs and neck will be played by five straight branches, which are attached to plasticine balls on the pine cone. The tail - a willow flower - is attached with glue to the top of the cone.
In the acorn cap you need to make two holes for the horns in the front and one in the acorn itself on the opposite side for the neck.
The horns are made from two gnarled branches, and their bases are sharpened with a knife so that they fit freely into the holes in the acorn. They can be attached using glue or plasticine.
We glue ears from sunflower seeds, eyes from peppercorns and a nose from rowan berries, finally forming the head of a deer.
After the head is attached to the neck, the craft is ready.
What types of crafts can we make?
In fact, sources of inspiration surround us everywhere: New Year's advertising and pre-holiday posters. You can come up with dozens of your own ideas to bring to life in the future. We present to your attention step-by-step instructions for creating the most famous craft.
So, today our list includes the following models:
- Deer made of cardboard and colored paper. Such crafts can be safely presented to people you know as a New Year's souvenir, and they are incredibly easy to make.
- Plastic figurines of deer. It’s enough to have a few old plastic bottles on hand and your child’s school craft is ready.
- Felt figures. Small but cute deer will decorate your handbag or your kids' backpacks. The work won't take up much of your time, but cute toys will remind you of the upcoming pleasant holiday weekend.
- Lightweight toy decoration for the Christmas tree. Manufacturers have long moved away from making heavy Christmas tree decorations, and we will not stand aside. Today we will create a decoration from foam plastic for the holiday.
- Wire frame deer. The most difficult moment in this technique is making the frame itself. Or you can supplement it with film, garland, fabric (at the discretion of the master).
Unusual solution
If there are deer antlers in the house, then very unusual things can be made from them that will serve both a decorative and functional role in the interior.
The simplest and most common solution is to mount the antlers on the wall and use them as a hanger.
There are also more original solutions for crafts made from deer antlers. By showing a certain amount of imagination, you can make unusual lamps.
Sconce and chandelier
To design an elegant wall lamp you will need several light bulbs with lampshades, a wire with a plug.
First of all, small lamps with lampshades are attached to the “branches” of the horns. The wire should be placed in such a way that it is not visible. By connecting the electrical plug to the network, you will get something completely different from any of the store-bought lighting fixtures.
In exactly the same way, you can make a whole chandelier, although this will require not one, but several deer antlers.
Recommendations from experienced professionals
When making crafts in the form of a deer from pine cones, it is better to adhere to the following recommendations:
- It is better to collect natural material in dry, warm weather;
- Preference should be given to the cleanest specimens possible, since contaminated material may contain resin, which greatly stains hands and clothes;
- if closed specimens are required to make the figurine, then they should be collected in the fall, you can also resort to soaking them and then fixing the scales with glue;
- To make the craft more colorful, the base can be painted any color you wish.
Working together with a child
Walks in the park or forest can be combined with collecting the necessary natural materials for future crafts. Collect and bring home:
- a couple of fir cones;
- several acorns;
- a small cut of wood for a stand;
- conifer needles;
- dry twigs.
All these materials, along with plasticine, cardboard and glue, will be useful in future work.
How else can you work on a craft?
Here you will need to acquire the following materials:
- a pair of cones of different sizes, one of which should be closed;
- rowan bunches;
- plasticine;
- a few autumn leaves for decoration.
It is best to make a head from a cone with closed scales. A deer made from cones must have eyes that can be easily molded from plasticine. It is recommended to leave sharp corners. The pupils are made black. You can finish the design of the eyes with eyelashes, for which rowan leaves are perfect. They need to be cut into thin strips.
For the mouth you will also need a piece of plasticine; it is attached to the top of the cone, and the eyes take their rightful place on the sides of the craft.
At the next stage you need to make horns with hooves. Rowan berry clusters would be an excellent decoration for pine cones, but not exactly in the form in which they are prepared. You need to pick off the berries, and the remaining branches will become horns. This part is secured with a piece of plasticine.
After the head is ready, all that remains is to fasten the two parts of the craft together. It turned out to be a wonderful forest dweller. Legs, if the cone will stand without them, are not necessary. In another case, branches of sufficient thickness are used as legs that can support the weight of the craft.
All that remains for the craft from natural material - a deer made of pine cones - is to make a stand, for which thick cardboard is quite suitable. For greater ambience, you can use autumn leaves, which are laid out on cardboard.
Landscape decoration
Owners of dacha plots care not only about obtaining vegetables and fruits on “hard-earned” acres, but also about decorating their estate. And what better way to decorate a plot than a garden craft in the shape of a red deer?
Imagination and the availability of the necessary materials will help you create something original that not a single guest at your summer cottage will pass by.
Make a greeting card
A deer can be a wonderful decoration for a postcard. If you use ribbed corrugated cardboard, the craft turns out to be very original and memorable.
- A colorful deer embroidered using colored threads will also decorate a greeting card.
- You can use floss or ordinary woolen threads for this.
- For the craft, you will need to draw a sketch of the picture, and then make large stitches using these lines.
- You will be pleasantly surprised and delighted by the resulting postcard with several thin layers.
- To do this, between the cardboard silhouettes, denser ones - from packaging - are laid.
- The craft turns out voluminous and airy. Silhouettes hovering above the background surface appear to be floating in space.
- If you insert a small light bulb into a congratulation, for example, a red one, instead of an animal’s nose, then the greeting will turn out “with a spark.”
- The nose can be represented by a candy. Chupa-chups with a stick or reddish lollipop.
- Red with white stripes on the sweet sticks are very similar to the horns of a cute animal.
- By adding small dried oak leaves to the composition, you will get wonderful branchy horns for the deer.
At the same time, the postcard looks not only original, but also in its own way, conveys the sincerity of congratulations.
