Winnie the Pooh is one of the most beloved characters among children. Therefore, if you have difficulty coming up with an activity for your child, you can invite him to make a Winnie the Pooh craft quickly and easily with his own hands. Materials for production can be found in any apartment, especially since almost any available means can be used.
This article will tell you how to make a fairy-tale hero from plasticine and polymer clay, as well as sew it from fabric. In addition to these materials, when making your work, you can use cones, paper, cereals, and even make a character out of balloons.
Learn to make cute crafts with Winnie the Pooh with your own hands
In this master class it is proposed to make a fairy-tale character from plasticine. The complexity of this work is not high, so this craft can be made with children in the middle group of kindergarten. The same technique can be used when sculpting from polymer clay or even mastic.
You will need:
1) Plasticine of different colors;
2) Stack and board for modeling;
1) First of all, prepare the plasticine for work, thoroughly kneading it, turning it into a soft and pliable mass. Then we form brown balls of two shades from the blocks. A darker color can be achieved by mixing brown and black clay until the color is even.
2) Then make a sausage from a light brown ball, which we divide in half. We give the new parts the shape of a ball and connect them to each other. This is the head and body of the future bear.
3) Give the desired shape to the head. To do this, use a stack to press the upper part of the ball and form a semicircular muzzle.
4) Then from a piece of dark brown plasticine we roll a small ball, which we turn into a sausage. Next, give it an arched shape and flatten it. We attach the resulting part in the upper part of the head above the protruding muzzle.
5) From small balls and sausages of both brown colors we form ears, which we attach to their proper place. Gently press one of the ears with a toothpick.
6) We make indentations for the eyes, into which we then insert white plasticine cakes. We attach black pupils on top. We form a nose from the same plasticine and fix it in place.
7) We form the paws from dark brown plasticine. We divide it into four parts, from which we sculpt oblong droplets. We attach the bear cub to the body.
We make a mouth and paws with a stack, sculpt eyebrows from black plasticine.
9) The final touch: make a balloon by attaching a circle of blue plasticine to a toothpick. We insert Winnie the Pooh into his paws.
Other works for the Children's Crafts Competition. October 2014. Preschoolers
Summary of the educational activity in English “Visiting Winnie the Pooh” (middle group) Topic: Visiting Winnie the Pooh. Objectives: 1. Activation of vocabulary on the topics “Colors”, “Parts of the body”. 2. Practicing the pronunciation of English sounds. 3. Acquaintance with new vocabulary.
Summary of a lesson on the formation of phonemic awareness for children 5–6 years old “Let's play with Winnie the Pooh. Sounds X-X'" Topic: "Let's play with Winnie the Pooh" (sounds X-X'). Purpose: 1. To introduce children to the new sounds X, X'. 2. Learn to highlight the initial consonant before the vowel. 3. Develop.
Mathematical entertainment in the preparatory school group “Visiting Winnie the Pooh Bear” Objectives: • consolidate knowledge of numbers, geometric shapes, counting skills, the composition of numbers, the ability to solve arithmetic problems; • develop mental operations (analysis.
Tutorial on making Winnie the Pooh from salt dough for beginners
This craft can be done with children in the older group of kindergarten. Modeling from salt dough perfectly develops hand motor skills and helps awaken creative abilities.
You will need:
2) Cold water in a glass;
3) Kinder surprise egg;
4) Board and stack for modeling;
5) Brushes and paints.
1) First, a dough is formed, which consists of water, flour and salt. The last two ingredients are added in a 2:1 ratio.
2) From the resulting mass we form a round plate of small thickness, lubricate it with water and wrap it around a plastic egg.
3) Then we form a sausage, the thickness of which will be 1 cm. We divide the workpiece into eight identical parts, from which we then roll into small balls.
4) Place the plastic egg blank on the base. At the bottom we attach two balls that will be Winnie the Pooh's legs. We make fingers using a stack.
5) Roll the other two balls into sausages, forming the upper legs, cutting through the fingers. We attach it to the body. From another ball we make a pot of honey, giving it the required shape using a stack. We attach it between the upper paws, adding a drop of honey.
6) Next, we form the muzzle and ears, then gluing them to the right places. We cut out the mouth, and also make small balls that will be the nose and eyes. We attach all the parts, remembering to use water.
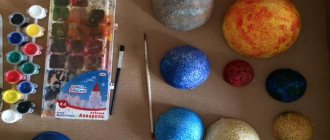
7) We paint the fairy-tale character with bright colors and enjoy the result.
Master class on making a soft Winnie the Pooh toy
Next, let's look at the step-by-step description of the process of sewing a soft bear. It is best to use short-pile fur in this work or make a craft from felt.
You will need:
1) Selected material;
4) Needle and thread;
Manufacturing stages:
1) The necessary parts are cut out according to the patterns and their insides are sewn together using a seam over the edge. The first step is to close the darts, indicated by dotted lines. The front and back of the head are then sutured, leaving a small hole at the bottom.
2) The workpiece is turned inside out, the junction of the ears and the head is stitched. The head is stuffed with the selected material.
3) Next, the cut out part for the muzzle is bent along the dotted lines, and the darts are sewn together. It is stuffed and sewn into place to the head. Eyes and a nose are cut out and glued from the skin, and a mouth is sewn on.
4) The front parts are sewn together, ensuring that the letters B and C indicated on the pattern match. The seam should be in the middle.
5) The blanks for the back are sewn together, leaving an open hole in the neck area through which the part is turned inside out. The frame is inserted inside and filled with filler. Then the head is sewn on using a hidden seam. 6) The paws are sewn in pairs, stuffed and attached to the body. The ends of the frame are inserted into the stitched parts of the lower limbs, the parts are stuffed and also sewn to the craft.
Craft ideas for kindergarten
Crafts made from pine cones are a good solution for decorating the interior on the eve of the New Year holidays. From the available components, you can make something new and interesting with your own hands at any time. Creating original crafts is an activity for the whole family.
A DIY Christmas tree is the main creation before the New Year.
To make a figure you need:
- cones of various sizes;
- glue gun;
- spray paint;
- cardboard;
- scissors.
At the first stage of mastery, you should form a cone with a base from cardboard. Spray paint on thoroughly cleaned and dried pine cones. If desired, the raw materials can be left in their natural form.
LiveInternetLiveInternet
- Registration
- Entrance
—Links
-Music
—Categories
- Beauty and personal care (120)
- beauty and care (80)
- hairstyles (21)
- fashion and style (19)
- Health (118)
- Painting, beautiful pictures, photos, illustrations (22)
- Animals, birds, insects (5)
- Cooking (785)
- salads (115)
- snacks, sandwiches (69)
- vegetable dishes (32)
- fish dishes (39)
- meat dishes (39)
- poultry dishes (32)
- minced meat dishes (14)
- mushroom dishes (6)
- pizza (17)
- casseroles (20)
- buns, buns (38)
- pies, pies, rolls (112)
- cookies (41)
- cakes, pastries (91)
- winter preparations (43)
- desserts (28)
- cocktails, drinks (17)
- wine, liqueur (11)
- food decoration (22)
- Crochet (376)
- toys, clothes for toys (124)
- for women (102)
- for children (101)
- for home (44)
- crochet lessons (2)
- Knitting (281)
- for women (153)
- for children (60)
- socks, mittens, gloves (23)
- toys (15)
- for home (15)
- for men (14)
- Embroidery (84)
- paintings (44)
- for the kitchen (20)
- pillows (12)
- cards, bookmarks (8)
- Sewing (202)
- toys, clothes for toys (78)
- for women (52)
- miscellaneous (25)
- for home (18)
- for children (18)
- alterations (10)
- for men (1)
- Child development (289)
- teaching mathematics (71)
- speech development (60)
- writing, fine motor skills (46)
- let's explore the world (29)
- logical thinking (27)
- diploma (17)
- finger games (11)
- reading training (9)
- riddles, proverbs, sayings (1)
- attention, memory, imagination (15)
- Educational games for children (124)
- Do-it-yourself development kits (20)
- Crafts with children (219)
- made of paper (74)
- applique (37)
- origami (29)
- salt dough (19)
- for the holiday (19)
- made of plasticine (19)
- made from natural materials (11)
- crafts from waste material (9)
- Coloring pages (56)
- Drawing with children (53)
- Reading with children (32)
- Tips for parents (27)
- Everything for the teacher (91)
- thematic, educational cards (40)
- demo material (32)
- group and hall decoration (10)
- medals (7)
- certificates (2)
- For school (23)
- Cartoons (46)
- educational cartoons (22)
- Cinema (81)
- Music (35)
- Poems (66)
- Proverbs (25)
- Audiobooks (24)
- Video collection (25)
- Beginner photographer (22)
- Travel (78)
- virtual travel (57)
- active recreation, vacation (21)
- Pets (12)
- Indoor flowers (24)
- Garden flowers (19)
- Landscape design (18)
- Interior (38)
- Useful tips (102)
- various (45)
- for the kitchen (33)
- for the garden (dacha) (12)
- care of clothes and shoes (11)
- Computer (81)
- lessons/usefulness (53)
- programs (27)
- Gift ideas (37)
- Holidays (15)
- Links (63)
- For a diary (123)
- lessons/usefulness (56)
- frames (33)
- buttons - transitions (15)
- dividers (13)
- Humor, jokes (29)
—Applications
- Postcards
Reborn catalog of postcards for all occasions - I am a photographer
Plugin for publishing photos in the user's diary. Minimum system requirements: Internet Explorer 6, Fire Fox 1.5, Opera 9.5, Safari 3.1.1 with JavaScript enabled. Maybe it will work - always no analogues at hand
^_^ Allows you to insert a panel with an arbitrary Html code into your profile. You can place banners, counters, etc. there - Wall Wall
: mini-guest book, allows visitors to your diary to leave messages for you. In order for messages to appear on your profile, you need to go to your wall and click the “Update” button
—Search by diary
—Subscription by e-mail
—Interests
-Friends
— Regular readers
—Communities
-Statistics
Application made of plasticine and cereal “Winnie the Pooh” for children 5 years old
What to do with your baby in your spare time? The little ones are always trying to get into trouble somewhere or break something. But they didn’t do it on purpose! Children at this age are especially inquisitive. A million questions arise in their little heads: “what” and “why”? Sometimes not every adult will give the correct answers to them. Enjoy your time! Channel your unbridled children's energy in the right direction! Offers you an idea for creating a funny Winnie the Pooh out of plasticine and cereal. This application is for children aged 5 years.
Applique at the age of 5 is an incredibly useful type of needlework. The child develops his imagination and logical thinking, hand motor skills, and learns to work with various materials. Both you and your baby will get a lot of positive emotions from such time together. And how delighted grandparents will be with such a gift!
What a cute applique you can make!
To create such a picture we will need:
cereals (in this case, buckwheat and millet are best)
1. Print out some funny picture from the computer. If you don’t have a computer or printer, you can draw by hand or translate a drawing from children’s books.
2. Apply and roll out plasticine to individual parts of the body. For this picture it is better to use brown and yellow.
This picture also looks good, but we will not dwell on this and will complicate our task. Let's cover the application with cereal.
3. To ensure that the cereal sticks well, cover the image with glue.
4. Sprinkle the bear’s body with millet and the shirt with buckwheat. And wait until it dries completely.
Let's add a frame and that's it! The picture is ready.
| Categories: | Crafts with children/applique |
Tags:
applique of cereal and plasticine Winnie the Pooh for children 5 years old
Cited 20 times Liked by: 6 users
Flat felt tiger – 6 patterns
The uniformity and density of the felt material makes it easy to work with it in the process of creating beautiful and unique patterns. For variety and the opportunity to choose the most attractive option, you should take a closer look at the proposed schemes.
Or like this
Another option
Such
Another pattern
Learn to make cute crafts with Winnie the Pooh with your own hands
Made from plasticine.
In this master class it is proposed to make a fairy-tale character from plasticine. The complexity of this work is not high, so this craft can be made with children in the middle group of kindergarten. The same technique can be used when sculpting from polymer clay or even mastic.
You will need:
1) Plasticine of different colors;
2) Stack and board for modeling;
1) First of all, prepare the plasticine for work, thoroughly kneading it, turning it into a soft and pliable mass. Then we form brown balls of two shades from the blocks. A darker color can be achieved by mixing brown and black clay until the color is even.
2) Then make a sausage from a light brown ball, which we divide in half. We give the new parts the shape of a ball and connect them to each other. This is the head and body of the future bear.
3) Give the desired shape to the head. To do this, use a stack to press the upper part of the ball and form a semicircular muzzle.
4) Then from a piece of dark brown plasticine we roll a small ball, which we turn into a sausage. Next, give it an arched shape and flatten it. We attach the resulting part in the upper part of the head above the protruding muzzle.
5) From small balls and sausages of both brown colors we form ears, which we attach to their proper place. Gently press one of the ears with a toothpick.
6) We make indentations for the eyes, into which we then insert white plasticine cakes. We attach black pupils on top. We form a nose from the same plasticine and fix it in place.
7) We form the paws from dark brown plasticine. We divide it into four parts, from which we sculpt oblong droplets. We attach the bear cub to the body.
We make a mouth and paws with a stack, sculpt eyebrows from black plasticine.
9) The final touch: make a balloon by attaching a circle of blue plasticine to a toothpick. We insert Winnie the Pooh into his paws.
Processing pine cones for crafts
When you need open cones during creativity, you should dry them well. Natural preparations can also be collected in the spring after being freed from seeds. It is important to note that open copies do not change their shape.
If it is necessary to use an unopened type of cones in your work, then after cleaning the scales, they are treated with glue. You can use regular PVA glue or wood glue.
Less often, curved shaped raw materials are needed for crafts. To obtain the desired workpiece, it is left in boiling water until it becomes elastic, and then the desired appearance is formed, secured with insulating tape.
The material intended for making figures must be clean and dry. Cones that have been pre-treated should be thoroughly dried.
There are 4 drying methods:
- Outdoors - choose a dry, well-ventilated place, cover the surface with paper and leave for 2-3 weeks.
- In a frying pan - place the raw materials in a cast iron bowl, leave on low heat and, turning occasionally, bring to readiness.
- In the oven - place foil or parchment paper on a baking sheet, distribute the buds not too tightly to each other and keep for 30 minutes at a temperature above 200ºC.
- In a microwave oven , cover the glass surface with napkins, lay out the workpieces and put the appliance on maximum power for 1 minute.
Pine cones take longer to dry than spruce cones. In addition, due to the lightness and volatility of the seeds, it is better to prepare them in a large and tall box.
Poorly processed elements can become deformed over time. Fir cones are especially susceptible to external changes.
To ensure that the creative result remains in perfect shape, the following recommendations must be followed:
- Boil the assembled pieces for 30-40 minutes;
- remove accumulated moisture by drying;
- carefully treat the finished material with wood glue;
- If you need to obtain light buds, you should soak the raw material in a container with universal bleach.
Natural raw materials after heat treatment will become clean and safe. DIY crafts made from cones can be covered with paint of the desired color, varnish or artificial snow. The choice will depend on the intended decoration.
In some cases, when performing artistic work, it becomes necessary to drill or cut material. With this impact, the scales of cones, especially those of spruce trees, break and crumble. To keep them intact, you need to use the tip of the drill to hit the center of the workpiece as accurately as possible and, without using any effort, deepen it with rotations. The resulting hole is covered with glue.
The principle of processing and creative work with spruce and pine cones is identical. The only difference is that crafts made from spruce material will have an elongated shape.
Dough is not just for the kitchen
What we'll get to now is sculpting. Namely, for modeling from salt dough. It is generally accepted that this type of needlework develops hand motor skills well, and also awakens creative ideas, capabilities and talents. First of all, you need to mix the dough.
For this we need flour, salt and 1 glass of cold water. The proportion of flour and salt is 2 to 1.
Our dough is ready. Now let's take the rest necessary for modeling, namely:
- Egg from Kinder Surprise;
- Modeling board;
- Stack;
- Tassels;
- Paints.
Since everything is ready, we can begin. Take the resulting dough, grease it with water and wrap it around a plastic egg. It is important that the dough plate is round and not too thick. Then we form a sausage, the thickness of which is approximately 1 cm. Divide into eight equal pieces.
Afterwards, roll each part into balls. Place the dough-wrapped plastic egg on the board. At the bottom we attach two balls, which are the legs. We attach the handles from above, and only the resulting two balls are formed into sausages. Another one of the balls is a honey pot. As everyone knows, this is Winnie the Pooh's favorite treat. We fasten the fashioned pot between the paws that are on top.
The stack comes into play. Using it, we cut out the necessary parts - fingers, honey lid. You can add anything at your discretion. For example, a drop of honey flowing from a pot.
All that remains is to form the muzzle and ears. Here we turn on our imagination, imagine what Winnie the Pooh’s face and ears are like. When you are sure that everything is done correctly, attach it to the body. Of the small parts there is a mouth, which we cut out in a stack. Well, don’t forget about the round, small eyes and nose. These are all ordinary small balls. We remember that when attaching each part, we add water. Water in this case is the glue.
Article on the topic: Artificial silk - what is it: composition, properties
This is what you should get:
Perhaps the most interesting part remains until the very end. You need to color Winnie the Pooh. How to do this is up to everyone to decide. We take paints, turn on the “imagination” button and create. The result is a bear like this:
And after that, we are inspired by our creation for subsequent masterpieces!
Pliable plasticine
Now we will tell you step by step how to create Winnie the Pooh from plasticine.
To do this you will need:
- Plasticine. Various colors required;
- Stack;
- Modeling board;
- Toothpick.
Knead the plasticine until it becomes a soft mass, ready for modeling. After this, we will make two brown balls of two tones. From a light brown ball we get sausage. Let's divide it into two halves. We form the resulting parts into a spherical form and combine them. The head and body of Winnie the Pooh have already been created. It is necessary to give the correct shape to the head. Here we need a stack. Taking it in your hands, press the ball on top, as shown in the picture:
Next we take dark brown plasticine. It should make a sausage, give it the appearance of an arch and flatten it. We attach the received one above the muzzle. We take balls and make ears. We use both dark brown and light brown. We attach the ears to the head, do not forget to press one of them with a toothpick.
Let's make indentations for future eyes. Let's use white plasticine and form small cakes. We attach black circles-pupils on top. We use the same color to make the nose. We fix all the parts in their “rightful” places. The next step is the paws. They will be dark brown in color. We sculpt four oblong droplets and attach them to the body. The last thing left is the mouth and the marks on the paws. The stack will help with this. With light movements we complete the final touches and voila - cute Winnie the Pooh is ready.
Don’t forget that this craft can also be made from felt, polymer clay, and even balloons.
Rey from the new Star Wars trilogy
thisisladyland.com Rey's Star Wars costume can be made without thread or glue. The main thing is to find the right things:
thisisladyland.com You can make arm ruffles from tights, and a cape from a scarf. Just throw it around your neck, cross it over your chest and leave the ends to fall freely, securing it at the waist with a belt.
You can complement the costume with a Jedi sword or BB-8 made of papier-mâché.
The costume consists of wings and a hat with antennae, the rest of the clothing is at your discretion. This could be a T-shirt with pants or a skirt or a dress. The main thing is that they are black or red with a black dot.
For the wings and cap you will need:
Cut out wings from cardboard, take a foam sponge cut in the shape of a circle, and put black dots.
Make holes in the wings, thread the red string through as shown in the picture below, and seal with tape. The child will thread his hands through the resulting loops.
Everyone loves soft toys
It's no secret that people like soft toys. Age is absolutely not important here, they are touched by them. Sometimes you want to buy a toy not for someone else, but for yourself. But you can not buy it, but sew it. It's not as difficult as it seems. If you have never picked up a needle and thread, then it doesn’t matter. Today we will tell you how to sew a soft Winnie the Pooh bear.
First of all, you need to take everything you need:
- Pattern;
- The material from which the toy will be made (it is better to use fur with a pile, preferably short, or felt);
- Padding material;
- Needle;
- Threads;
- Scissors;
- Wire.
Since everything is ready to go, we start with the pattern. We cut out important parts and sew their wrong sides together. We use the seam over the edge. The dotted lines mark the undercuts. They are sewn up at the beginning. The front and back of the head are stitched together afterwards. Leave a small hole in the bottom area. The blanks can be turned out, we stitch the area of the toy where the ears and head are connected. We fill our heads with the selected material.
The part for the face, previously cut out, is folded along the dotted lines, and the darts are sewn together. We stuff the resulting part with material and sew it to the head. We cut out eyes and nose from leather. Don't forget to sew on the mouth. There are letters on the pattern - B and C. The front parts are stitched so that these letters are connected. The seam is located in the middle. Let's move on to the back. The blanks are connected, leaving a hole in the neck. We turn the part inside out, insert the frame inside and fill it with filler. The head is sewn on using a hidden seam.
Article on the topic: Interior of a Narrow Hallway in an Apartment - Ideas
We sew the paws together in pairs, stuff them with material and sew them to the body. The ends of the frame must be inserted into the lower limbs, only then sewn to the toy. And here is the result. Now this Winnie the Pooh will please your eyes. You can also give a toy as a gift. It will be doubly pleasant, because it is made with your own hands.
Tools for work
In addition to forest raw materials, to perform artistic work you will need auxiliary tools, the most commonly used of which are:
- scissors - must have blunt ends for the safety of children;
- an awl or a large needle - a tool made of durable material is welcome, always with a thread passed through the eye;
- a simple pencil - needed for drawing lines or outlines;
- paints – necessary for the design of the intended toy or decor, preferably gouache;
- brushes - softer for painting products, hard - for glue;
- stack - intended for shaping the surface of clay or plasticine in creativity;
- tongs or pliers – used for screwing in wires and hooks;
- transparent varnish – gives the finished product strength and smoothness.
Accessories that are hazardous to children should only be used under adult supervision or assistance.
It is important that the teacher or parent knows the features of working with devices and, as necessary, acquaints the child with them.
Step-by-step photo lesson:
We will sculpt our cartoon bear in brown tones. This is exactly how Soviet animators portrayed Winnie the Pooh in such a believable way. Prepare two brown shades and an additional black.
Prepare two light brown balls to create the head and body of the cartoon.
Connect the balls and smoothly spread the plasticine with your fingers. You should get a matryoshka figure. This is exactly the silhouette that Winnie the Pooh will have. The bear has no neck and a fat belly, because he is a glutton.
Create two dark brown thin sausages for the ears. Make rounds out of them.
Attach the sausages to the top of your head.
Add a dark brown area to the front part, where the eyes will later be placed. Under this dark brown area, attach a black nose dot.
Place white eyes on the prepared dark area.
Blind small paws in the form of blocks. Black claws can be attached to the tips of the paws.
Attach the arms and legs to the bear figurine.
Cute little bear Winnie the Pooh, who constantly puffs, is ready. If you wish, you can treat your new plasticine pet with honey, because this is his favorite treat.
The master class was conducted by Anna Nigmatullina.
Making crafts from natural materials is an excellent activity for children, which develops imagination, creative thinking, and fosters a love for the world around them. Leaves, cones, acorns, chestnuts, tree bark, twigs - all this and much more can be included in the creation of a unique piece!
natural materials; can; plastic bottle; plywood according to the size of the work; cardboard; round lid; braid; self-adhesive paper or fabric for curtains; acrylic paints; masking tape.
Tools:
hot gun; scissors; stationery knife.
What other materials can be used
In addition to pine cones, there are also a lot of natural materials that can be combined with pine cones - bright leaves, chestnuts, pebbles of various shapes, acorns - excellent tools for children's and adult crafts. Combining raw materials of various shapes and textures will allow you to create artistic work of any size.
Cereals, nuts, matches, threads or other handicraft items in art Additional elements will make the work more realistic and creative, breathing life into animal figures. Experts assure that the combination of artificial and natural parts is welcome in any craft.
Mini-toy "Winnie the Pooh"
Small toys are usually very popular with children. After all, you can always carry them with you and play with them anywhere - on the street, in transport, at a party, in kindergarten.
You can find many small toys in stores, but it is much more interesting to sew such a toy yourself. Although this work is painstaking, it is not very difficult. If your child loves the fairy tale about the funny and restless Winnie the Pooh, then you can sew this cheerful teddy bear. The child will be happy with such a surprise and will not be able to part with his favorite fairy tale hero.
To make a mini-toy “Winnie the Pooh” we will need:
- - paper;
- - a simple pencil;
- - bright yellow felt;
- - red felt;
- - padding polyester;
- - black beads and seed beads;
- - scissors;
- - threads of yellow, red and black colors;
- - needle.
The procedure for working on the mini-toy “Winnie the Pooh”
1. Let’s transfer the mini-toy pattern from the screen onto paper and cut out the parts. It is easy to transfer details onto paper if you place the sheet of paper on the screen and lightly trace their outlines with a pencil. We should have seven parts: body, blouse, sleeve, collar for the blouse, small ear, front and hind legs.
2. From bright yellow felt we need to cut out two parts of the body, two ears, front and hind legs (four parts each).
3. From red felt you need to cut out one collar, four sleeve pieces and two blouse pieces.
4. When all the pieces are cut out, you can start sewing them together. We fold the parts made of bright yellow felt trampled and sew them with yellow threads using an overcast (buttonhole) stitch. We will leave a hole on each part for stuffing with padding polyester or some other filler. In addition to padding polyester, holofiber and padding polyester are good for stuffing toys. It is not advisable to use cotton wool for stuffing soft toys, because... it quickly gets lost and the toy loses its shape.
5. Fill all the sewn parts with padding polyester (but not too tightly), pushing the padding polyester with a thin stick, for example, a bamboo skewer or a toothpick. After this, we sew up a hole on each piece with yellow threads.
6. Take the parts of the blouse cut out of red felt, attach them to the body of the teddy bear and sew them on both sides with red thread using a blanket stitch.
7. We attach sleeve pieces to each paw on both sides and sew the edges of the sleeves with red thread using a buttonhole stitch.
8. Carefully sew the collar to the neck of the blouse with a hidden seam using red thread.
9. Unscrew the collar and straighten it.
10. Use red thread to sew the front legs to the body directly on top of the blouse.
11. Using yellow threads, sew the hind legs to the bear’s body. The paws should not be sewn too tightly to the body so that they can move.
12. Sew small ears cut from yellow felt to the bear’s head. To sew on the ears, we will take yellow threads and sew them on with a hidden seam using small stitches.
13. All that remains is to make our Winnie the Pooh’s eyes and nose. We will make the eyes from black beads, sewing the beads on the sides of the head with black threads. We will make the nose from a black bead, also sewing it to the muzzle with black threads.
The mini-toy “Winnie the Pooh” is ready. The height of the teddy bear is 10 cm, and when seated its height is 7 cm. The toy can easily fit in a pocket or in a child’s fist. If it gets dirty, you can gently wash it by hand. Not only can this toy be played with, but older children can use it as a keychain or as a pendant for a school bag or backpack.
How to choose the right cones for crafts
When collecting, it is better to give preference to clean material without dried resin and insects. Remaining dirt can be easily removed with a cotton swab dipped in an alcohol solution.
The internal cavity of forest coniferous raw materials is cleaned by soaking it in vinegar essence diluted with boiled water in a 1:1 ratio. After processing, the scales may close, but their shape will remain original.
To create crafts from closed cones, it is recommended to collect material in the autumn and in sunny weather. This is due to the fact that the harvesting material will be well cleaned and dried. October is the best period, when the raw material is moist and the covering scales are tightly closed. Here you can also find cones of non-standard shape.