If you enjoy making a variety of colorful crafts, this is a great way to work with your child. Children really appreciate attention. The more time you devote to his development, the more gifted he will be. You may also be faced with the need to manufacture for a certain holiday date.
On Cosmonautics Day, school and preschool institutions host handicraft exhibitions, where children show individual products. Check out some of the fun techniques for making a model of a space object.
Work supplies
Space subjects are made from everything that is at hand, that has fallen out of use or is prepared only for the process of needlework for crafts in a child’s home room, kindergarten, or school.
- Several spheres of different sizes.
- Supplies for drawing.
- Illustrations and newspaper strips.
- Wallpaper paste.
- Thin plywood, foam rubber.
- Thread and wire for loops to products.
- CDs.
- Plastic bottles.
- Plastic mass for modeling.
- Food grade aluminum foil and much more.
Layout "Journey to Mars"
A competition or exhibition on the theme of space in kindergarten or school is a reason to get creative. The model with the Martian surface, an astronaut and details of the space station will look original.
As a base we will use a regular corrugated cardboard box, the top and two sides of which will be cut off to create a corner for the layout.
Now we need to create the surface of Mars - red, with craters and depressions. It can be made from a large amount of plasticine of the appropriate shade.
Fill the bottom of the box with plasticine. We paint the walls black and decorate the starry sky - we draw planets, satellites, stars, we make a hemisphere-sun from yellow material and attach it in the corner, we finish the rays with yellow paint. There are many options for designing the sky; you shouldn’t limit your imagination.
We make the parts of the space station from a white plastic Christmas tree ball - we simply cut it in half and fix it in the Martian surface. We supplement it with elements borrowed from a regular constructor. But you will have to work hard on the astronaut - sculpting a figurine, decorating the spacesuit correctly.
Mars is a very interesting planet, unusual, mysterious. There is something to tell the child about it while working, or you can compose a whole fairy tale, a story, the author of which will be the child.
Creation
When constructing a galaxy system and depicting its realism, it is advisable to study tone and volume. Look:
- The sun is golden.
- Mercury – faded, gloomy.
- Venus is straw-colored with whitish streaks.
- Earth – dark blue with greenish.
- Mars is scarlet.
- Jupiter is red-orange with a whitish admixture.
- Saturn is bright yellow.
- Uranus is blue.
- Neptune is turquoise.
- Pluto is beige.
Creative process
Modeling in this case consists of the following stages:
- To prepare the paste, you need to thoroughly stir the flour in a bowl with water.
- Then you should tear the newspapers into small pieces.
- The resulting scraps are smeared with paste, after which they are applied in several layers to the ball taken as a base.
- The resulting workpiece should dry thoroughly.
- Now it's time to paint the Moon grey. There is no need to polish its surface before this, since the real Moon does not look like an ideal sphere.
- Using a needle, you need to pierce the shell of the natural satellite and pull out the ball from it.
- Next, craters are formed. To do this, gray paper is cut into small squares, which are rolled into funnels. Their sharp ends are smeared with glue and fixed on different parts of the Moon.
- The modified satellite must be dried again.
- To create the effect of orbital motion, you need to bend the wire and pierce the polar part of the Moon with it. A thread or an elegant braid is threaded into the resulting eyelet, on which the craft is suspended above the desk.
From threads
This is the most common option for making a planet. To work you will need the basic components. The next steps are simple:
- Inflate the balloon.
- Fire a soap bubble of glue with a needle and pull the thread through. It will be saturated with glue.
- Take it by the edge and begin to wind it around the ball in a chaotic manner, forming a fairly dense mesh.
- Set the future planet aside until the glue has completely dried.
- As soon as this happens, heat the ball and remove it from the workpiece.
- Study the World map or globe, and color all the continents on the ball in the appropriate colors.
Then build a pedestal and secure the craft. If the coloring option does not suit you, all the sushi areas can be made of felt and glued to the surface of the ball, and you need to paint the craft itself blue.
Solar system using felting technique
Felting wool is a new way for craftsmen, but already gaining popularity, to create original crafts.
For work we will need:
- Wool.
- Styrofoam.
- Needles for felting.
- Old nylon tights.
- Liquid soap and water.
- Paper towels.
- Wire and pliers.
Today we are creating Mars. Step-by-step instructions for the master:
- Cut out a small ball from polystyrene foam.
- Prepare red wool, add inclusions of white material.
- We wrap our base ball with red threads. Now you need to wet the workpiece with hot water.
- Drop 3-5 ml of liquid soap onto the workpiece and begin adding wool to the future planet.
- Next, gently roll the ball between your palms.
- Now we lower the workpiece into cold water.
- If necessary, repeat the procedures several times (we focus on the looseness of the material).
- Remove excess moisture with a towel.
Our Mars is ready!
Papier mache
The French technique of making copies of objects has found its niche in needlework. Take:
- Balloon.
- Old newspapers, any other thin paper.
- Paste.
- Drawing set.
Instructions:
- Cook the paste. The recipe can be easily found on the Internet.
- Tear newspaper sheets into small pieces of paper in large quantities.
- Dip individual pieces of newspaper into glue and glue them layered onto the ball.
- Let dry. Air drying will take a lot of time. It is allowed to use the oven at low heat.
- When gluing, uneven surfaces will form, do not try to smooth them out. They will form excellent three-dimensional elements of the planet’s exterior.
- Pierce the inside of the ball with a point and use the gap made to remove the remainder.
Next, cut the pages into small squares. Stack them to form craters. Carefully glue the edges of the funnel to the lunar surface. Dry again. If you make a buttonhole from wire, you will get a hanging Moon.
Learn to draw Mars
Children who adore the theme of space and everything connected with it can be asked to draw Mars. If you take the task seriously, you will get a very realistic drawing.
Let's prepare:
- paper;
- pencils, preferably watercolors;
- brush and water;
- compass and eraser.
Pencils are needed in certain colors - red, yellow, orange, black, two shades of brown.
Let's start drawing with a simple circle. The circle can be made using a compass or simply by tracing a plate or any other object of the correct shape. Then, using a simple pencil, we highlight the highlands and lowlands (Martian seas). It is better not to make clear, bright black borders. Let's denote them with light strokes.
The next step is filling with color. One side of the planet will be light – sunny, the other dark – “night”. We “adjust” the saturation of the shade by pressing the pencil. Watercolors allow you to use this technique of playing with color. Leave a small white area at the bottom of the circle.
Then we design the space around the planet. For this we use light brown, gray and blue shades.
The final stage of work is to use a damp brush to smear pencil strokes over the entire surface of the drawing.
If you have no experience working with watercolor pencils, you can use a video tutorial from an experienced artist before starting to draw:
Made from plasticine
The plastic material is ideal for making crafts for preschoolers. In the process of sculpting, the mobility of the fingers is developed, and the imagination deepens the spiritual perception of the world. You will need:
- Plasticine.
- A base, such as a disposable cup.
- Paints and brushes.
Memo
- Take the base and paint it a dark bluish shade. It is possible to use any color that your imagination allows.
- Draw stars along the edge of the dish and place the main planets and asteroids.
Feel free to experiment when depicting a galaxy. It is not at all necessary to sculpt the Moon, Jupiter or Pluto exactly.
For example, make a ball out of dark green plasticine. Craters on the Moon will be blue spots. Attach them to a model of a cosmic body. Place the model itself on the base.
Pillow planets as interior details
In the case when you want to make a craft not for a school exhibition, but just for yourself, you should arm yourself with threads and needles. Soft and comfortable pillows will decorate your sofa and also serve as a cozy interior detail in your home.
For work we will need:
- Planet templates.
- Any fabric you prefer to work with.
- Threads with needles.
- Filling fabric.
Step-by-step instructions:
- Using the prepared template, make fabric blanks.
- Having folded the blanks with the wrong side out, sew the edges. Leave a “window” for the filler.
- Sew the seams.
- Turn the product inside out through the “window” and stuff the filling inside.
- Sew up the “window”.
In fabric stores today you can find a wide range of colorful fabrics: from dark blue solids to star-filled expanses. Choose the fabric that you like.
We looked at only a small part of the ways to create homemade planetary systems. What are the advantages of these techniques? Making colorful models will help your child to be curious and think while working. Choose a method convenient for you and start making new planets!
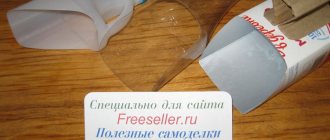
Globe stand
Take a toilet paper roll, make a cut on one side and bend it over. Apply hot glue to them and attach them to the middle of the plastic plate. You can use the bottom of a round cake box instead. If necessary, widen the hole in the globe. Insert the other side of the sleeve into it, pre-lubricated with glue. The tabletop globe is ready. If the papier-mâché workpiece turns out to be quite heavy, then weight the stand with plaster or use a container with sufficient weight instead of a plate.
The benefits of modeling
In addition to plasticine, there are many alternative materials. Cold porcelain is considered one of the best materials for modeling. It is easy to prepare at home. You can use polymer clay, which subsequently hardens. Some types of clay require heat treatment.
Activities such as making various crafts are very useful for developing mental abilities in children, as well as for improving their psycho-emotional state. Modeling from plasticine provides many advantages:
- The development of fine motor skills of the hands has a beneficial effect on the development of speech skills and diction. Therefore, it is very useful to engage in modeling with plasticine, making paper crafts, and handicrafts with children of primary school age.
- Making a globe from plasticine with your own hands will help give children basic knowledge about the structure of the world, namely the basics of geology and geography. They will become familiar with concepts such as the planet, the location of continents and oceans, mountain systems and plains on the surface of the Earth.
- The process of working with plasticine activates creativity.
- Working with crafts helps develop qualities such as perseverance, attentiveness, accuracy and concentration. Children learn to concentrate on one activity.
- By creating new shapes from standard blocks, spatial, abstract and figurative thinking is activated.
When a child kneads and rolls a ball between his palms with both hands, both hemispheres of his brain are involved. Interhemispheric connections are strengthened, which contributes to the harmonious development of the baby in all directions.- The process of sculpting various figures and forms according to a model develops memory and the ability to compare the proposed option with one’s own work.
- If the baby sculpts, inventing his own images and shapes, this helps develop imagination and creativity.
- Making crafts teaches children to set simple goals and achieve them, bringing the job they start to completion.
- Engaging in such types of creativity that require prolonged concentration and perseverance has a beneficial effect on the health of the human nervous system. His psycho-emotional state improves.
- Regular quiet games help reduce excessive activity, irritability and hyperexcitability. Such children are less likely to suffer from attention deficit disorder. In addition, their sleep becomes normal.
- If your child manages to make a few crafts on his own, it will help boost his self-esteem and give him inspiration for further achievements in the arts and sciences.
The educational process, which is carried out in a playful and relaxed atmosphere, is most effective. A small child gradually learns new things through the language accessible to him. This awakens interest and stimulates the desire to learn in the future.
A model of the Earth is a fairly common souvenir. There are many varieties: globes made of crystal or natural stones, wooden crafts, models with a bar hidden inside, floor-standing, levitating, held in the air by a magnet, and many others. Plasticine crafts complement this range of unusual souvenirs.
with your own hands
Tear the newspaper into small strips or squares with your hands. Lubricate with oil or Vaseline. Place a pan with a binding solution in front of you. Dip newspaper pieces into the paste and apply to the ball. So make several layers. Don't forget to leave a small hole through which you will then remove the ball. Cover the remaining paste with a tight lid or plastic bag. Leave the workpiece to dry for a day.
Warm up the adhesive mixture and repeat the entire process. That is, wrap the ball in pieces of paper and let it dry. In principle, you can stop at this stage. But the more layers of paper, the stronger the ball will be.
We are already getting closer to how to make it. From paper we did not make a completely closed blank, but with a small hole. Puncture a balloon through it or untie the tip and deflate. Don't let go of the tail, hold it with your fingers. Remove the balloon. The result was a hollow piece of papier-mâché in the shape of a ball.
An endless universe of crafts
So how can you make a solar system model for kids at minimal cost? There are several ways.
The most primitive model of the solar system can be made from plasticine or salt dough, painted in the desired colors. It is suitable for the smallest babies.
This model will give the child an idea that all planets revolve around the sun and their number.
- let's blind the orange sun;
- brown-orange Mercury;
- in the same color we sculpt Venus;
- the Earth will be blue and green;
- black-red Mars;
- Jupiter will be brown;
- Saturn is blinded with rings;
- Uranium will be made of blue + gray mass;
- We make Neptune out of blue;
- gray Pluto.
We string all the “planets” onto wooden skewers and attach them to the “Sun”. For greater clarity, skewers can be made of different lengths. Ready.
A plasticine model can be made on a plane:
As a gift for a little schoolchild, you can make a model of the solar system from papier-mâché.
Papier-mâché (translated from French as “chewed paper”) is a plastic mass made from paper with the addition of binders and adhesives (starch, gypsum, glue).
A paper layout is the simplest and most affordable to make. A detailed master class with photos will help you make it.
Materials for work:
- newspaper;
- gray toilet paper;
- office glue;
- plywood sheet;
- colored gouache paints;
- quick-drying blue paint;
- some silver beads.
Make a ball of newspaper soaked in water.
We wrap it with toilet paper and roll this lump into a bun. Lubricate the paper bun with glue, spreading it evenly over the surface.
Leave the balls to dry at room temperature or on a radiator.
While the parts are drying, let’s prepare the basis of the layout: we cut out a circle of the required size from plywood, taking into account the size of the prepared planets. We paint it with blue paint.
We make scatterings of stars from silver-colored beads, evenly distributing them on a circle, according to the picture of the starry sky.
We paint the dried koloboks, imitating the color of the planets.
We will make the rings of Saturn from silver paper.
It is imperative to accurately position the planets in relation to the Sun.
We screw screws into the bottom of the plywood, according to the location of the planets.
We screw our “planets” on top of them.
Our model of the solar system is ready.
During the manufacturing process, you can tell your child about the structure of the solar system, about the planets and everything that will be interesting to him. And such a gift will take on special meaning for him.
A wonderful idea to create a model of the solar system as an element of the interior of a children's room.
First, we decorate part of the ceiling as a starry sky.
We make planets from papier-mâché as described above.
We paint them with acrylic paints. It is more effective to use glossy ones.
We pay a little more attention to the sun. We color and make rays from a strip of faux fur.
We attach a fishing line to the “planets” and secure them with paper clips or a stapler to the ceiling, observing the order of their location from the “Sun”.
Preparatory stage
Cover the table on which you are going to make crafts with newspapers, waste papers or special oilcloth. Prepare all the necessary materials so as not to be distracted by searching for them during the process.
You will need:
- pots;
- glass containers;
- spoon;
- water - five glasses;
- flour - one cup;
- newspapers or consumer paper;
- balloon;
- primer;
- tassels;
- paints (acrylic or gouache diluted with PVA glue);
- scissors;
- hot glue;
- toilet paper roll;
- plastic plate (cake stand).
The globe needs a base. Therefore, you need to figure it out. Ideally, you need a round balloon. Choose the diameter with which you want to make the globe. Inflate the balloon and tie tightly. Place it on a glass or any other convenient container that can serve as a stand. If you want to make the most realistic model of the planet, then try to achieve a slightly flattened shape. If you only find a standard oval balloon, just inflate it lightly.
Materials used
Making a model of the solar system for school with your own hands is quite simple. Making a model just seems like a time-consuming task. At the beginning, you just need to decide on the choice of materials for work. As a rule, the model is made using the following materials:
This is not a complete list of materials, because there is no limit to imagination. You just need to imagine exactly how the future product will look like as a result and it will immediately become clear what material to choose for this.
Cooking the paste
Before you make a globe from paper with your own hands, you need to prepare a binding solution - a paste. Pour four glasses of water into a saucepan and bring to a boil. Meanwhile, in another container, mix the flour with the remaining liquid. As soon as the water boils, gradually add the resulting mixture into it, stirring constantly.
Reduce heat to low and cook for a couple more minutes. Don't stop stirring otherwise it will burn. The finished paste can be placed in a cool place so that it cools faster.