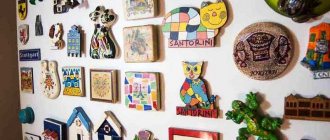
On the eve of the New Year, each of us begins to stock up on gifts for loved ones! And today I want to offer you to make small gifts for your dear people with your own hands - these are New Year’s magnets “Winter Hut”. We will make them from salt dough (can be replaced with self-hardening clay). I chose salted dough, because the ingredients for it are available to everyone, and you can make such products with children!
For work we will need:
- salted dough (the recipe I use will be below);
- stack, stationery knife;
- toothpicks, needles;
- a plasticine board or ceramic tile (where we will roll out the dough);
- acrylic paints (if there are metallic colors);
- gouache (black and ocher);
- brushes;
- felt;
- magnet;
- varnish (I used colorless Varnish XB-584);
- rhinestones (I have a diameter of 3 and 5 mm);
- glue (Moment, PVA);
- optional white glitter;
- sponge.
Salt dough recipe (I’ve made it many times already):
- 150 g water + 1 tbsp. l. Mix simple wallpaper glue and let the glue dissolve thoroughly;
- 200 g flour + 200 g fine salt + 2 tbsp. l. (with top) mix potato starch separately;
- combine everything + 2 tbsp. l. vegetable oil.
For several magnets, the amount of salty ingredients can be divided in half.
It’s better to prepare the dough in advance (I make it the night before and put it in the refrigerator overnight, wrapped in 2 bags).
Important! When working with salt dough, always keep the bag closed, the dough dries quickly!
We will have two versions of magnet huts!
Magnet “Winter Hut” with two Christmas trees
1. Roll out the dough, cut out the blank for the huts according to the template (the edges can be trimmed with a brush and water). Let's outline where the logs, roof, and snow will be. We make a sausage from 4 mm dough, cut it into approximately equal parts, lubricate the workpiece with some water and begin to place our logs, flattening them a little.
2. While our logs are not dry, we go over them with a needle, we get an imitation of wood. Make two more sausages, flattening them a little. Using a needle or toothpick, we make curves on one edge and transfer our blanks to the hut, having previously lubricated the places with water, then we make indentations on the rounded blanks (I did it with a dots, but you can also use a regular toothpick). We make a pipe over the roof, go through the dough with a needle, imitating bricks. Next, we roll the ball, flatten it, cut it in half, we only need one part (this will be the window above the roof), attach it to the hut, make indentations, and we get a window.
3. Make a thin sausage, smear water around the window, wrap it in the sausage - it turns out to be a cashed-out window, flatten it a little.
4. In the middle of the hut there will be a main window made of a rectangular piece of dough; we make indentations in it. We roll the sausage, divide it into four parts according to the size of the window - these will be the platbands. We flatten the workpieces and transfer them to the hut, not forgetting to lubricate the gluing areas with water.
5. Now you can sculpt the Christmas tree. We cut out three trapezoidal blanks of different sizes, round each blank, cut the bottom edge into three parts and round it with a toothpick (you get twigs). At the beginning, we place the largest piece down and in increasing order. We go along the edges of the branches with a needle.
6. We will get two Christmas trees, tall on one side and smaller on the other. We make indentations in the Christmas tree that are slightly larger than the rhinestones themselves, because as the salt dough dries, it becomes smaller. We make snow on the roof, in front of the hut, on the windows.
Magnet “Winter hut” with snowman and Christmas tree
Let's move on to the next version of the magnet. The first stages of modeling are the same as for the first hut.
1. Let's make the platbands at the roof a little differently, small curves at the edge and indentations in them using a toothpick. We roll the ball, make an oval, cut off a little at the bottom, we get a semicircular blank for the window. We attach in the middle of the hut and indentations.
2. Take a strip of dough, place it over the window and flatten the edges a little with a knife or stack.
3. We do the same at the bottom of the window. Next, we make the shutters: we cut out two rectangles, cut them at an angle and attach them to the hut.
4. Let's make a snowman. We roll three balls of different sizes, flatten each ball and start attaching it to the hut from the largest one, roll four balls, these will be the arms and legs of the snowman