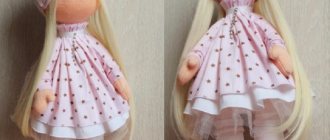
A doll is an indispensable toy for a growing girl. It is not at all necessary to have a large number of similar dolls; they do not develop the child’s imagination. It’s better to create an extensive wardrobe for your favorite toy with your own hands, and choose accessories and shoes with your daughter. This will give you a lot of room for creativity and will help you combine your own clothes in the future. One of the most popular dolls among girls is the life-size baby doll Baby Bon. Not a single baby doll can do without a warm and terry envelope. Every mother can sew such an envelope for a doll quickly and easily with her own hands for her daughter. It will consist of 3 parts: top, bottom and lining. For beauty on top, the envelope can be trimmed with lace around the edges. You can also make a simplified version of the envelope without a lining, and it will take about half an hour.
Master class on making envelopes for baby dolls and more
I decided to sell a few vintage items, but that’s not a problem: now autumn has come, it’s getting cold, and my kids don’t have any clothes.
I won't send them naked. For a very long time I searched the Internet for how to quickly and easily sew an envelope for babies and I FOUND IT! I suggest you watch my master class on making envelopes for baby dolls. The photos are dark because... I practically sewed last night.
We take two almost squares and place one on top of the other. The material is better dense so that it holds its shape (I have calico, because the doll is small)
Fold it in half and draw these lines, and then cut them out. You get two blanks like this
Next, I took the baby lace and trimmed off the excess
On the front side I baste the lace along the contour without tension
Now I add a second piece of fabric to what we got (face to face)
I stitch not far from the edge and zig-zag the edges (there is no overlocker) I turn it inside out, this is what happened
The ruffles seem to look in one direction, and we turn the workpiece with the other side and bend the edges. Sew the bottom
Turn it inside out
It remains to determine the size of the doll, i.e. how the envelope will be opened. We decorate by securing the lapels with ruffles. I tried to write as detailed as possible. If you have any questions, I will answer in the evening. The whole job took me less than 30 minutes, and I’m an “amateur.” As a bonus, my first cotton envelope for my daughter’s baby doll (doesn’t hold its shape)
Do-it-yourself clothing patterns for dolls - look at
Yamogu
: Clothes for Paola Reina dolls and more.
Knitting with knitting needles
A warm envelope can be created with knitting needles in a short time. The color scheme of the product may vary at the discretion of the needlewoman. To such an envelope, the step-by-step diagram of which is located below, you can knit a hat and mittens for the kit. The work is easy to do, so it is accessible to both beginning needlewomen and craftswomen.
- beige acrylic thread;
- blue acrylic thread;
- knitting needles No. 3.5.
For a doll with a 21 cm neck, you need to cast on 38 loops. These loops are then divided into three parts:
Please note that when casting on loops, you must add 1 raglan loop.
38 loops of blue thread are cast on knitting needles.
5 rows of elastic are knitted (1 knit, 1 purl) without adding loops. The blue thread changes to beige. Stocking knitting begins. On the front rows, before and after the raglan lines, 1 loop is added (4 × 2 = 8 loops). There are no additions for the purl row. The height of the strap is 7 cm without elastic.
By applying the binding to the doll, you can control the length of the binding. When the work is knitted to the armpits of the toy, the loops intended for the sleeves are removed onto other knitting needles.
The knitting of the back and front panels continues without any additions. The sleeve loops are waiting their turn.
The envelope is then knitted for another 18 centimeters, after which it is joined into a circle. The length of the neckline should be controlled according to the doll so that it fits freely into the product. The length of the envelope is adjusted to the height of the doll. The hinges are closed.
Next, the sleeves are knitted. Of the 27 remaining loops, one is decreased in the armpit area.
The remaining 25 loops are knitted 15 rows, changing color. By knitting the 16th row, 6 loops are shortened. The final 20 stitches are knitted with an elastic band, about 15 rows. For the second sleeve the pattern is repeated.
For the neckline, a placket is knitted with a set of 40 loops. Holes for buttons are knitted on the placket. To do this, knit 3 rows with an elastic band (1 knit, 1 purl). On the fourth row, in the places where the buttons will go, 3 loops are closed.
When the row with holes for buttons is completed, you need to cast on these 3 loops in the next row using a simple yarn over. 3 rows are knitted with an elastic band and the loops are closed. We sew the end of the strip to the envelope.
In the place opposite the button holes, the buttons themselves are sewn. The lower part of the product is stitched.
That's all, the envelope for Baby Bon is ready.
We sew from denim
The proposed product with white trim and denim ruffles is an excellent winter clothing option for a child’s favorite toy.
- denim (DT) 1 m * 75 cm;
- white gabardine (GB) 1 m * 75 cm;
- cord 90 cm;
- 2 zippers up to 40 cm;
- 2 pcs lanyard fasteners;
- meter and chalk;
- sewing threads.
It will take no more than 2 hours to create a masterpiece.
A prepared pattern is necessary for cutting out the exact contours and dimensions of the envelope.
DT serves as the basis for two side parts, one back, one front part, two strips 38.1 * 4.1 cm, one strip 95.1 * 4.1 cm and three regular strips. One strip for the hood, two strips are created from GT simple and two strips with assembly, one main strip.
Planks assembled from DT and GT are folded in half and stitched at a distance of 0.5 cm from the edge. The threads at the beginning and end of the strip are pulled together and secured with a knot. The length of the finished part is 11.6 cm.
A white GT strip is sewn from the bottom 7 cm to the side part.
A DT strip is sewn onto the side parts from the bottom 9 cm, covering the seam of the GT strip.
The GT strip is placed on the DT strip with the front side aligned and the seams running at a distance of 1 cm.
The upper section of the GT strip, made above, is folded 3 cm and sewn to the side part.
The DT back is folded in half so that the front side is inside and the upper sections meet.
The finished side parts are applied to the back. All parts are facing inward. It is being stitched.
The DT plank measuring 95.1*4.1 cm is folded in half and assembled.
The GT strip on the hood is prepared for the insertion of laces. To do this, you need to line the holes for the ties.
A DT 95.1*4.1 strip is applied to the side parts and back, then a GT strip for the hood, folded in half. A seam is sewn, matching all the edges of the fabrics.
A lace is inserted into the prepared loops and secured with clamps and end caps.
On the front side of the part, in the upper part of the front, a strip with an assembly of DT and GT is applied, after which the main strip of GT, folded in half. A seam is sewn, matching all the edges of the fabrics.
A 38.1*4.1 cm DT strip folded in half is placed on the main part.
A zipper is sewn into the side section of the main part, over the denim strip.
Satin envelope for a doll
Hello, dear guest and doll lover. I sewed a satin envelope for a baby doll. If your doll needs a beautiful envelope, sew one with your own hands.
The envelope for the Baby Born doll, 43 cm tall, is made of satin, decorated with embroidered lace, and has 3 ties at the top.
The envelope consists of 12 parts: 1 lower long part made of satin, 2 parts made of flannel and 1 part made of batting for a mattress, 1 part made of fleece for a blanket, 1 part of a top made of satin, 4 parts of valves made of satin, 2 parts of flaps made of non-woven fabric.
For the work I needed 50 cm of satin with a width of 150 cm, 3.5 meters of sewing lace, 2 meters of satin ribbon. All parts fit completely on this piece of fabric. The valves are conveniently cut from the side. I created an edge along the edge of the main part.
OPENING AN ENVELOPE FOR A DOLL
- Cut one lower piece, which will simultaneously be both a mattress and a blanket measuring 92x32 cm from satin. Mark with a pencil or make small cuts at the marked points. Make a seam allowance of 0.7 cm.
- Cut one piece measuring 57x32 cm from satin, two pieces from flannel and one piece from batting (for the mattress). Seam allowances 0.7 cm.
- Cut 4 pieces measuring 36x16 cm from satin for the valves. Allowances are also 0.7 cm
- Cut a fleece blanket measuring 36x32 cm. This piece is cut without allowance.
SEWING AN ENVELOPE
- Cut 2 meters of satin ribbon into 6 ties.
- Using an iron, glue non-woven fabric onto the two paired parts of the valve from the wrong side so that the valves retain their better shape.
- On the part with non-woven fabric, baste 3 ties at the marked points, aligning the front sides of the flap and the satin ribbon
- Baste the lace on top, aligning the front side of the flap with the front side of the lace, make folds on the curves of the flap on the lace
- Place the second valve piece on top (front side to front) and baste the two valve pieces along the curves and in a straight line to the right.
- Stitch valve parts.
- Turn the flap right side out and sweep it away.
- Iron the valve.
- Baste the valve parts from the bottom, connecting the fabric sections.
- On the top piece (57x32cm), baste a 1cm seam allowance to the wrong side. Place the finished flaps on the front side of the top part, face up, and baste them, aligning the bottom of the parts.
- Baste the lace on top, matching the right side of the lace with the right side of the fabric, making folds on the curves of the part
- Baste the lace onto the bottom piece 92x32 cm (in a straight line), aligning the right side of the fabric with the right side of the lace. The lace should not reach 0.7 cm to the edge of the part. It is better to hem the edge of the lace by hand with several stitches.
- From the top of the lower long part to the notch, baste a fleece blanket, matching the front sides of fleece and satin.
- To the upper part of the same part, before the notch, baste the top part with the flaps with the right side inward, that is, aligning the right sides.
- Sew the blanket and the top along the entire length in one line.
- Place the two pieces of the flannel mattress with the right sides facing inward. Place a piece of batting on top. Baste and stitch all three parts, leaving a small hole at the bottom unstitched. Turn the mattress right side out and sweep away. Hand sew the unstitched part at the bottom. Topstitch along the edge. The mattress is ready.
- Turn the envelope right side out. Sweep only the blanket and stitch it at a distance of 0.5 cm from the edge. Place a mattress inside the envelope. Use hidden stitches to connect the blanket and the top of the envelope, grabbing the bottom of the envelope so that the mattress does not move.
The beautiful baby doll envelope is ready. You can beautifully tie ribbons in front.
Instead of a one-piece blanket, you can cut separately 1 piece from satin and 1 piece from fleece. Sew a blanket separately. Place the finished mattress in the resulting pillowcase-top. Connect the blanket to the top piece.
It is better for a girl to sew a pink envelope, for a boy - blue, but you can also have a different color, lilac looks great.
For a boy, you can make an envelope with a zipper, then do not sew lace on the flaps and do not round the edges of the flaps.
You can sew simpler summer terry and winter fur envelopes for your baby doll.
The doll envelope is made of satin. Sewing skills are required for this job.
Dear guest, Did you like this envelope for a baby doll? Share your opinion in the comments.
How to make accessories for dolls with your own hands
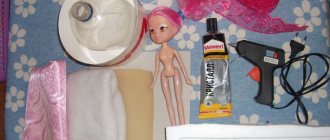
Playing with dolls is a favorite pastime of all little girls. Each of them wants to receive one or another doll as a gift. When a girl’s dream comes true, she begins to do everything to arrange the toy’s living space. Since the doll comes with a minimal number of accessories, the child begins to ask her parents to buy clothes, pieces of furniture or jewelry for her new “friend.” Often parents cannot afford such purchases, and they have to figure out how to get out of this situation. An excellent solution would be to make doll accessories yourself.
Selection of materials
Before you make decorations for dolls with your own hands, you need to select all the materials correctly. The appearance of the future product will depend on their quality. When making accessories, it is recommended to use the following materials:
- textile;
- beads;
- polymer clay;
- satin ribbon;
- wool threads;
- various decorative elements.
Each of the listed materials is perfect for creating one or another craft. Having chosen them, you can safely start learning how to make accessories for dolls with your own hands.
Proper Use
Transformer is necessary in the first months of a baby's life. It is usually prepared for discharge from the hospital. The blanket is laid out evenly on the changing table. First, the baby's legs are placed in the pocket. Then fasten the top zipper and form a hood. Lastly, connect the main zipper on the envelope blanket. The bottom is bent outward so that the legs do not blow, they are covered with several layers of blanket.
Putting your baby in an envelope is quite simple.
Caring for textiles is quite simple. When choosing a washing mode, take into account the type of insulation. The growth of children is individual; some children are ahead of their peers. Prematures, on the contrary, lag behind. The transformer is selected according to size so that the newborn or newborn feels comfortable.
The blanket can be washed in a washing machine.
Although manufacturers offer a huge selection of envelopes, transformable blankets of their own production do not lose their relevance.
Multifunctional, bright, comfortable and practical products are easy to sew and wash. You can use them instead of a blanket and for swaddling your baby for a walk.
Manufacturing of accessories
If you have the desire and a little skill in needlework, you can create many beautiful and original things for a doll. Not only clothing items, but also dishes, furniture, and jewelry are easily made from simple materials accessible to everyone
Doll bag
To decorate any doll and make it stand out from others, you can add a cat-shaped handbag to its outfit. Polymer clay is ideal for its production. The craft turns out beautiful and your daughter will definitely like it. To create it we will need the following materials and tools:
- polymer clay of different colors (green, gray, black, white, pink);
- a small knife for working with clay;
- toothpick;
- stick for rolling out polymer clay;
- chain and connecting rings.
Master class on making a handbag:
- Take some gray polymer clay and roll it into a flat ellipse. Trim the edges to get the most correct shape possible.
- We make small triangles from clay of the same color and attach them to an oval base.
- Using a toothpick, apply strokes where the triangles are attached to the base. This creates the effect of ears sewn to the bag with thread.
- Now we move on to green polymer clay. Roll out oval eyes from two small pieces and attach them to the original ellipse.
- From black clay we make the pupils of the future purse cat. We attach them to the green ovals.
- We make eye highlights from white clay. We place them on the pupil and the green oval.
- Using two small gray balls and one pink ball, we make the nose of the selected animal.
- Using pink clay we make the cheeks, and using white clay we make the lips.
- We pass a gray strip one centimeter long through the connecting ring. Fold it in half and cut off the excess pieces.
- We do the same with the other ring.
- We attach the resulting parts to the sides of the bag.
- Using a toothpick, draw a clasp and padlock.
- We process the edges of the product with a thin strip of black clay.
- Place the product in a preheated oven and bake at low temperature.
- After cooling, thread the chain through the rings.
Watch for a tilde doll
One of the most striking accessories of any toy is a watch. They can be made in any shape and size. A plastic watch for a tilde doll will look best. Let's take the following materials for their manufacture:
- plastic;
- wire;
- toothpick;
- a piece of leather;
- acrylic paints.
By following the tips and recommendations, you can easily figure out how to make a decoration for dolls in the form of a watch. To do this, we perform a number of simple steps:
- We make the case of the future watch from light plastic. It can be made either square or round.
- Using a toothpick, squeeze out the dial on the workpiece.
- We attach wire along the edges of the body. Next we will attach a leather strap to it.
- Place the watch case in the oven and bake for about half an hour at a temperature of no more than 110 degrees.
- During this time, we cut out even strips for the strap from a piece of leather.
- We add color to the watch using acrylic paint. Gold or silver is most suitable.
- We put leather strips on the wire.
Doll backpack
For toy lovers of a healthy lifestyle, you can sew a small backpack for sports shoes and a change of clothes. The finished accessory looks original and realistic. To make a toy backpack we will need:
- a piece of plain fabric of any color;
- scissors;
- needle;
- threads of the same color as the fabric;
- pin;
- wool threads of any color.
We make a backpack for a doll from wool with our own hands:
- Take a piece of fabric and cut out small squares with a side length of 6 cm.
- Using a needle and thread, carefully finish the edge using any seam you know.
- In both squares we bend the tops a centimeter and sew them with small stitches.
- Take a pin and tie a woolen thread to it. We thread it into the hole obtained from the previous operation. We do the same with the second square.
- Let's take another thread and, after threading it through both pieces, tie it into a knot. The result is a ring connecting both blanks.
- To determine the length of the backpack straps, you need to try it on the doll.
- We turn the backpack inside out and decorate it with decorative elements.
Jewelry in scale 1:6
To provide the beautiful Barbie with worthy jewelry, the needlewoman will have to show a lot of resourcefulness and ingenuity. Thus, it is almost impossible to find small enough clasps, and not every doll can have its head removed, thus getting the opportunity to wrap beads around its neck. Therefore, alas, one can only dream about fashionable chokers.
With bracelets, the situation is much simpler - a thin silicone rubber band is used as the basis for them. All that remains is to find beads or beads of the desired size and shape, string them on an elastic band, tie the ends with a knot and secure it with a drop of glue (the transparent “Moment Crystal” is best suited for this purpose).
You can make a massive DIY decoration for a doll using sewn-on rhinestones.
It will resemble a strip assembled from precious stones. In this case, a row of rhinestones is formed, and an elastic band is passed through two adjacent holes in each frame. When the bracelet reaches the desired length, the elastic must be secured and passed in the opposite direction, capturing the remaining holes. Not only bracelets, but also belts are made in the same way.
For other options, you need to stock up on tools. They should be small and fit comfortably in your hand:
- round nose pliers;
- pliers;
- end cutters.
The simplest earrings can be assembled in just a few minutes if you have everything you need:
- stud bases;
- short pins (pins) 2.5 cm long with a ball;
- pearl beads 4 mm.
Place a bead on the pin and bend the pin to the side at an angle of 90°. Using wire cutters, shorten the wire so that about 1 cm remains. Grab the very tip of the pin with round nose pliers and, rolling it into a ring, attach it to the stud. Taking this simple master class as a basis and adding a little imagination, you can easily make earrings for any occasion in a busy doll’s life.
A chain with large links and a toggle clasp will make a stylish belt.
If the links of the chain do not separate, then measure out a little less than necessary; You also need to remember that the fastener will add length. For assembly you will need two connecting rings. Using pliers, the edges of the rings are spread a short distance, put on one extreme link of the chain and one of the fastener fragments. The ring is closed, restoring its shape, the same procedure is repeated with the second part of the toggle.
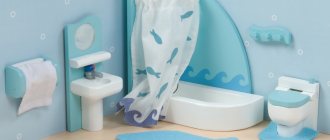
Homemade toy furniture
To add some variety to your daughter's play with the doll, you can make simple pieces of furniture and furnish the toy house with them. The easiest way to make a chair is from furniture accessories.
Doll chair
To create it we will need the following tools and materials:
- scraps of fabric and padding polyester;
- lace;
- newspaper sheet or small cardboard;
- glue;
- scotch;
- juice or milk packaging;
- sewing machine.
During the manufacturing process we perform the following actions:
- Let's take a juice bag as the basis for the future chair. The dimensions of the product will depend on its size.
- We cut out rectangles of the same size from a sheet of cardboard, newspaper and fabric.
- We put them in one pile and roll them up. Make sure that the top layer is always cardboard.
- We take a padding polyester and cut out a rectangle of a size that will completely wrap our base and the made armrests. We seal the joints with tape.
- We take pieces of fabric and cover the base of the chair with it. We fasten the joints with glue.
- We use a sewing machine to make covers for the armrests. We gather the ends onto a thread and tighten them.
- For decoration we will use lace, which we sew to the seat with invisible stitches.
- From thick cardboard we cut out two rectangles according to the size of the back of the chair.
- We glue them together and wrap them with fabric in the same way as the base.
- We attach the back to the chair with glue, and sew the armrests to the seat.
Fillers
Today, brands take a responsible approach to the issue of environmental friendliness of raw materials, offering customers high-tech envelope fillings (for example, purified cotton). To prevent the filler from leaking out of the envelope after washing, manufacturers pack it in special fixing bags. During the production process, the filling also undergoes pressure cleaning. Brands use different insulation inside the envelope.
Most often, Australian merino wool is used for insulation, as well as artificial fur and medical sheep skin. In addition, down, padding polyester and micro-down are used in production. Each type of material has its own characteristics and is suitable for certain climatic conditions of the region. For example, down is good in any cold weather; in such an envelope, the baby is not afraid of any temperature outside. The weight will not make the product heavier, and even at a temperature of -40, the baby will not freeze inside the warm cocoon.
However, it will be hot for a child in such an envelope indoors. For this reason, parents often prefer insulated sheepskin products with fur. These options warm the baby using “dry” heat, so overheating is excluded. Synthetic winterizer cannot be called the best insulation, since after the first wash it will clump together, and in some places it simply won’t be in the envelope, which cannot be said about its fur counterpart.
In addition, it is not so warm, which is especially noticeable in winter when the weather is windy. A good analogue of natural fur insulation is bamboo fiber. It is easy to wash, has high warming properties and is safe for the baby. Such a product is not inferior in performance characteristics not only to a sheepskin, but also to a down envelope.
Toy cutlery
If your child asks to buy him a toy dishware, you shouldn’t rush headlong to the nearest children’s store and buy expensive accessories. They can be made very easily and simply with your own hands from scrap materials. To make dishes we will need:
- chocolate box with liner;
- scissors;
- decorative elements.
Making toy dishes takes little time and is done like this:
- We take a box of chocolates and take out the shiny and thick liner.
- We cut out plates and bowls from round candy boxes.
- To obtain cutlery, we will use the denser edges of the liner. We cut out forks, knives and spoons from them.
- We decorate the finished dishes with a variety of decorative elements.
Making accessories for dolls is very interesting and exciting. To enhance the effect, you can involve your children in this activity. They will happily do this work, and will be proud of the result for a long time.
Advantages of hand-made
First of all, we note that sewing a blanket for discharge is not at all as difficult as it might seem to you at first.
The main advantages of home crafts are:
- Selection of fabrics of suitable composition.
- Individual choice of colors.
- Creating a model that fits perfectly. After all, you can adjust the blanket (envelope) depending on the height and weight of the baby.
- With the help of lace and other decorative elements you can create a truly exclusive item.
A transformable blanket for a newborn is suitable for both walking and home use.
DIY clothes for dolls: simple methods and life hacks
October 18, 2018
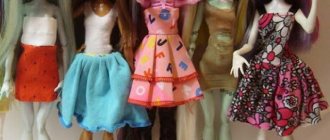
Dresses, skirts, trousers and other clothes for dolls: a selection of simple and quick ways.
There are craftsmen and craftsmen who sew real masterpieces for dolls - for example, designer Nigel Chia, whom we once talked about.
It is clear that in order to create such complex outfits for dolls, you will have to follow all the rules: think through the model, take accurate measurements, draw patterns, carefully carry out all the miniature components... But if a new thing for a doll is needed urgently, you have to act differently. Here are some simple ways and ideas on how to quickly sew clothes for dolls with your own hands.
DIY felt toys: 6 ideas with master classes
An easy way to sew a dress for a doll
This method is suitable for creating different dresses for Barbie dolls and other dolls. Before starting work, you need to take measurements from the doll: chest circumference, length of the bodice to the waist, length of the skirt of the dress. You will also need Velcro for fastening. Cut out 2 rectangles: one for the top of the dress, the second for the skirt. Process both. Place the bodice on the doll. Gather and sew the skirt. Finally, add straps and velcro.
Photo and source: craftinessisnotoptional.com
How to sew toys based on children's drawings: 3 master classes
Skirts for dolls
A variety of skirts for dolls are even easier to sew than dresses. Change the fullness of the skirt, its length, add different belts and decor - all the outfits will turn out different! You need two measurements: waist circumference and skirt length. We cut out two rectangles, for the skirt and for the belt. We process the rectangle of the skirt on 3 sides, gather it in, and sew on a belt (by the way, it can also be made from braid). All that remains is to sew on the Velcro fastener.
You can also not sew on the belt and Velcro, but replace them with an elastic band.
Photo and source: craftinessisnotoptional.com
Home decor and toys from a passionate craftswoman: Instagram of the week
Clothes for dolls: the fastest option
If a new dress for a doll is needed extremely urgently - and parents know that such situations sometimes occur - you can do without a pattern, and even without a needle and thread. Place the doll on a piece of fabric, mark the locations for the armholes, cut holes, add a belt - done! To create new trousers, you still need a machine or thread with a needle, plus about 15 minutes of free time. But you don’t have to bother with the pattern either: place the doll on the fabric, trace it - and you’re done. For such super-fast options, it is better to take stretch fabrics that do not fray. This will hide cut flaws and eliminate the need to process the edges.
Photo and source: wikihow.com
Here are some more simple options that require only scissors:
We sew a basket for toys with our own hands
Doll clothes made from socks
Leftover socks are an excellent material for making a wide variety of doll clothes! From the elastic of the sock you can make skirts and tops without straps, from the elastic + top - dresses with open shoulders (if you take a longer sock or a golf sock, you can make a maxi dress), from the toe you can make a hat or sleeveless blouse by cutting out holes for the head and hands The heel can be used to create a hood or an original collar. If you try and sew on the sleeves, you can make a dress or jumper with sleeves.
Photo: vansdolltreasures.blogspot.com, michkascreativesolutions.blogspot.com, lifestyle.howstuffworks.com, spaaz. de
Fun DIY sock toys
Clothes for dolls from unwanted children's clothing
You can use unwanted children's clothes to sew clothes for dolls. This method is especially suitable for large and medium-sized dolls. If the children's clothes are very small, and the doll, on the contrary, is large, try the item on the doll: you may only have to sew the clothes a little in the right places. But even if the item is disproportionately large, you can successfully use it to make doll clothes. Choose parts of the item with a finished finish - processed edges, decorated details, fasteners, for knitwear - with elastic. This will significantly reduce the amount of work, and the finished clothes for toys will look beautiful and neat.
Photo and source: confessionsofaserialdiyer.com
Bonus: Paper clip hangers
Armed with a pair of thin-nose pliers and wire cutters, the right size paper clips can be used to make excellent hangers for doll clothes.
quick and simple step-by-step MK with photos and videos
A doll is an indispensable toy for a growing girl. It is not at all necessary to have a large number of similar dolls; they do not develop the child’s imagination. It’s better to create an extensive wardrobe for your favorite toy with your own hands, and choose accessories and shoes with your daughter. This will give you a lot of room for creativity and will help you combine your own clothes in the future. One of the most popular dolls among girls is the life-size baby doll Baby Bon. Not a single baby doll can do without a warm and terry envelope. Every mother can easily and quickly sew such an envelope for a doll with her own hands for her daughter. It will consist of 3 parts: top, bottom and lining. For beauty on top, the envelope can be trimmed with lace around the edges. You can also make a simplified version of the envelope without a lining, and it will take about half an hour.
- First we must measure the doll's height to determine the length of the future robe. The Baby Bon doll for which we will sew a new wardrobe item has a height of 43 cm, and the envelope will be 46 cm. The width is about 30 cm.
- For sewing, we will use a bright, terry towel with a cheerful pattern and a suitable length. If you don’t have an unnecessary towel, you can sew an envelope from an old blanket, robe, or just thick fabric.
- If the towel is too short, then steam one edge, and if it is long, then cut off the excess fabric.
- We cut the towel into two unequal parts, the upper part of the envelope should be shorter than the bottom.
- Take a landscape sheet and cut off a corner along an inclined line. The sheet will serve as a template for the rounded ends. We apply the template to all corners one by one and cut off the excess fabric. This way all 4 corners will be the same size. For convenience, we secure the template with sewing pins so that the fabric does not crumple.
Sewing process
- We begin to sew a piece of lace to the top of the product from the wrong side in a straight line. If the towel is edge-stitched, sew it on by hand. If the edge is loose, then we fold the lace together with the fabric, trim it and stitch it on a sewing machine. Press the seam well downwards.
- We apply the upper part to the lower front side, retreat half a centimeter from the edge and sweep it away.
- Starting from the bottom of the envelope, where the doll’s legs will be, we sew lace onto the envelope, inside the front side, along the entire length. Leave small folds at the rounded corners.
- Place the lining face down. For lining, you can use any fabric, even the wrong color. We sweep everything together along the edge.
- Stepping back 10 cm from the bottom of the envelope, we sew the lining with the envelope.
- Turn the finished envelope right side out, straighten the lace, and sew up the remaining bottom. Carefully iron all seams.
The envelope for the Baby Bon doll is ready. Even a completely inexperienced seamstress can handle this type of sewing.
You can sew a jumpsuit for the envelope, the most necessary clothing for babies and dolls.
Using a life-size pattern specifically for the doll, this will be easy to do. Moreover, this pattern is also suitable for the Baby Annabelle doll, which is slightly different in height.
When we transfer the pattern to the fabric, we need to add a centimeter of seam allowance. The patterns are suitable for a baby doll of any size, you just need to take measurements and increase the size of the picture to the desired size. We process all the edges and side seams and sew on the fastener. If the doll's owner is a very small girl, then it is better to avoid using buttons for overalls; it is better to replace them with Velcro or buttons. We decorate the product with ribbons, bows or applique.
Video lessons
Several video master classes to help.
sdelala-sama.ru
DIY furniture with dolls
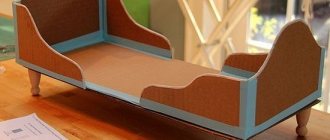
Crib
You will need:
- Plywood or thick cardboard.
- Scissors or jigsaw.
- Glue "Moment".
- Fabric for bed linen.
Step-by-step instruction:
- All parts of the product are transferred to plywood or cardboard: mattress, backrests and sides. You can use the following sizes: mattress (10 cm - width, 16-20 cm - length), backrests (height - 6.5 cm, width - 10 cm). The length of the side parts coincides with the length of the mattress, and their thickness is 2 cm.
- The parts are carefully cut out along the contour.
- They are connected to each other using Moment glue. First, the “mattress” is attached to the backrests, then the side elements are carefully glued.
- The crib is ready.
- Now all that remains is to prepare the bed linen. A mattress and pillow are sewn from the prepared fabric. You can use lace, ribbons, and beads as decoration.
Clothes and other additional details: we do it ourselves
DIY hat for Barbie
Making an unusual hat for a doll is very simple. You will need :
- Pattern.
- White thin fabric - the base will be made from it.
- Fabric for the outer surface - to taste.
- Lace and ribbons for decoration.
- Glue: moment and PVA.
- Scissors.
The pattern consists of three elements:
Step-by-step master class:
- Saturate white fabric with PVA glue; it will become rigid and hold its shape.
- A shape is cut out of the dried fabric according to the pattern.
- Parts are also cut out from the fabric for the outer side of the hat according to the pattern.
- Using “Moment”, the white bottoms are glued to the crown.
- Next, the fields are glued.
- Now the form is covered with decorative fabric using the same “Moment” in the following sequence: bottom, brim, crown.
- The most interesting thing remains - decorating the hat with lace, feathers, ribbons - whatever your imagination allows.
Using the same principle, you can make other hats: caps, top hats.
Doll glasses
Making such an accessory with your own hands is very simple. You will need :
- Corrugated paper.
- Thin wire.
Step-by-step instruction:
- The wire is covered with a piece of paper.
- It is cut into two equal parts - these are blanks for the frame with temples.
- A short part of the wire is also cut off - this is the connecting element.
- Long wires are bent in a circle. To make it even, you should use a round bubble of the required size. So, if glasses are made for a designer doll, you can use the cap from a bottle of nail polish, for Barbie - a small cosmetic pencil.
- The arms are covered with paper, the remaining paper is cut off.
- A short wire should also be bent using a lighter or a thin brush. The remaining wire is cut off with scissors.
- The parts are carefully coated with glue at the joints.
- The frame is connected into a single whole.
- You need to wait until the glue dries and cover the joints with paper.
- The original glasses are almost ready. Now you need to bend the arms so that the frame looks like a real one and remove the remaining wire.
- To make the glasses original, you can cover the finished product with nail glitter.
Elegant decor
When choosing decor, you need to be guided not only by your preferences, but also take into account the gender of the child. It is better to decorate an envelope for a girl with flowers or animal figures. For a boy, it is recommended to choose cars or geometric patterns. The most common options are:
- laying out figures from multi-layered lace;
- creating flowers and bows from satin ribbons;
- decoration with glass or plastic beads;
- fixing decorative fur pompoms;
- beadwork.
If desired, you can simply sew a colored 3D applique onto the top layer. When attaching decorations, it is important to place them in a place that the child will not come into contact with. It is also advisable that the decor is not too voluminous, as this may make the envelope inconvenient to use.
