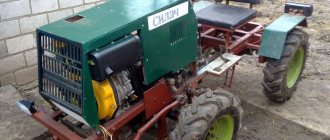
Today, active recreation, fishing and other activities related to movement in shallow water are quite common. However, large boats not only make it difficult to navigate such parts of the journey, but are also quite expensive. That is why many resort to making unusual watercraft on their own. How to make an airboat with your own hands? To answer this question, you first need to decide what it is. A vessel that moves with the help of a propeller or an aircraft turbine is an airboat (airboat). This type of vehicle is very suitable for moving through shallow waters, since its moving part (engine, turbine, etc.) is above the water. Therefore, the depth of the reservoir does not matter. The second feature is that the dimensions of such a vehicle are quite modest, which increases its advantage.
General information about the unit
So, let's start figuring out how to make an airboat with your own hands. Everyone understands that the most necessary parts of this watercraft are the hull and the engine. Here it is worth paying attention to the fact that you can choose several device options as the driving part. Experts say that the best engine option is the power part of the trike. It is almost ideal in such parameters as:
- Power.
- Reliability.
- Efficiency.
Another good additional characteristic is that such a device copes well with overcoming reed thickets, sedges and algae accumulations.
However, not everyone has such a power unit, and buying it is not always profitable. Therefore, you can use, for example, a motor from a Japanese motorcycle. A homemade airboat with this type of device will also be quite good.
Engine
The motor for our homemade product can be used from a regular Soviet-era boat. But for lovers of high speed, this will not seem enough. In this case, you should pay attention to the Japanese Honda and Yamaha engines with power from 150 to 210 horsepower. Paired with a propeller, such a motor is capable of accelerating a boat up to 50 kilometers per hour on water and up to 90 on ice. The V-belts and thermostat are taken from a Zhiguli-type passenger car. The driven and driving pulleys are made of duralumin steel.
Selecting a moving part
One very important feature of such unusual boats is that they discharge emissions from the operation of power elements not into the water, but into the air. Environmental experts say this is much better.
If a person decides to create such an airboat, then the first thing he needs to purchase is an engine. In the article, the Whirlwind outboard motor will be taken as an example. The characteristics of this unit are as follows: two-cylinder, liquid-cooled, and its power is about 25 hp. A rather pleasant bonus is that the device is compact in design. However, this does not mean that you should only use this type of engine. You can construct an airboat from a car engine with your own hands.
If we return to the consideration of “Whirlwind”, then there is one nuance. In it, the frequency with which the crankshaft rotates is quite high. It is not suitable for direct connection to a propeller. To solve this problem, the motor is additionally equipped with a three-ribb V-belt gearbox with a gear ratio of 1.6. Models used in Zhiguli cars, where the “engine-pump-generator” system is used, are taken as V-belts.
Airboat BatFF updated, adding drawings.
Preface: This article was written a year ago, but there was not enough time to take and add a photo to the article. Today I decided to finish the article, but please excuse me for the quality of the photo, the ship saw a lot last season, and in the end a small child got to it, beating it up pretty badly. The basis was a sheet of 50mm extruded polystyrene foam purchased at a hardware store: I decided to make the rudders from a ceiling with stiffeners from a wooden ruler cut in half lengthwise. Everything is covered with orange tape and ironed. There are almost no photos of the assembly, so I simply photographed it in its disassembled state. More photos and comments:
1) The hull of the vessel consists of 4 parts: base, PVC plate, cabin, motor mount
A cavity has been selected in the case for electronics, the battery is located there, it is secured with Velcro, the receiver and previously had a speed controller. It burned out during operation, so I took the next one out to the cabin. While I was selecting this very cavity, the foam cutter burned out, so it turned out ugly, but the electronics fit in, so I didn’t bother any more.
The electronics are attached to the PVC plate with double-sided tape. The motor frame is glued to the cabin on a UHU Por, 2 spokes made of bamboo sticks are additionally glued, then glued to a PVC plate on the same UHU. There is a servo embedded right there, the cheapest 9 gram one. Glued to a heat gun.
I made the motorama with the propeller angled upward to better press the stern of the vessel to the water, the propeller is a 7x4 regular one, it is simply put on the shaft backwards, and instead of pulling, it pushes)
Next, the rudders were made and installed, I didn’t know how effective 1 or 2 rudders would be, so I decided to make 3 at once, so that the “steering potential” would be with a reserve, it’s better to overdo it than to underdo it, after which it will be possible to correct the strong sharpness by adjusting the costs.
The wing is glued on top
It is located at a slight angle and is designed, just like the prop angle, to press the stern into the water.
BC motor D2822/14 1450kv Product https://www.parkflyer.ru/product/103495/ Battery ZIPPY Flightmax 1500mAh 3S1P 20C Product https://www.parkflyer.ru/product/6307/ Micro servo Turnigy TG9e, 9g / 1.5 kg / 0.10 sec Product https://www.parkflyer.ru/product/9549/
This is what I had.
Glider weight: 540g.
Video: Own comments: The vessel was modified during operation, at first I used a 3S 1500mAh battery, due to insufficient rear alignment, the vessel cut the wave with its bow and water got into the electronics compartment, then I decided to make a seal and install a lighter 2S 1000mAh battery, maybe I thought that the ship sags greatly from the weight and does not react very sensitively to the rudders. But on one windy day, my glider was positioned in the wind and I could not turn it around, as soon as it stood across the wind, it turned in the wind like a weather vane, and eventually, after several attempts to taxi, the glider turned over. After that, I realized 2 things: 1) The weight is not enough to stabilize the vessel 2) The rudders have a large fixed plane, which allows the wind to turn it like a weather vane, but gives additional directional stability when moving straight. Therefore, it was decided to leave the rudders as is, while loading the ship back with a 3s 1500mAh battery and playing with the alignment. In the end, I achieved what I wanted, the ship goes on planing at about 1/3 of the throttle, and it feels like it is gliding along the surface of the water. It reacts sensitively to the steering wheels and is not afraid of small waves. The only thing left is the fear of turning my model over again, so I don’t make turns at high speeds. As I wrote above, I burned out one 18A regulator, it is clear that it was too small for this motor, but I didn’t have another one at hand, and then water rushed onto the propeller on a bend, and the regulator burned out with a beep, the model was washed ashore by the waves, so I took the next one to the roof of the cabin for better cooling.
I recommend the model for repetition, I am satisfied.
For those who will repeat the model, I recommend increasing the width of the body by 2-3 cm in order to improve stability on turns and not tip over the model!
If you have any questions, I’m happy to answer in the comments.
Who needs drawings, I slowly begin to take measurements and draw. I drew the bottom part:
The cabin with the VMG is almost ready, I'll fill it a little later.
Airboat pulleys
The next elements are two pulleys. One of them will be the leader and the other will be the follower. These two parts are also the main ones for assembling an airboat with your own hands. Pulleys are machined from a material such as duralumin. After this, they are adjusted and subjected to an operation such as hard anodizing. The first part, that is, the drive pulley, must be attached to the flywheel using rivets. To install the second pulley to the engine, you will have to place a spacer plate made of 5 mm thick steel on its front part. It is necessary to install the cantilever axle of the driven pulley on this plate. It will rotate on an axis using two ball bearings 204 and one 205. Between these elements there are spacer bushings, also made of duralumin.
Securing parts
To secure the pulley to the axle, a locking ring and a screw and washer are usually used. The spacer plate, which was used previously, is bolted to the engine crankcase and to the brackets. These elements, that is, brackets, are mounted on adapter bushings, which are screwed onto the engine head mounting studs instead of nuts. Next you need to move on to tensioning the belts. To perform this operation, you need to use a special mechanism, which consists of several elements. The first is a sleeve welded to the attachment plate, and the second is a bolt with a nut.
It was already mentioned earlier that the cooling in the design of homemade airboats of this type is liquid. It is important to note here that sea water is used, which is supplied to the cooling jacket. To draw liquid, a homemade pump is used, which is made on the basis of an impeller from a Kama electric pump.
The simplest car thermostat is used as a sensor that monitors the temperature and regulates it within the normal range (80 - 85 degrees Celsius). To launch an airboat with your own hands, a cord is used. The location of this element is between the propeller and the spinner. By pulling the cord, the engine starts, since there is a pulley inside, around which this part is wound before starting the device.
What is a glider
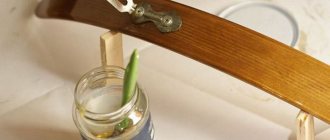
A glider is a lightweight spinning bait that is designed for fishing near the surface of the water.
The principle of operation of gliders is quite simple: due to its volumetric shape and low weight, the glider literally glides along the surface, and at the same time creates vibrations in the water, which should attract the attention of the fish.
Actually, in connection with this feature, this bait got its name: translated from French, the word “glisser” means “sliding”.
Gliders are used for fishing in areas of the reservoir with a depth of no more than 1.5 m, since in other cases these baits are unlikely to show good results.
Excellent places for glider fishing are the coastline with relatively calm water, backwaters, shallow areas, heavily overgrown with a variety of aquatic vegetation.
Both in appearance and in its play, the glider imitates not so much a fish as a small swimming animal like a frog or mouse, so in this case the emphasis is placed on the gluttony and hunting instinct of the pike.
Gliders also boast a high level of non-snag resistance, which is extremely important when fishing in places with water lilies, reeds and other obstacles.
For lures of this type, the center of gravity is shifted in the lower central part of the body, which prevents the glider from turning over, and the position of the hooks is such that their stings are directed upward.
Air propeller
This is also one of the main details of the type of watercraft under consideration. To create a propeller for an airboat with your own hands, you need to understand its design. This element is wooden and monoblock. In other words, you need to use a solid block of wood to make the part. It is worth noting here that finding a timber that does not have defects in the form of knots or cracks is problematic. Therefore, you can do it differently. Designers suggest taking several plates, the thickness of which will be at least 10 mm, and gluing them together using epoxy resin.
Before you begin the gluing process itself, you need to make sure that the layers of wood are arranged symmetrically. This must be done in order to save the screw from possible deformations during further operation. The finished (glued) workpiece is marked according to a standard drawing, which is hung in the center of the block and nailed with a small nail. Next, you need to circle the existing drawing, and then turn it 180 degrees and circle it again. In this way, projections of both blades can be obtained.
Assembling the screw structure
It is very important to remove any excess wood that may interfere with the operation of the screw. For this, a fine-toothed bow or band saw is used. The most important part of the work when creating an airboat with your own hands is giving the propeller an aerodynamic profile. It is important to note here that one of the sides of this part should be flat, and the other convex. It is better to immediately note this on the drawing, since the error cannot be corrected later. You will have to create the entire structure again.
To process the propeller blades, you need to have a small ax that will be sharpened very well. This tool must be made of high quality steel. When removing an excess layer of wood, you need to work quite carefully to avoid cracks. Experts recommend making small cuts - this is the safest option. After rough processing with an ax, you can begin preliminary preparation, for which a plane and rasp are used. Final finishing is carried out using a slipway. Let's tell you what it should be like.
Screws, blades and propeller
In addition to the engine, you should also take care of the airboat's propeller. We will make it from solid wooden beams. You can go the other way by gluing together several 10 mm plates with epoxy resin. It is important that the finished element does not contain unnecessary knots and burrs. As for the plates, when fitting them, it is better to make a 1:1 drawing, which will be a kind of template, and using this data to make a boat propeller.
To make a high-quality airboat with your own hands, you should not be lazy and make everything “by eye” - each part is made according to its own template and drawing.
The propeller blades should also be free of burrs and other deformed areas. Such defects can be removed using a small hatchet. Next, the wood is processed with a plane and rasp. Transverse cuts are made on a special slipway. They are needed to install the propeller blades.
How to further make an airboat with your own hands? For the core of the slipway we need ordinary steel. The main thing is that its diameter is equal to the hole in the hub of the mentioned part. Next, the rod is placed on the center of the slipway board. Afterwards, the propeller blank is put on it and pressed against the template with several blades. This workpiece should show template marks (where the blades touch the propeller).
These places should be processed with a plane and placed back on the slipway. The blade processing process must be repeated. Next, using the upper templates, the upper part of the screw is processed. As a result, both elements must touch up to the plane of the connector. All treated areas are marked with a colored pencil or marker, after which zones are created between the control section. The correctness of the work performed is checked with a steel ruler - it is applied to the points of adjacent sections. Ideally, the gap between the ruler and the blades should be minimal.
Now the screw needs to be balanced. This is done as follows. First, a steel platen is inserted into the central hole and the propeller is mounted on the balancing rulers. If suddenly one blade turns out to be lighter than the other, it is loaded with lead (thin strips of this metal, previously poured into a mold, are glued on). The finished rod is inserted into the hole of the blade - where the lead strips were applied. It is countersunk on both sides. The propeller is covered with fiberglass on both sides, sanded, balanced and goes through a painting procedure (priming and enamel).
Slipway
To build an airboat with your own hands, you will definitely need this device. It is a carefully leveled board, the thickness of which is at least 60 mm. It is used to make cuts up to 20 mm deep. The lower profile templates of the propeller blade are inserted into the resulting recesses.
The slipway is machined from several parts. Its basis is the central rod, which is made of materials such as steel or duralumin. The diameter of the rod is determined by the hole in the screw hub. They must match each other. The resulting rod is located exactly in the center and strictly perpendicular to the slipway board.
Homemade airboat from a broken car, quadcopter propellers and polystyrene foam
I want to tell you about a small weekend project, a radio-controlled glider, assembled with the son of a friend, who is 11 years old, his name is Klim. Next is the text by the young DIYer: Hello, this airboat is very simple: at the back it has two ordinary brushed motors with orange three-blade propellers for racing quadcopters. The control board, motors, battery holder and remote control were taken from a broken radio-controlled car, like this: By the way, the remote control also broke and we made our own on its board:
And here is the airboat itself: The cover is made of foam plastic and is held on by magnets, for example on these. You can also find smaller quantities.
The entire list of materials: - Expanded polystyrene for the glider body - Pressed foam - remnants of the packaging of the monitor for the cockpit - Remote control machine with remote control (no matter which one) - parts donor - Wire (optional) - deck fencing - Thread (optional) - fencing decks - Two propellers - set the glider in motion - A few wires - for connecting the engines and antenna - A wooden stick - for attaching the engines - A pair of cable ties - for attaching the engines to the stick - 4 magnets - for attaching the cabin to the deck
And then a few words from me, I will describe the details of the design. I think many children have had or have radio-controlled cars, and due to the general flimsiness of the design, they fail quite quickly. But by spending very little time, you and your child can transform one broken toy into another one that works. From the non-working machine we took a control board, a holder for two AAA batteries and two electric motors. The car had two absolutely identical engines, one for driving the rear wheels, the second for steering. We removed the unnecessary resistor from the steering motor and glued the propellers to both engines using superglue (link in the header of the post). The propeller kit included 3 bushings, the one with the smallest diameter was useful. The hull of the future ship was cut out of scraps of extruded polystyrene foam (left over from insulating a house). Polystyrene foam will also work, but it will produce much more debris; it’s better to cut it out on the street. From the foam parts of the monitor packaging (the two parts are glued together with hot glue) we made a cabin in which the batteries and the control board will be placed. To make the cabin easily removable, we secured it with 4 neodymium magnets and glued them with hot glue (the main thing is to glue it on the right side). Klim decided to install the antenna on the nose of the glider; it was the right decision to balance the weight. Since the diameter of the blades is quite large - 130 mm, the engines were installed at the two ends of a wooden rail so as not to interfere with each other. The engines were securely secured using plastic ties. The control panel was also broken, so we got rid of its case, installed four buttons on a piece of a breadboard and soldered them to the remote control board. In the original, there were tracks on the board along which metal contacts on the “steering wheel” and “gas handle” slid and closed them. The control panel turned out to be quite brutal-looking (it’s better not to appear with it in the subway, airport or crowded places), but the main thing is that it works. The left pair of buttons controls the left motor (forward/reverse), and the right pair controls the right motor. The controls are like a tank - to move forward you need to press two forward buttons on the left and right. If you press “forward” on one side and “backward” on the other, the glider will turn around in place.
And at the end - a short video showing how the resulting glider floats (in a bathtub, in open water until the weather allowed testing):
Airboat hull
To create a working homemade airboat, you need to devote a lot of time to creating the hull. This is the main element, which is quite voluminous if made entirely. For this reason, experts recommend dividing it into two components - upper and lower. It is better to start assembling these two elements from the bottom. To do this, it is necessary to cut out form-building frames from plywood, the thickness of which is at least 12 mm. To prepare components such as keels and stringers, slats with dimensions of 20x20, 30x20 or 30x30 mm are used. The frame of the lower part of the boat must be assembled on a flat floor. Before starting the process of forming the lower part, you need to mark its diametrical plane, and also mark the places where the frames will be located.
Aquatic Jungle Lure Idea
The first thing that came to my mind was to fish with a spoon... without a hook. The idea is not new and not mine, one friend suggested. He saw how they catch pike in a similar way somewhere in the Azov estuaries. This is done as follows - first, a “scout” is thrown into the water - it can be an ordinary spoon without a hook, or it can be a streamlined wooden or plastic bait, with a load inside, but the main condition is without a hook. By the way, it is not difficult to make such a decoy, and it goes even better than a spinner on the grass.
So, at first I threw such a “scout” into the water, sometimes into the very thick of the grass, and carried out the wiring almost at the very surface. If my bait was attacked by a pike, then I remembered the location of the attack and tried to throw an ordinary spoon with a hook into this place as quickly as possible. It was necessary to act very quickly, replace the bait as quickly as possible and throw at the target as accurately as possible. Speed and coordination are the basis for the success of this method of pike fishing. If I managed to instantly replace the lure and get as close to the target as possible, then often the pike attacked my new bait immediately after it fell into the water, well... or did not attack at all.
It is clear that this fishing technique is very exhausting and brings little pleasure. So I continued my search for a better way to fish in the grass. I imagined a bait that could move freely even in the densest thickets. I realized that this could only be achieved if the bait glides along the surface of the weeds without collecting a bunch of grass with its “nose” or hook. I understood that the bait had to meet several important requirements. Firstly, it should not be heavy so as not to drown in floating algae. But a bait that is too light is also not an option - it is not suitable for long casts. In my imagination, I pictured a bait whose weight would allow me to cast more or less far. I imagined her not floating, but most likely slowly sinking. So that when passing through a window of clear water, such a bait would have the possibility of some deepening, and when approaching an overgrown area, it would easily and without snags come to the surface of the grass, sliding freely along it. To do this, the bait must have a very streamlined shape, without unnecessary protruding parts. Its center of gravity should be shifted closer to the “tail” so that its “nose” is slightly raised, allowing the bait to easily jump to the surface of the algae. It is clear that the hook should be on top - and always on top, both during casting and during retrieving. You need to create a bait of this shape, load it and position its center of gravity in such a way that it does not turn over with the hook down, either when it hits the water when casting, or during retrieving. Once upon a time, as a child, I watched small sports motor boats moving through the water. The more they accelerated, the higher their nose rose above the water. If I'm not mistaken, such boats are called gliders. This is something similar that I imagined when I was thinking about the shape of the bait and the method of wiring it.
I decided to make the first samples of the glider bait from foam rubber. The shape of the bait was similar to an iron - it had a flat bottom, a pointed streamlined nose and a thick rounded back. To move the center of gravity of the bait a little back, I glued a lead plate to the bottom, closer to the back. According to the plan, the center of gravity of the bait shifted back will allow it to raise its nose during retrieving, which will help it easily overcome floating islands of aquatic vegetation, moving out and sliding along their surface without snags. I selected the weight of the lead plate experimentally, checking the buoyancy of the bait in a bucket of water. I tried to achieve the property of a slowly sinking bait. On top of the body of the bait I made a shallow longitudinal cut into which I inserted and glued the hook. I connected the hook with wire to the winding ring. That's it, the bait is ready.
Testing bait while fishing
I made four prototypes. I really liked the look of the hand-made baits. All that remains is to find out the pike's opinion. Going to the reservoir with new baits, of course, I was a little nervous. But, fortunately for me, the tests were quite successful. The pike appreciated my work - at the end of the fishing trip, four pike of different sizes were fluttering in my cage.
While fishing, I experimented somewhat with bait placement. But mostly I tried to imitate the behavior of a small frog - a uniform, slow movement with short stops and short sharp jerks. This is how I managed to tempt the pike to attack.
In addition to its ability to catch a predator in aquatic thickets, my glider also showed its weak points. First of all, this is fragility, and hence the fragility of the material. Literally after a couple of bites, the bait receives “injuries” incompatible with life. Moreover, the appearance of the bait may not suffer too much, but the glider practically loses its main property - balancing. With the loss of balance, the bait is no longer able to fulfill its main task - to fall into the water and pass obstacles vertically, keeping the hook on top all the time. By the way, due to poor balancing, I immediately rejected two of my four gliders - they fell on their sides and collected a decent green tail of floating algae on their hook.
For this reason, I decided to make my next models from a more durable material - foam, plastic or wood. Although foam gliders are the easiest to make, and most importantly, they catch pike.
Fishing on a glider
More than a year has passed since my first glider fishing. But I still continue to use these baits in areas heavily overgrown with grass and floating algae. In addition to homemade gliders, I have already begun to use branded baits - now they are already produced by various manufacturing companies.
In general, fishing with surface baits is very spectacular, and fishing with a glider gave me such wonderful views. I remember one incident... I was fishing from a boat in a small bay overgrown with reeds. A small island of reeds in the middle of the bay caught my attention. Between my boat and the reed island there was a long strip of grass that grew from the bottom, and the ends of the stems lay on the surface of the water. I decided to throw the bait under the island. Having abandoned it, I started wiring. When my glider came close to the grass, suddenly a breaker appeared behind it - the pike, jumping out of ambush, decided to attack my bait. But at the moment when the pike almost caught up with the bait, it was already on the surface of the grass. The pike helplessly buried its nose in the grass and walked away. Usually in such cases, the pike, after standing for a short time, returns to the ambush or remains in place for some time. I decided to take my glider again along the route I had just taken.
And again my bait is already on the surface of the grass. And at that moment a pike jumps out of the water, belly-first onto the grass. She continued to chase the glider, twisting and sliding with her belly on the grass. In a split second, my bait was in the pike’s mouth, and a couple of seconds later I was holding this predator in my hands. It was quite a spectacle.
This case is, of course, exceptional. Often I noticed the trace of a pike chasing on the water, but often the predator still did not have time to grab the bait in a window of clear water, and it slipped to the surface of the floating algae. It often happened that while guiding my glider crossed several windows free of algae, and in these windows it was attacked, each time by a different pike.
Glide fishing technique. Wiring methods.
As I wrote above, through experimentation, I developed my own style of glider wiring - a uniform wiring combined with short sharp jerks. It happens that I make short stops at windows of clean water. That's probably all the technology, it can't be called complicated. Another note - if you plan to catch perch with a glider, then the wiring should be more intermittent, while for pike a more uniform wiring is preferable.
Directly on the reservoir, everything looks something like this. At the fishing site, we select the window of clean water that is furthest from the shore or from the boat; fortunately, this bait is capable of flying long distances. We make as accurate a cast as possible into the selected window. As soon as the bait touches the water, we bring it to the surface; to do this, we raise the spinning rod almost vertically. We begin uniform wiring. Gliding through clear water, the bait leaves an attractive trail behind it. We work the reel evenly, and periodically twitch the tip of the rod. During such twitching, the movement of the glider accelerates, then slows down - thus, we “revive” the game of the bait. The trace on the surface of the water looks very natural, like the movement of a small frog.
When the bait slides off the seaweed into a window of clean water, I usually stop reeling for a couple of seconds and let the bait go deeper a little. Often it is at this moment that bites occur. Having passed a section of clear water, on the approach to the next obstacle of algae, I try to bring the bait to the surface of the floating “greenery”. During such an “exit” a large number of bites also occur.
If during retrieving, in some place I notice an attack by a predator, which he was unable to complete to capture the bait, I make sure to return the bait to this place during the next casts. Once I had a case when a pike attacked the bait in the same place five times in a row. And only on the fifth attack I managed to hook her and pull her ashore. In general, there are a lot of “empty” bites from a glider, but if a predator has already “sat” on the bait, then there are practically no escapes - a large single hook holds the fish securely.
Making a glider bait with your own hands
I bring to your attention a step-by-step scheme for making a glider bait from foam rubber at home.
Small dishwashing sponges are great for making gliders. They have a durable top layer, which, although not for long, is still able to extend the life of the bait after pike “kisses”. We will also need a piece of sheet lead and large number hooks with a long shank.
I prefer colored baits, although perhaps this is not justified in the eyes of pike. Using scissors, cut two oblong bars from the washcloths.
Again, using scissors, we give the bars a teardrop-shaped, streamlined shape. We adjust their sizes to a specific hook.
We make bevels in the narrow nasal part of both blanks, which will subsequently create a narrow shape for the nose of the bait.
From the inside of the upper blank we make a cut into which we insert and glue the shank of the hook with a metal leader.
First we glue the narrow nose part of the bait.
Now we glue the entire bait completely.
Using scissors, we cut out a round blank from sheet lead. It is very important to select the weight of the workpiece. To do this, we wrap the workpiece with threads to the body of the bait and lower it into a bucket of water. By cutting the lead plate, we bring its weight to such a state that the bait will slowly sink in the water.
Glue the prepared lead weight to the bottom of the bait. This is a very important operation that must be performed carefully - the lead circle should be positioned evenly along the center line of the bait and be slightly offset back. A properly loaded bait should not fall on its side and have a center of gravity shifted to its rear.
All. The glider bait is ready. In a similar way, you can make a glider from more durable materials - wood, plastic, foam, etc.
Conclusion
At the end of the article, I would like to draw a conclusion to all of the above, to draw some conclusions. Over the years of fishing, I have tried this bait on various bodies of water, with different fishing conditions. I tried to catch not only pike and perch with it, but also chub and asp. In each body of water, the predator responded well to my homemade glider. But... still, this bait has a very narrow specialization - do not forget that it was invented and manufactured for places heavily overgrown with grass and algae. For those places where no other bait is simply able to pass along the surface without collecting a huge green tail behind it. It is precisely in such “paddling pools” that the glider simply has no competitors; here it has no equal. Well, in other places where it is possible to use a spinner or a popper, it is better to use these baits.
Based on articles by a real master of spinning, Konstantin Kuzmin.
Top part
If we talk about manufacturing the upper part of the case, then this process is practically no different from assembling the lower part. The only significant difference is that it is formed not from plywood frames, but from previously prepared curved slats. Note that the formation of the body is no longer carried out on the floor, but on the directly finished and assembled lower part of the body. It’s worth saying here that you can avoid this labor-intensive work if you assemble an airboat from a PVC boat with your own hands. The body of such models is already ready and represents a single structure.
Engine frame
Let's look at one more important detail. This is the engine motor mount. It is attached to one of the frames. The element to which the frame will be attached must be reinforced. Its cross section should be increased. It should also have reinforcement at the joints of the slats. This can be done using a plywood scarf. To secure the frame to the crossbar, a 40x40 mm square steel pipe is used. To fix this element, a brace is used, which is created using pipes with a diameter of 22 mm. For glazing of doors, if any, plexiglass with a thickness of 4 mm is used.
Depending on the reliability of the frame fastening and the planned use of the vessel, various load-bearing elements can be used. Some take the engine from the Ural for a homemade airboat. You can also achieve good power with this component.
A little about the benefits
Naturally, to gain popularity, it is necessary to have some advantages that other types of swimming equipment do not have. For an airboat, these qualities were the following few points. Firstly, engine leakage will accumulate not outside, but inside. Secondly, steering such a small boat brings quite a lot of adrenaline, since the speed it can reach is quite high. In addition, making homemade airboats with your own hands will bring a lot of joy to those who love to make things. For fishermen, the most significant advantage is that such a vehicle can plow almost any water expanse, and quiet operation allows you to silently swim to fish habitats.
Salon
The seats for passengers and the driver are made of wood slats and plywood. The frame is filled with foam rubber and covered with leather. You can go the other way - take ready-made seats from a foreign car or even a domestic car. At this stage, the question “how to make an airboat with your own hands” can be considered closed. All other little things in the cabin can be arranged to your liking; the main thing here is to have imagination and enthusiasm.
So, we found out how to make an airboat with our own hands. Good luck!
Control
Today, such devices do not use direct control transmission, but belt or gear transmission. The advantages of both systems are that they adjust the fuel supply to the engine and steering movement.
It is also worth noting that some fishermen or simply those who like to travel this way equip their airboat with additional equipment. This could be glass, comfortable seats, spotlights, etc.
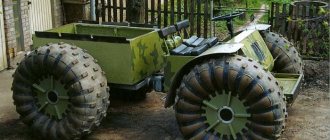
Universal device
An airboat can be used for more than just traveling on water. Some craftsmen have quite coped with the task of creating a small “amphibian” that can be used to move not only on water, but also on ice. If we talk about the characteristics of the resulting transport, its speed (with passengers) on hard surfaces is up to 90 km/h, and on water up to 45 km/h.
The basis for creating such an amphibian was the Yantar motorboat. The main difference from conventional airboats (besides the fact that it also moves on hard soil) is that a V-belt variator from a snowmobile is used as a transmitter from the gearbox to the propeller. This is what served as the main difference and the opportunity to create a real all-terrain vehicle.
Types of gliders
“Frog” looks like an amphibian corresponding to its name, and is usually equipped with a pair of hooks. The vast majority of models are made of silicone or PVC material.
"Mouse" imitates a small swimming rodent. It is also made from the same materials as the “frogs” and is equipped with 2 hooks. There are “mice” also made from balsa wood.
"Croatian egg" is made of wood, foam or plastic. A glider of this type actually somewhat resembles an egg in shape and is equipped with one hook in the back.
The color of the bait is not a particularly important factor in fishing with gliders. An active, hungry predator is unlikely to look for a long time at a prey floundering on the surface, especially in conditions of an abundance of water lilies and algae.
Regarding the issue of the size of baits, it is worth saying that the dimensions of the glider can be very different (of course, within reason). When choosing a glider, take into account the size of the predator you intend to catch.
Remember that sometimes the glider attracts not only pike, but also medium or large perch.
Gliders are those spinning baits for which it is especially appropriate to experiment with wiring techniques. Initially, of course, it is worth trying classic uniform wiring, but often it may turn out to be ineffective. In such a situation, it is worth making some adjustments, adding, for example, jig elements.
When casting, try to get the bait onto a lily pad or a carpet of algae and grass, and then lightly pull the glider so that it falls into the water, like a frog or a mouse. Next comes the wiring itself. If there is no bite, make periodic pauses for 1-2 seconds and sharp jerks.
Sometimes, during an attack, a pike may not immediately catch on to a single hook. In such cases, do not rush to pull out the tackle, wait until the predator is definitely hooked, which is clearly felt by the rod.