Six years ago I recorded a big master class about how I made such a hat and posted it on YouTube. But after some time it was removed and they did not say why. And now I decided to make the same master class, but in text form. In this master class I use the same photos that I used when editing the video.
I decided to start making hats literally as soon as I became interested in the leather hobby. At that time, there were no resources on the Internet with hat patterns, and what was sold in the store was too expensive and did not suit me with its design. I took my favorite hat, took its measurements and used them to make patterns for a new hat.
How to make a simple cowboy hat with your own hands from paper and cardboard
The simplest solution for beginning needlewomen is to use available materials at hand - paper and cardboard. In this case, the product may not be very durable, but it will be effective and quite simple to manufacture.
We begin work by making a blank for the hat. To do this, measure the circumference of your head and draw a circle on cardboard. We give it the shape of an oval, for which, on one side, we increase the circle by 0.5 cm, and on the other, we decrease it by 0.5 cm. We mark the lines of the width and length of the ovals. We cut out 8 blanks and glue them at the designated points, place them under a press for 1-2 hours.
Glue together four sheets of A4 paper, fold them lengthwise and in half. We outline the cardboard blank and draw the fields of the required diameter. Make an allowance of 1 cm, draw a line and cut out the margins. We cut the allowance in the form of a fringe 1-1.5 cm wide, cut out the fields.
We insert a cardboard blank into the hole in the margins, cut out a band of paper 3 cm wide and a length equal to the circumference of the head plus 2 cm. Fix it and sew it with oblique stitches using a needle and thread.
We form curved fields. To do this, we cut the paper on the margins along the short sides, make an overlap 2 cm wide and glue all parts of the margins together, cutting off the excess paper. We make sure that the curve of the hat is the same on both sides.
We measure the circumference of the layout using a measuring tape. Divide the resulting value in half. From two sheets of A4 paper glued together along the short side, we cut out the blank for the future crown. We fix the paper on the blank with tailor's pins and cut off the excess. To make the top of the crown curly, we make a height correction on both sides, cutting off 2-3 cm of excess paper, as shown in the photo below.
We remove the crown from the blank and make a correction in width. To make the hat slightly narrowed at the top, cut the blank and form an overlap 1.5 cm wide. We glue the paper or fasten it with tape. If necessary, adjust the dimensions a little.
We cut out the figured bottom of the crown from paper. We make an allowance about 1 cm wide and cut it in the form of a fringe, carefully folding the allowance inward.
Glue together all the resulting segments. To ensure that the parts are held in place as firmly as possible, we coat the allowances with glue and additionally go over each seam with tape. To prevent the product from becoming deformed, we carefully combine all dimensions at the designated points.
At the end, we paint the hat with paint of any color you like, decorate it with decorative seams, buckles, and thread an elastic cord to secure it on the head.
Tools.
►►Tools for leatherworking◄◄
- knife
- circular knife
- small round punch
- awl
- edge cutter and 220 grit sandpaper
- gloves
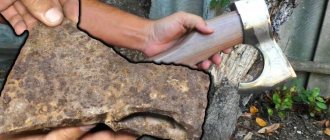
- water
- a piece of leather 2-3 ounces (you can read about leather thickness here – Leather infographics) and dimensions 65cm*40cm.
- deerskin cord
- paper
- glue
This pattern can serve as an example for developing a hat in sizes from medium to large. Depending on how you will do it, which I will talk about next.
We sew a version of a fabric hat with our own hands in a master class
A very stylish cowboy hat can be made from thick fabric. This product, unlike a paper hat, can be used not only as an element of a carnival costume, but also in everyday life.
We create a pattern for the future hat on paper, taking into account all the necessary differences in the height and width of the crown and brim. You can use the parameters of the previous paper and cardboard model. We cut out two parts of the brim, one part of the bottom and the crown from the main fabric, adding allowances of 1-1.5 cm for each size. From duplicating fabric we cut out all the details in one copy. We sew the edges together using a sewing machine, trim the seam allowance close to the seam line, turn it inside out and carefully steam the piece with an iron.
Create the image of a real musketeer
First you need to decide what wardrobe elements are included in the image of a musketeer. If a child wants to play musketeer on his own, then you can discuss with him how he sees his image.
Of course, the first thing that comes to mind is the cloak that all musketeers had. It should be black and the symbol of the heroes should be depicted on the back - a large cross. You can decorate the cloak as you wish, for example, there can be lace on the arms and hem of the cloak.
Next, you need to purchase boots; you can buy them ready-made, but you can also make them yourself. You need to complement black shoes with high leg warmers, and then it seems that the child is wearing over the knee boots.
In the case of pants, you can wear simple dark pants or breeches in a matching color. And, of course, we should not forget that the musketeers had their own accessories - a belt, a sword and a hat. The hat is the most difficult part of the entire musketeer image, because you will have to sew it yourself.
How to make a cowboy hat with your own hands: detailed instructions
The headdress of American cattlemen was created to protect the face and head from the sun, dust and rain while herding livestock on horseback. Therefore, it is distinguished by a specific appearance: wide brim, deep and comfortable crown and fastening on the chin so that the hat does not blow away in the wind or carry away during a fast ride.
Initially, the material for production was the skin of farm animals: cows, pigs or horses, carefully cleaned and processed. This material does not allow moisture to pass through and reliably protects from the sun.
Classic models have two or more small holes for ventilation in the crown.
With the advent of Westerns, cowboy hats entered the everyday life of people far from farming, and movies about the Wild West inspired many boys to imitate brave heroes.
Let's try to make a headdress for young Clint Eastwood or Wild Bill ourselves.
Cowboy hat made of paper and cardboard
The simplest material for a cowboy hat is paper. You can create masterpieces from it.
Necessary materials
For work we will need:
You can make the entire structure from ordinary office paper and then paint it, or you can create a more durable hat from cardboard.
Operating procedure
Before you start making a cowboy hat, take a tape measure and measure the circumference of your child's head and the distance from the forehead to the top of the head. This will help you cut out a product that will fit comfortably on your head, not pinch or fall off.
We cut out thick cardboard (you can use boxes from the store) according to the following scheme: the length of the rectangular part - the crown and the internal diameter of the “donut” and oval should be equal to the circumference of the child’s head. The height of the crown is determined by the distance from the forehead to the top of the child’s head.
On the rectangle, 2 centimeters are added on three sides, from which special teeth are cut for gluing.
Next, we assemble all 3 parts and glue them together. For cardboard it is better to use PVA, and for paper a regular glue stick is also suitable.
We leave the hat to dry, and then paint it with paints or cover it with colored paper.
A cardboard cowboy hat covered with velvet paper looks incredibly beautiful.
Fabric cowboy hat
Sewing a cowboy headdress from fabric is somewhat more difficult, but such a product lasts much longer and looks like a real store-bought hat.
Necessary materials
When choosing fabric, give preference to fleece, suede, velvety materials or fabrics reminiscent of leather. This way, the product will look more natural.
Operating procedure
For sewing we will need to make such a pattern.
If the fabric is quite dense and holds its shape on its own, then instead of cardboard you can use wire sewn into the outer edge of the brim.
If the fabric does not hold its shape, then the crown will have to be made on the frame in the same way as we previously made the brim of the hat.
A cowboy hat is not only a reason to please a child, but also unlimited scope for imagination. You can make different models, with narrow or wide brims, and also sew a whole cowboy costume for a game or for a holiday.
Musketeer hat: diagram and step-by-step instructions
The musketeers' hat is prepared in a similar way. It has its own feature - round fields.
Making a musketeers hat:
- We cut out the fields: we make a round template with a hole of the same shape in the center, the diameter of which corresponds to the size of the head.
- We cover it with beautiful material.
- We attach the walls: the height of the walls is up to 25 cm. Otherwise, a cylinder will come out.
- The walls are sheathed with the same material.
- It is enough to sew a circle of fabric on top. You can fix the cardboard there and then cover it with fabric.
- We carry out decorative work: insert a feather, sew a ribbon or strip along the rim.
- We bend the fields. The hat is ready!
DIY cowboy hat made of paper with photos and videos
Children's parties are accompanied by headaches for parents associated with the selection of a stylized costume. In this case, you can do with little effort and invite the child to feel like a cowboy. You just need to choose a vest and build a cowboy hat to match it. At the same time, a cowboy hat can be made with your own hands in just a few hours.
Elements of a cowboy costume
First you need to understand the components of a cowboy's outfit. This suit includes:
- trousers;
- shirt;
- hat;
- vest;
- holster with pistol;
- neckerchief or cord;
- star; belt;
- cowboy boots.
Sheriffs and conquerors of the wild West spent most of their time in the saddle. Often they were forced to live in open fields. This is where the peculiarities of cowboy clothing came from:
- Practicality. The shepherd's clothes must be durable, because on the prairies there are no conditions to repair their clothes and put on patches.
- Convenience. Clothing must be comfortable, because a cowboy sleeps in it, rides horses, eats and lives in it.
- Simplicity of decoration. Real brutal macho men never decorated their clothes. At first there was no time under harsh living conditions. Later, decorative decoration was considered inappropriate for their serious image.
Cowboy headdress
A time-saving option for making a cowboy hat is to make such a miracle using paper. Since this material is quite fragile, you will have to handle the carnival accessory with care.
To work on the product you will need:
Before starting work, you should measure the circumference of the child's head. Using the resulting measurement, a pattern for the future hat is constructed.
When constructing, it should be taken into account that the crown of the headdress should be slightly concave at both edges, and the brim of the hat on the sides should be less wide than at the front and back.
The paper pattern is cut out. The resulting parts are glued together in the following order: the crown is connected to the brim of the hat, then the bottom is glued.
Two laces are fixed on the inside of the work with glue.
Now you should “drape” the finished base of the product, using toilet paper. A small area of the hat is treated with glue. Toilet paper, previously torn into pieces or randomly crumpled, is fixed to an adhesive base.
This technique is carried out over the entire surface of the product. How it should look in the end is shown in the photo.
Let the glue dry well and you can start painting.
When painting, it is not recommended to use a large amount of water in order to prevent the top layer of paper from getting wet.
The product undergoes final drying.
All that remains is to string the pre-prepared clip onto the laces, and the cowboy accessory is ready.
Treads for a boy's musketeer costume
Textile leg warmers paired with black shoes will look like real boots.
To make your boots look chic, you will need to have:
- thick black fabric (50 cm);
- scissors, thread, sewing needle;
- elastic band;
- materials for decoration (you can use any tinsel you like). Open up parts of future boots, sew them, and place decorative elements on the lapels. If the “over the knee boots” do not stay on the foot as they should, then the lower end of the bell should be equipped with an elastic band.
Scheme
Beautiful boots.
A mustache and a smart beard are what your boy needs to complete the image of a musketeer. Remember what your favorite musketeer movie characters look like and use the image of the musketeer that you like best.
Musketeer makeup
To apply makeup, use safe face painting or a hypoallergenic contour pencil.
Instructions for creating other costumes:
- "Night"
- Mice
- Carlson
- Puss in Boots
- Firefighter
- Bees
- Clown
- Crows
- Chicken
- Monkeys
- Squirrels
- Papuan
- Gerda
- Zorro
- Alien
- Winters
- Harry Potter
- Batman
- Penguin
- Christmas tree toys
- Months
- Hussar
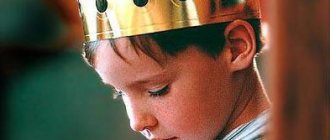
- King
- Watch
Bring brightness
Not only boys, but also girls like to dress up as cowboys. If you tie a bright-colored satin ribbon to the base of a cowboy headdress, and decorate the vest with a cord that matches it, then such a costume will be ideal for a girl.
A cowboy hat will look completely “girly” if you make it two-layer, where the top layer is satin fabric. Only here you need to take into account that it is no longer paper that is involved in the work, but cardboard.
The pattern used is similar. The only difference is that fabric is previously glued onto the hat parts cut out of cardboard (before attaching them). To do this, coat the cardboard with glue and leave it for a few minutes, giving the glue a chance to set a little.
Then fabric is placed on the cardboard blanks and carefully straightened underneath them to avoid wrinkles.
Approximately 2 cm is retreated from the edge of the patterns and fabric parts are cut out. The allowances made on the material are cut to their corresponding depth. You should get small squares with which the fabric will be glued.
The allowances are folded onto the back side of the parts and fixed there with glue.
For strength, you can apply glue along the fabric allowances themselves. Subsequent steps are similar to the master class presented above.
Cowboy costume for girls
The main elements of clothing without which a man could not call himself a cowboy are a cowboy hat and boots. Therefore, a girl dressed in a dress made of natural fabrics, but also wearing a hat and boots, will remind you of the Wild West. And if you try, you can make a real cowgirl out of her.
So, a children's cowboy costume is not limited to just a hat and boots. For the image you will need:
- a loose checked shirt, tied in a knot above the waist, under the bust;
- comfortable skinny jeans or denim shorts; leather or suede trousers are perfect;
- a silk scarf that will protect from dust and sun;
- leather riding gloves;
- wide leather belt with a massive plaque.
The main rule of a cowgirl is to wear a hat only with boots. Boots need a long toe, a small heel, and spurs can be added to enhance the look.
Origami in cowboy style
Sometimes there is no need to make a costume for a children's party, and the child just decided to play cowboys with his friends. In this case, a suitable method for making a cowboy hat for a boy using the origami technique.
To do this, you will need a sheet of paper measuring 15*15 cm. You should fold it diagonally.
One sheet is folded to the bottom edge, then straightened. This creates a visible line.
The right corner should be moved to the left side so that the top of the corner is in contact with the edge of the previously formed fold line.
The left corner is folded similarly, but towards the right edge of the line.
The upper corners of the sheet are bent towards the middle of the workpiece, but in different directions.
The resulting figure is turned over so that the wide part is at the bottom.
A triangle is formed on the upper side of the workpiece using diagonal folds.
Next, the figure is folded in half along a vertical line, and the fold becomes convex.
On the back side of the workpiece, bend the sheet at the bottom, and press the upper folds inward.
To continue working, it is advisable to turn the figure with its side facing you.
The lower corners are alternately bent upward, forming triangles.
On the right side, you need to carefully pull the white edge of the sheet. A similar action is performed with the left half of the figure.
The main fold opens from the bottom of the product. The cowboy hat is ready.
You can let your child decorate the headdress himself by giving him multi-colored markers. Not only children, but also adults love to wear a cowboy accessory. For them, hats, as a rule, are made using more complex techniques using high-quality materials.
What does a musketeer costume consist of?
- A do-it-yourself musketeer suit will cost you several times less than its store-bought counterpart. In addition, for this you do not need to be a professional seamstress or designer; it is enough to have minimal needlework skills and have some free time.
- In the cult Soviet film, costume designers managed to create truly masterpiece images of movie characters - Athos, Porthos and Aramis . Let us also take as a model the elements of the musketeer’s costume from this particular picture.
The image of a musketeer is recognizable by such striking elements:
- a sky-blue cape with silver crosses on the back and front. They are also on the middle part of the sleeve;
- white turn-down collar;
- wide-brimmed hat with feathers;
- boots;
- sword.
Features of paper hats
Making a hat from paper or cardboard is not difficult: the material holds its shape well, as befits a real cowboy’s headdress, and the colors of craft sheets or packaging cardboard match the style of the beige-sand outfits of cowboys.
Where can crafts on this topic come in handy?
For children, a paper cowboy hat will come in handy at New Year's parties at school or kindergarten, during home theater productions, or simply for playing cowboys and Indians. Adults can also use a homemade accessory at themed parties or photo shoots.
Examples of ready-made crafts made from paper and cardboard
Cowboy accessory made of craft paper.
Option for girls with ribbons and rhinestones.
Headdress from the Wild West using papercraft technique.
An outfit for the smallest sheriffs made from a plastic plate.
Craft made of thick cardboard, decorated with a matching leather cord.
A simple schematic two-dimensional model on a paper frame.
Headdress made from a cardboard box.
Outfit for an adult girl
Regardless of the fact that the time of cowboys is passing, the color scheme always remains at its level.
The use of natural materials and the same natural colors: mustard, brown, beige. The elements of a cowboy outfit are so distinctive and original that they should not be combined with other styles, so jewelry in an ethnic style is suitable for a girl: earrings made of feathers or coins, rings and bone bracelets, a jacket or poncho made of natural wool.
A cowgirl should have a matching hairstyle. Two braids look very beautiful, and in the absence of a hat, intricate hair braiding. And long flowing hair under a hat will also look beautiful.
If a girl has a boyfriend, then after rummaging through his wardrobe, she will definitely find a checkered shirt for herself. By tying it into a knot at the waist and rolling up the sleeves , the first half of the look is already created.
Wearing tight jeans with a wide massive belt will highlight the sophistication and at the same time the strength of a free woman. A white loose skirt instead of trousers will emphasize femininity and, at the same time, rebellion.
A leather vest with fringe on a light linen blouse, as well as on a men's shirt, will look great. A fringe up to half a meter long will suit a woman's look.
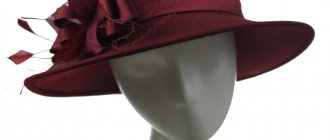
It is better to choose a hat for an adult lady in a store. There are many options and styles. Hats are suitable for everyone, without exception, the main thing is to choose the right accessory. The material from which the hat is made may depend on the time of year. In summer, straw is perfect, at other times - felt and leather.
Cowboy boots can instantly make any, even the simplest and most casual outfit, cool, stylish and tied to a special theme. Moreover, today in the world there are a huge number of variations of these same boots: with long toes, rounded tops, with embroidery, sewn fringe, painted, combined from different types of leather.
The image of a girl from the Wild West is ready. Everyone present at the festival will not be able to take their eyes off such a cowgirl.
How to make a full-size paper cowboy hat
Required materials and tools
To make a paper cowboy hat you will need:
If you want your paper cowboy hat to have a realistic leather-like texture, then you will additionally need:
Step-by-step assembly of a three-dimensional craft
Even a middle school-age child can make a cowboy hat with his own hands if he carefully follows the instructions.
1. Measure the circumference of the young cowboy's head.
2. A pattern is drawn on whatman paper using the resulting size.
The brim of the headdress should be made wider on the front and back sides than on the sides, and the crown should be slightly concave.
3. Cut out the paper blank.
4. Glue the crown with the brim.
5. Glue the bottom of the headdress.
6. Glue the lace to the wrong side.
A do-it-yourself cowboy hat made of cardboard or whatman paper is ready; to give the product a “leather” texture, you should follow a few more simple steps:
1. The surface of the craft is coated with PVA glue.
2. While the adhesive layer has not dried, small pieces of crumpled toilet paper are attached to it in a chaotic manner.
3. To make the cowboy hat stronger, you can apply several layers of toilet paper, first drying each of them.
It is better to glue not the entire workpiece entirely, but in separate zones - then the PVA will not have time to dry.
4. After the craft has completely dried, begin painting it. To prevent the hat from getting wet and losing its shape during the dyeing process, it is recommended to use as little water as possible.
The finished craft can be decorated with a foil sheriff’s star, various laces and rivets, or you can draw “stitching” on it using a black marker.
You can make a horse's head on a stick according to these instructions.
Option for girls, upholstered in velvet fabric
A cute version of a cowboy hat for girls can be achieved by decorating the cowboy hat with a bright satin ribbon at the base of the crown.
The headdress will become even more “girly” if you cover the parts of the hat with a “velvet-like” fabric in brown or dark burgundy colors. In this case, the patterns are made in the same way as in the previous version, only not from whatman paper, but from thick cardboard.
Must-have cowboy accessories
Clothing is, of course, good, but there are details without which a cowboy costume will be incomplete and incomplete. Doesn't mean you have to buy a horse . Although you can make a horse on a stick for a child with your own hands. It can be made of cardboard, thin plywood, or sewn from fabric and stuffed with filler. All you need is: a sock for the horse's head, thread and needle, scissors, flaps for the ears, nose and eye, filler (sintepon), yarn from an old sweater for the mane, a stick (wooden or plastic).
Holster with pistol
You should look for such equipment in your son’s toys or on the shelves of a toy store. It is not difficult to find a pistol in police toy sets or the carnival costume department. But if you can’t find a holster, then there is always the opportunity to make a holster yourself. It is a small pocket without a bottom for weapons with a loop for attaching to a belt. You can sew such a pocket from suede, leather or artificial leather with your own hands.
Neck scarf or cord
As an accessory for a complete look, use a silk scarf in a rich, bright color. A neck cord for men will also look impressive.
Cowboy or Sheriff star
Using a gold star you can decorate a vest and a cowboy hat. To create such a star you will need cardboard covered with foil or gold brocade.
Leather belt
Choose a wide leather belt for trousers in brown or black, it all depends on the capabilities and overall color of the decoration. The main condition is that there should be a large, voluminous plaque on the belt.
Cowboy boots
The uniform of the defender of the Wild West includes shoes.
There are many options here. A very small boy can wear simple black shoes, since a suit for a baby should be comfortable and safe. For an older child, boots will be needed. “Cossacks” with sharp noses will look ideal. If you don’t find anything suitable on the shoe shelf, you can dress your child in black rubber boots and decorate them with leather overlays and fringe. If you create a cowboy costume for a boy yourself, then you can wear comfortable sneakers as shoes, and sew a boot-shaped cover on them. Such a rag boot can also be decorated with a sheriff’s star.
Cowboy carnival hat
You can buy a hat, like everything else, for your cowboy in toy stores or specialized costume stores.
There they are available in a wide range. If you don’t have the opportunity or time to visit the store, or you’ve decided to create a cowboy costume for a boy with your own hands, then a cowboy hat can be easily made from thick cardboard, painted and decorated with a gold star. This option is the simplest. A headdress for a little cowboy made in papier-mâché style - this option is more complicated and will take more time. But if you decide to create a cowboy costume with your own hands, then make sure that the baby has a real cowboy hat. It is advisable to choose black color, but the colors of the suit’s trim will also work. The hat should have a large brim . The papier-mâché style paper hat consists of two parts: the brim and the top.
The brim of the headdress is the basis, which is made according to the size of the baby’s head. The top of the hat can be made with papier-mâché on a balloon. When the two parts are ready, they are glued together along the joint, and covered with fabric on top and decorated with paints. The cowboy star can be painted or glued separately.
Important Accessories
To make the costume look original, tie a scarf for your baby.
It can be plain, checkered or striped. The main thing is that he looks harmonious in a suit. It is worth noting that a scarf, radically different from the color of the outfit, will be a bright detail that attracts the attention of the audience to the baby. Since the New Year's cowboy costume is made for a carnival ball, it would not be superfluous to decorate the clothes with rain and tinsel. Do not forget that the suit is for boys, so you should not overdo it and overload the outfit. It will be enough to trim the edges of the vest, cowboy shirt and belt.
Other paper ideas
The listed options for making hats are the most popular, but there is a whole list of ideas on how to make other shapes.
For example, Dunno’s hat will be interesting for a child’s participation in a play, and a magician’s headdress will be an excellent holiday gift for a boy who is fond of magic tricks.
A few ideas on how to make different hats:
- Vietnamese hat - a circle with a hole is cut out and glued in the right place.
- A hat for a snowman is made by analogy with a cylinder, only the top is rounded.
- The wizard's headdress is an ordinary cone, to which an elastic band is tied for convenience.
- Stargazer's cap - a cap with small brims is made.
- Zorro's hat is made by analogy with a top hat, only the top hat itself is half as low.
- For a detective, it is a cap with short, rounded brim.
- For the judge, the cut out cylinder is attached to the square.
- Witch's headdress - made in the same way as an astrologer's cap, but with a wide brim.
Fans of modern TV series will love the pattern for a maester's hat - it looks like a small, round, brimless hat that can be easily made according to the pattern.
Useful video
Source
Pirate hat
These hats are often necessary for boys for New Year's parties.
- Cardboard, preferably black
- Thin album sheets
- Scissors
- Rubber
- Glue
- Make a square shape from cardboard
- Draw a circle of large diameter on it and cut it out
- We cut strips from album sheets and make fringe from them
- Twist it with scissors
- Glue the fringe you made around the perimeter of the circle.
- We bend the edges of the circle so that there is a triangle and fix them with glue
- Again we take the album sheets and fold them several times, draw a feather and make a fringe along the edges. You need to make two of these feathers
- Glue one feather to each side of the triangle
- We draw bones, a skull or other pirate emblems on a sheet of paper, cut them out and glue them to the front of the future hat.
- Using paints, pencils or felt-tip pens, we decorate what we have pasted.
- To keep the hat on your head, we thread an elastic band around the edges. The hat is ready