Hair ties: choice
Scrunchies are most often used by those with long or medium length hair. It is very easy to collect strands of hair in a bun using an elastic band, because constantly walking around with your hair down is not always comfortable.
With the help of elastic bands you can create a lot of different hairstyles, as it holds the strands firmly. This is why many hairdressers often use elastic bands in their work, using them to create interesting hairstyles.
Making rubber bands with your own hands is quite easy if you decide on the model in advance and choose a certain option. Rubber bands come in the following types:
- Silicone
- Foamiran
- Satin
- From different types of fabric
Instructions and diagrams on how to make kanzashi
To work fruitfully in the art of crafts, you must follow all the rules of work indicated in the instructions and diagrams on how to make kanzashi. If the technology is violated, the products may turn out to be of an irregular or even ugly shape, which will undoubtedly upset the artist.
Craftswomen with a rich imagination constantly invent new ideas and techniques for creating crafts; they are interested in unusual patterns and stunning results.
From the instructions and diagrams for creating crafts, it becomes clear even to uninformed people what material to use and in what quantity, what tools to use in the work, how to fold ribbons or fabric correctly and in what sequence in order to competently design a petal or some detail of the work.
Without following the recommendations specified in the instructions, you will never be able to create a truly unique and worthy decoration for clothing, hairstyles or home interior.
Satin ribbons
You can make very beautiful and stylish elastic bands from satin ribbons that can definitely decorate your hair and give you a good mood. Elegant rubber bands made from satin ribbons with your own hands do not injure the strands and glide over them. They can be decorated with any decor - beads, rhinestones or various decorations.
If you want to make an elastic band to your liking, then be sure to use these instructions. The decoration will turn out to be very original and unique, and as you know, hand-made items are incredibly valued in our time.
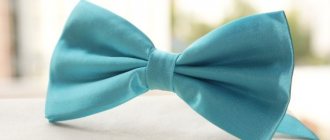
Contrast bow
The combination of white and black is a classic option for any decorative decoration. The traditional headdress for girls is no exception.
For production you will need:
- white tape;
- ribbon with black stripes or polka dots;
- black lace;
- scissors;
- rhinestones or beads.
Stages of work
- Stage No. 1. The variegated ribbon is cut into three pieces about 25 centimeters long.
- Stage No. 2. The white base is cut into shorter pieces - approximately a couple of centimeters less than the first.
- Stage No. 3. The simplest bow-loop is formed from ribbons and stitched in the center.
- Stage No. 4. A piece of black lace is sewn onto one of the white bows.
- Stage No. 5. The two remaining white bows are placed crosswise on top of each other.
- Stage No. 6. The colorful bows are folded like a snowflake and also secured in the center.
All that remains is to connect both blanks and a contrasting decoration can take its place on the girl’s head.
Manufacturing process
To make elastic bands from ribbons with your own hands, you need to take the following materials:
- — Elastic band for sewing;
- - Satin ribbon;
- - Scissors and needle.
You need to wrap the ribbon around the elastic and sew the edges, not forgetting to make a little drapery, so the elastic will look more elegant. The edges of the ribbon and elastic are sewn together at the very end, the finished product can be trimmed with beads and seed beads, and any other decorative elements can be sewn on top.
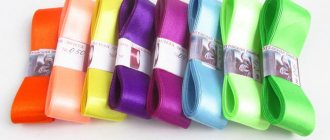
Materials and tools
To create exclusive kanzashi bows with elastic, satin, grosgrain, and chiffon ribbons of different widths are used (from 1 to 10 cm, depending on the desired size of the finished product). The base is a circle cut out of thick felt, to which an elastic band, bow, or flower is attached with hot glue or sewn. By selecting the appropriate fittings, kanzashi elements are used for a variety of decorations. For production you may need:
- headbands;
- bases for earrings, brooches;
- clasps for necklaces, bracelets;
- elastic bands;
- bandages;
- hairpins.
Each master class requires its own tools, but the basic set includes tweezers, scissors, hot glue, thin pins for creating blanks, petals, and buds.
To prevent the edges of the ribbons from fraying, they are scorched with a candle, lighter or match. The material melts well, the cut sets neatly.
A heat gun is most often used to fasten parts together. It's more convenient than regular second glue. To connect very small parts, glue is applied pointwise using a toothpick. To protect the product from contamination, at the last stage, apply hairspray, spraying it at a distance of 25-30 cm from the decoration.
Kanzashi hairpins are most often decorated with beads, sequins, and rhinestones. Cords, braid, and beads are also used for decoration. The last elements are the most popular, as they are the core of the fabric flower.
Thermal gun Satin ribbons
Basics for elastic bands Blanks for hairpins
What is an elastic band made of?
At home, there are often leftovers of various unnecessary materials that are usually thrown away. These can be scraps of fabric, lace, ribbons, sequins, shreds and much more. All these materials can be used to make rubber bands with your own hands.
Don’t forget to use your imagination and creative thinking, then you can create unique jewelry that will delight others. You can create brightly colored scrunchies that are perfect for summer, or you can create more calm and neutral decorations that are suitable for fall and winter.
Do not overdo it with decoration and decor, otherwise the elastic band will look ridiculous and inappropriate. It is worth wearing different elastic bands, using elegant accessories for holidays, and neutral ones for everyday wear.
LiveInternetLiveInternet
- Registration
- Entrance
–Categories
- Knitting (1766)
- Knitted toys (610)
- For ladies (174)
- Blankets and bedspreads (103)
- Little things for the home (56)
- Crochet patterns (44)
- Napkins (43)
- Socks and slippers (31)
- For Barbie dolls (30)
- Panama hats and hats (24)
- Knitted flowers (23)
- Potholders (19)
- Knitting patterns (16)
- Rugs (15)
- Knitting with beads (10)
- Knitted underwear (1)
- Children's (657)
- Booties (201)
- Hats, panama hats, bonnets (116)
- Various utilities (113)
- Cutting and sewing (56)
- Soft toys (patterns) (35)
- Kanzashi MK (44)
- Embroidery (36)
- Schemes (22)
- Ribbon embroidery, ribbon flowers (28)
- Handbags and cases for mobile phones (21)
- Beading (20)
- flowers and bead crafts (19)
- crafts from ribbons (17)
- My works. (15)
- Cool Porcelain (13)
- Candy bouquets (10)
- Dry felting (7)
- Felting tutorial (7)
- Toys (6)
- Everything for the diary (3)
- Cord braiding (2)
–Tags
-I'm a photographer
- To the application
Fabric elastic
Making the most ordinary elastic band from fabric is incredibly easy. You need to prepare a piece of fabric, you can use chiffon, satin, silk, velvet and so on. The larger the flap, the more voluminous the accessory will be.
The most common elastic band for sewing is used as a base, which is covered with fabric. You can sew a fabric cover in advance, thread a sewing elastic band into it and sew the ends together. The finished product is decorated to your taste; you can use false flowers, sequins and much more.
Any DIY hair tie is an original hand-made item that is worth your time. You can create elastic bands in different styles and colors, choosing them to your liking.
Detail of a man's suit
Nowadays, men's suits have more formal shapes and our men are accustomed to ties or, in extreme cases, a bow tie. But for a wedding ceremony you can wear a more elegant outfit, for example, with such a frill. It’s easy to sew it with your own hands using a pattern. You will need a narrow neck strip that fastens at the back, under the collar of the shirt with a button, hook or Velcro. The frill itself is represented by two rhombuses of different sizes.
The large element is located below and the smaller element is located above. You will need an overlocker to trim the edges of the delicate material. After the blanks are processed, connect the two rhombuses together and, having gathered the upper edge, sew it onto the rim. The self-sewn jabot is complete.
Unusual rubber bands
In addition to the usual fabrics, elastic can even be made from felt, corduroy or denim. In addition to fabric accessories, you can make it from wooden beads, knit an elastic band from yarn, and also make it from multi-colored stones in the form of beads; such elastic bands are perfect for a holiday or any celebration.
It is best to store elastic bands in a separate bag or case so that they do not get lost and are always at hand.
Other options
Watch more master classes in the “Kanzashi” :
In order not to forget the address of the page and share with friends, add it to your social networks: Do you want to know news about competitions or master classes?
Tags: Elastic bands and hairpins, DIY jewelry
Attention! It is better to write urgent questions in the comments on the website (form at the bottom of the page) or, better yet, directly by email. There are no notifications about comments from the VKontakte form! This form is more for feedback. 
Children's elastic bands
When making children's rubber bands, you can show your imagination; the brightest elements and multi-colored scraps are used here.
You can make a simple elastic band covered with fabric, or decorate it with your own made bows, artificial flowers and lace. Girls love everything shiny and bright, so rhinestones, sequins and beads are perfect for children's elastic bands.
DIY elastic bands made from satin ribbons are also perfect for girls; they look discreet, but at the same time elegant. You can experiment with fabric using suede, velvet, lace and other unusual fabrics.
Material for kanzashi technique
First of all, you need to purchase kanzashi to make the product - these are ribbons. But, as it seems at first glance, this is not all the necessary material. You will also need scissors to cut the ribbons. A ruler to measure the required length. A needle is also on the list of necessities. In addition, you will need threads that match the color of the tape.
In order to seal the ends of the tape and give them smooth and round ends, you need a lighter and tweezers. When the work is done, glue is needed. To hide the connections in the middle, you need buttons or beads.
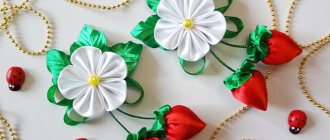
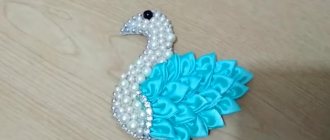
Elastic bands in the shape of a rose
Elastic bands in the shape of roses turn out beautiful and elegant. Roses are made from pieces of satin ribbon, the width of which is 15 mm and 5 mm. You can take ribbons of any color; black and pink go well together.
Making a rose from a ribbon is very simple, you need to fold it into seven parts and stitch it with a needle, this way it will come together and you will get a flower. A small rose made from a 5 mm wide ribbon is sewn inside the large rose. The finished flower is sewn onto an elastic band, which can be anything.
How to attach jewelry to a base
Ready-made bows and kanzashi flowers from ribbons can become part of an elastic band or hairpin. Attaching the workpiece with glue is impractical and unsightly. Fastening with tape looks much neater, for this:
- Cut a circle out of felt and make two small cuts in the center.
- Glue an elastic band between the resulting holes.
- Insert the ribbon, bend it around the elastic, and bring it out into the second hole.
- Glue the ends from the inside out.
You don’t have to make cuts on the felt circle, but secure the elastic with a strip on top. A flower or bow is attached to the resulting blank. You can create a universal mount. You will need two pieces of elastic and a felt base. The last element can be round or rectangular. Four cuts are made on it. Rubber bands are inserted into the resulting holes, and the ends are glued from the inside out. This blank is suitable for attaching to a headband or hairpin.
Leather elastic
The leather elastic band looks incredibly impressive and original. It is not suitable for children, but will perfectly decorate an adult representative of the fair sex.
If you are wondering how to make a hair tie with your own hands, then use one of the suggested tips and make a unique accessory for yourself or your loved ones.
Leather elastic bands look in a minimalist style; the color of the skin is best matched to the hair color, then the elastic band will look harmonious and emphasize the individuality of its owner. In addition, leather elastic bands are perfect for men who wear long hair and like to tie it in a ponytail.
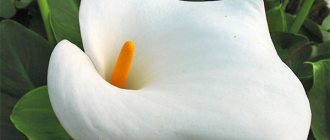
Kanzasha flowers for wedding decor
Brides want to fill their bouquet with something unusual and lovely. As a rule, flowers for a wedding bouquet are chosen white or pink.
But often the choice falls on bright flowers in the kanzashi style. Among the kanzashi flowers, you can attach ribbons or large beads on a thin silver wire.
Flowers using the kanzashi technique are attached to the base in the middle and glued completely, without missing a space. The perfect wedding bouquet is original and very unusual.
Photo of DIY hair ties
One-piece frill
If the oval drawn according to the previous pattern is not cut, then you can make a solid frill with your own hands, as in the photo below. The oval should not be cut in half, but a straight line should be drawn in the center dividing it into two equal parts. Only the top line above the neckline is cut. Next, the fabric is folded in counter folds and ironed so that the folds do not diverge and it is convenient to sew them together onto the neckband. It can be made not in a circle around the neck, but on two buttons that are sewn under the collar of a shirt or dress. All that remains is to fasten the decoration if desired and the outfit is ready.
The article describes in detail how to make a frill with your own hands, with patterns and examples, and also provides step-by-step instructions for making several types of such decoration.
Sources used:
- https://postila.ru/post/search
- https://www.livemaster.ru/topic/870179-sozdanie-broshi-zhabo-izumlenie
- https://sdelaisam.mirtesen.ru/blog/43718236887/next
- https://kollekcija.com/zhabo-iz-lent-i-kruzheva-svoimi-rukami-master-klass-valerii-baevoy/
- https://fb.ru/article/366880/jabo-svoimi-rukami-vyikroyka-neskolko-variantov-poshagovyie-instruktsii