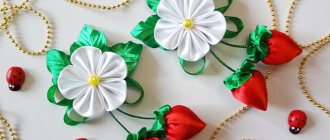
The calla lilies themselves are not similar to the flowers we previously mentioned in the master classes. They don't have petals. But despite this, they attract attention due to their unusual appearance. Our master class on making and assembling these flowers will not leave you indifferent.
Let's prepare everything necessary for creation. So, we will need:
- satin ribbons
- yellow, 2.5 cm wide
- white or other color according to your wishes, 5cm wide
- green, 1cm wide
- green organza ribbon, 2.5 cm wide
- scissors
- tweezers
- lighter, candle
- glue
We form the so-called “veil” of the inflorescence. To do this, cut off a white piece measuring 5x10cm. Next, fold our segment in half crosswise and unbend it again. The result is a line in the center across the segment. In this way, our segment is divided into two squares. Fold them diagonally in one direction, wrong side in. We fix the junction of the corners above the fire.
So we made a triangle. Fold it in half again, with the whole side inward and the curved edges outward. Next, hold the resulting triangle by the corner along the fold line and cut the triangle in half. We fix the cut corner over the fire.
Now we turn it inside out. We will make the middle yellow. We cut the edge at a slight angle and process it over the fire.
Next, we wrap our segment into a tube. To do this, we clamp the edge with tweezers and begin to wrap it inside out, slowly moving it to the side. In this way, the tape will not be wrapped straight, but slightly at an angle, like a spiral. We fix it at the beginning and at the end with glue so that it does not unfold.
Assembly process. We coat the lower end of the yellow center, which is wider than the upper one, and glue it inward.
Let's do another one. To do this, bend the green ribbon in half with the front side inward and cut the resulting rectangle diagonally. We clamp the cut side with tweezers and fix it over the fire.
Next, we turn it inside out and thus get a leaf.
Glue the calla flower itself inside the leaf, smearing the stem with glue for this. The finished flower can be used to assemble and decorate a variety of bouquets and decorations.
We will tell you how to put together a beautiful bouquet that can be used to decorate a variety of products.
To do this, we will make another organza leaves. Cut out a piece measuring 2.5x14cm. We bend it in half and cut off the edge at an angle, from the side where the two ends of the ribbon folded in half are connected.
Now we fix it over the fire, holding this place with tweezers. Turn it inside out and get a leaf. For our composition we will need inflorescences with leaves - 8 pieces, and organza leaves as well - 8 pieces.
Next, we will glue everything onto a base, for which we will have an oval made of felt, measuring 4x6cm. First we glue the organza leaves. We glue them in two rows, in the middle of the oval, placing the smeared bottom side of the leaf with the sharp end up diagonally, like a Christmas tree. In this case, the leaves should be placed with the connected, sharp side of the leaf facing up.
Now we glue the flowers themselves on top. They need to be placed in a checkerboard pattern, like a bunch. First we glue 5: one on top, in the center, and two on the sides, one under the other.
Next, we glue two more blanks together.
We glue the already glued flowers in the middle of our bouquet. And we attach another one. It should be located in the middle, between the two previous ones, glued. Thus, our bouquet of calla lilies is ready.
floating cup
You will need: thin floral felt, cup, saucer, fork, foam sponges, glue gun, titanium glue, soldering iron, ruler, satin ribbons of different colors 5 cm wide, tweezers, weight (metal square or something else), decorative ornaments - stamens, microbeads, beads, butterfly...
Master Class
- Cut out felt leaves in the required quantity. There are 30 of them in this master class. Image 4.
- Cut the ribbons into squares; for one flower you will need 5 squares of the same color. Image 5.
- Form a petal by folding the square twice diagonally, then pinch with tweezers. Image 6.
- Guide the soldering iron along the marked line. Image 7 and 8. You should get a petal like in image 9.
- Turn out the petal. Image 10 and 11.
- Make 50-70 petals this way. Image 12.
- Fold 5 stamens and thread them through a bead. Image 13 and 14.
- Shape the fork into a curved shape and glue the fork handle to the inside wall of the cup with a glue gun. Then glue the fork to the center of the saucer, leave it for 10 minutes, and then apply hot glue on top. Image 15 and 16.
- Place a metal square on the fork and saucer as a weight. Image 17.
- Cut the sponge into pieces and glue them on, masking the fork, weight and making a platform for the flowers. Image 19.
- Cover the foam rubber with felt. Image 20.
- Take a bead with stamens and glue 5 petals. Make all the flowers this way. Image 21,22 and 23.
- Apply titanium glue to the core of each flower and sprinkle with microbeads. Image 24.
- Cover the saucer and the inner wall of the cup with petals. Image 25 and 26.
- Glue the flowers as shown in images 27 and 28.
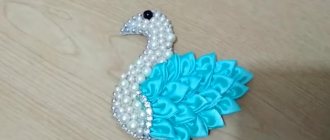
The soaring flying cup with kanzashi flowers is ready!
Master class 4. Small textured flower made from wave braid
If you want to decorate a ring, headband, brooch or necklace with a flower, then a rose made from wave braid is best suited. After all, it turns out so neat, strong, elegant and small.
What you will need:
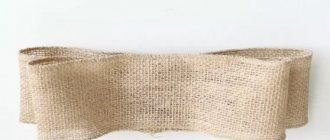
- A wave braid of medium width and a length of 50-60 cm (for one rose) or two ribbons of different colors of the same width, 25-30 cm long (if you want to make a two-color rose). However, the length can be longer or shorter, it depends on what size you want to make the bud.
- Scissors.
- Sewing machine.
- Threads with a needle to match the braid.
Step 1. Take two wave braids of the same length and intertwine them together as shown in the photo. Before you start weaving, secure the two ribbons with some kind of clamp so that they do not unravel.
Step 2: Machine stitch along the edge of your piece to secure the weave.
If you don't have a machine, it doesn't matter. Just run large stitches along the entire length of the braid.
Step 3. To make the flower, simply start folding the ribbon at one end, securing the layers with hot glue in some places.
Step 4: When you're done, you should have a bud that looks something like this. Simply tuck the remaining end of the braid under the flower and secure it with glue.
Step 5. Glue a small circle of felt, cardboard or thick fabric to the base. In the future, you can glue anything to this base - from a hairpin to a ring.
Step 6. Have you noticed that all the petals of our flower are closed? In this form, it looks more like a peony or ranunculus. If you want the flower to become a rose, simply spread each petal outward one by one.
Necessary materials
- Satin ribbon, lilac, 75 mm wide and white, 65 mm wide
- Half bead, diameter 8 mm
- Bead cap
- Felt circle with a diameter of 2 cm
It is worth preparing 16 petals from pieces of 7.5x7.5 cm. Fold the piece diagonally, fold it again, and again in the middle. We hold the resulting triangle by the center, and lift the edges up and lay them flush with the upper bend. All edges of the tape on top should lie flat.
After this, we bend the petal inward. Cut off the tip and solder over the fire. We cut the bottom at a slight upward angle and solder it with a flame.
When they are ready, we begin assembly. We glue 8 blanks together.
We glue the next eight pieces from the bottom. We place them between the previous row in a checkerboard pattern.
We make the following ones from white tape 65x65 mm. We make exactly the same 8 pieces and glue them together.
We glue the layers together, not in a checkerboard pattern, but under each other.
You will need another layer of white pieces of 5x5 centimeters. We form them in the same way as the previous ones. We collect eight small ones on a thread. They can be glued together, but it is better to gather them on a thread and pull the leaves together more tightly. Fix and cut the thread.
We glue the last layer of small ones so that they are under each other.
We decorate the middle - glue a large rhinestone or a beautiful bead.
Additionally, we will make green leaves from green ribbon of different shades, measuring 4x8 cm and 5x10 cm from. Fold the corners of the rectangle towards the center. Fold the resulting triangle in half, and holding the middle of the triangle, lift the edges up; they should be at the same level.
We cut off the tip, solder it, also cut off the bottom and singe it over the fire. 3 large and 4 small leaves.
Additionally, we use stamens for decoration.
We glue the stamens and leaves from the bottom.
The incredibly beautiful product is ready!
To create leaves
- Take a green ribbon, it should be wide. To begin with, measure out five pieces of seven cm and six pieces of four cm.
- Cut out circles that will serve as the basis for the sepals.
- Fold 1 half of the leaf, turning it inward with the edge. Using a needle and thread, pierce the petal where the edge is folded.
- They do exactly the same on the other side, but in this case they bend the edge.
- The petal is collected a little and secured with threads where the edge is.
- The sections of the leaves are folded in two and the leaf is cut out. The edges are scorched.
- Take the wire, it will be needed for fastening. Before this, the edges of the petal are smeared with a glue gun, the first petal is taken and wrapped around the end of the wire, and the others in turn, around the first petal.
To clearly fix the rose on the wire, turn the rose over and fill it with glue until it cools completely, at the end of the work the sepals and petals are glued.
Preparatory work
A very simple way to create a real masterpiece with your hands. In order to start work, you need to prepare materials.
- canvas or fabric with a wide weave in a hoop
- white satin ribbons 12 and 25 mm wide and green
- soft wire
- acrylic paints preferably
- PVA glue
- paint brush
- toothpicks
- needle with large eye
- scissors
- lighter
- awl
- Diagram or template
Scheme of a lily, leaves, stem and buds.
When all the tools are prepared, all you have to do is be patient and not worry if something doesn’t work out as you would like. If you're new to embroidery, you can make it easier by hoopping the fabric and drawing the outline of a flower on it.
Today there are ready-made kits for needlework in specialized stores. If this is your first time creating a painting, then it is better for you to use just such a set. The outlines of the flower are clearly printed there and high-quality materials are selected. They will not curl up during work and irritate the novice master.
What materials are needed
Purchase the following materials from a specialty store:
- Satin ribbons
- Needles with a wide eye
- Fabric with hoop as base
- Scissors
- Beads as decoration
- Matches (burn the ribbons)
- Pencil
Christmas tree cover made of ribbons
You will need: a bottle of champagne, 10 meters of green satin ribbon 2.5 cm wide, gold ribbon 2.5 cm wide, titanium glue, glue stick, decorative snowflakes, thin gold ribbon and bead for a bow, sketchbook sheet, ruler, scissors .
Master Class
- Prepare a sheet of thick paper 16 cm long.
- Try it on the bottle and glue it using a glue stick. The cover should be easy to remove.
- Prepare a strip of paper 8 cm wide, try on the collar and cut off the excess.
- Glue the collar to the cover using a glue stick.
- Glue the gold tape above the paper as a collar using titanium glue.
- Cover the entire bottle with green tape as shown in the image.
- Prepare 9 cm long pieces of green tape.
- Form loops from the ribbons by folding them in half, then glue them as fir branches.
- Make a bow out of gold ribbon, glue a bead and attach it to the bottle.
- Glue snowflakes onto the spruce branches.
The Christmas tree-case for champagne is ready! I recommend watching this video!
Wedding champagne Groom Bride decor with ribbons master class/wedding champagne.
Watch this video on YouTube
Creative materials
Before plunging into the creative process, prepare everything you need and buy what you need. Buy materials in reserve. Maybe you will like the black and white hoop from our other lesson. Or a schoolgirl's set of hairpins and a tie.
For this master class you will need a satin ribbon:
- wishing (width 5 cm) – 2 meters;
- blue (width 5 cm) – 2 m;
- green (width 0.6 cm) – 5 m.
And:
- stamens to match the wide satin ribbons - 15 threads of each color;
- white half beads (diameter 0.8 cm) – 5 pieces;
- metal rim (width 0.5-0.7 cm).
For rubber bands, additionally: two felt circles and two elastic bands in the color of the satin ribbons.
Tools:
- scissors;
- heat gun + rods;
- lighter, candle or thermal cutter, if available.
Needle Safety
At first, a person only needs one needle for everything. Then, a person begins to slowly understand that for beads you need one thing, but for wool embroidery, darning or embroidery, something completely different, and it would be nice to buy a set, or better yet, another set too. And now you have a whole arsenal.
I would like to warn beginning embroiderers against carelessness. X-rays, stitches on the legs and other hospital horrors are not for us. For us – accuracy and prudence.
It is prohibited to: stick a needle into the armrest of a chair or sofa, put a needle in your mouth, or leave a needle on any surface. Even for the tiniest bit, even for half a half second. It is forbidden.
The needle is either stuck into the needle bed, or you are working with it. There are simply no other options, that’s all.
It's easy to get used to. Especially if you get beautiful and comfortable needle beds or organizers.
For example, such organizers. This one is from Tatyana Maksimenko. She posts master classes on her blog “Evening Gatherings”. She has free master classes, and there are also paid ones.
You can read about beautiful needle beds here on the website. A pincushion or a work of art.
And they delight the eye and keep the body safe and sound. And also the bodies of our loved ones and relatives.
It’s not difficult for me to remember - So, don’t step here!, So, we’re all looking for a needle, I dropped it here! (And especially in the carpet, it’s indescribable.)
There is one more rule. Do not leave thread in the needle. You can accidentally catch a thread, and the needle flies out of the needle bed and for some reason immediately disappears somewhere. Take out the threads and ribbons and then stick the needle into the needle bar.
Please be careful.
Side Ribbon Stitch
This ribbon stitch is done in almost the same way as the basic stitch, but here the ribbon is laid at an angle.
1. Pull the ribbon to the right side at the base of the stitch.
2. Place the needle under the tape at the base of the stitch (with the tape pointing upward). Moving the needle back slightly pulls the ribbon, straightening it.
3. At the very edge of the tape (on the left), we pull the needle to the wrong side, holding it with your finger at the base of the stitch. Then we pull the ribbon on the wrong side so that a curl is formed.
4. Attach the ribbon to the wrong side of the work.
Sunflower petals are made with a side ribbon stitch (by Dasha Svetlaya)
Leaves are embroidered with side ribbon stitch
Kanzashi lily - master class
Lilies made from satin ribbons invariably attract the attention of needlewomen with their beauty, and their ease of manufacture gives them additional popularity. In this article we will tell you how to make a lily from a ribbon with your own hands
In this article we will tell you how to make a ribbon lily with your own hands.
What is kanzashi?
Kanzashi (kanzashi) are Japanese hair ornaments that are worn as part of a traditional women's costume.
Initially, they looked like ordinary hairpins or combs; later they began to be decorated with artificial or live seasonal flowers, pendants, and inserts made of valuable materials.
Over time, hairpins decorated with silk flowers gave their name to a whole direction of applied art. It is based on typical origami techniques, but the material for folding is not paper, but pieces of silk (satin).
How to make a lily (kanzashi)?
Before starting work, prepare all the necessary materials, choose a comfortable place and time. You should not rush or be nervous, because despite the simplicity of execution, working with fabric requires patience, good mood and attentiveness. Necessary materials:
- silk or satin ribbon (5 cm wide);
- PVA glue (preferably thick construction glue);
- hot glue;
- candle;
- semolina;
- green food coloring or the core of a green pencil, a cotton pad or ball for rubbing the dye into the fabric;
- golden sparkles;
- thick fishing line;
- felt base (small circle, about 2.5 cm in diameter);
- a towel (thick enough to create a soft base when creating veins on the petals);
- knife.
Let's look at the step-by-step implementation of kanzashi lilies in our MK.
- First of all, we will make a pattern for making the petals. The easiest way to do it is from cardboard, but if you have the opportunity to use thin plastic for this purpose, it will be much better. In addition, a plastic pattern will last you much longer. Pattern length – 7cm, width – 5cm. For one lily we need 17 petals. Moreover, in five of them, one tip should be cut deeper than the usual ones.
- We singe the edges of the petals one by one over a candle flame. We burn it and immediately, while it is hot, pull the edges in different directions, giving them a “wavy” appearance.
- Add texture to the petals. To do this, place the petals on a towel folded in several layers. We heat the knife and draw it with the back side (not the sharp one) along the petals, pressing slightly, so that longitudinal stripes-veins remain. Petals with cut ends (5 pcs) are additionally tinted green. To do this, it is better to use a few grains of food coloring. Just rub the toner thoroughly into the fabric (use a cotton pad or ball so as not to stain your hands and apply the dye evenly). If there is no dye, grind the lead of a green pencil and rub it into the satin.
- Preparing the stamens. We cut the fishing line into pieces 5 cm long and dip the edge of each in glue and then in dry semolina. If little semolina sticks, dry the “stamen” and repeat the procedure several times. At the end, dip the dried stamen with semolina in glue and golden glitter. Let the stamens dry completely, then cut some of them shorter.
- Glue the first row (6 pieces) of petals to the felt circle. Let it dry a little and glue the second row (6 more pieces).
- Before gluing, fold the tinted petals in the center (along the longitudinal axis). We make the third (3 pieces) and fourth (2 pieces) tier of petals from them. When the structure dries a little, drop a little hot glue into the center and insert the stamens. Don't release them too early, hold them until the glue sets a little.
- If desired, the lily can be attached to a chosen base - a hairpin, headband or elastic band. Or you can not attach it anywhere, leave it as is. As a result, we have such a beautiful flower.
According to our master class, a lily from ribbons can be made of any color, shape, splendor and size. Ready-made lilies are used to decorate clothes or accessories, create floral panels or souvenir bouquets, decorate rooms... The field for experimenting with satin lilies is so large that there is no way to list all the options.
Rest assured, loved ones will certainly appreciate such a gift, because hand-made kanzashi lilies carry a colossal charge of the master’s energy.
We weave flowers from ribbons with our own hands: 97 photos and videos of creating original crafts
My recent hobby is DIY flowers made from satin ribbons. This type of needlework has captivated me so much that I really want to share my knowledge.
I do not claim to be an expert in this field; my article is more for beginners. I will try to tell you about all the nuances of this needlework and teach you several techniques for creating flowers from ribbons.
The uniqueness and simplicity of this needlework
If you look at photographs of ribbon flowers, the beauty and sophistication of floral arrangements, this skill will seem incredibly difficult. I hasten to please you that this is not the case.
The flower you have in mind will always work out, of course, depending on the experience and skills acquired, the end result will be different.
- Artificial flowers are created from various materials, knitted, woven from macrame, sculpted from polymer clay, all these methods require talent and special skills.
- In our case, it will be enough to carefully study the step-by-step instructions for beginners on how to make flowers from ribbons and you will succeed.
I will say a few words about the strength of products made from nylon tapes. It all depends on the functionality of the future product; if flowers will decorate the interior, then special reliability is not required here, but if the flower will decorate a children’s headband or headband, then you need to try to make a very high-quality thing.
Methods for making flowers from ribbons
I want to tell and show you several basic ways to create flowers from ribbons. Having mastered this simple science, you will be able to create any kind of flowers.
My advice to you is to try making any fantasy specimen using one of the techniques, and you will feel all the nuances of the method you have chosen and master it faster.
Preparing for needlework
- Any ribbons of different colors and sizes you like
- Needles and threads
- Sharp scissors
- Glue gun
- Tweezers
- Centers for flowers or beads, sequins
- Floral sleeve (or tube for thickening the stem).
Also prepare a work table with a table lamp.
Kanzashi
My acquaintance with flowers made from satin ribbons began with the kanzashi technique. This technique came to us from Japan; kanzashi are decorated with hairpins or hairpins.
Girls' hairstyles bloom with chic flowers thanks to such hairpins. Due to the fashion for kanzashi, more and more needlewomen are mastering this completely simple technique.
- In addition to the prepared materials mentioned above, take a ruler, chalk for patterns and a candle for singeing the ends.
- Kanzashi uses three types of leaves: round, long and sharp.
- To begin, cut a satin ribbon 5 cm wide into squares, naturally identical.
- We take a square and fold the corners towards each other, as shown in the photo and lower the outer corners to the lower central corner.
- Then we bring the side corners back and clamp them with tweezers.
- If necessary, cut off the bottom cut and melt it over the candle.
- Thus, you get a round petal, of which you need to make several pieces.
- We collect the finished petals on a thread, roll them into a flower and glue them to the base, and attach a bead to the middle with a glue gun.
- Congratulations on your first kanzashi flower!
- I present to you several video master classes on how to make flowers from ribbons.
- Creating a more magnificent flower.
- Creating double petals using the kanzashi technique, which make the cutest butterflies and beautiful snowflakes.
Melted petals
Another way to create flowers from ribbons is melted petals. This method is good for making large flower arrangements; for example, I made a basket with roses.
However, there are some nuances here:
- Not all ribbons work well for these colors;
- Melted petals do not look as neat as kanzashi;
- It may not work out right away, you need to get better at it.
- A more suitable material for creating these flowers is nylon ribbons.
Manufacturing instructions
- We make a pattern in the shape of a half heart, as shown in the photo;
- Next, cut out the petals, 7 large, 7 medium and the same number of small;
- The edges of each petal you cut are melted over a candle, after this treatment the petals become voluminous;
- We collect the petals on a thread in a checkerboard pattern, with a slight overlap, then the flower will be lush;
- We attach beads to the core.
- The flower is ready.
- Next are a few master classes, enjoy.
Charming ribbon embroidery
Yes, they also embroider with ribbons! In embroidery, ribbons of different widths are used, which, when draped correctly, creates volume and beauty of the embroidered picture.
This technique is good for several reasons:
- Quick results;
- Ribbon embroidery looks very rich and is valued among amateurs;
- Not complicated schemes, anyone can do it if they want.
- I have prepared several master classes, watch and learn.
- Nowadays they sell a lot of kits for embroidery with ribbons, such kits are very good for beginner needlewomen, they contain a diagram, a canvas, a set of ribbons, threads and everything that is used to create a picture.
- If you want exclusive work, you can draw up diagrams, select colors and textures yourself.
Photos of flowers made from ribbons with your own hands
Source: https://sdelajrukami.ru/cvety-iz-lent-svoimi-rukami/
Tools for work
Every housewife knows that the quality of the entire composition depends on the correctly selected instrument.
For ribbon embroidery you will need:
- Hoop. The better the base for the composition is stretched, the better the result will be. The hoop must be selected according to the size of the future painting. If you are planning a small job, you can use a hoop with a diameter of 10 cm. If the picture is of impressive size, you will have to use a large hoop, namely a stationary one.
- Special or tapestry needles. Embroidery with ordinary sewing needles is not possible in this case. The ribbon should fit easily into the needle. The needle size can be from No. 13 to No. 18. A No. 26 needle is also required for beads. It is best to use blunt needles. They will not cling to the warp and move the warp threads apart perfectly.
- Lighter. Cut ribbons must be singed immediately to prevent them from unraveling.
- Scissors.
- An awl if the work is planned to be done on a thick base.
- Floss threads. A flower stem embroidered with floss will fit perfectly into any composition.
- Paints for fabric or batik. Used to achieve more dramatic shades.
Satin ribbons
To start working, you need to decide what kind of plot you should get in the end. If the painting is in a floral style, you need to choose which flowers you need to choose the material for. For example, if you are embroidering small flowers with ribbons, you should think about which ones. Only after careful consideration can you buy materials in appropriate colors, shades and sizes. Here it is necessary to take into account all the available shades of one flower. After all, one flower can have two or more shades.
Before determining how many shades a flower has, you need to take a closer look at it. Sometimes novice needlewomen can make a common mistake. Decide that, for example, the forget-me-not has only one color - blue. In fact, if you look closely, you can see that forget-me-not petals have a blue tint at the ends of the petals, and become a little darker and richer towards the middle. Such little things need to be taken into account before starting work. Then the result will exceed all expectations.
The width of the tapes can vary from 2 to 50 mm, so before purchasing, you also need to decide on the width. Here you need to know that, for example, narrow ribbons are suitable for embroidering leaves or petals of small flowers. Wide ribbons will make a beautiful flower with large petals.
Tapes for paintings can be:
- from organza;
- from nylon;
- corrugated;
- silk;
- satin.
You can embroider flowers and compositions with ribbons using one type of material or combine different types
It is important to remember that when the painting is finished, there is no need to get rid of the remaining materials. In the future they may be used in another composition
Airy inflorescence made of satin ribbons
And so to create a lily flower from satin ribbons we will need:
- satin ribbon, 5cm wide
- lighter or candle (optional)
- scissors
- glue "Moment gel"
- tweezers
- stamens
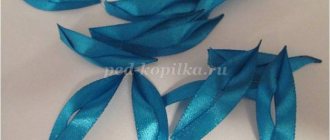
Since there will be 6 petals in the bud, and they must be the same in size and shape, we need to make a small pattern. For this we need a small piece of paper and a pen. Now we draw a petal, 5 cm wide and 10 cm long. Cut it along the contour. Thus, our pattern is ready. Next, we take the tape and measure out a 10 cm segment. Since we will have 6 blanks, we also make 6 segments. We apply the pattern to our segment and cut out the petal along the contour of the pattern. Then we process the contours over fire. If desired, you can wrap them a little in different directions. To do this, without waiting for the edges to cool, we bend some forward, the other back. Then the edges will be a little wavy.
Next, we bend our petal in half along the long side with the front side inward. We clamp it with tweezers and bring it to the fire so that it heats up and takes the desired shape. Thus, we will fix our bend, and we will get a strip in the center. The bend can be done in another way. For this we will use a soft surface. A towel folded several times can serve as a soft surface. Next, we heat our petal over the fire and immediately, while it is still warm, place it on a towel with the front side up and press the strip in the center with tweezers.
We choose the method of forming the bend ourselves, based on our desires and preferences.
To make our petals more petal-like, we need to bend them a little. In order to bend the sheets, we take an object that has the shape of a small cylinder. It could be an ordinary tea light or something like that. We apply our petal to its tin edge, with the wrong side facing it, and heat the petal over the fire. Then we take it away to cool down. Thus, the petal will take a curved shape.
After we have done everything, we proceed to the formation of the bud itself. First, we take two pieces, fold them evenly, with their front sides facing each other. It turns out to be two folded into one. Now they need to be fastened on one side to each other. Use tweezers to pinch the bottom edge on one side, where they will connect. We bring them to the fire and lightly burn them to hold them together. Then we take another petal and fasten it to the edge of the free side, which we have already connected, in the same way as the previous ones. Next, we connect the free edges to connect all three together.
In the same way we connect the remaining three. We made rows.
Only the stamens are missing. They can be purchased at any florist store or made with your own hands. It all depends on your preferences and desires.
One flower requires 6 stamens. We put them in one bundle and fasten them. We insert it through the middle of the first row of three pieces, up to half the length of the twigs of our stamens. We glue them with glue. Then a little lower under the first row we attach the second row of petals. We cut off the remaining darts under the flower. Ready! Such flowers can be used to decorate various flower arrangements, as well as to decorate hairpins or headdresses.
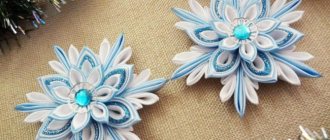
“Water Princess”
The technique is available for craftswomen of any level.
Required for work:
- Stamen blanks (you can also make them yourself from beaded fishing line, glue and large glitter)
- Ribbon 5 cm wide (3 pieces in different colors)
- Ribbon 4 cm wide
- Scissors
- Glue/heat gun
- Candle/lighter
- Cardboard
- Tweezers
At the beginning of the work, we make pieces of tape 5x7 cm - 6 pieces. We cut out the shape of a leaf from the segments and, to add texture, we singe the leaf over a candle and stretch the edges after each zone. Note to yourself that the waves you create should be large (the technique of movement should not be with the help of nails, but with the help of the fingertips).
Let's start production. Again we make the blank pieces that are necessary for use: 4x6 cm, in the amount of 6 pieces. Fold the ribbon in half (right side inward) and again cut out the shape of an elongated semicircle. We burn it over candles (avoid darkening the tape!) and stretch it.
Next we need blanks 5x7 cm. Fold it in half, singe it first in the middle, and then cut out the shape of a leaf, treat the edge with fire and stretch it along the periphery. This will be the 2nd type of petals - we need to make 12 of them. Using the same principle, from another color of 5x7 cm ribbons we make the 3rd type of petals - 18 pieces. But in order for the inflorescence to be lush, at the base, using tweezers, we form two opposing folds and secure them by melting them over the fire.
Like any other craft, we need a base. In this case, we cut it out of cardboard with a diameter of 5 cm. We decorate it with ribbon. We attach a matching elastic band to the front side. You can also take a piece of felt if you feel more comfortable working with it. Let's start putting together the composition. First we glue the leaves. Next we lay out the 3rd type in several rows.
We take the stamens, connect them together into a bundle, and fix them with glue. Do not cut off the stems of the stamens immediately, because... we need long antennae, it is better to remove what is not needed at the end of the stage. We begin to glue the first type of petals around the stamens - place 3 pieces in the first row, and then the petals are glued according to the principle of closing the gaps between them.
And the second type of petals is also glued in a circle around the previous workpiece, but as if lowered down a little. We cut off the stems of the stamens and singe the bottom a little. We apply glue at the base of the second blank and glue it to the previous petals with leaves.
So, we created a lush flower in a short time. As for the color scheme, you are free to choose. The range of uses of the flower is vast, do not limit yourself to just using it for a hair tie, as shown in this case. Be creative in your creativity, even if you have the taboo of not being a creative person.
Kanzashi lily: video master class
Lily using the kanzashi technique attracts many needlewomen with its beauty and ease of manufacture. No need to fold or stitch anything. All you need to do is have a ribbon and a lighter on hand. To speed up the process, make a petal pattern from cardboard and use the kanzashi master class.
For kanzashi lilies you need a wide ribbon
The “Lily” master class will require the following materials:
- Hobbies and handicraftsKanzashi dahlia Hobbies and handicraftsKanzashi sunflower
- wide white ribbon;
- green pencil lead or food coloring;
- lighter;
- PVA glue;
- white threads;
- semolina;
- glitter;
- a piece of felt.
Video tutorials on creating flower kanzashi
- Video tutorial No. 1 on creating a kanzashi lily for a headband
- Video tutorial No. 2 on creating a small Kanzashi lily
- Video tutorial No. 3 on creating a large Kanzashi lily
The procedure for making petals
The relief of the petal depends on the execution technique
Place the shape on the wide white tape and trace around it. Cut out 17 petals, 5 of which cut off the sharp edge on one side. These petals will form the middle of the flower. Run the flame of a lighter along the edge of each petal, and while the cut is still hot, stretch the tape.
By following the instructions in the master class, you will get wavy petals.
When all the leaves are ready, start “painting” the flower. This MK involves the use of classic relief petals obtained by embossing. Fold the towel in several layers and place the petals on it. It is necessary that when pressing, the upper part of the towel deepens greatly.
Heat a knife over the fire and rub the blunt side across the leaf. You will get a groove that looks like a vein. Paint the remaining petals in the same way.
Lilies
The art of kanzashi pleases with the wide variety of execution of any types of crafts. This is an excellent alternative for creating accessories of different types and complexity. Initially, the technique involved using products as hair decorations, but now it also includes brooches, bows, bracelets, boutonnieres and even sewn-on decorations on bags. Indeed, what could be more beautiful than flowers is only a durable work created in their likeness in a realistic interpretation. Ribbons and simple materials at hand are embodied in the most elegant and individual creations. Roses, orchids, tulips, crocuses and ribbon lilies are just a small list of what the kanzashi technique can do.
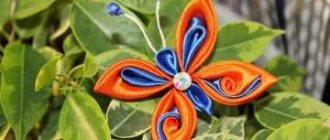
Pansies
These beautiful flowers can also be created simply and easily from satin ribbons; to do this, do the following:
- Having prepared the yellow square, it is folded into a triangle. In this case, the side corners are bent down to obtain a fold in the middle.
- Turning the petal over, bend the edges. Fold the corners towards the central part and cut off the excess. Thus, they make 2 petals by gluing them together.
- Purple and black scraps from ribbons are formed into triangles, placed in this way: small on large.
- Do 1 action, collect the same 2 petals.
- Glue the petals in the center and decorate with a bead in the middle.
These are all the proposed options for making flowers from satin ribbons with your own hands. We hope you like one of the options and try it at home.
Where can you use flowers from DIY ribbons?
If you think that the range of uses for artificial flowers made from satin ribbons is small, then we will surprise you!
- Panels, paintings, pillow decorations. Embroidery with satin ribbons requires imagination, diligence and a certain amount of free time.
This wall panel seems, at first glance, to be a real living bouquet. The paintings seem alive!
Pillows decorated with such embroidery seem to be the height of grace. - Making jewelry and using ribbons as accessories. Bracelets, beads, and ribbon earrings refresh the look. The headband will decorate a girl’s head, creating a luscious summer look. Hair clips can be of any size, color and style. A necklace around the neck will add charm and tenderness to a woman’s look.
- Design of book bindings, albums, postcards.
Photo frame decorated with satin ribbons Such a postcard will be welcomed and placed in the most prominent place in the house - Decoration of boxes.
The variety of decor depends only on the author’s imagination
In addition to the above products, you can make topiary from ribbon flowers and decorate flowerpots, clothes, shoes, and bags with them. This is a limitless manifestation of imagination and the creation of comfort in your home.
Braiding for decoration
Making a kanzashi-style headband begins with braiding the outer part. It will hide the metal and create a beautiful background.
From a green ribbon 0.6 cm wide, cut two strips 2-2.5 meters long. Treat the edges with fire.
.
Fold the edges 1 cm inward. Glue the very edge to the tape using a heat gun. You will get two initial loops.
Pass the right loop into the left one so that the edge of 6 millimeters peeks out, and the rest is hidden.
Fold the left ribbon to form a loop and insert it into the right one. Pull up the bottom band. The photo shows the process from the front side.
Continue weaving, remembering to tighten the ribbons.
During the process, be sure to try on the kanzashi braid to the headband so as not to make a mistake with the length. Form the tip into a loop. Flame it and glue it to the base.
This is how beautiful it turns out.
Glue the pigtail to the headband, leaving 3-4 centimeters from the edges.
Making lily flowers
Now the most difficult part - you need to make kanzashi lilies to decorate the headband. For greater clarity, it is better to use a schematic image. Take a blue and yellow satin ribbon. Cut 5*5 cm squares, 25 pieces of each color.
Fold the square diagonally into the lower left corner. Then again diagonally only to the upper left corner. And fold it a third time to get an envelope. Cut off the bottom corner. Glue with fire. Press with tweezers. By the way, we have an article about the types and selection of tweezers for needlework.
On the reverse side, cut off the excess part so that the product takes on the shape of a petal. Fire seal the ends.
Make the rest of the kanzashi petals for the lily with your own hands.
Glue the seven petals together.
Glue a half bead in the center. For the headband you will need three of these flowers: yellow and two blue. Glue the stamens on the back side.
Glue the two petals together, placing a thread of stamens of a contrasting color in the center. They are needed to decorate the beautiful edge of the kanzashi-style rim.
Brooch made of satin ribbons
You will need: green satin ribbon 2.5 cm wide, yellow satin ribbon 0.5 cm wide, regular and curly scissors, thread with a needle, a piece of felt, a pin, beads.
Master Class
- Prepare 20 pieces of green ribbon 8 cm long and a square of felt for the base of the brooch.
- Fold a piece of ribbon in half and sew it at a diagonal angle to the felt. Thus, sew all the pieces to the felt in a circle, overlapping each other.
- Cut out a small circle of felt with curly scissors and attach it to the back of the workpiece.
- Prepare 20 pieces of yellow tape, 5 cm long.
- Cover the inner circle with yellow pieces in the same way as the outer one.
- Sew beads into the center of the brooch.
- Attach a pin on the back side.
The satin ribbon brooch is ready! I recommend watching this video!
DIY: DIY satin ribbon rose clip | kanzashi | hair clip with satin ribbon rose
Watch this video on YouTube
Master class 5. Poinsettia with leaves
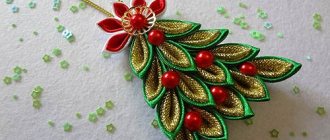
It's time to tell you how to make poinsettias from ribbons, which can be used to decorate anything, for example, an autumn wreath as in the photo below.
What you will need:
- Ribbon 4-6 cm wide in red, cream or any other desired shade;
- Green ribbon (for leaves) 2-3 cm wide;
- Scissors;
- A needle and thread to match the ribbon for the petals or thin copper wire (jewelry);
- Beads;
- Hot glue.
How to make a poinsettia from ribbons:
Step 1. Cut three pieces of equal length from the ribbon. How long should the segments be? It depends on what size flower you need. If you want to make a flower with a diameter of 12 cm, then the segments should be exactly this length.
Step 2. Give the resulting rectangles a diamond shape. You can do this in the following way: stack the pieces on top of each other, fold the stack in half, then give the resulting square a triangle shape by cutting off the excess on the sides. Voila, you've got diamonds!
Step 3. Pinch each diamond in the middle and tie the folds with thread (you can do a couple of stitches) or jewelry wire.
Step 4. Place all three pieces next to each other, then tie them with thread or jewelry wire to create a flower. Adjust the petals if necessary.
Step 5. Glue several stamen beads into the center of the flower.
Step 6. Now let's work on the leaves. Cut two lengths of 6-9 cm from the green ribbon (the length of the pieces should be approximately three times the width of your green ribbon). Place one of the rectangles on the table, wrong side up. Bend its right side downwards along the bias so that the workpiece takes on an L-shape (see photo). Now fold your letter G in half to create a house-shaped piece with a roof. Gather the bottom of the “house” with a couple of stitches or glue.
Step 7. Now the leaves can be glued/sewn to the back of the poinsettia, to a felt round base (if you have one) or directly to a decorative object (headband, pillow, etc.).
Technique for making mk petals
Production begins with the petals. Having drawn three narrow petals and three wider ones, we begin the process. Using a thin ribbon, sew three petals with reverse stitches.
Take a 12mm white ribbon and fasten it to a needle, making a tack. We draw our needle on the front side in the center of the drawn petal. Next, fold the ribbon underneath:
We pierce the center of the fold with a needle and pull the ribbon down without tightening the petal too much:
Turn the tip of the third petal slightly to the side when bending.
Consists of 6 petals, three of them are larger. Try to show the actual size of the flower in your picture.
When making flowers, it is very important to leave a little space in the middle, because there will still be pistils with stamens there.
Now wide petals follow the same principle as narrow ones. This is what all six petals should look like:
- Since the 25mm ribbon is very wide, and we need to easily pull it into the eye of the needle, we will need to cut the tip obliquely not at 45 degrees, but at 25. Do not forget to make a tack.
Most novice needlewomen make a big mistake by tightening the stitches too tightly; this will only worsen the appearance of the painting, because the fabric inside will warp.
For more experienced craftswomen, we can advise you to make the petals using a reverse stitch, but starting from a French knot. It’s just that the reverse stitch is more suitable for daisies, and for lilies, as you know, the petal is slightly curved and it should be noted that water lilies are embroidered using the same principle, only there should be twice as many petals and they should not be curved towards the bottom, as in this case , and to the top.
Petals coloring page
When six beautiful petals look at you, it's time to decorate. It is advisable to use acrylic paints; they do not cause smudges or streaks. The inside of the petals is lightly moistened with water and a small amount of orange paint is applied with a brush, evenly distributed over the middle of the petal.
If you notice that the paint has begun to spread, you need to stop this process as quickly as possible. In this case, a hairdryer will come to your aid; they need to dry the problem area of the flower and you can continue.
Adding spots to the flower
People who have seen a lily at least once in their life remember that the spots in the middle are an integral element of the flower; if you want your picture to be realistic, then they also need to be depicted.
Black henna is used for this. Or you can make the mixture in another way. Like this, for example:
- Mix brown paint with a small amount of PVA glue.
- Apply the resulting liquid to a toothpick and make small dots along the bottom of the petal.
- You can again speed up the process using a hairdryer.
Boy's bow tie
You will need: blue satin ribbon 5 cm wide, elastic band, fastener, ruler, scissors, blue thread, needle, stationery pins.
Master Class
- Prepare: two pieces of ribbon 11 cm long, one piece 25 cm long and one piece 7 cm long.
- Take an 11 cm piece of tape, fold it at a right angle, bend it in half and secure it with a pin. Make the second piece in the same way.
- Make running stitches on one piece, then, without breaking the thread, on the second.
- Pull the thread and fasten the parts together. Set the item aside.
- Fold a 25 cm piece in half, mark the center, then unfold.
- Fold the edges towards the center, making an overlap of 1 cm.
- Place running stitches, pull the thread and wrap it around several times.
- Sew the two butterfly pieces together.
- Fold a rectangle from a 7 cm segment. This will be the jumper.
- Sew fasteners to the elastic, glue the butterfly to the elastic and wrap it with a jumper.
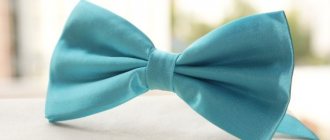
The satin ribbon bow tie is ready!
Peony flower
Do this option at home and you will be satisfied with the work process and the result, the main thing is not to rush and do everything exactly according to the instructions.
What you will need:
- Lighter
- Ribbon (for kanzashi) 5 cm wide, it is better to take silk or satin
- Needle with scissors
Process of creation:
- The tape is divided into squares in the amount of 10 pieces, their dimensions are 5 by 7 cm; 9 pieces of 4 by 6 cm; 8 pieces of 3 by 5 cm and half-seed 7 pieces of 2 by 4 cm.
- As a result, the number of all petals is up to 40 as desired.
- Cut out petals from squares and stack them on top of each other.
- To get a beautiful shape, burn it under the edge with a lighter, taking into account the distance from the petal to 2 cm.
- A small petal is rolled into a roll shape, secured with a thread and a needle.
- All petals are sewn together from small to large, distributing it all in a checkerboard pattern.
You have a voluminous peony that is perfect for decorating a room or as a gift for a loved one.